
Easiest fastest cleaning Z-axis tool for P1/X1/H2D

Print Profile(3)



Description
Membership
Like my models? Please consider subscribing. This will help me dedicate more time to create new interesting designs. As a subscriber, you'll get my direct email for priority support, and you can gain access to high-res model files (STEP), original project files (F3D) and source code of my scripts (SCAD) and optionally a commercial license.
News
2025-04-30 - User Stampa3DH24 (@3DTony) created an optimized rear tool for the new H2D printer.
Why this model
One of the most annoying thing I have to deal with in the ordinal maintenance of my Bambu Lab X1C printer is cleaning the Z-axis screws from the old grease before putting on the new one. Especially the one on the back of the printer.
Investigating for finding a solution to this problem I was wondering how mechanics deal with cleaning small parts of the engine and I was talking about this to a friend of mine who is a daredevil cyclist and he gave me the solution.
The product
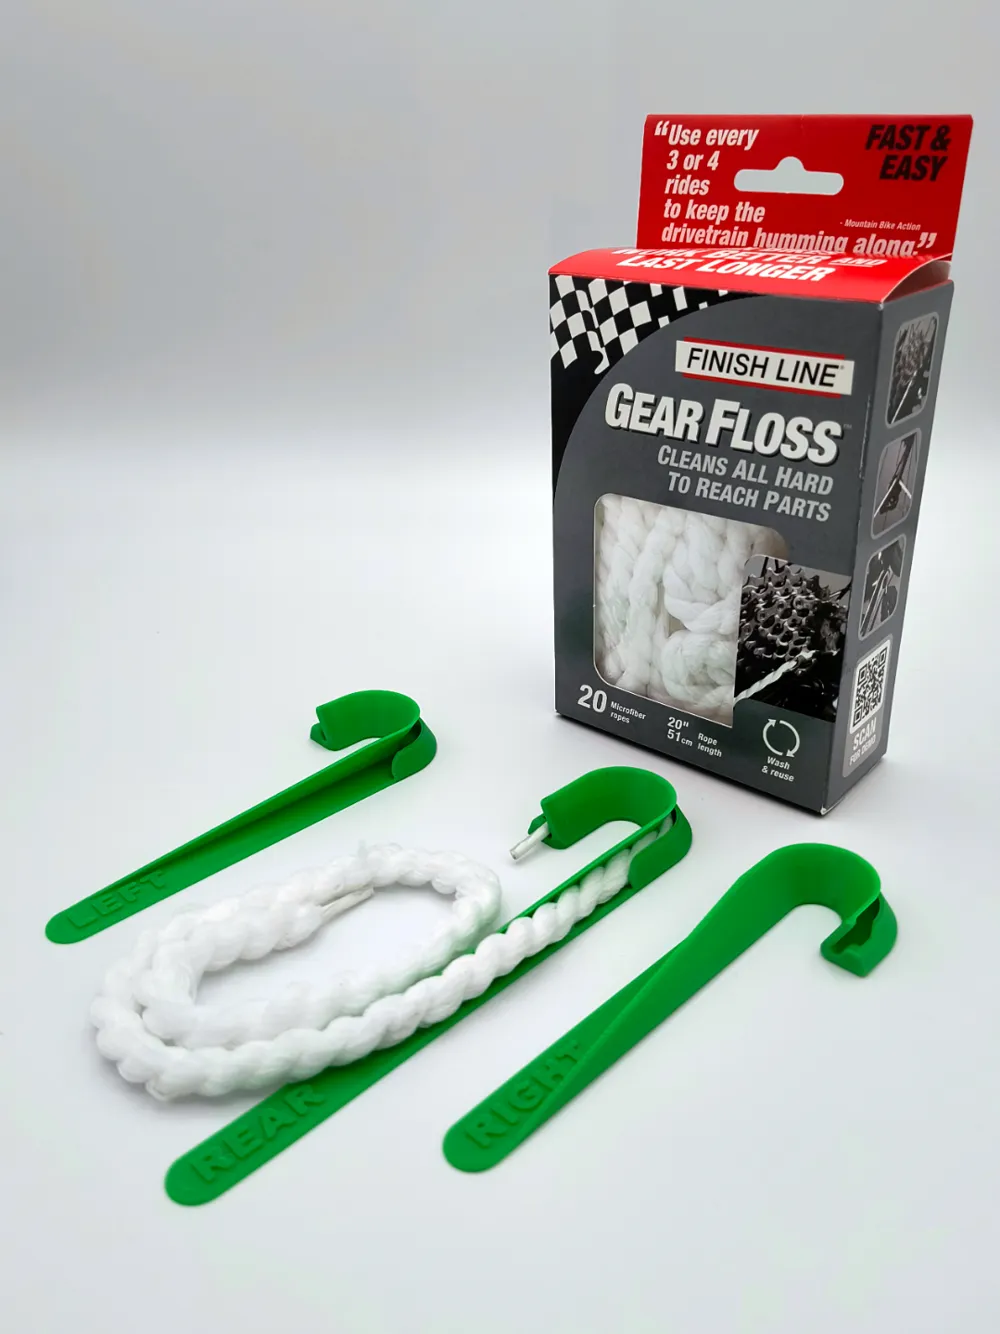
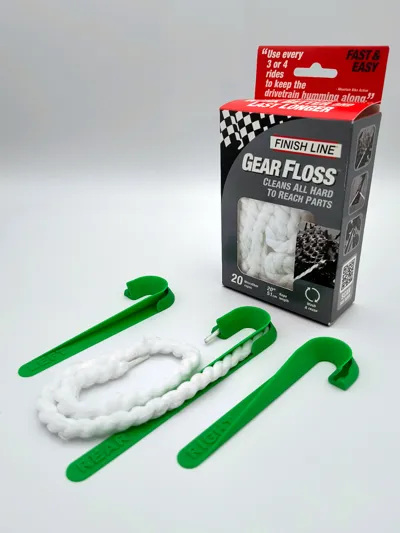
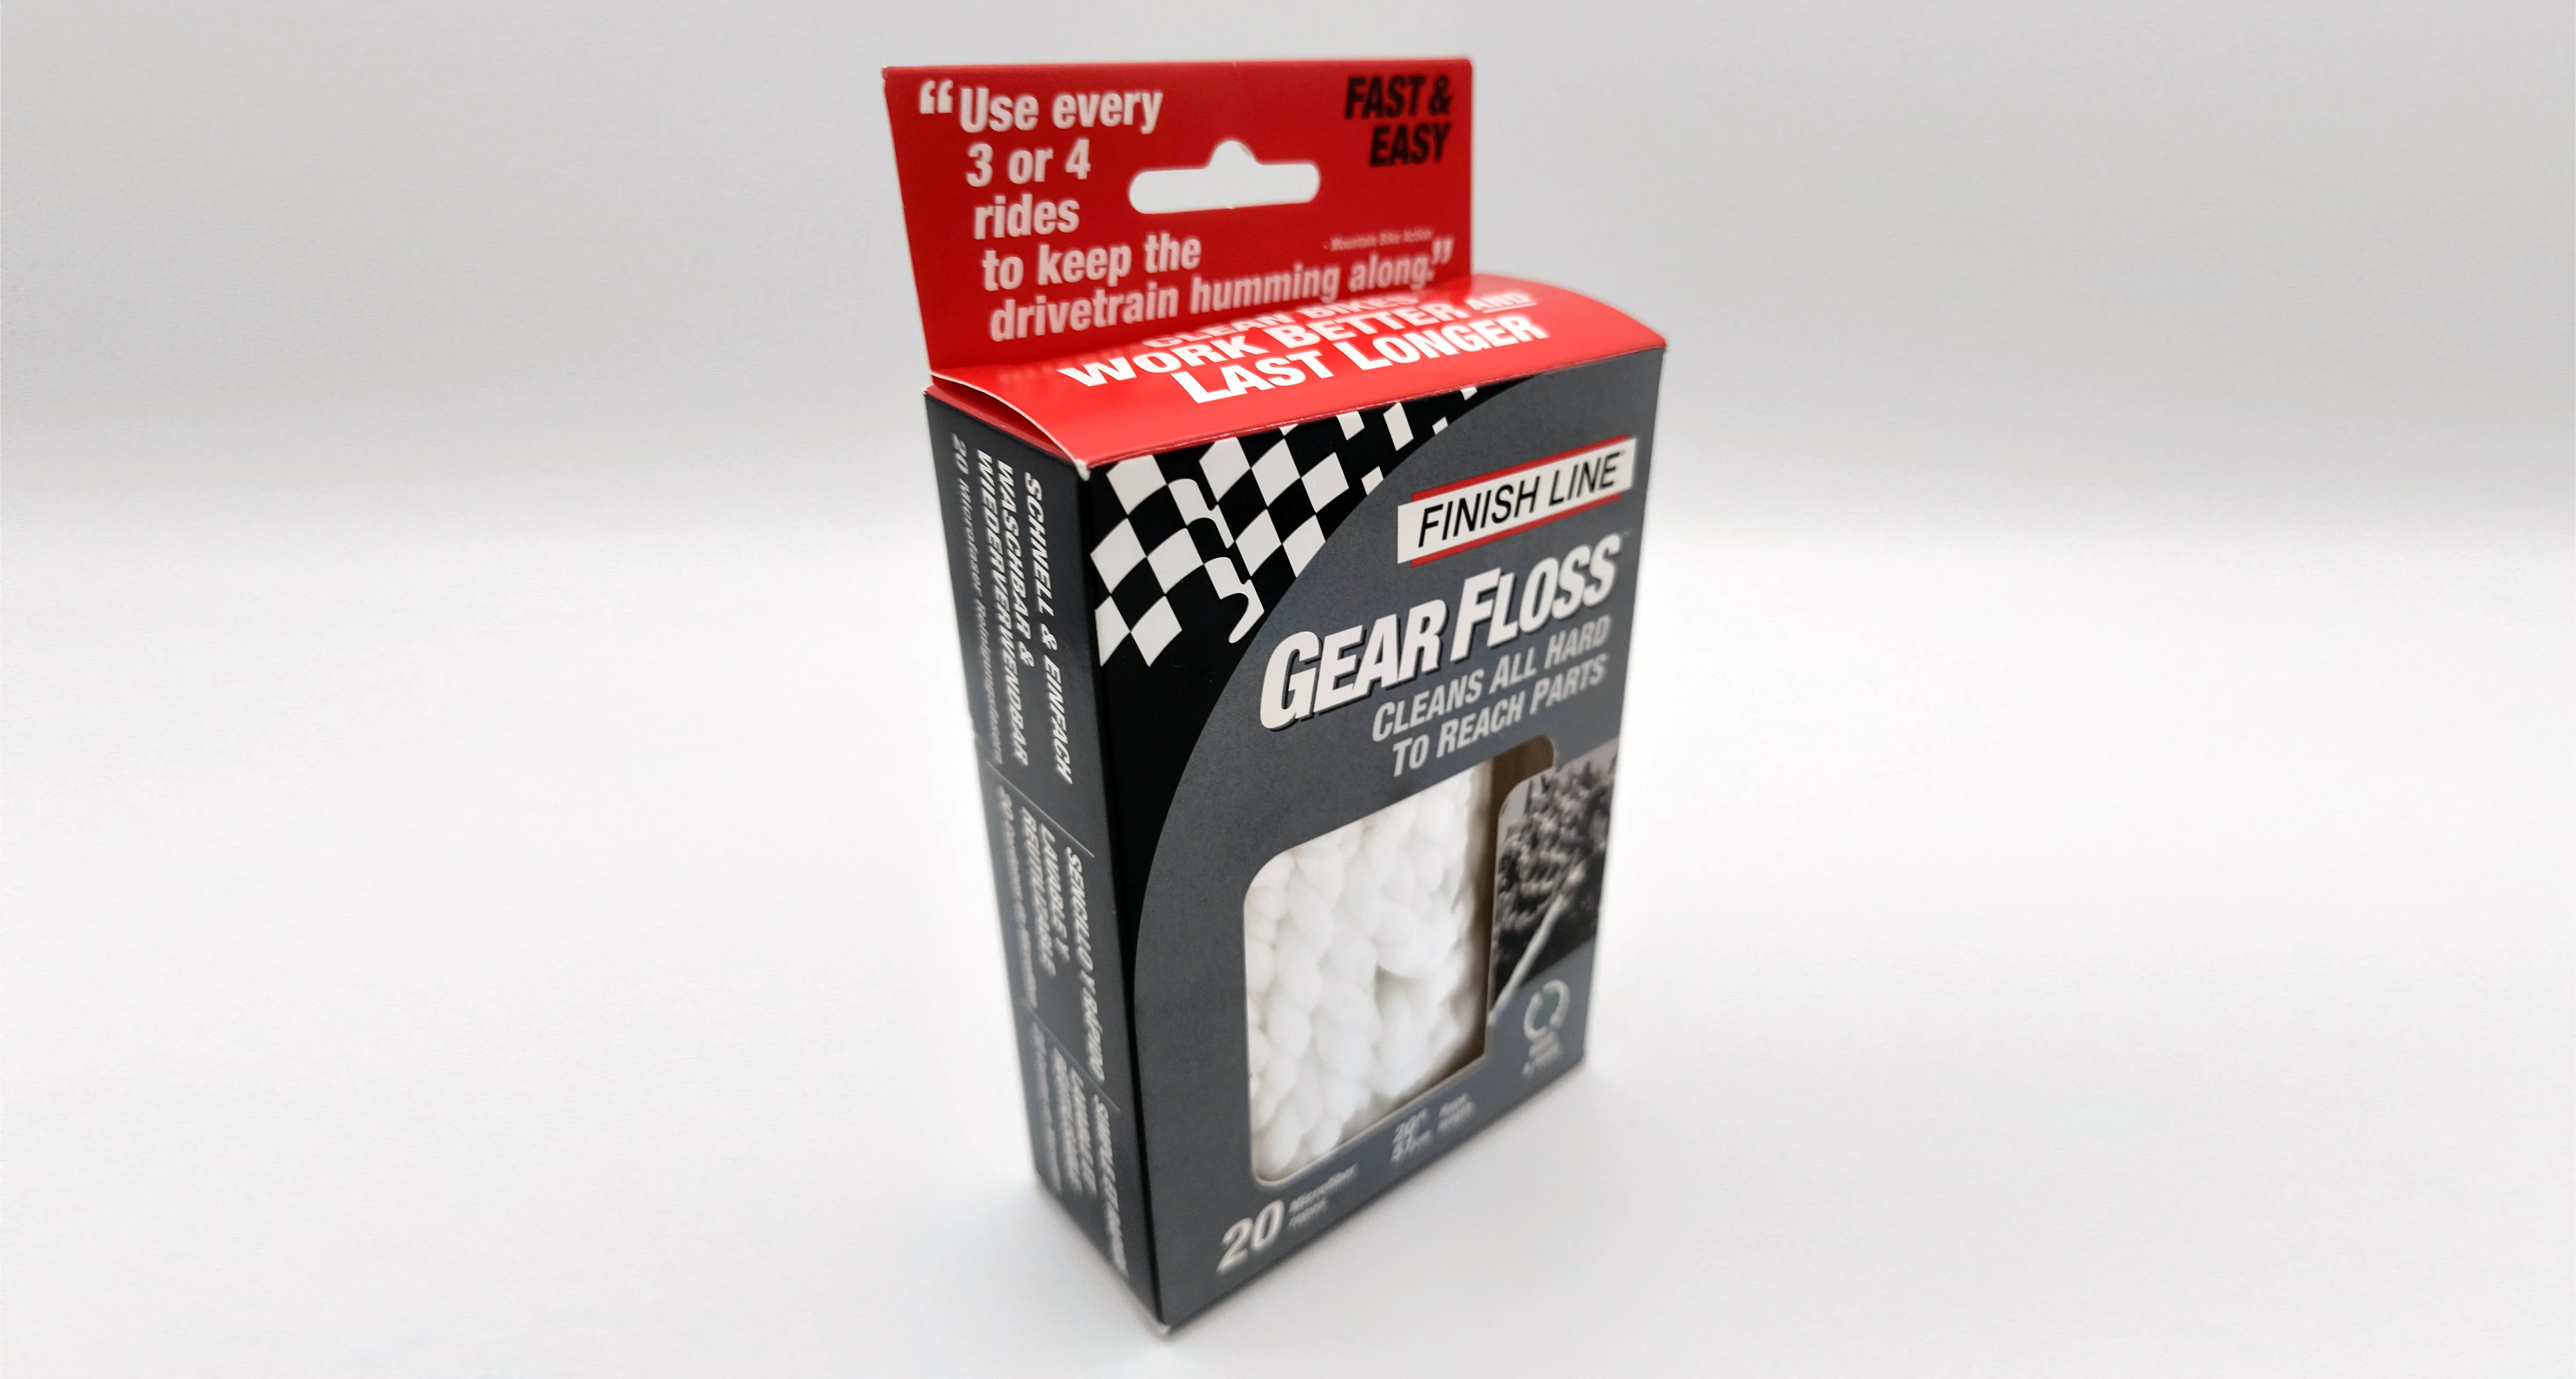
Finish Line, a company based in the United States is selling “Gear Floss”, a product my friend is using to clean his bike' sprocket from the grease and dust and it works wonderful, they're just a bunch of strings just like the shoelaces the resemble, and are composed on a huge quantity on microfibers that capture the grease and dust when rubbed between the mechanical parts.
So I gave it a try and it works magically, I was shocked how effective they are!
There was just one small problem: how to get them into place without getting dirty.
How to use it

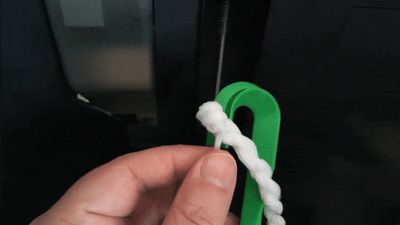
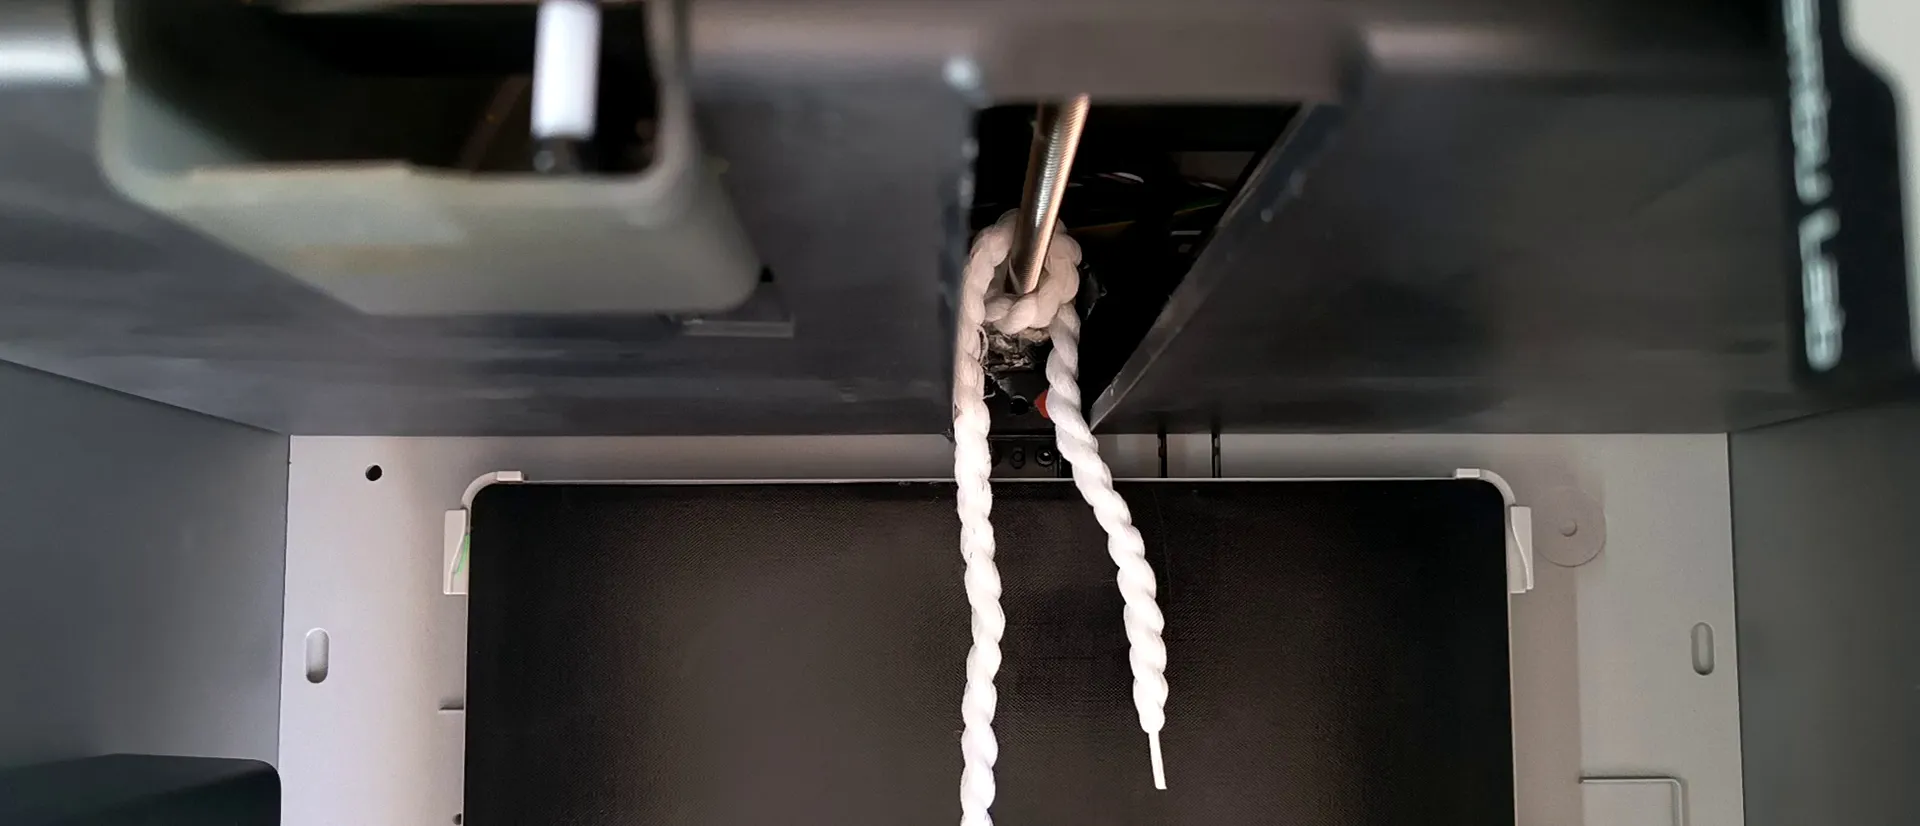
You just need to pass one of the strings contained in the package around one of the Z-axis screws twice to create a whole loop around it and having it coming back to you, as shown in the picture.

Now, by gently pulling one of the string's ends towards you the string will rotate around the screw and the microfibers they're composed of will enter the coils and capture all the grease. When you are approaching the screw, start pulling the other end and continue alternate them. The string itself will go up and down simply following the direction to your hands.
Do this just a couple of times and you will end up having a shiny screw in less than thirty seconds.
Once you're done, pull one of the ends and then pull the other, the string will come away and you're ready to put on the new grease.
The problem
The problem is simply explained: if you're using the strings you're gonna mess up a little bit when putting them in place, no matter what. So I decided there should be a way to simplify this task, speeding up it and making it cleaner.
The solution
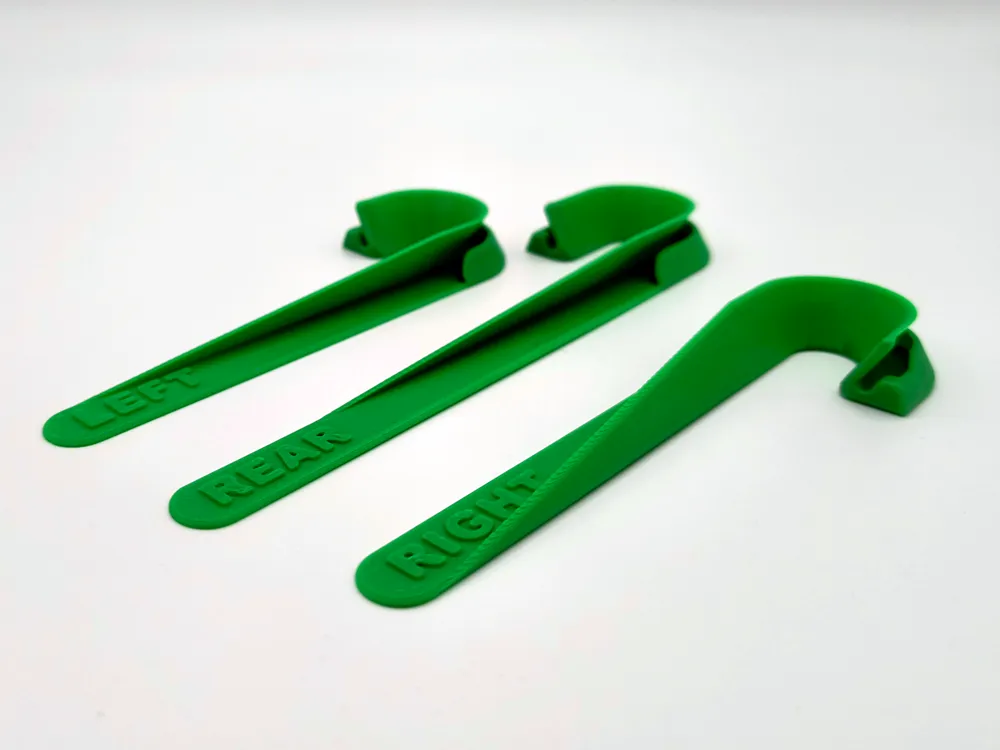
After 23 design versions and 7 printed versions here there's the toolset.
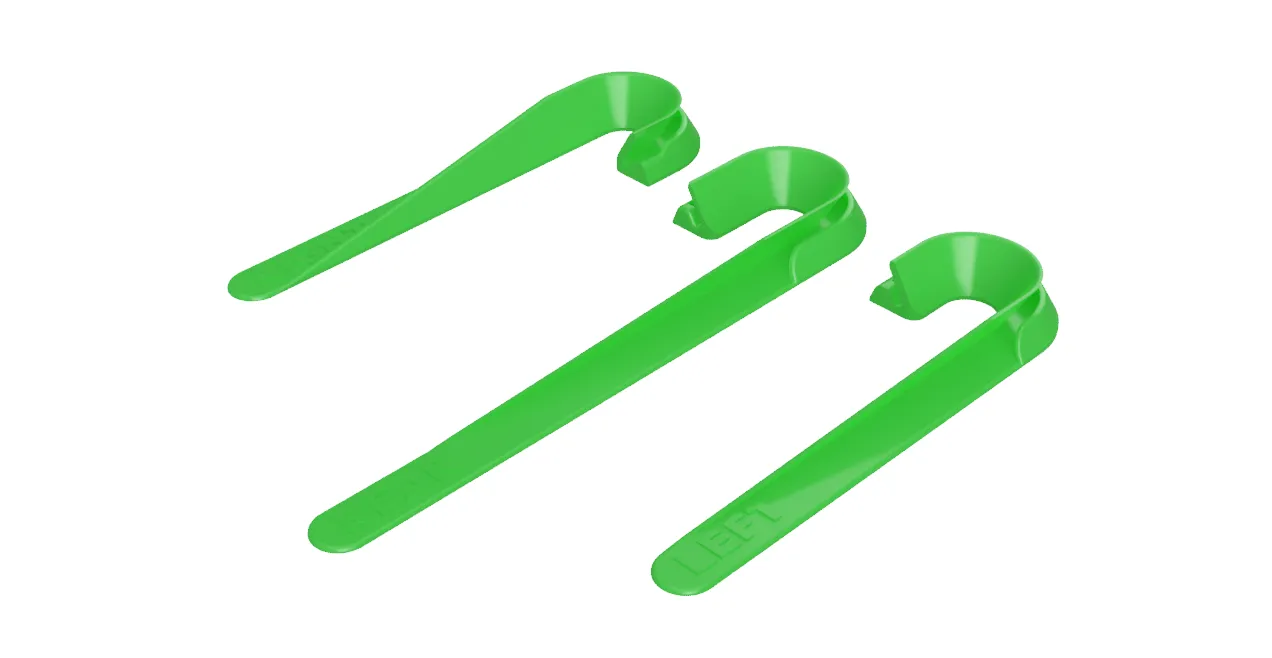
These tools were designed specifically for this task and are the best I could get to.
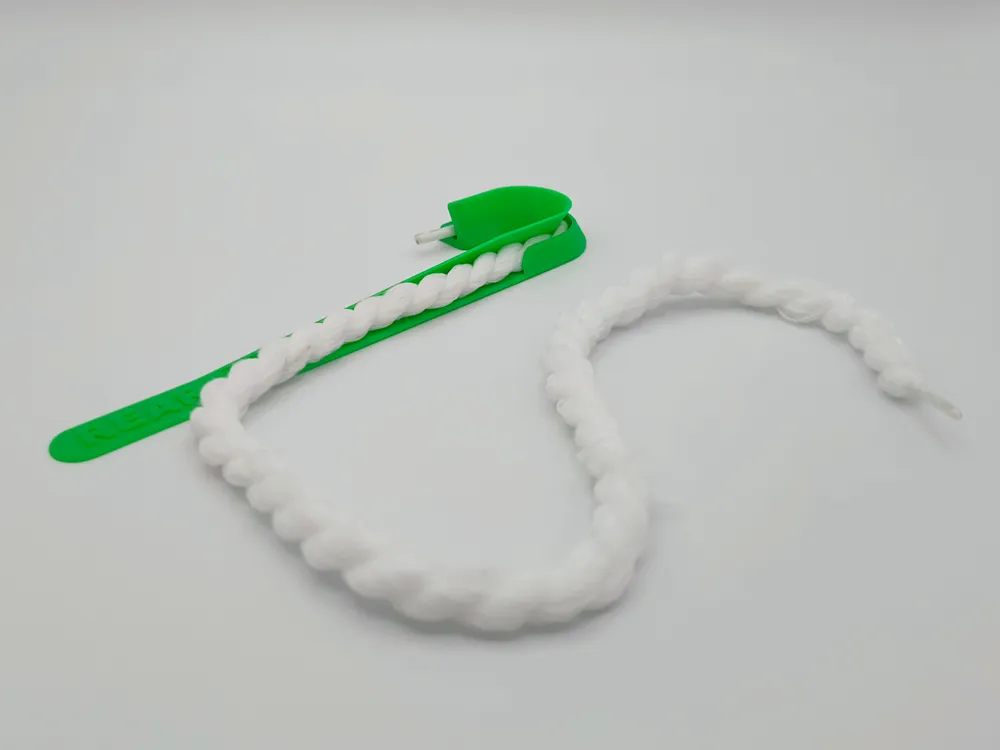
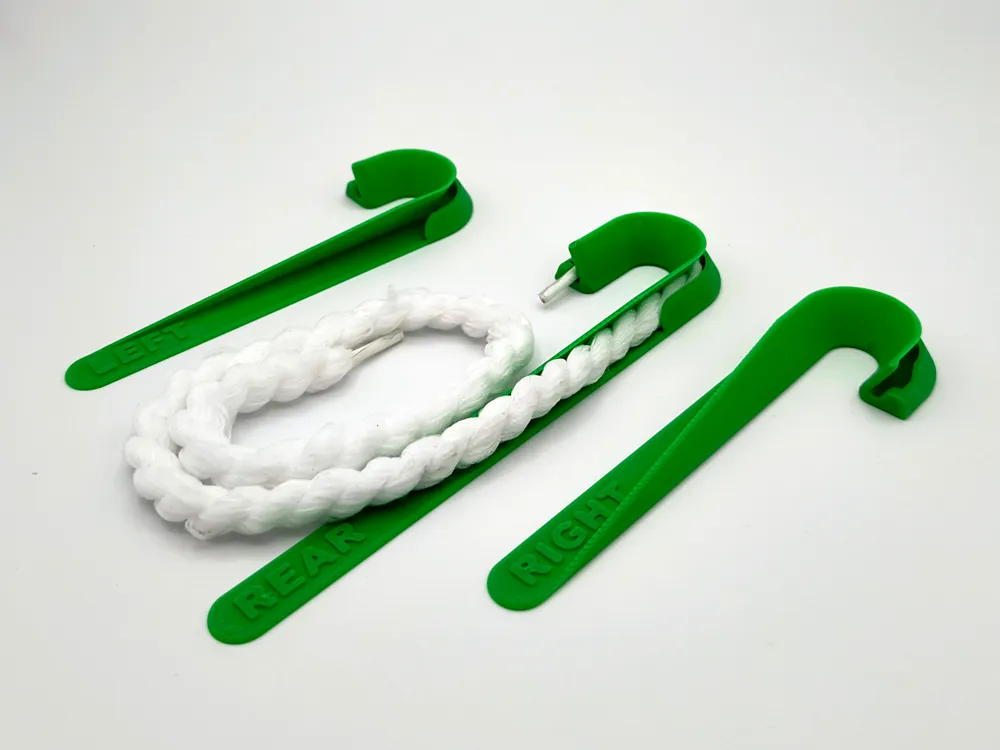
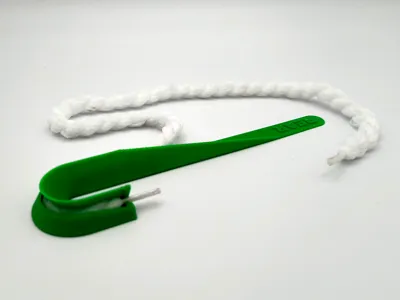
They're a protection when inserting the string and allows you to put it around the screws without ever touching them or getting near them with your fingers.
Note that this tool doesn't need supports to be printed.

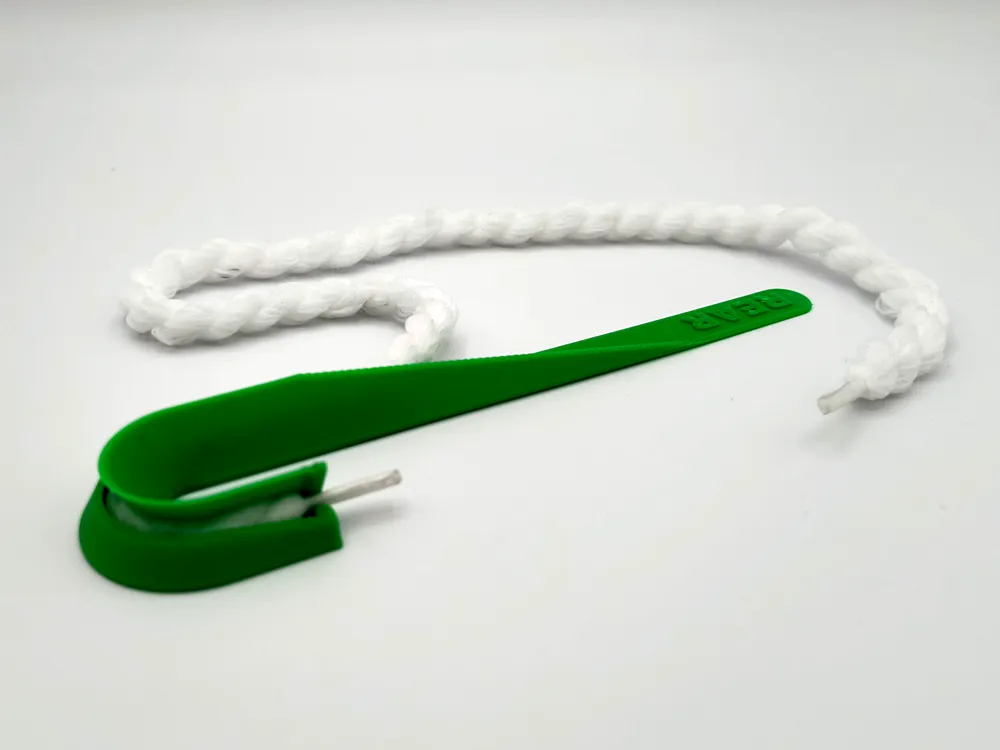
The inside border turns around the screw and keeps you, but more importantly the string away from the grease.

The clip holds the aglet (the end plastic cylinder of the strings) firmly and ensures the string is anchored to the tool.

The outside border ensures the string doesn't fall off the tool while operating it.

The inside tunnel allows the string to smoothly slide through the tool while pulling the aglet.
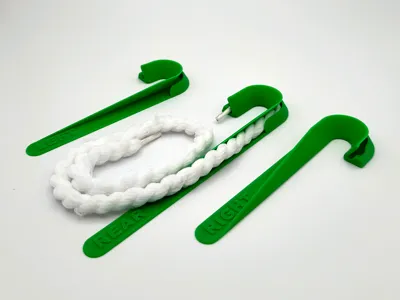
The toolset comes with three easy to use tools:
- a tool marked with LEFT which is to be used on the front-left screw and has a left turn;
- a tool marked with RIGHT which is to be used on the front-right screw and it is symmetrical to the previous one;
- a tool marked with BACK that is to be used to the back Z-axis screw and has a left turn.
How it works / how to use them
Simply follow this step by step guide. I'm preparing a video, in the next days maybe I will be able to upload it.
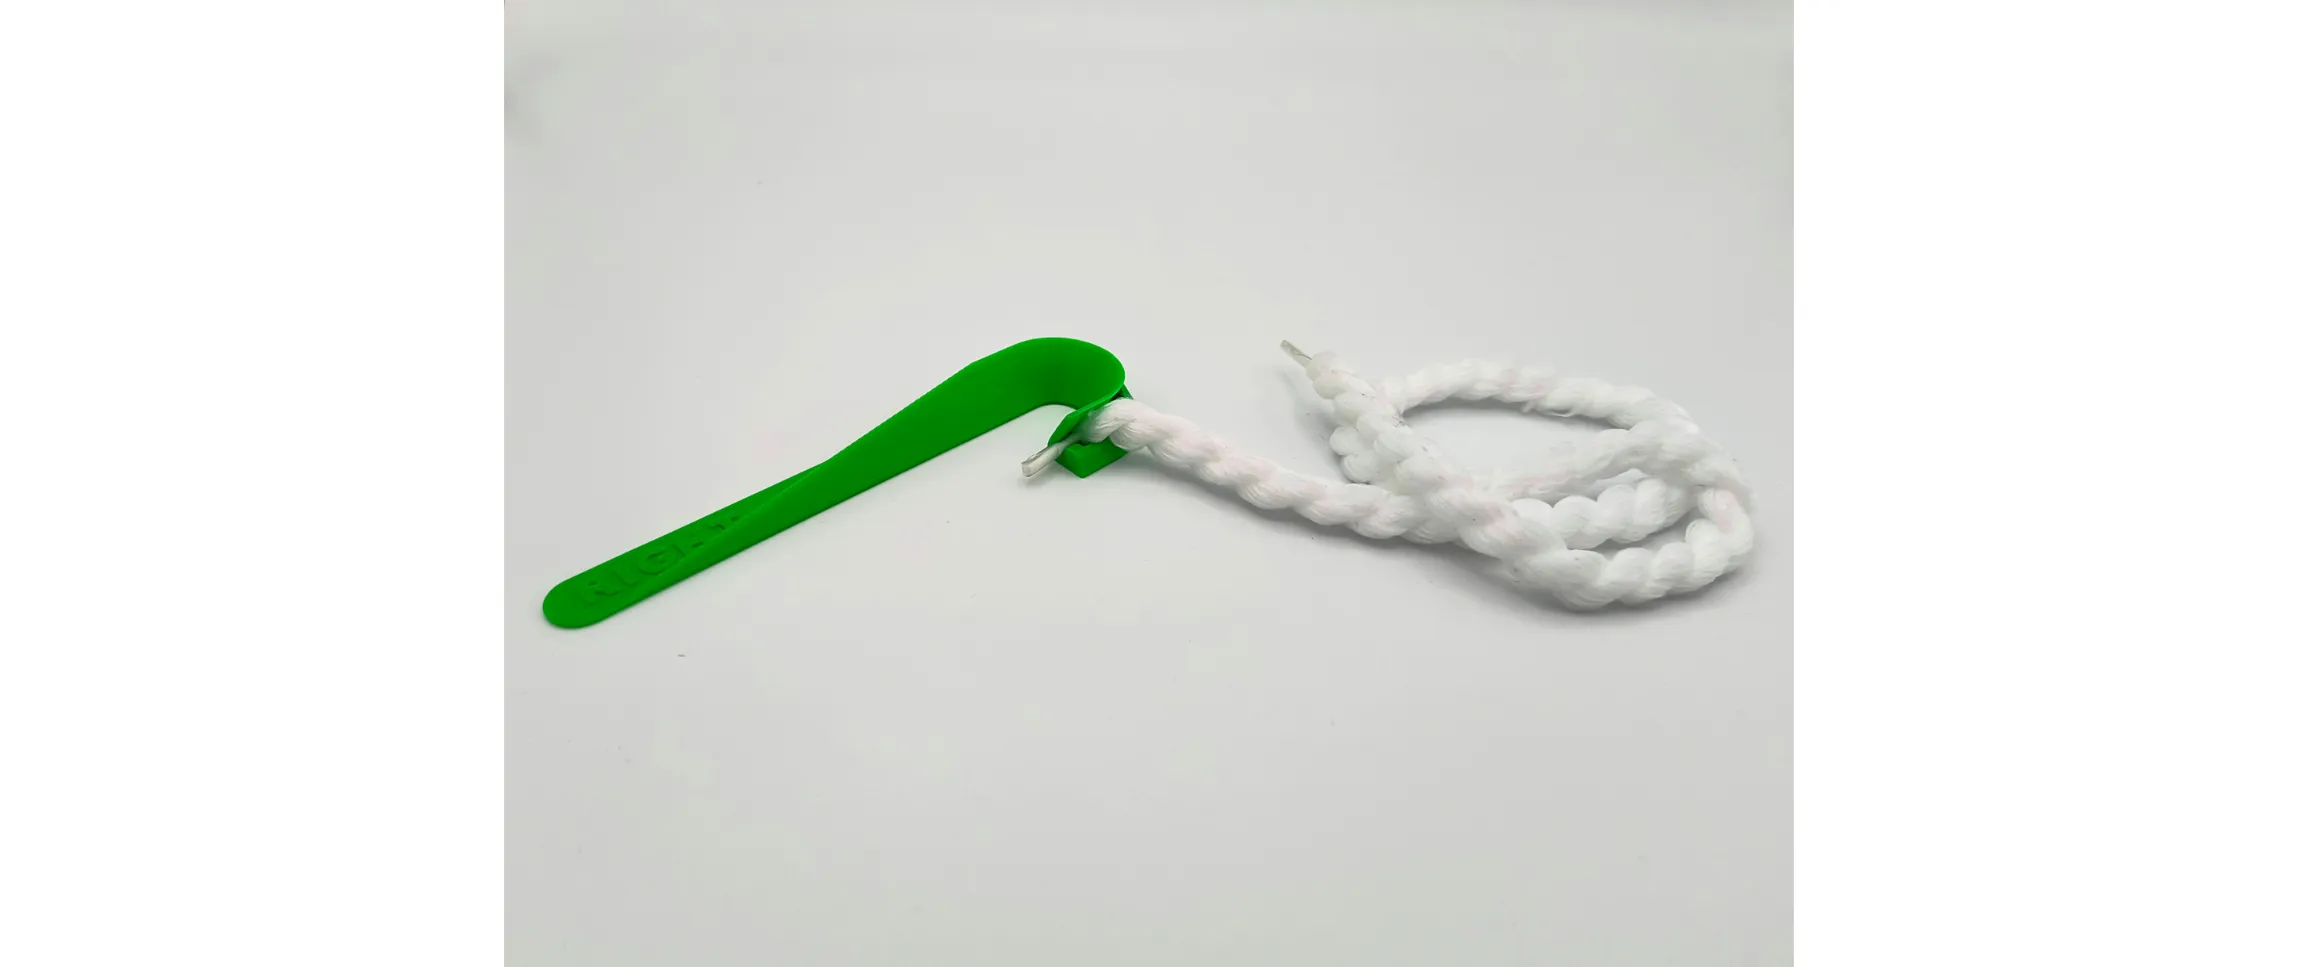
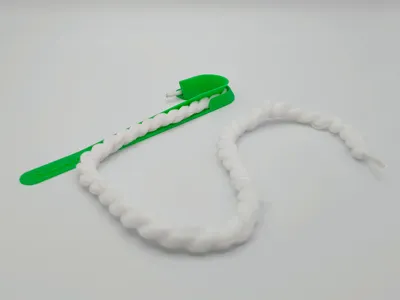
The first step is to secure the aglet with the clip, when doing this please make sure to leave out of the tool the most of the aglet to be able to catch it in the next steps.
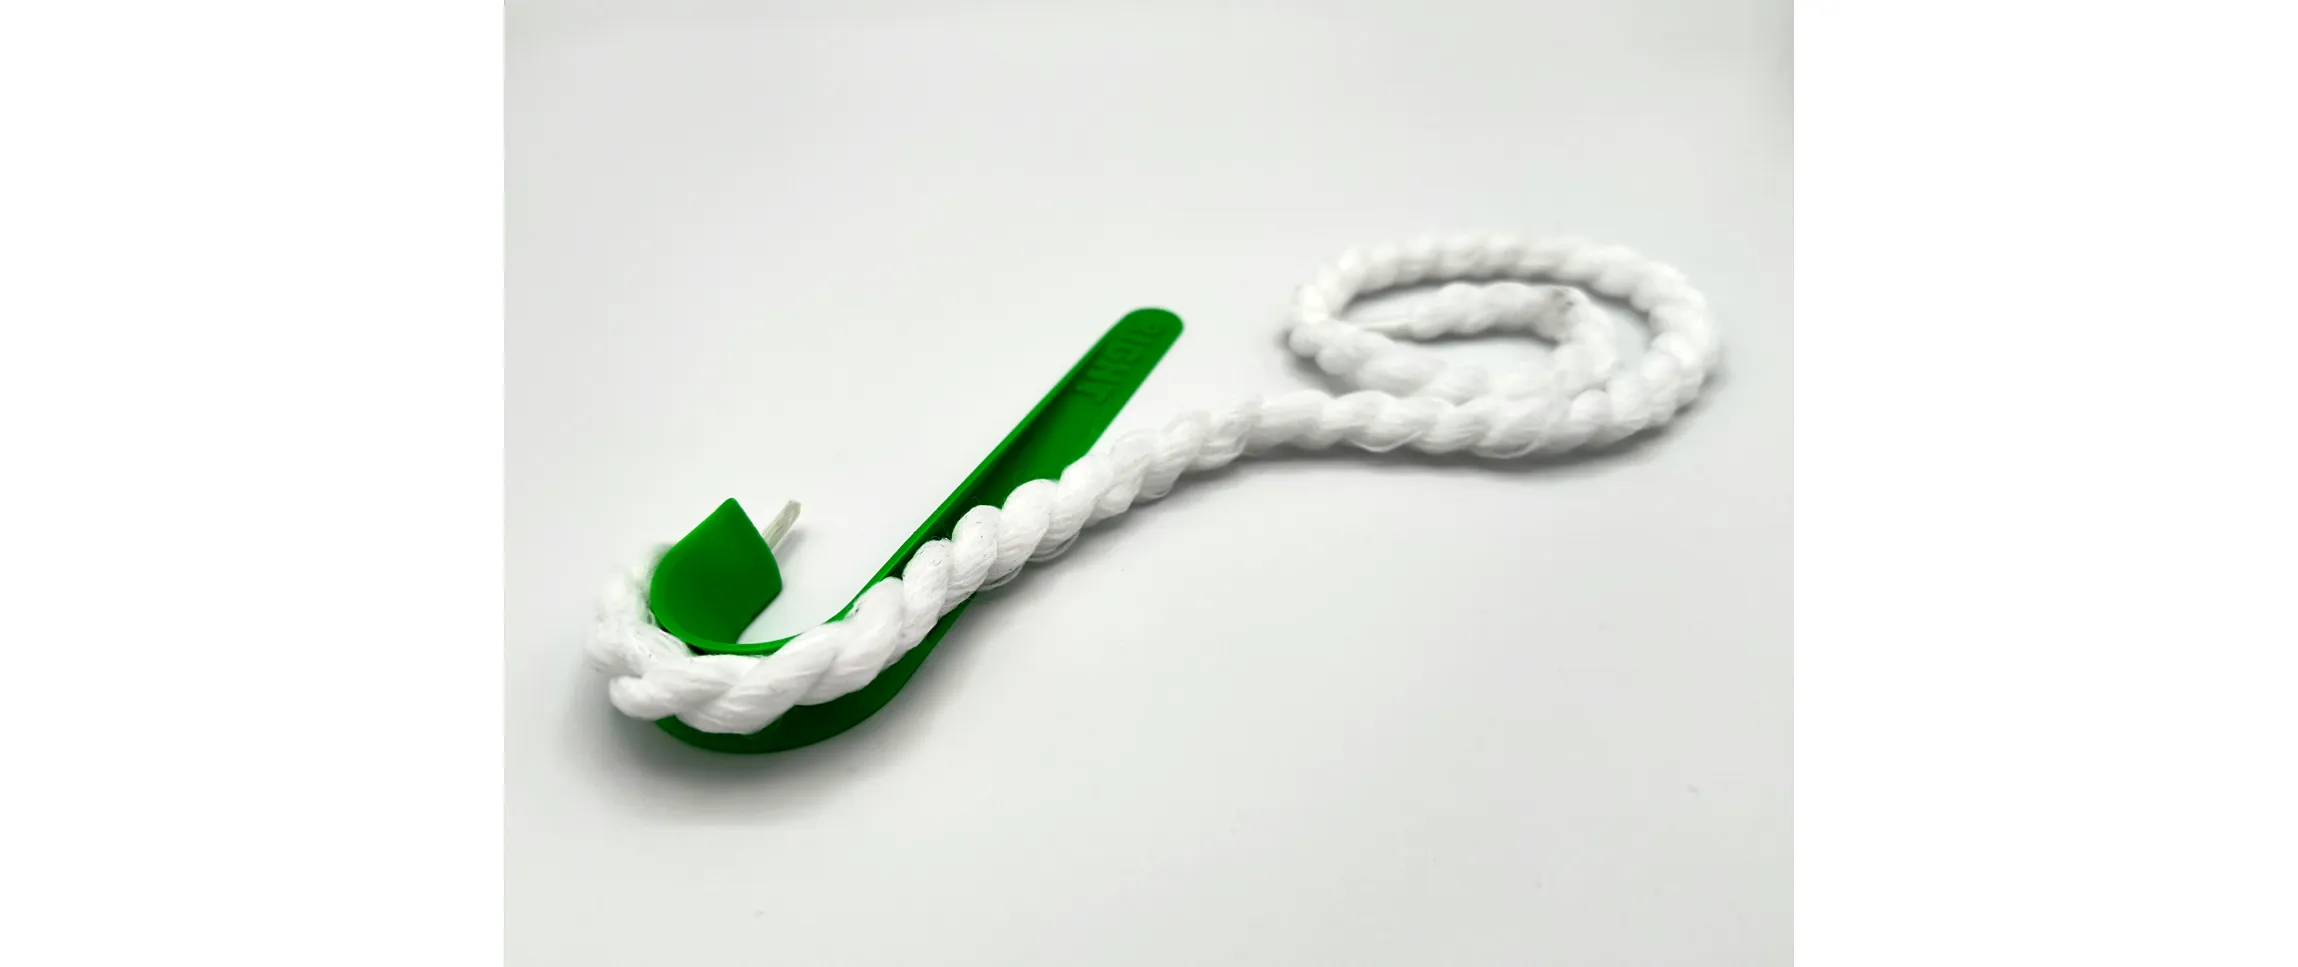
After tying the aglet, pass the string around the too.
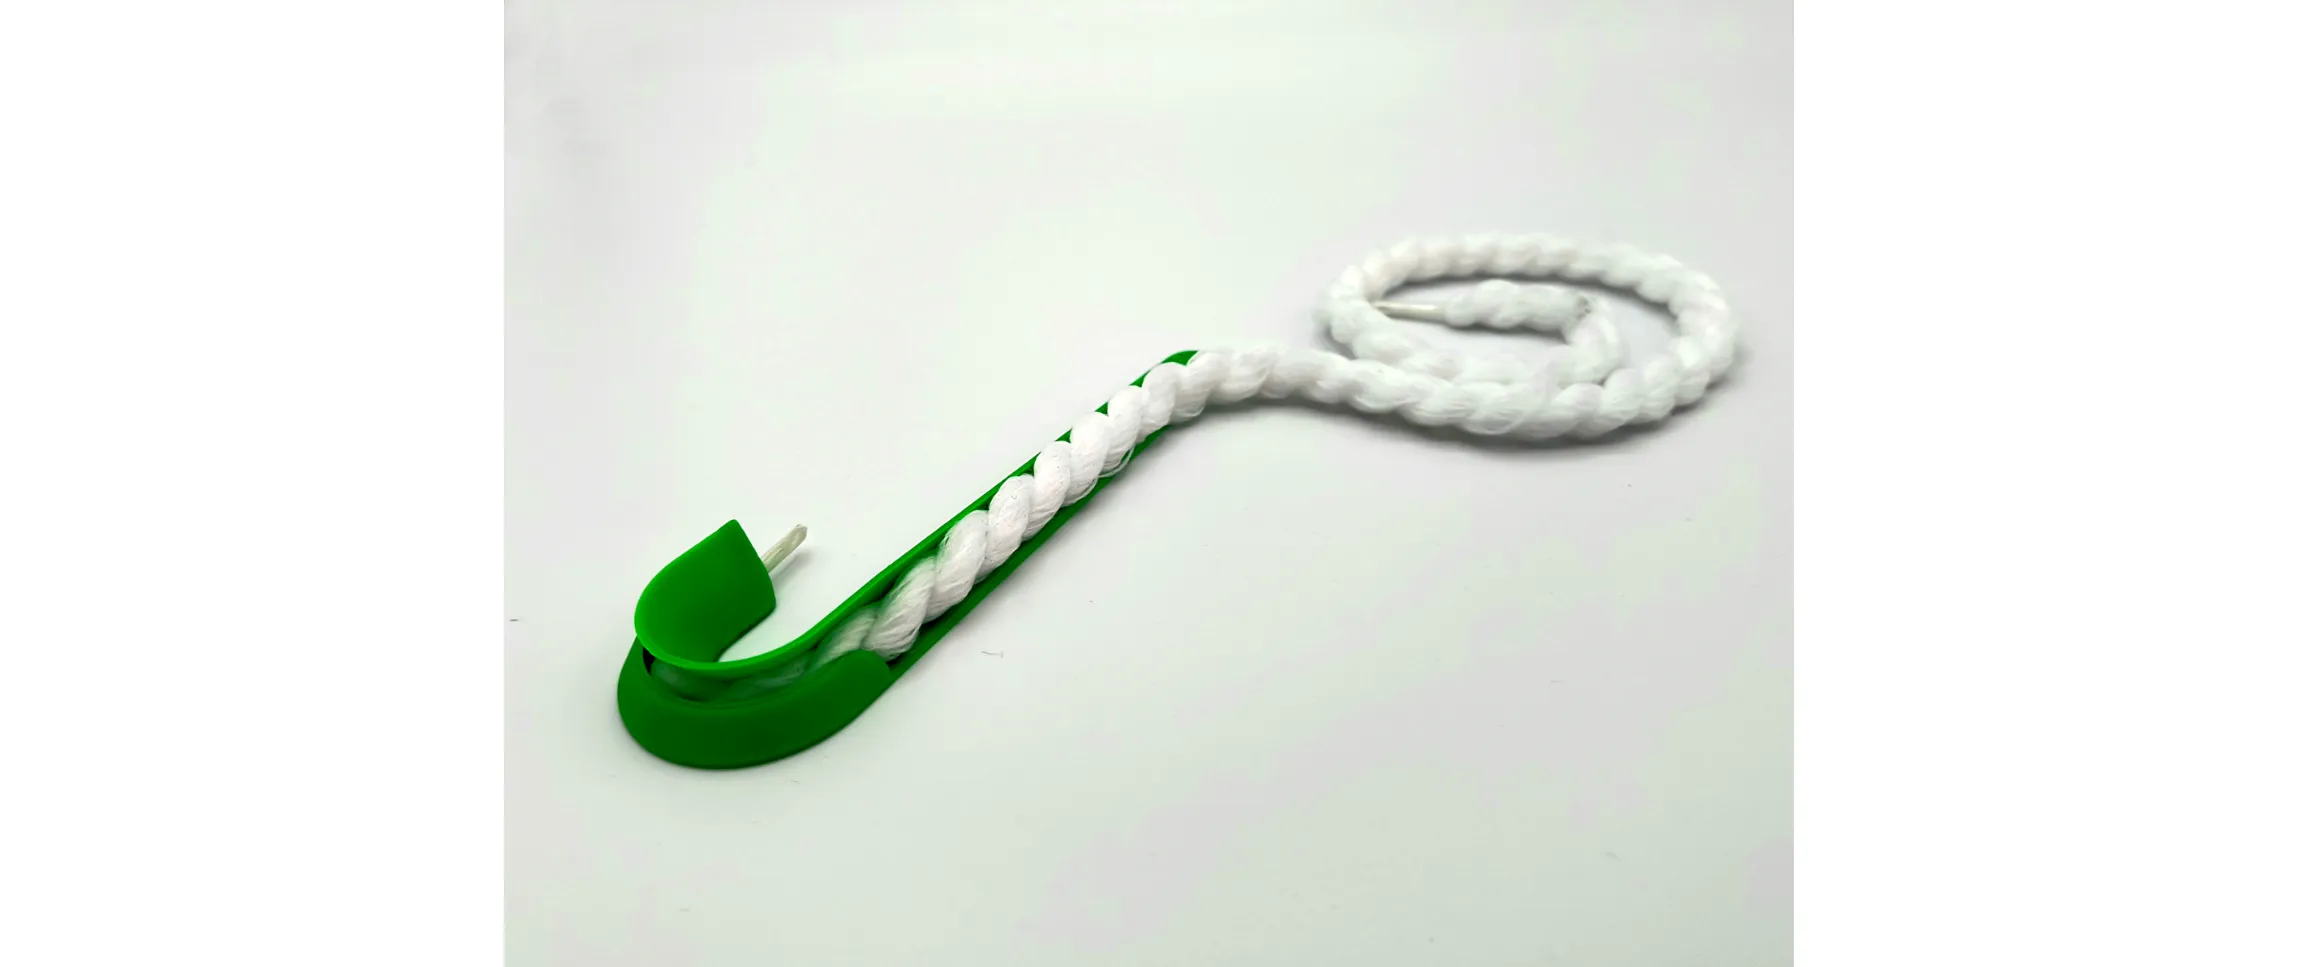
Gently pull the string from the long side and the shrinking of the string itself will cause it to enter the sliding tunnel.
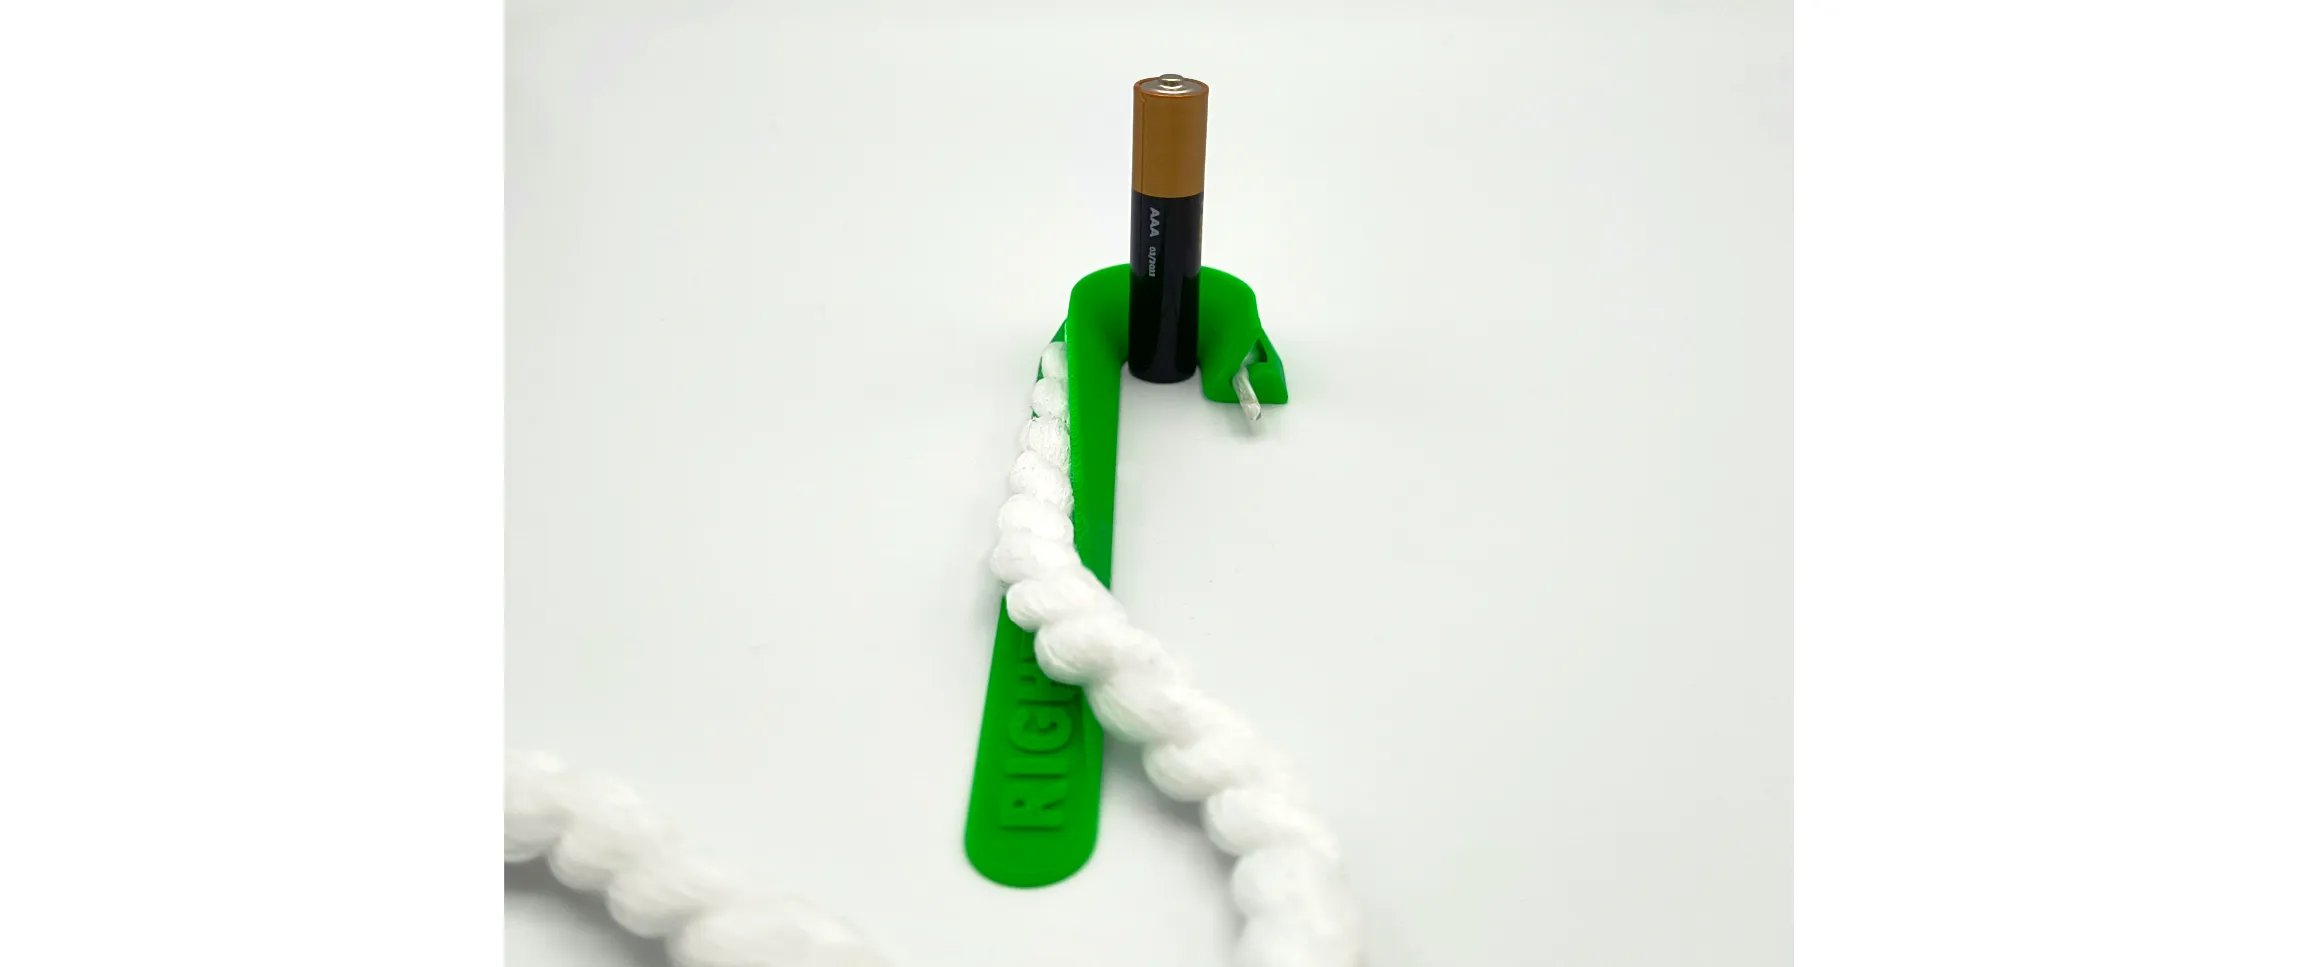
Move the tool head to the back of the screw (here represented by a anonymous battery) and then bring it forward thus surround the screw.
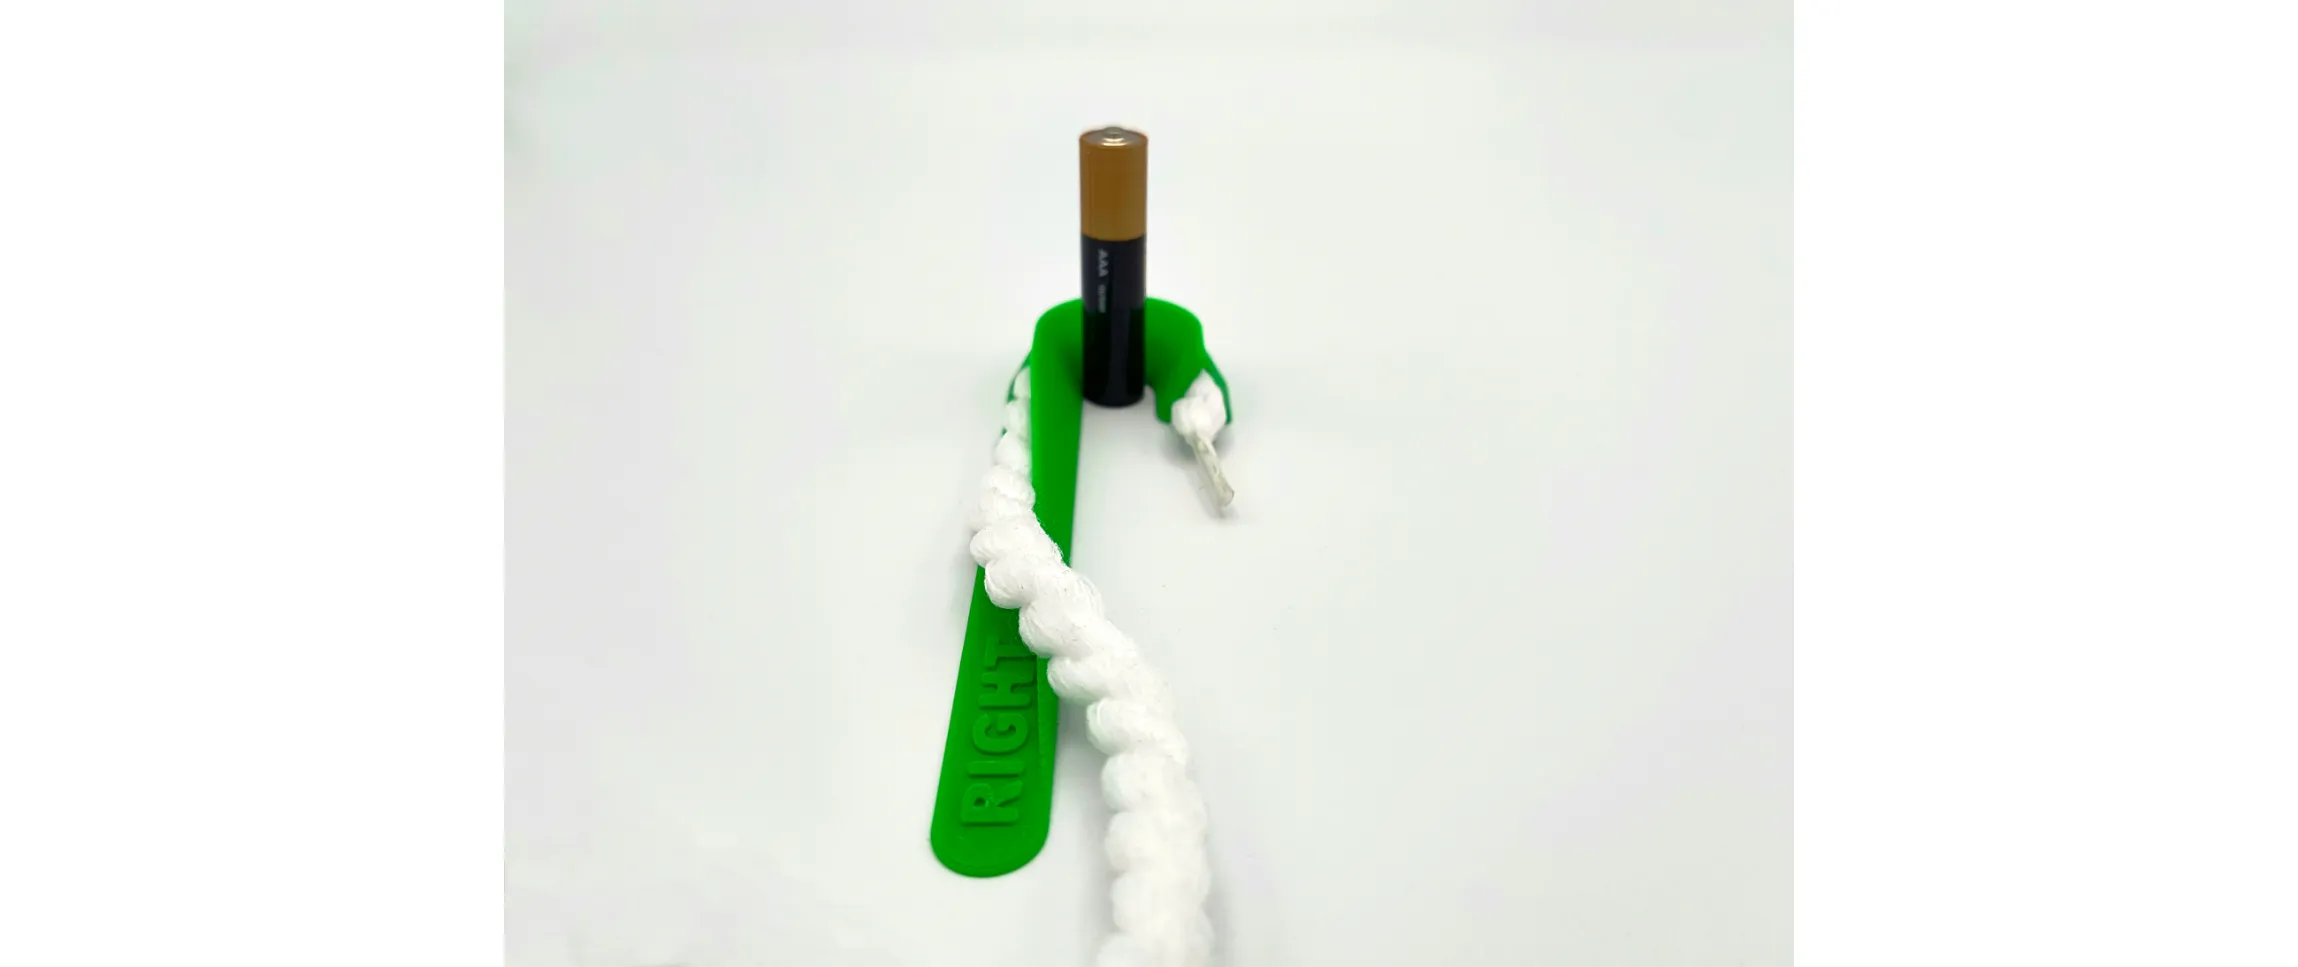
With the tip of two finger pinch the aglet and pull it gently in the direction opposite to the clip itself freeing the string.
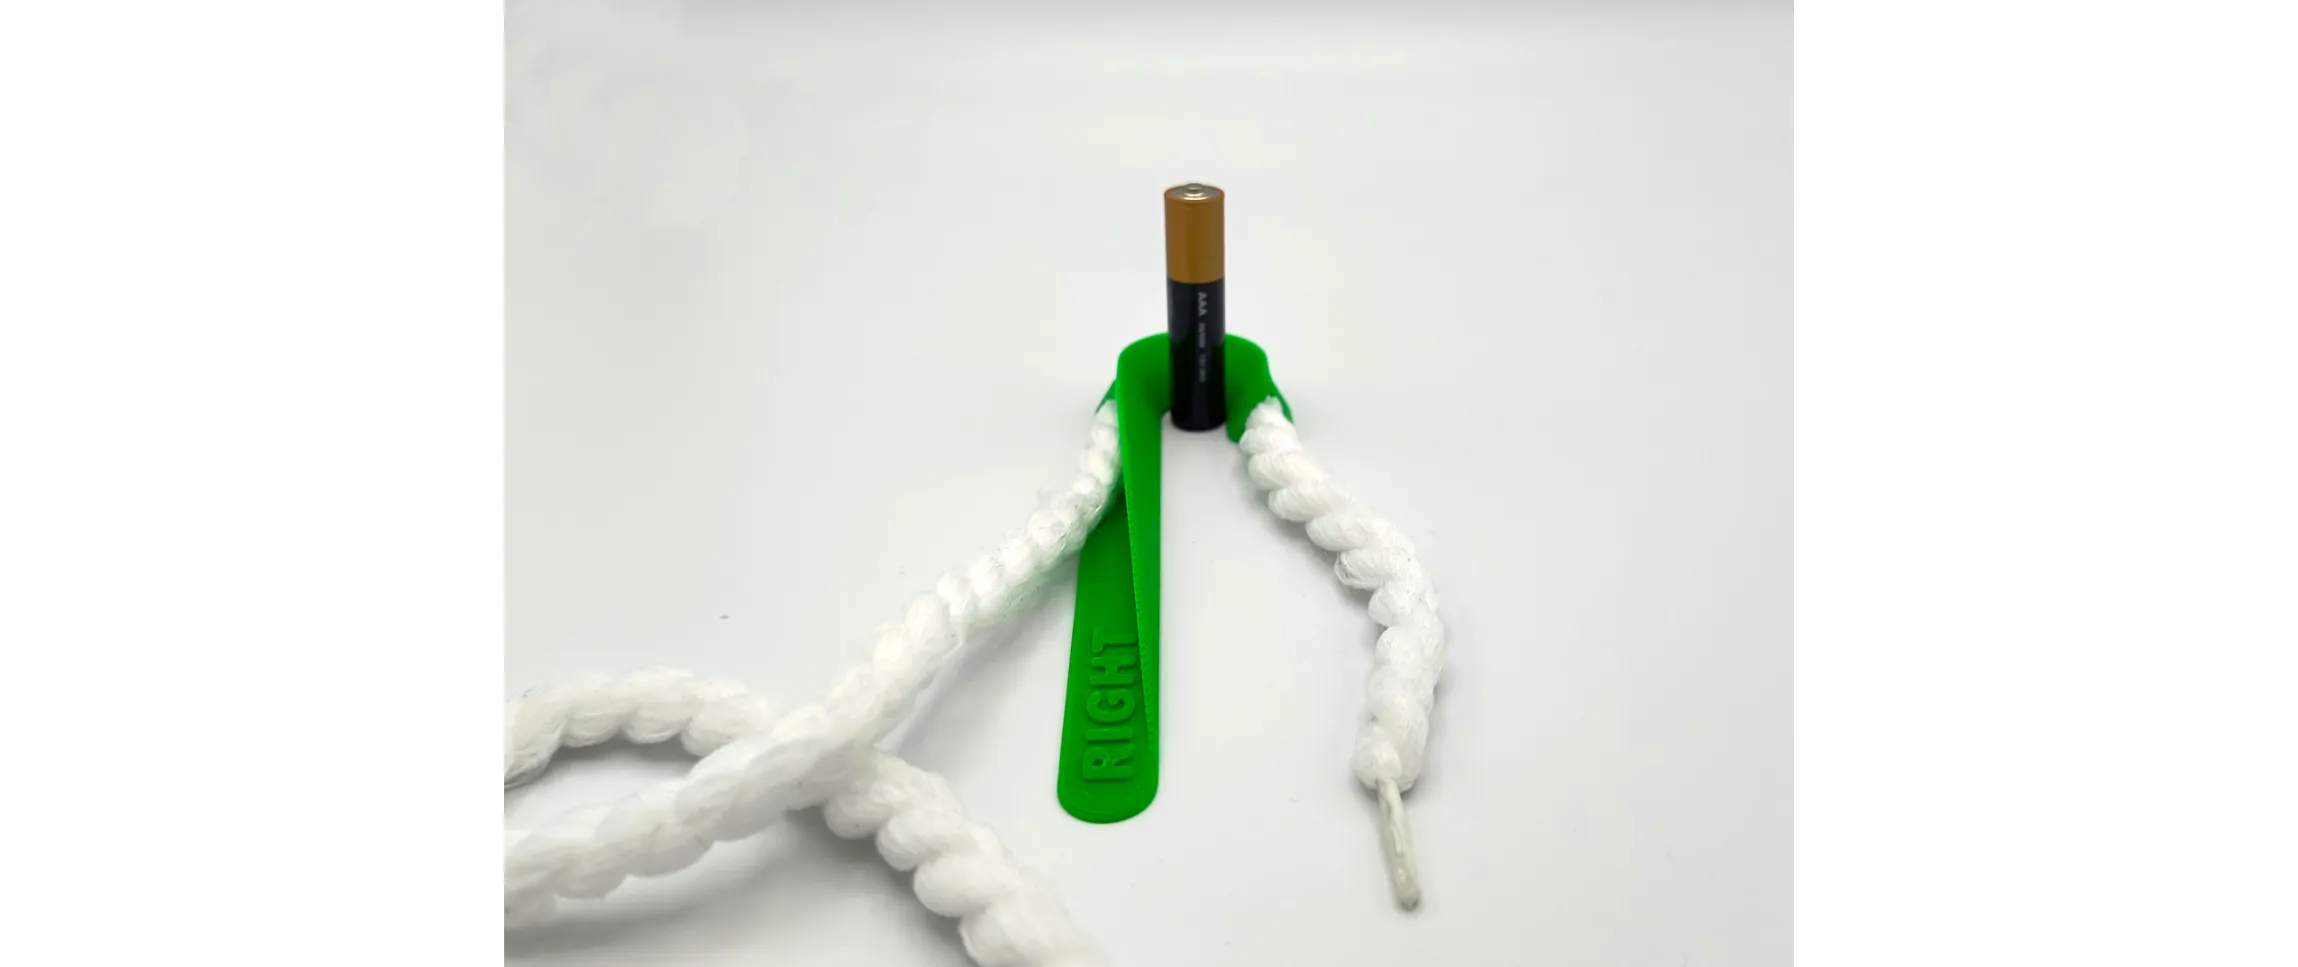
Pull the string towards you making it slide through the tool until you have enough string to do another turn around the screw.
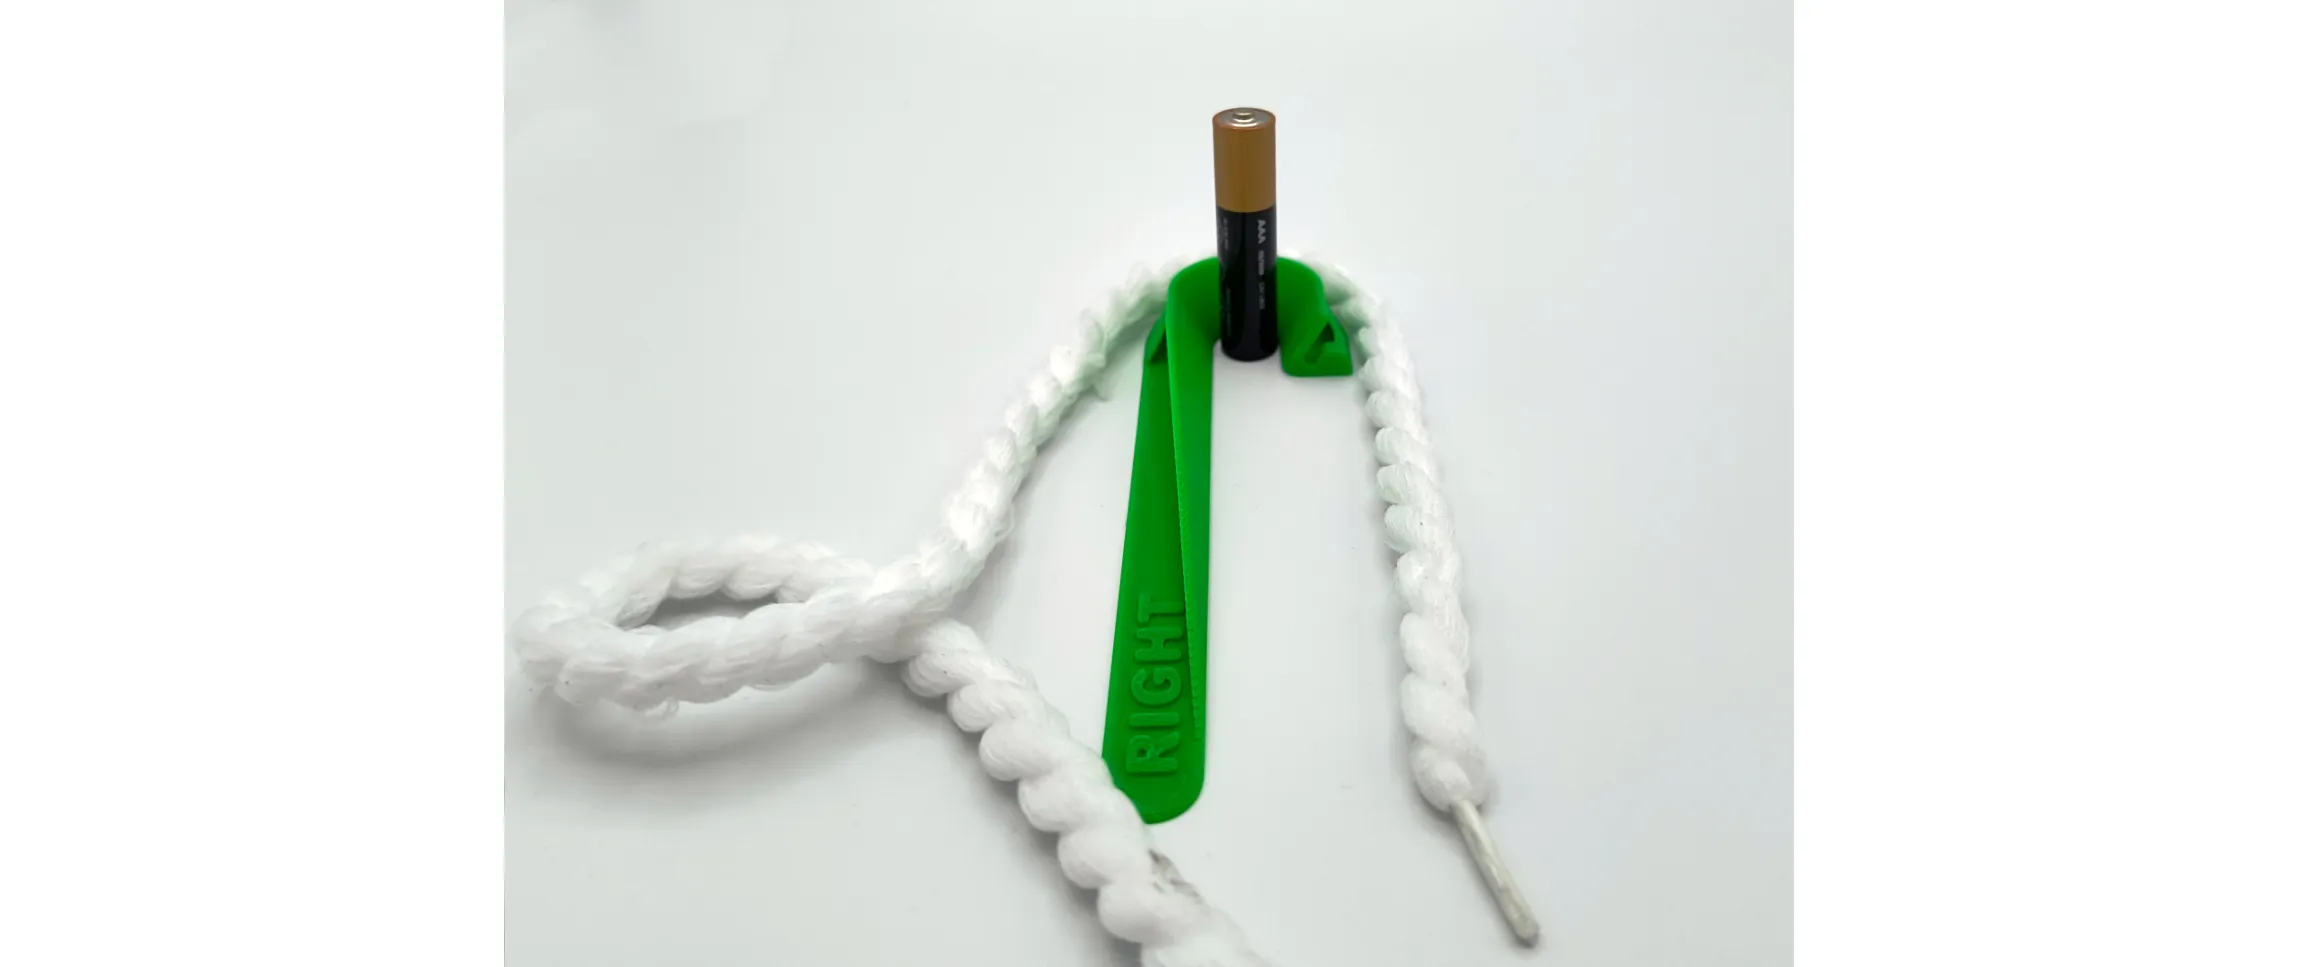
Pull the string vertically from both ends to the upside, freeing it from the tunnel.
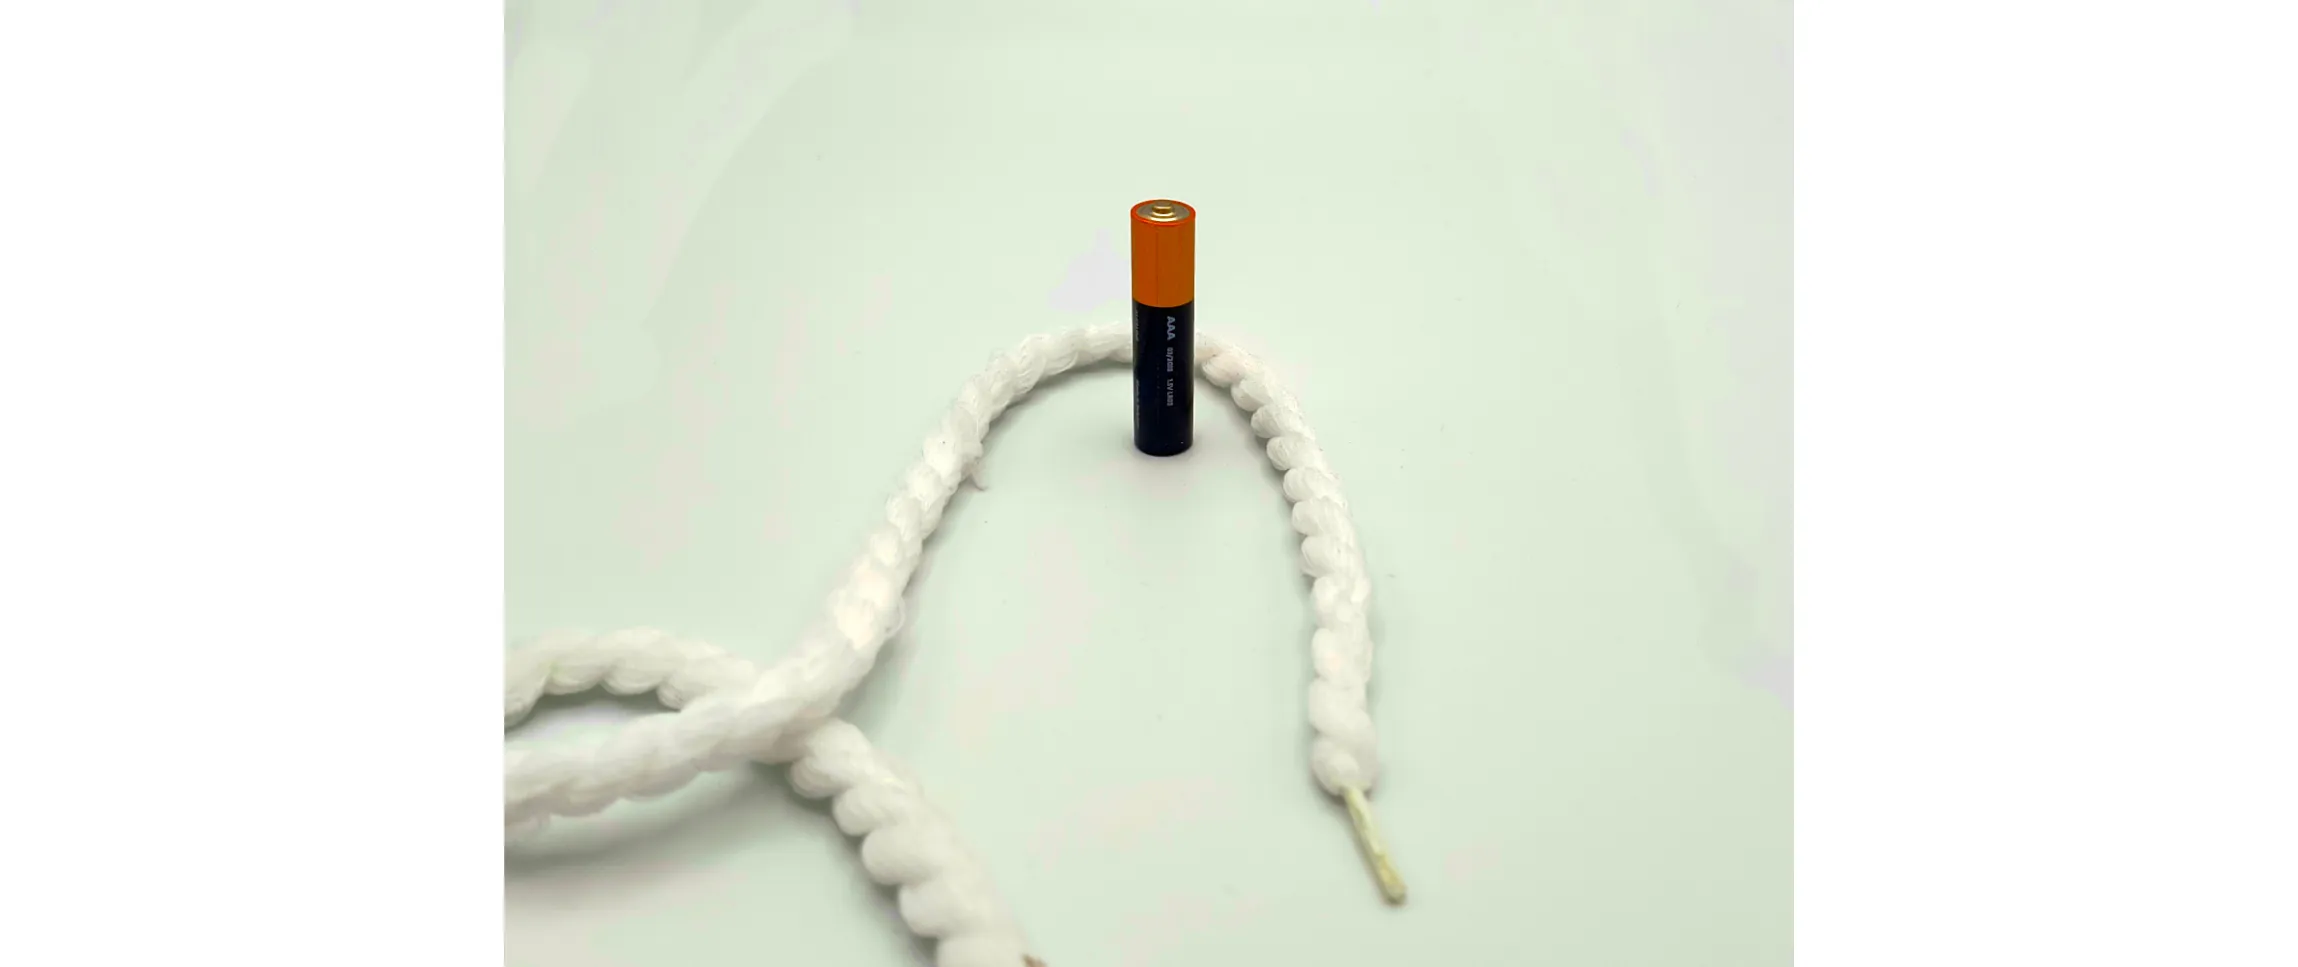
Remove the tool by going back with it, moving to a side and bringing it forward again.
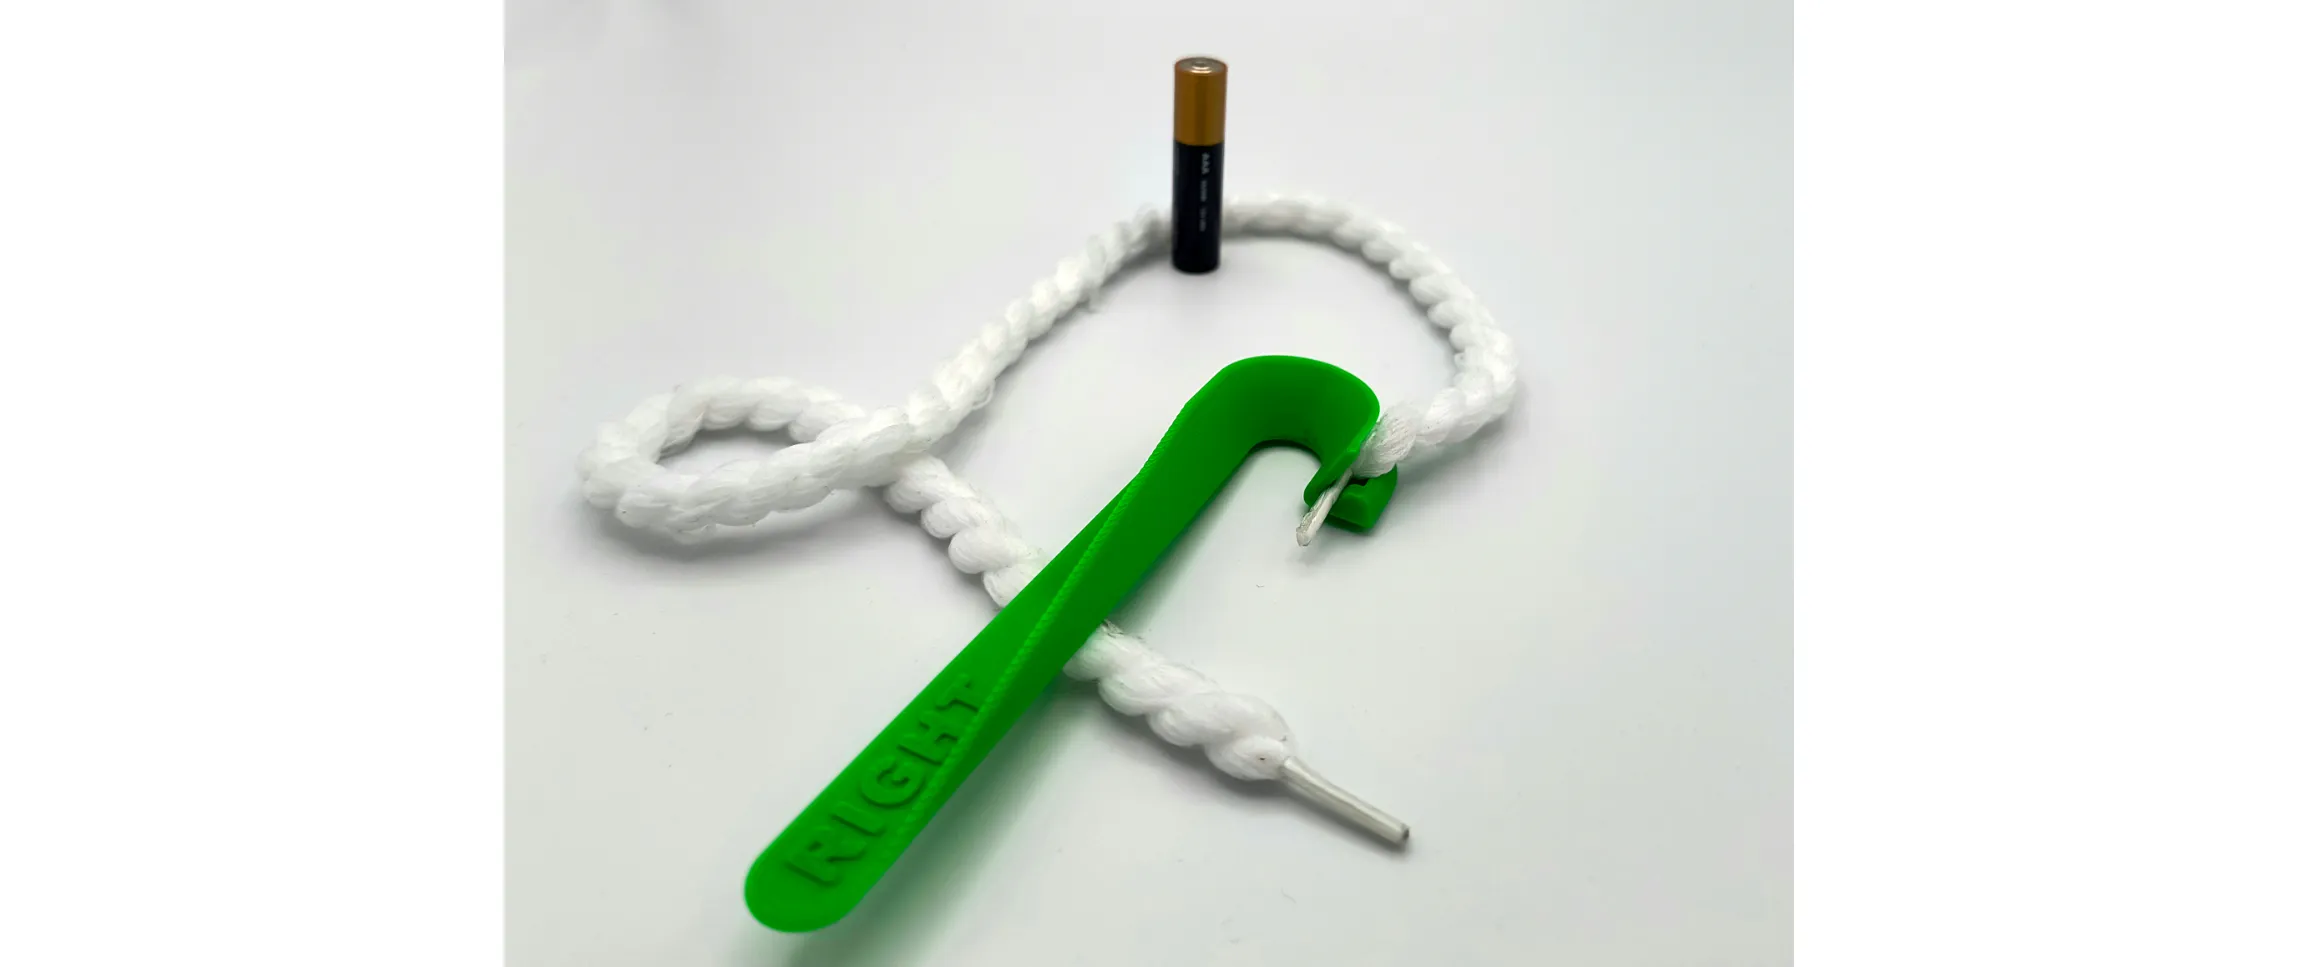
Clip the same aglet again, as you did in step 1, but this time make sure not to pull the string too much.
This time there's no need to insert the string in the sliding tunnel, even if you are free to do it again.
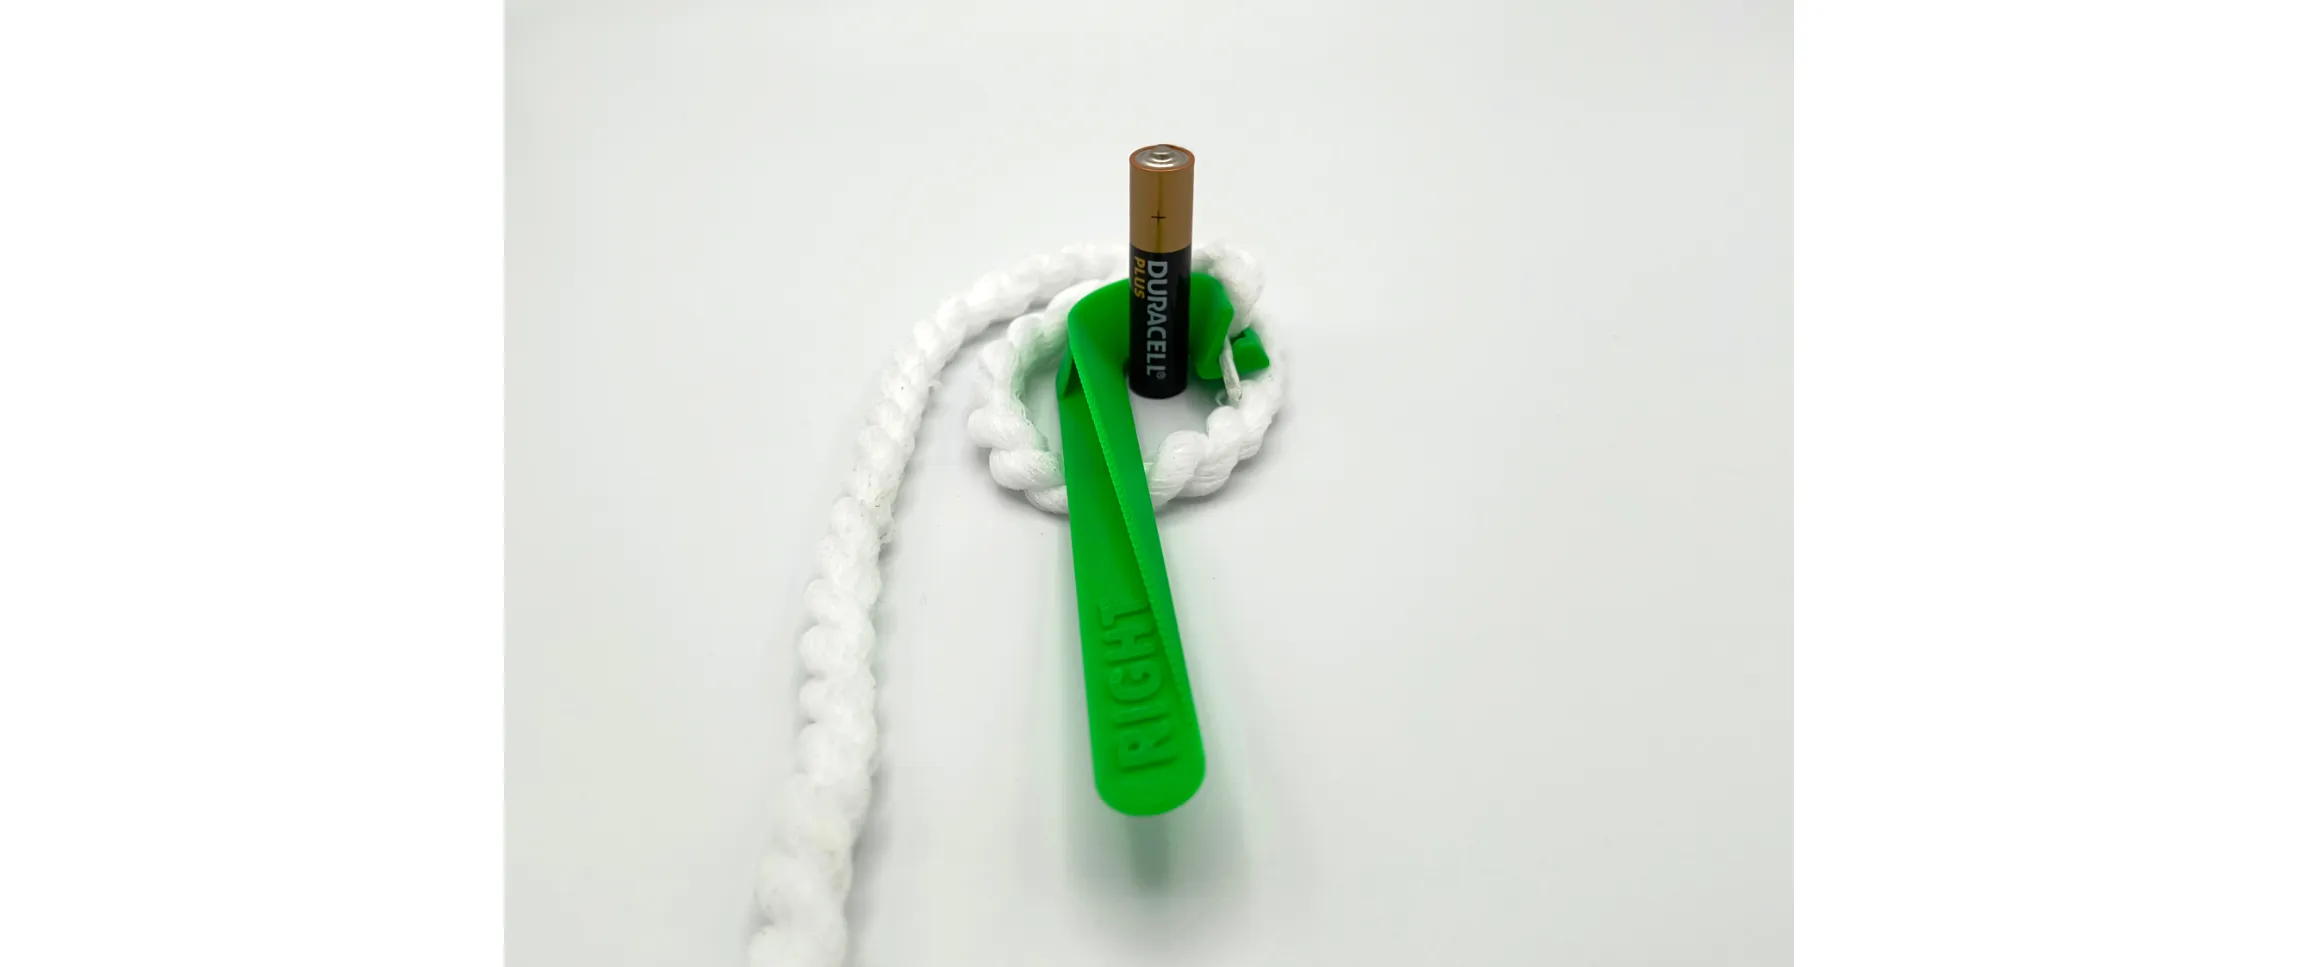
Repeat what you've done in step 4 this time creating a full circle around the screw.
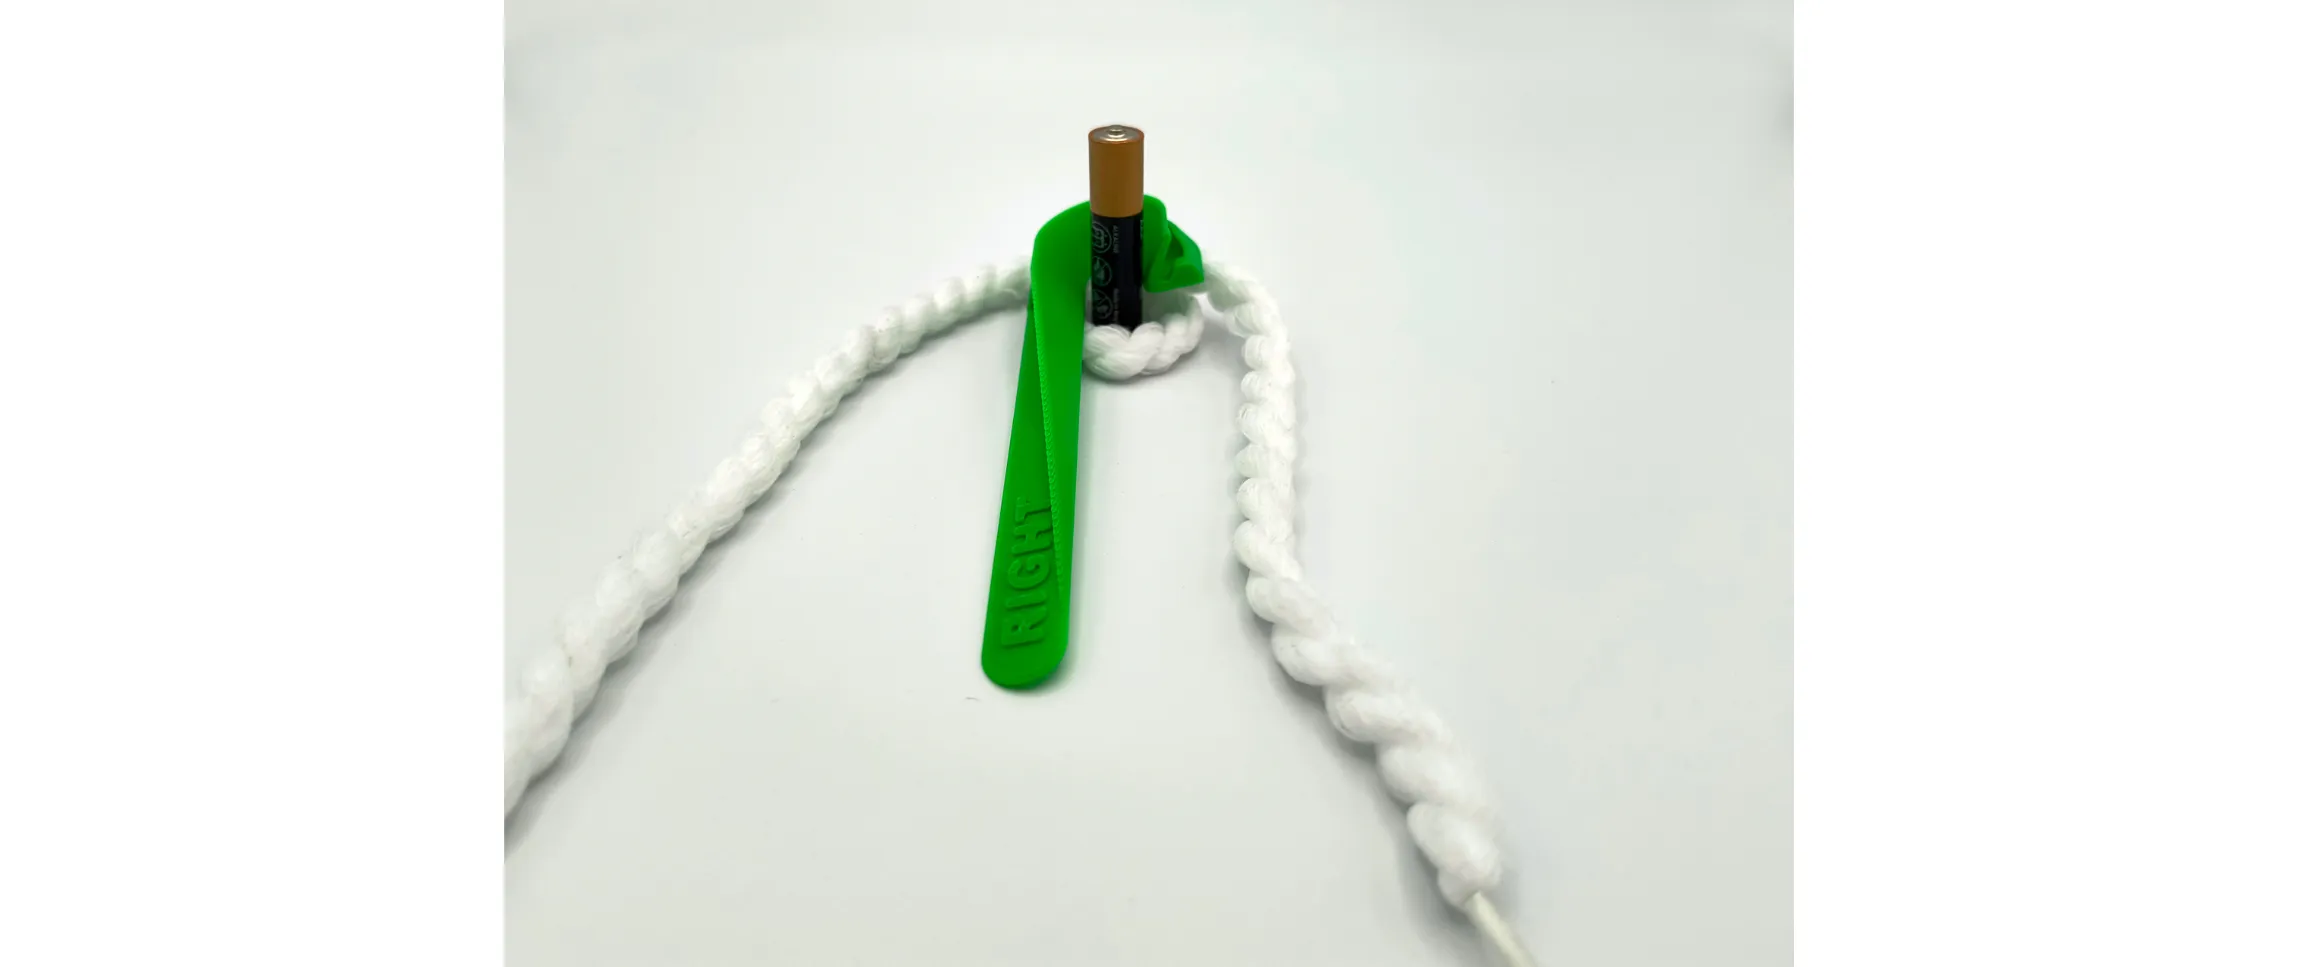
Pull the string from the aglet towards you.
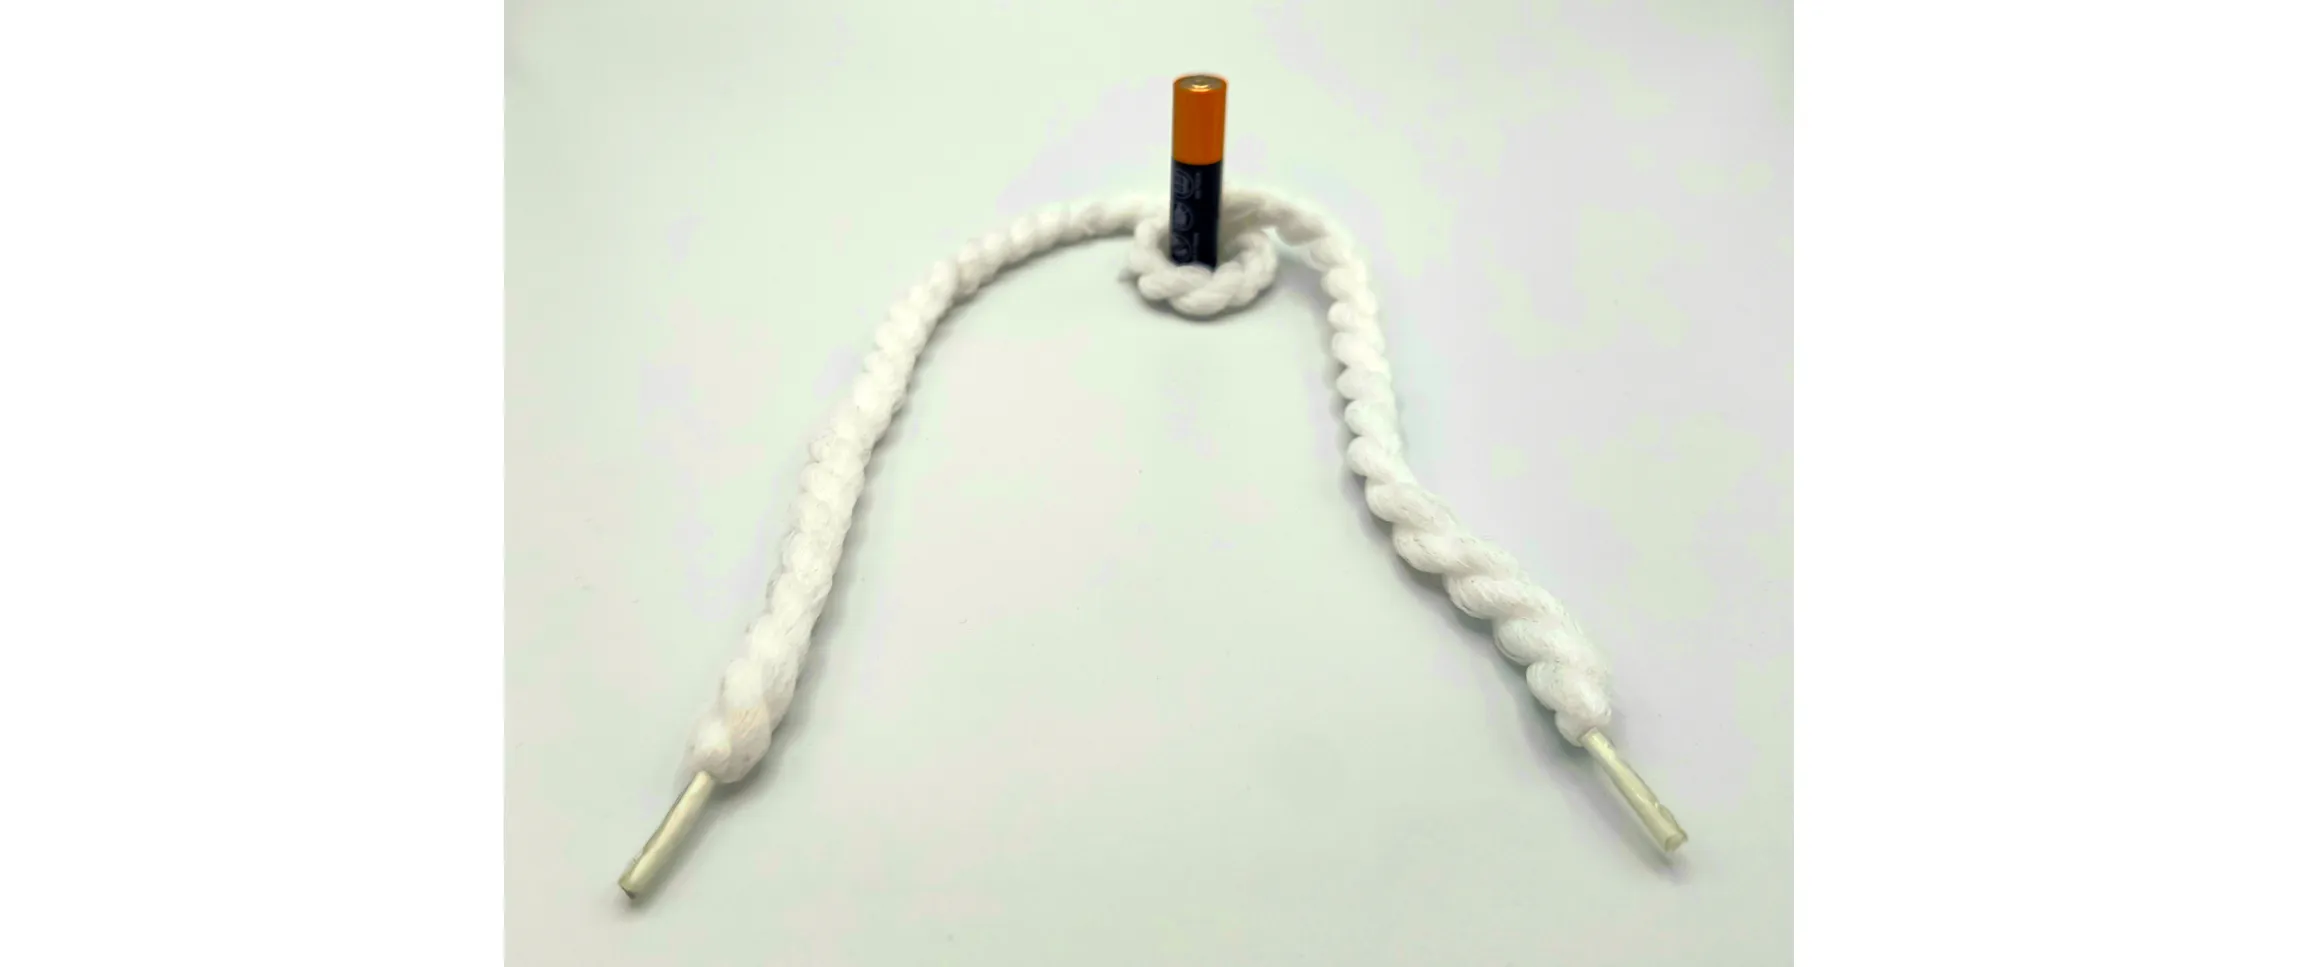
Remove the tool and you're basically done.
What to do then
These strings are washable, just put them in a cloth cleaning bag and drop them in your washing machine for the next laundry. They will come up almost like new.

After using them about ten to twelve times they're a little stressed so I just suggest to put them away and use others. In the package there're twenty strings (in some packages only twelve), they will last you very long.
Where to get the product
For your convenience I created a list of places where you can buy from at your location, but check at your local bike shops too, they probably have it available or can get them for you.
Flag | Country/Nation | Amazon | Reseller |
|---|---|---|---|
 | United States of America | 
| Finish Line USA |
 | Brasil |  | N/A |
 | Canada | N/A | Full Cycle |
 | United Kingdom |  | N/A |
 | Germany |  | N/A |
 | France |  | Royal Velo France |
 | Italy |
 | Ciclo Promo |
 | Spain |  | N/A |
 | Netherlands |  | N/A |
 | Sweden |  | N/A |
 | Poland |  | N/A |
 | Belgium |  | N/A |
 | Saudi Arabia |  | N/A |
 | United Arab Emirates |  | N/A |
 | Japan |  | N/A |
 | Singapore |  | N/A |
 | Australia |  | Velo-vita |
 | Austria |  | Funbike |
 | Mexico |  | Benotto |
 | Switzerland | N/A | Velok |
Some of the Amazon links above are part of the affiliate program. I may earn something from your purchase, please consider this as another way to show your appreciation for this model.
Boost Me (for free)
Want to show your appreciation for my work? Consider sending me a boost. This encourages me to keep creating beautiful, useful models and scripts, and to share them with full documentation as I always have.
Show me your appreciation: buy me a coffee.

https://buymeacoffee.com/zizzo81
All my models are proudly created in Italy with ♥.

License

You shall not share, sub-license, sell, rent, host, transfer, or distribute in any way the digital or 3D printed versions of this object, nor any other derivative work of this object in its digital or physical format (including - but not limited to - remixes of this object, and hosting on other digital platforms). The objects may not be used without permission in any way whatsoever in which you charge money, or collect fees.


Comment & Rating (343)