Search models, users, collections, and posts

Airless Soccer Ball Model/3MF

Print Profile(1)

All
P1S
P1P
X1
X1 Carbon
X1E
A1
H2D
H2D Pro
H2S
P2S
H2C
X2D
A2L

0.6mm nozzle, 0.3mm layer, 4 walls, 50% infill
Designer
26.6 h
1 plate
4.9(8)

Open in Bambu Studio
Boost
232
469
32
15
542
82
Released 

Description

Watch our printing video here: 


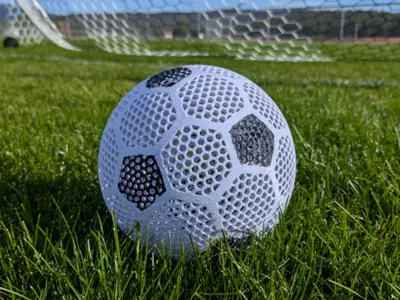
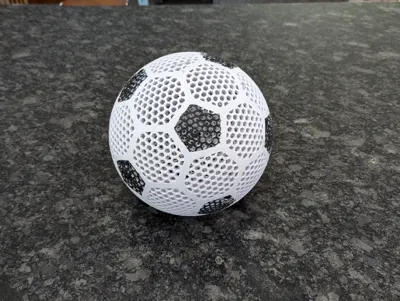
Our new airless soccer ball model! I designed the soccer ball to meet the official size and weight of a professional league (size 5) soccer ball. Please note that this is still a work in progress – the printing profile I provide is for Ataraxia Art’s flexible PLA filament, which is a bit “squishy” for a soccer ball, so it doesn’t perform as well as a regular soccer ball. I will keep experimenting with different filaments and posting any well-performing filaments to this page.


Link to the Ataraxia Art Flex PLA filament: https://amzn.to/3BZPBAa


Printing settings:


Printer: Bambu Lab P1S

Nozzle Temp: 220C

Bed Temp: 55C (I used a glue stick for adhesion/release agent)

Walls: 4 walls (5 on the “top layer”)

Infill: 50% gyroid

Speed: 44 mm/s

Supports: manual tree supports (painted on the bottom of the ball in Bambu Studio)


Links included in this description may be affiliate links and I may receive a small commission if you make a purchase. There is no additional charge but it does help to support my channel if you make a purchase.

Comment & Rating (32)

(0/1000)

Boosted
Print Profile
0.6mm nozzle, 0.3mm layer, 4 walls, 50% infill
craxkes from my son kicking it around the house with flexpla. it looks great though.
The profile uploader has replied
0
Reply
Sorry to hear it! I am hoping to find a filament that will be more durable
0
Reply
Boosted
Replying to @makeitlabchanne :
I will try the annulling I plan to print another soon.
0
Reply
Print Profile
0.6mm nozzle, 0.3mm layer, 4 walls, 50% infill
My spool got messed with and it printed the rest with no filament so I had to run the print again but trick my P1S to think it was delivering filament and then when it was just at the right height I put the plate back with the first half that was printed and it worked very well. The reason you see a line of pink is because I wanted a different color to make it easy to line up the print exactly. That's called The Triple R (Rothwell Rapid Recovery) fyi. worked great so shout out to them. obviously I cleaned up the excess but I don't have the ball with me at the moment to show you. luckily I photograph every print. As far as the filament I used spoolhaus PEBA printed as TPU for AMS from the bambu app. part fan 30%, Aux fan about the same (no fans ever on first two layers). and I printed at 166% speed for most of it at 242°C with a 0.6mm Obxidian nozzle. Bed temp set to 0°C (room temp basically) on a holographic plate but I did the first layer at 260°C.
0
Reply
Boosted
Hey - do you think you can add a TPU profile? Our expectations are low - it's just a ball to kick around, even if it acts nothing like a real soccer ball. We have cheap TPU laying around, and my kid's motivation for a "better" ball isn't high enough to justify buying a new roll of FlexPLA. We've also been using polyurea print plates (specifically BIQU CryoGrip Pro Glacier), to see if we can reduce the support densities on these prints. I'll be happy to share results. So far, ultra-minimal supports with this model on another TPU profile you provided on the airless basketball doesn't work. The build plate does some good, but eventually gives way. Surprisingly, the magnetic door to the toolhead is a weak point for such a print, and needed to be taped down.
The designer has replied
1
Reply
Interesting - I will see what I can do. I will have to get some TPU first so that I can do some testing
0
Reply
Boosted
Replying to @makeitlabchanne :
Actually, I did a fairly good print just by changing to generic TPU. Go figure!
0
Reply
what do you think needs to be different about a TPU profile? i can't think of a single profile I couldn't get to print in TPU if I wanted. just select that filament in the app. or don't and just change the temperature and fans yourself. for TPU I would run no fans for the first layer then 20% part fan after that and maybe 30-40% MAX for the Aux fan. and I'd print first layer 50% speed (always and forever and for every single print you ever do) and 124% for the rest at about 240°C
0
Reply
have you been working on a Sainsmart PEBA version like your awesome basketball?
The designer has replied
0
Reply
That is definitely on my to-do list. I am hoping that I can work on this soon.
0
Reply
Replying to @makeitlabchanne :
I am going to try to use this current model and use the "Generic TPU' filament profile you made for the Sainsmart basketball, and use some similar settlings like 0.35 z-distance and such (like the bball) and give it a try. Your basketball model turned out GREAT. Took a long time but no flaws and it even came off the supports much easier than I had feared. In the immortal words of Chit....."SUCCESS" . My kids LOVE IT. Thank you!!! Will let you know how the soccer ball turns out.
0
Reply
Replying to @Houghton40 :
Glad to hear it! Hope the soccer ball turns out well.
0
Reply
Turned out great but the supports were very hard to remove.
The designer has replied
0
Reply
Yes, I think I need to increase the z-distance in the 3mf because the supports are difficult to remove.
0
Reply
needle nose pliers. pinch and twist at the outer most edge and go in circles and you'll be able to grab bigger and bigger pieces. don't bother trying with your bare hands or even with pliers just grabbing at the bottom. do it as described and it's easy as pie. also starting at layer 3 I like to run at least the layers with support at the fastest speed I can with the most fan I feel comfortable with and that makes them easier to remove. i usually anneal rubbery prints anyway so I don't mind the very slight dip in quality for that section.
0
Reply
make a o.4 nozzle
The designer has replied
0
Reply
If that would be helpful I can add it, but to make it a 0.4 nozzle/profile, all you would have to do is change the nozzle size to 0.4 and the layer height to 0.2, and that is it 🙂
0
Reply
can n u do it?
0
Reply
really cool i love it
The designer has replied
0
Reply
Thanks!
0
Reply
hello, do you think this print can be made with a diameter of 80cm? split and glued in parts for the simulation of a huge ball
The designer has replied
Show original
0
Reply
Hello, I'm not sure how the elasticity or durability would be, but perhaps you could join the pieces with a very strong glue. It would probably be best to use a flexible glue
Show original
0
Reply
Boosted
This ball prints quickly compared to the double latticed bball I printed right before it. The ball is cool, it cracked in under an hour from a 9 year old kicking it in the house. still awesome I'll print again!
The designer has replied
0
Reply
I hope the next one holds up better! If they keep cracking, I would recommend annealing it if you can. We have a video on this: https://youtu.be/F0lkJQr95Gw
0
Reply
ve it
0
Reply