Search models, users, collections, and posts
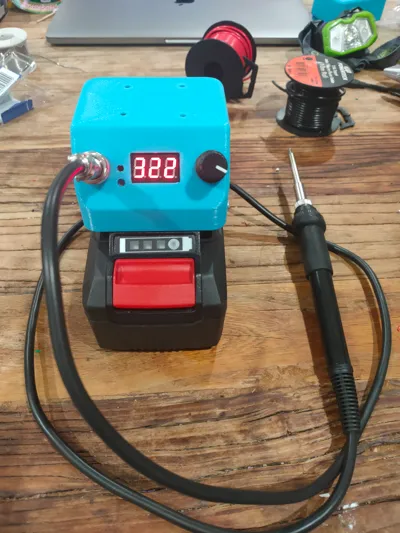
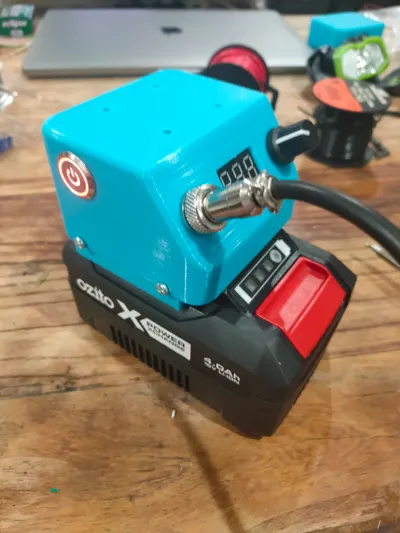
Ozito PXC 20V 72W Soldering Iron Station
IP Report


Print Profile(1)

0.6mm nozzle, 0.3mm layer, 3 walls, 15% infill
Designer
1.8 h
1 plate
Open in Bambu Studio
Boost
14
26
0
1
18
4
Released
Description
A soldering iron station which plugs into an Ozito PXC 18V battery. This soldering iron is amazing! Heats up super quickly and maintains temperature well. The tips are interchangeable too.
Parts required:
- HAKKO T12 Handle DIY kit (eg. https://www.aliexpress.com/item/32740527077.html)
- 16mm Metal Push Button LED Switch (eg. https://www.aliexpress.com/item/1005003120415869.html)
- XL6019 DC Boost transformer (eg. https://www.aliexpress.com/item/32788804655.html)
- NARVA 6.3mm blade terminals from Bunnings (https://www.bunnings.com.au/narva-3mm-blue-electrical-terminal-male-blade-connector-14-pack_p4330755)
- M3 x 10mm nuts and bolts from Bunnings (https://www.bunnings.com.au/pinnacle-m3-x-10mm-zinc-plated-round-head-bolts-and-nuts-20-pack_p0247262)
Instructions:
- Print all the parts. You need support as shown in the attached image. (Sponge box and iron holder optional)
- Using a heat gun or some other heat source, heat up the blade terminals and remove the plastic insulation using pliers.
- Press the terminal connection end flat using some pliers.
- Solder some wire to the end of the terminals
- Pull the wires through the holes in the base then press the terminals into their respective positive and negative slots. Once the terminals are aligned properly, superglue the terminals into place.
- Press the nuts into their recesses in the base and use some superglue to fix them in there.
- Calibrate boost transformer to output 24V
- Follow instructions for the switch (normally open)
- Wire up the soldering kit per the instructions.
License
This user content is licensed under a
Creative Commons Attribution-Noncommercial-Share Alike
Comment & Rating (0)