


Print Profile(1)

Description
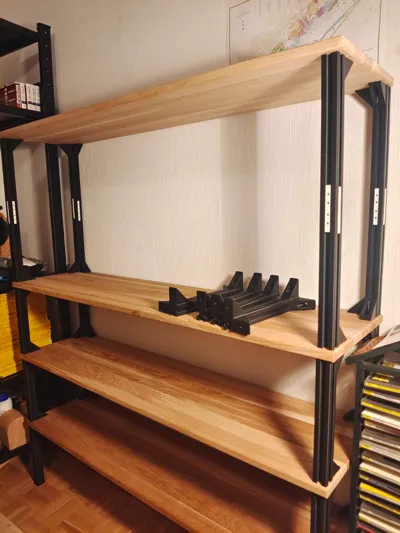
Strong Modular Customizable Shelf Rack
A customizable, modular shelf based on 3030 aluminum extrusion profiles. Quickly make your shelf (<1h) in any size with only screwdrivers and a hand drill. You can also use standard 3030 aluminum extrusions instead of printing everything.
Load bearing capacity: when printed with Bambu PLA Basic, using 1200mm x 300mm x 20mm hardwood, supports the weight of 2 adults (140kg) without noticeable deformation.
Boost Me (for free)
Support my work and boost for free!
Materials & Tools
- Wooden plates (any size)
- 6mm drill
- M6x40 screws (DIN6912) and nuts (ISO4032), 6 sets per layer
- Approx 700g of filament per layer (PLA Basic works well)
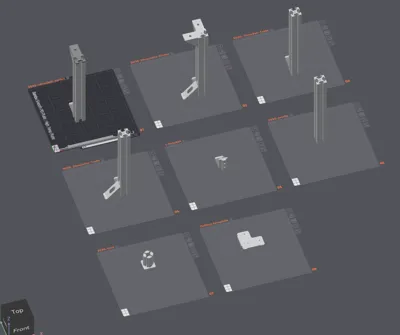
Print Instructions
(Tall parts are placed just outside of the print bed because it's not allowed by makerworld. Move them inside and delete the dummy part.)
The height of all beams is set to 255mm by default. To enable this, follow the official instructions (https://wiki.bambulab.com/en/knowledge-sharing/print-volume-limitations). TLDR: In Printer → Printer Settings → Printable height set max height to 256. Make sure the bottom of your printer is clear of any debris.
If you want shorter beams, use the Cut functionality of the slicer. DO NOT SCALE the model because that would make the thread pitch incorrect.
If you want longer beams, use the Length Extender to combine multiple beams.
Assembly Instructions
Cut the wood panels to size. Mark the board using the drilling template like so (beams with 2 brackets go on the back side).

- Optionally fillet/chamfer the edges using a router (I used a 5mm fillet on all edges).
- Drill using a 6mm drill.
Assemble the foot part to the bottom-most beams for load distribution. Optionally add felt pads or 3d print some TPU pads.

- Tap the center hole of the top side of beams of each layer with 8mmx1.25. Holes are threadded already but tapping helps.
- Screw the positioning pins to the top corner holes.
- Assemble the wood plate, add beams for the next layer, and screw in the 6 holes per layer.
License
You shall not share, sub-license, sell, rent, host, transfer, or distribute in any way the digital or 3D printed versions of this object, nor any other derivative work of this object in its digital or physical format (including - but not limited to - remixes of this object, and hosting on other digital platforms). The objects may not be used without permission in any way whatsoever in which you charge money, or collect fees.
Comment & Rating (13)