Search models, users, collections, and posts

LED module for my 170 and 245 mm dials

IP Report
GIF
GIF

Print Profile(2)

All
A1 mini
P1S
P1P
X1
X1 Carbon
X1E
A1
H2D
H2D Pro
H2S
P2S
H2C
X2D
A2L

0.2mm layer, 2 walls, 15% infill
Designer
1.4 h
2 plates
5.0(84)

alternative to magnets
Designer
10 min
1 plate
5.0(21)

Open in Bambu Studio
Boost
625
1176
184
141
950
482
Released 

Bill of Materials

Maker's Supply Kits and Parts
Select all
D10x3 mm Round Magnet (20PCS) - CA009

Description

https://makerworld.com/en/collections/4639439-licensed-models

You can sell this model, and all the models in the link above, 
with a membership on Patreon.
www.patreon.com/cP_3D


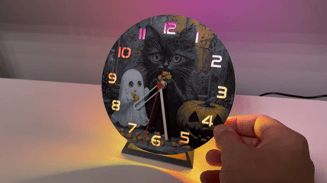
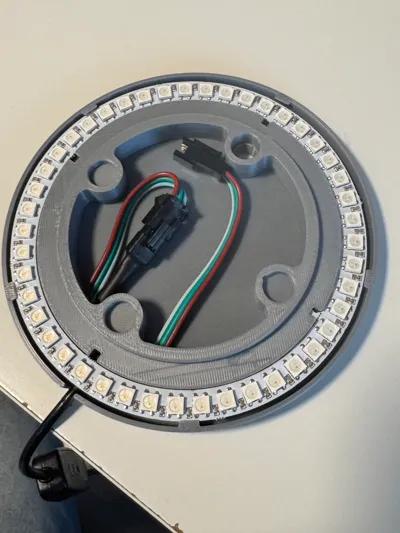
I found an LED ring on Aliexpress, which gave me the idea of using it for my clocks. And I succeeded. The LED ring can be controlled with a remote control, and it can even react to music. This is a nice idea, especially for a party.


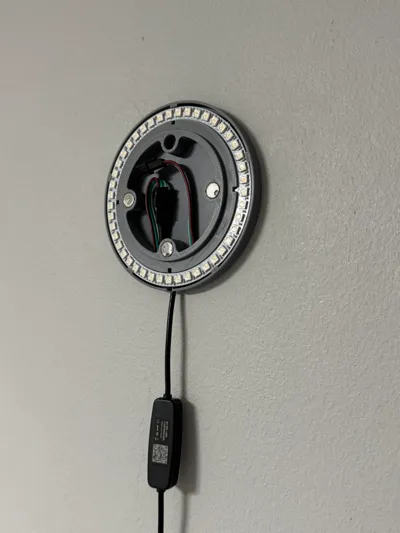
The LED module can also be used as a night light/sleep light because it can be dimmed and you can set a 30M or 1H timer.


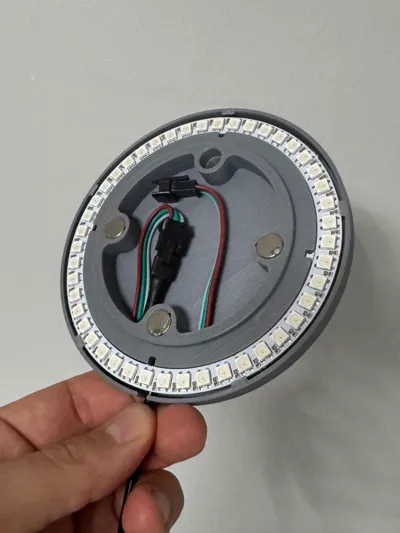
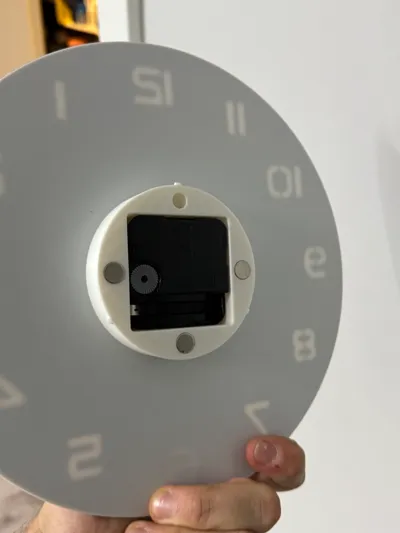
You need 6 pieces of 10x3 mm magnets. 3x for the module and 3x for the magnetic backplate.
https://makerworld.com/en/models/643115#profileId-569109


you also need the 45LED controller kit... here's the link... whether black or white, it doesn't matter.
If the link no longer works, please let me know.

https://www.aliexpress.us/item/3256803329000178.html?spm=a2g0o.productlist.main.10.a1aa6d72tTUVzs&algo_pvid=41660534-21f5-45af-9489-8d71366afa9c&algo

or
https://de.aliexpress.com/item/1005006962344373.html?spm=a2g0o.order_list.order_list_main.5.3cec5c5fA6E3WG&gatewayAdapt=glo2deu


You need a lot of strength to push out the magnets and connect the ring to the plate. It's best to take a hard object and place the parts on the floor, then you can work a little with your body weight. I intentionally made it so strict so that no glue is necessary and nothing falls off the wall.


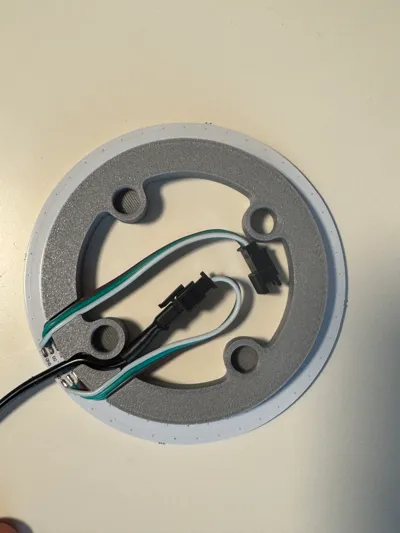
First, put the LED ring over the mounting ring from the front and place the cables flush through the recesses on the back


Then press the ring onto the nubs of the plate with a lot of force. Be careful not to pinch the cables when doing this.


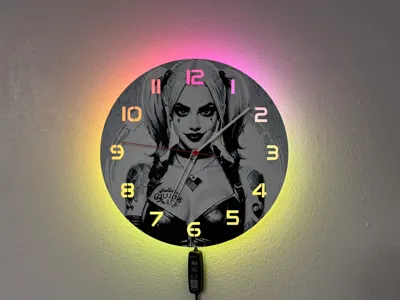
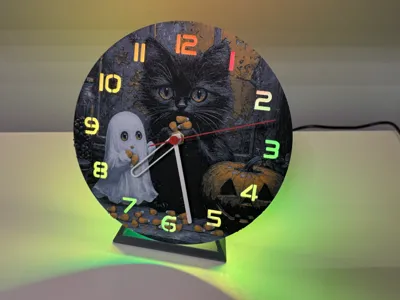
Here you can find my other dials collected
https://makerworld.com/en/collections/1715414


Boost Me (for free)

It gives me pleasure to create things for 3D printing. I also hope to be able to bring joy to others, or to offer a great gift for others.

If the object has brought joy to you or your recipient, then you could also give me joy with a boost 😉

Happy printing

Comment & Rating (184)

(0/1000)

Boosted
Print Profile
0.2mm layer, 2 walls, 15% infill
It took me a moment to assemble the correct parts, but the result is truly splendid and will make a wonderful Christmas gift. Thank you very much.
Show original
2
Reply
How did you assemble the back part? Do you have a photo?
Show original
0
Reply
Boosted
Replying to @brabbit1989 :
Hello @Maschine, unfortunately I've already gifted the lamp. I did find this photo. I've gathered the following objects for 170mm: - The image itself: https://makerworld.com/en/models/591080#profileId-512703 - for the clockwork and magnets: https://makerworld.com/en/models/643115#profileId-569130 - the stand here: https://makerworld.com/en/models/600983#profileId-523239 - and also the module for the LED ring: https://makerworld.com/en/models/643259#profileId-569271
Show original
0
Reply
Replying to @palumbus :
thx
0
Reply
Boosted
Print Profile
0.2mm layer, 2 walls, 15% infill
Everything fits perfectly. It looks fantastic. I only made one modification because my clockwork no longer ran with 3 (6) magnets, so I only used 1 (2) magnets. Still holds up great.
Show original
3
Reply
I have the same issue
0
Reply
Likewise, thank you for the advice
Show original
0
Reply
Print Profile
0.2mm layer, 2 walls, 15% infill
A clean design, though magnets did not work for me (the clock stopped), with the PLA bolts it runs perfectly and looks cool
Show original
0
Reply
This is my very first time making anything like this. Do i have to drill a hole in the back plate for the clock mechanism shaft to go through to the front of the clock face? And this runs without batteries?
0
Reply
I'm new at this what do you mean by PLA bolts?
0
Reply
Replying to @sirtcreations :
the version without magnets ... parts are connected with printed bolts...
0
Reply
This is what i have so far. What am i missing? Im not sure how to attach the back plate to the clock face.
The designer has replied
0
Reply
also the back plate is a little to big it hangs over some of the clock numbers. I printed the 170.
0
Reply
Replying to @cP3D :
Ok thats what im printing now. You rock ma man
0
Reply
Boosted
Print Profile
0.2mm layer, 2 walls, 15% infill
Everything is perfect
Show original
0
Reply
Can you please tell me where you got such a back part for led ring, without magnets?
0
Reply
Boosted
Replying to @agressor68 :
The back panel is identical, although an alternative magnet solution is also available on this page The print profile is available for download above
Show original
0
Reply
Print Profile
0.2mm layer, 2 walls, 15% infill
Genial
0
Reply
Hello I'm new to this can you share the link for the lights with me
Show original
0
Reply
Boosted
I received two rings today Unfortunately without a remote control and USB controller I ordered exactly the offer on Aliexpress I just checked again Is anyone else having this problem
The designer has replied
Show original
3
Reply
I only just received the smaller sizes today Everything went smoothly if you paid under 10€ you might have ordered the version without controls If you're sure you selected the right one then dispute it Ali has always been very understanding and fair so far
Show original
0
Reply
Boosted
Yes, it was indeed selected without a controller Well, now I have everything here and have already installed it once What did you do with the little ones
Show original
0
Reply
Yes, same for me and the ring doesn't fit at all, far too small
Show original
0
Reply
Print Profile
0.2mm layer, 2 walls, 15% infill
printed perfectly
0
Reply
Super cool fast, my daughter loved it
Show original
0
Reply
Print Profile
0.2mm layer, 2 walls, 15% infill
It worked great! The setup is understandable and definitely doable with a bit of skill
Show original
0
Reply

License

This user content is licensed under a Standard Digital File License.

You shall not share, sub-license, sell, rent, host, transfer, or distribute in any way the digital or 3D printed versions of this object, nor any other derivative work of this object in its digital or physical format (including - but not limited to - remixes of this object, and hosting on other digital platforms). The objects may not be used without permission in any way whatsoever in which you charge money, or collect fees.