
Cable routing Bento-Box / USB Anschluss

Print Profile(1)

Description
German | English |
|
|
German
- When reconstructing the bento box, it was imperative to me that the power supply not involve any modification of the X1C, and that the printer remain entirely unaltered
- Connection via a standard USB cable was the only feasible option
Cable routing was to be implemented via the poop chute
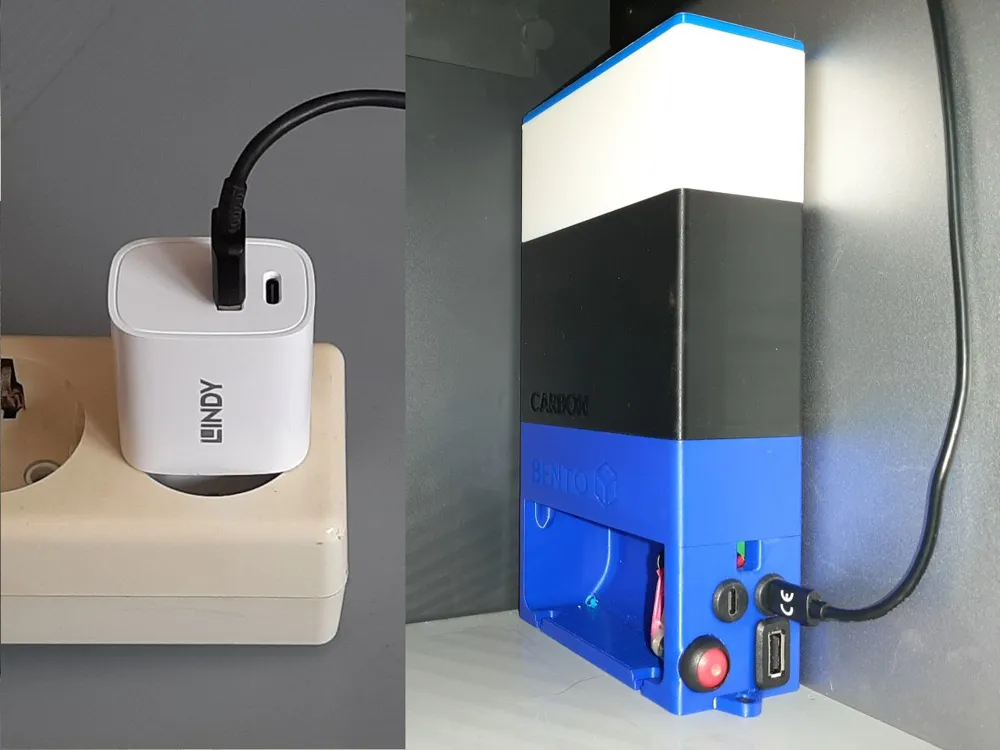
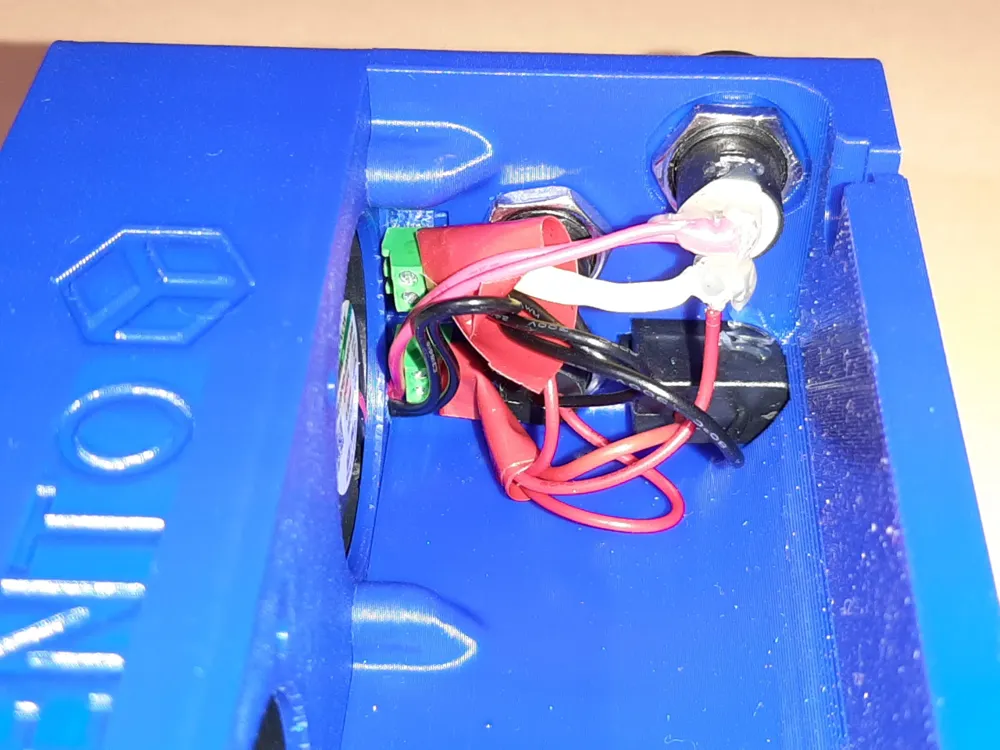
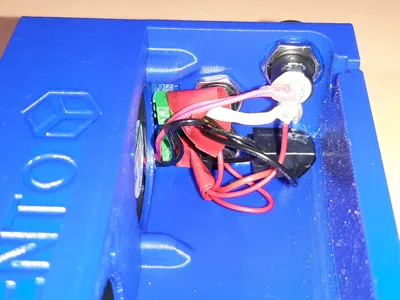
- My implementation of the box incorporates an on/off switch with LED, and three USB ports—one USB-A and two USB-C—all connected in parallel
- One USB port serves to connect to the power supply, while the other two will facilitate future expansion such as supplementary lighting
The USB cable is inserted into one of the bento box’s USB ports, then routed externally to the USB power supply, ensuring no interference with the printer at any point
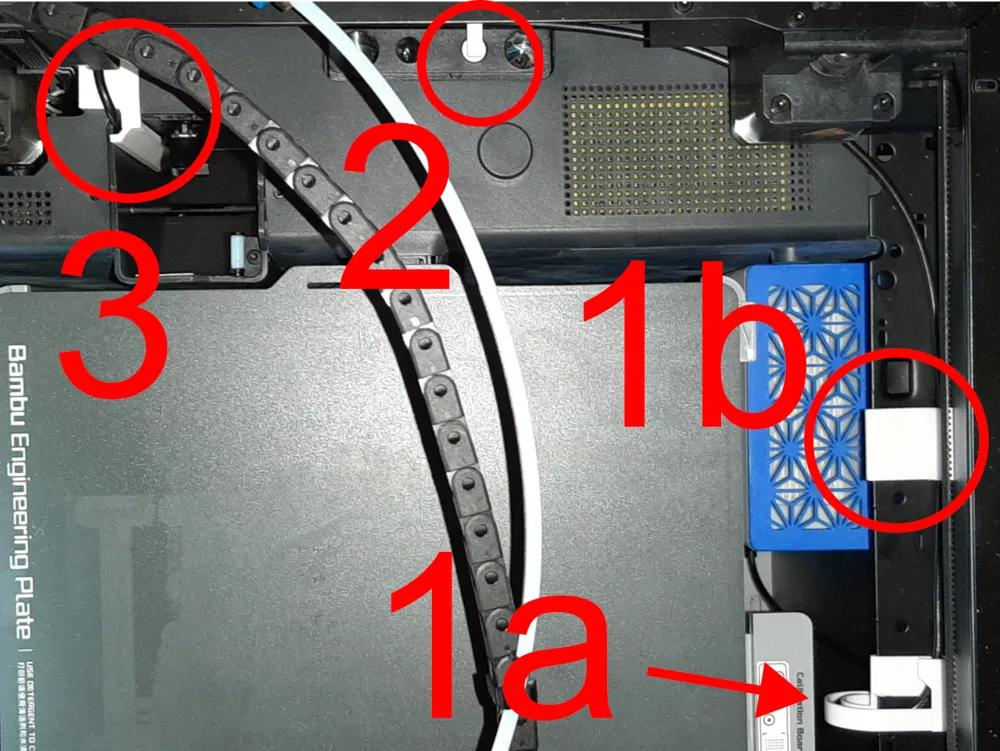
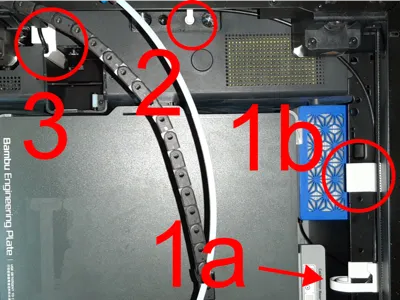
To this end, four distinct components were designed:
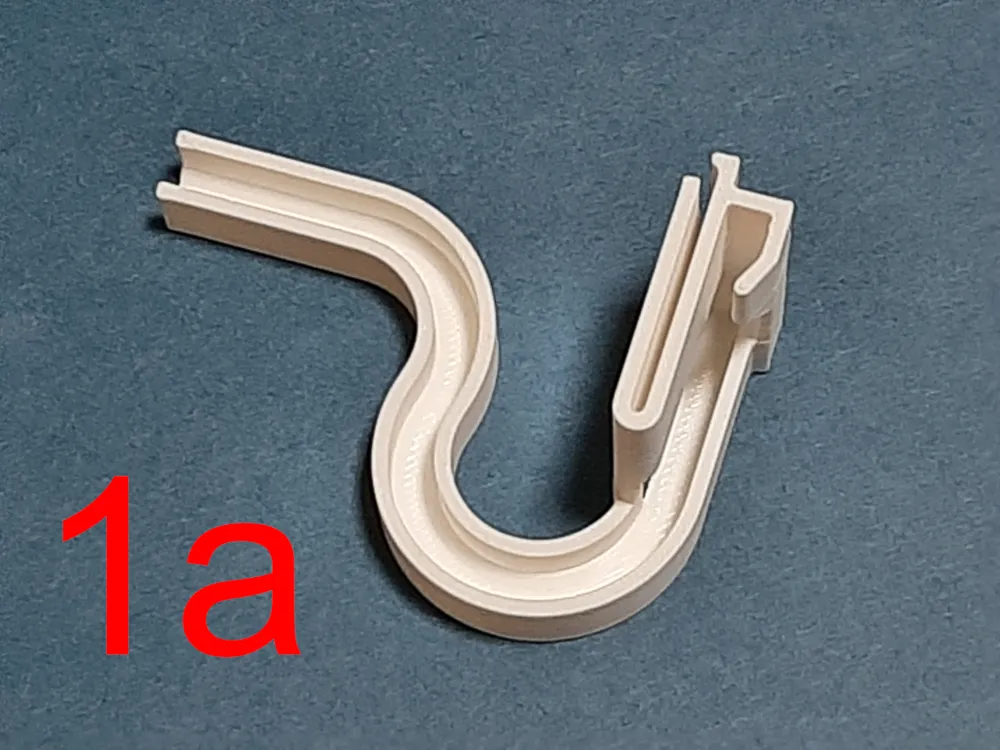
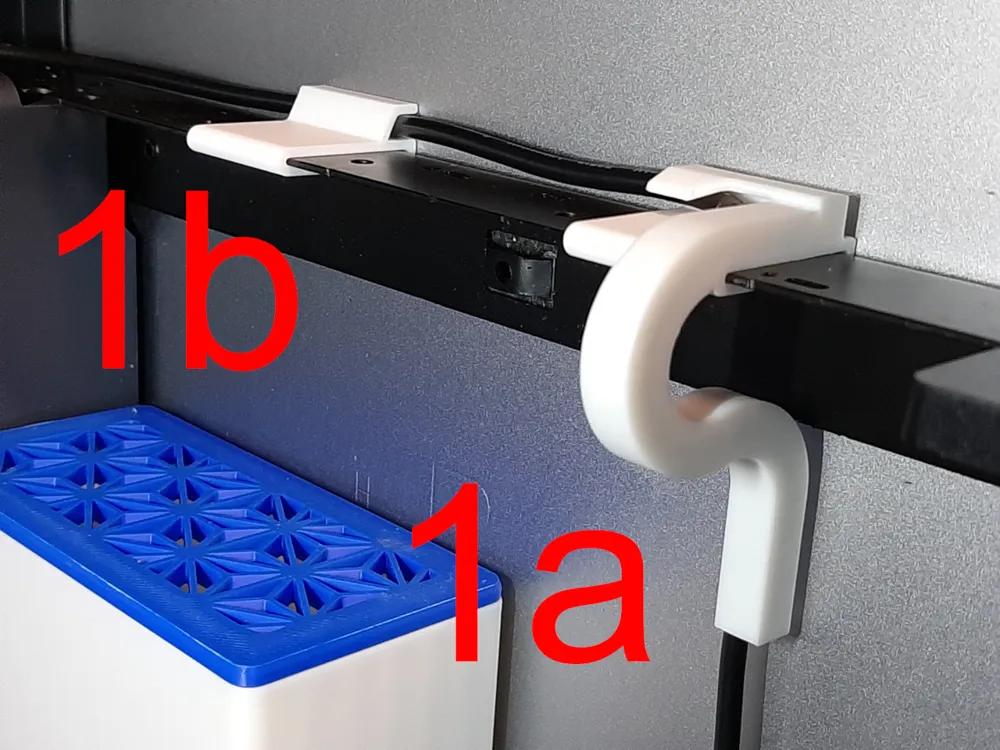
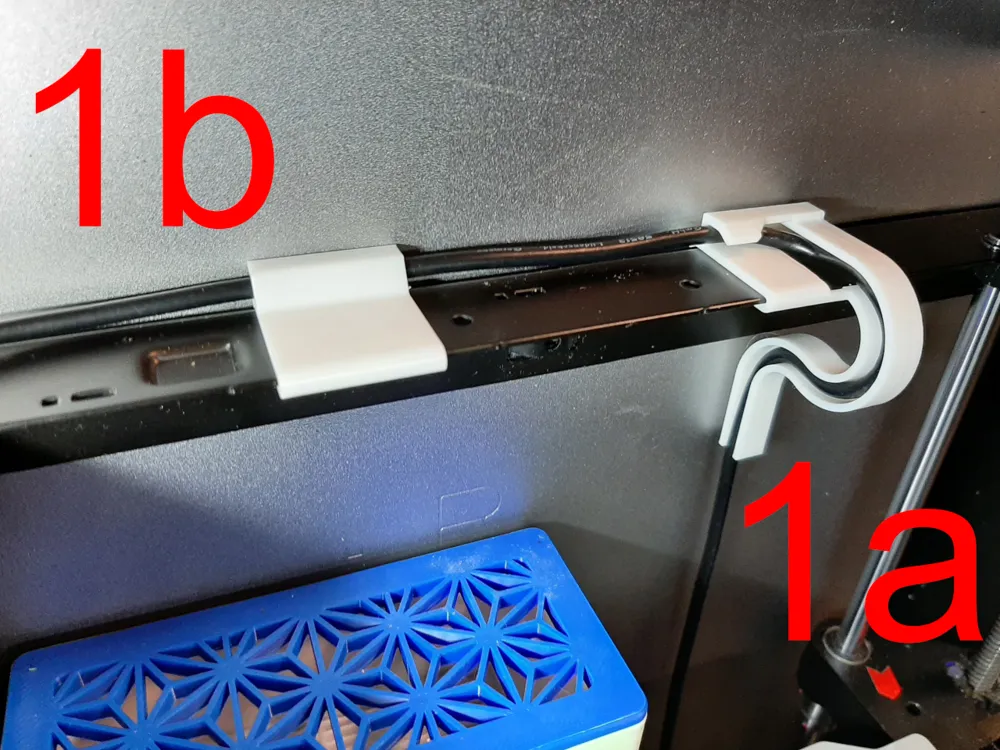
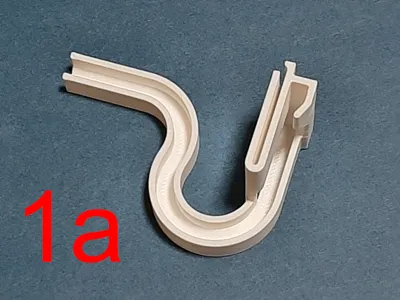
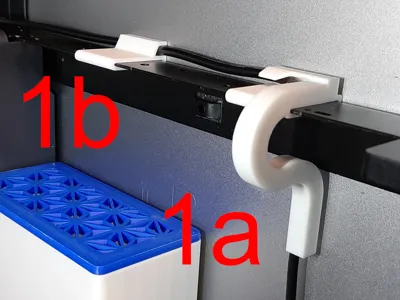
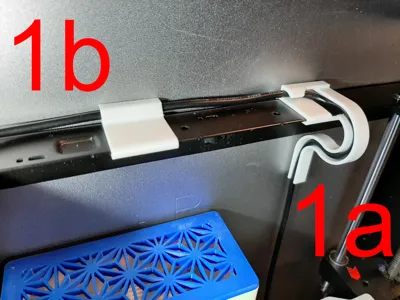
- 1a_cable_route_right_front_v3
- Guides the cable from the box upwards, over the cross-member
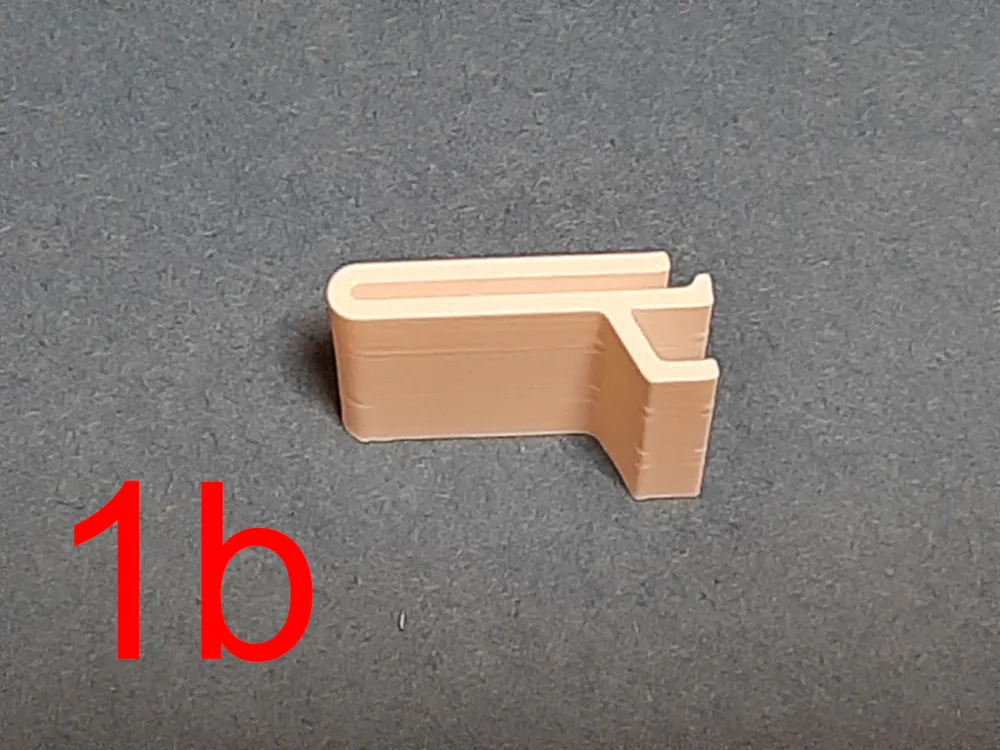
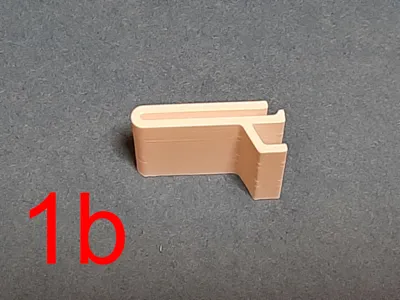
- 1b_cable_route_right_rear_v3
- Continues the routing to the rear, above the cross-member
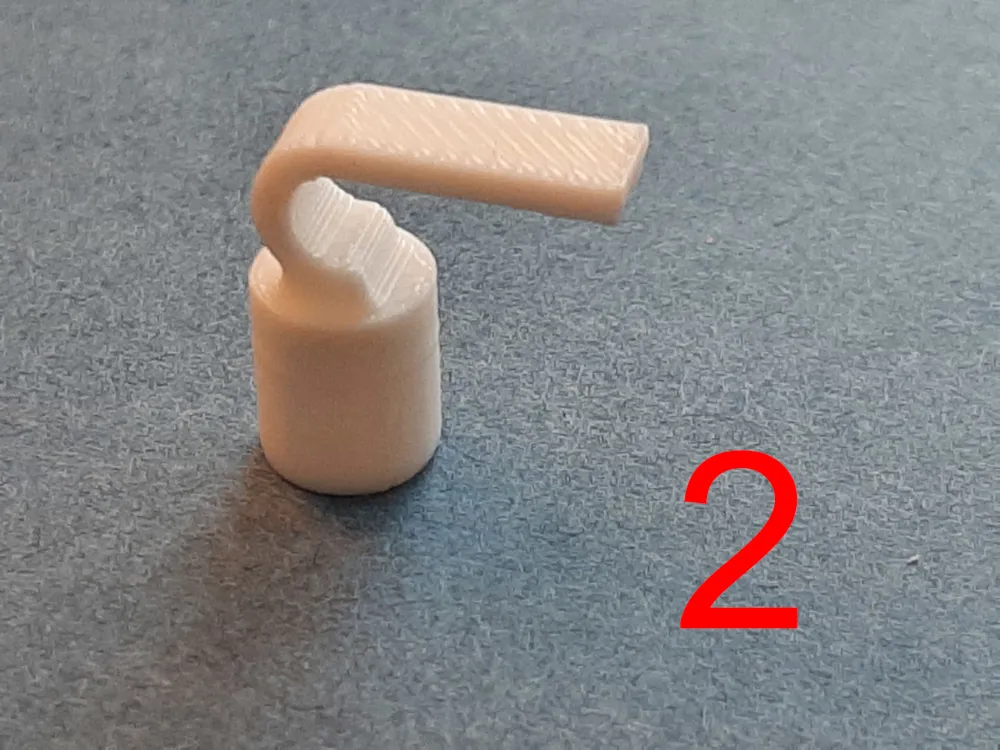
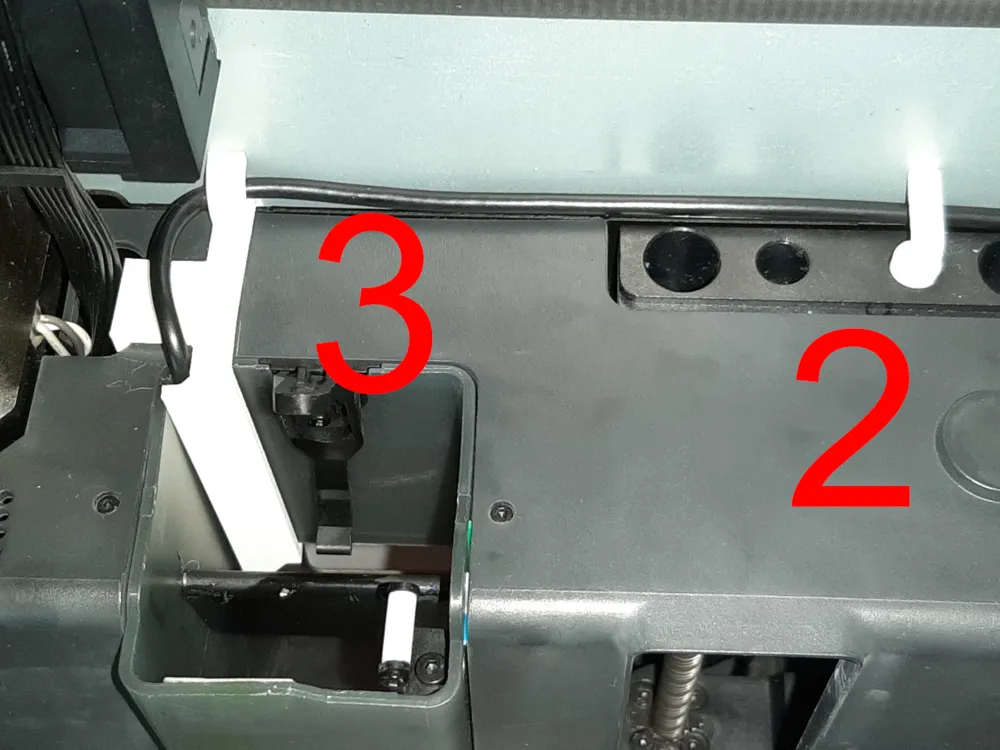
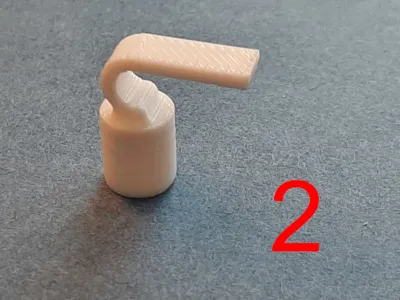
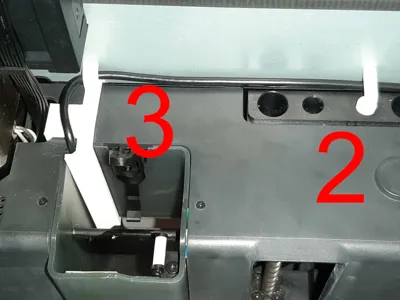
- 2_cable_route_near_pooper_v3
- Secures the cable to the rear wall
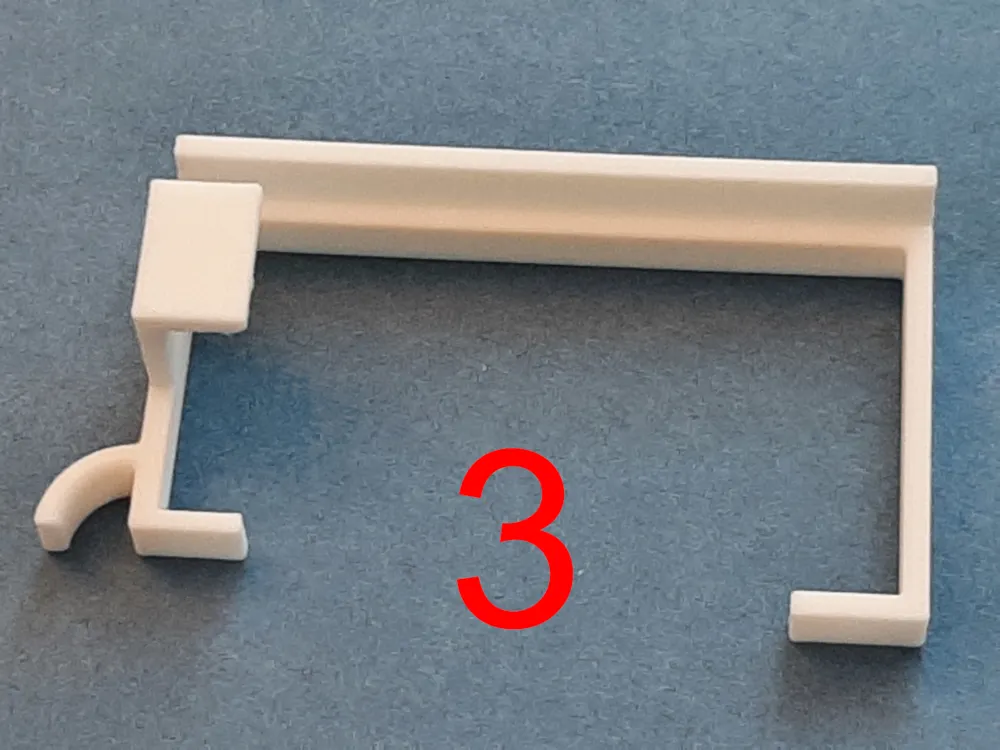
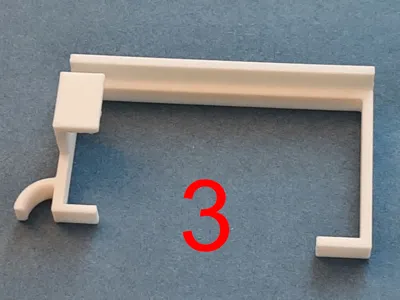
- 3_cable_rout_through_pooper_v3
- The USB cable is routed externally through the poop chute via a dedicated cable channel
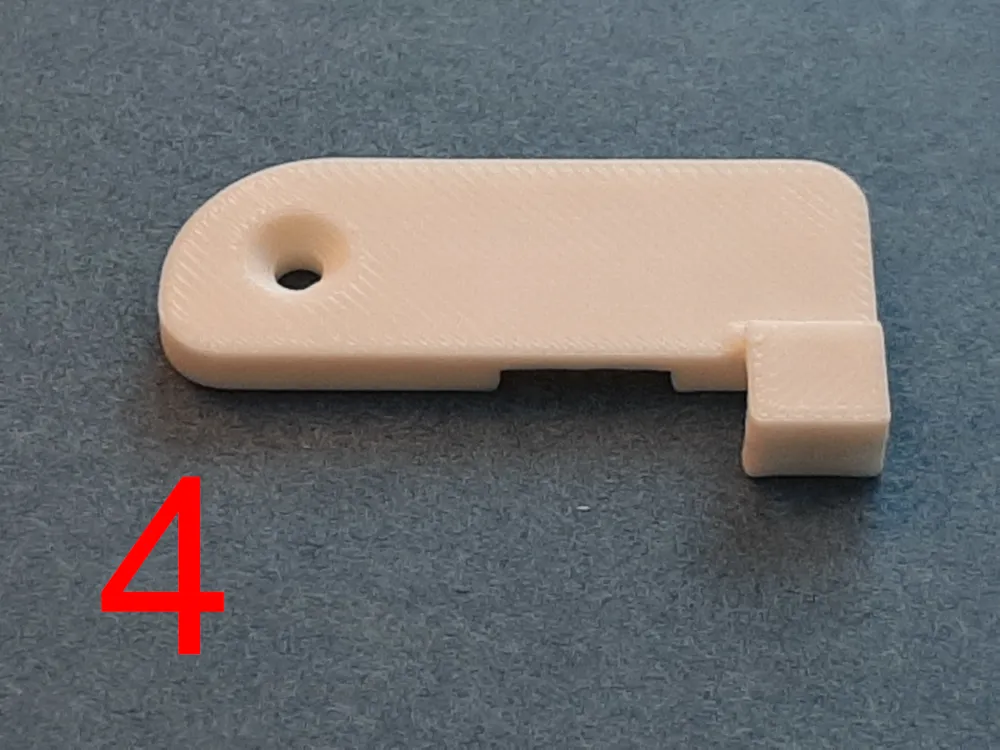
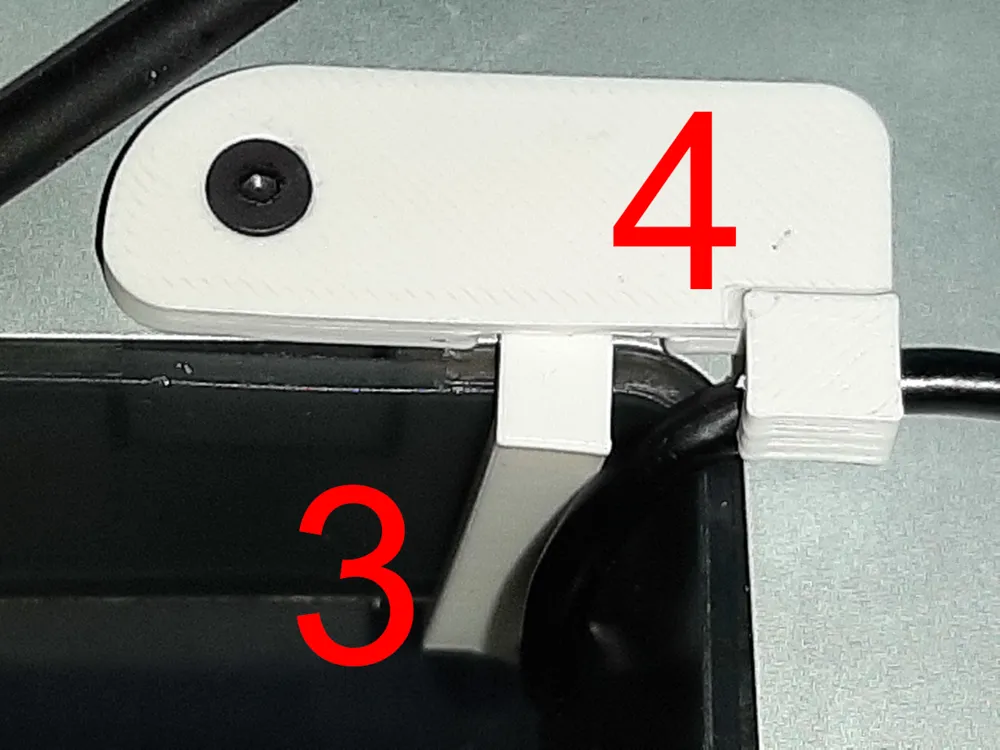
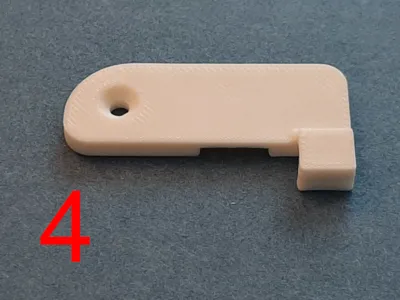
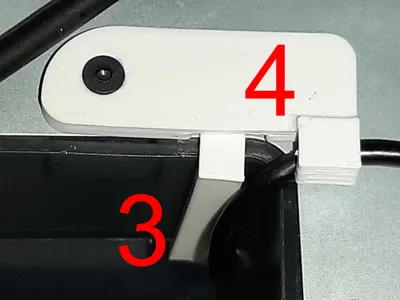
- 4_cable_rout_outside
- The cable is diverted from the pooper; from here, cable routing to the USB power supply is unrestricted
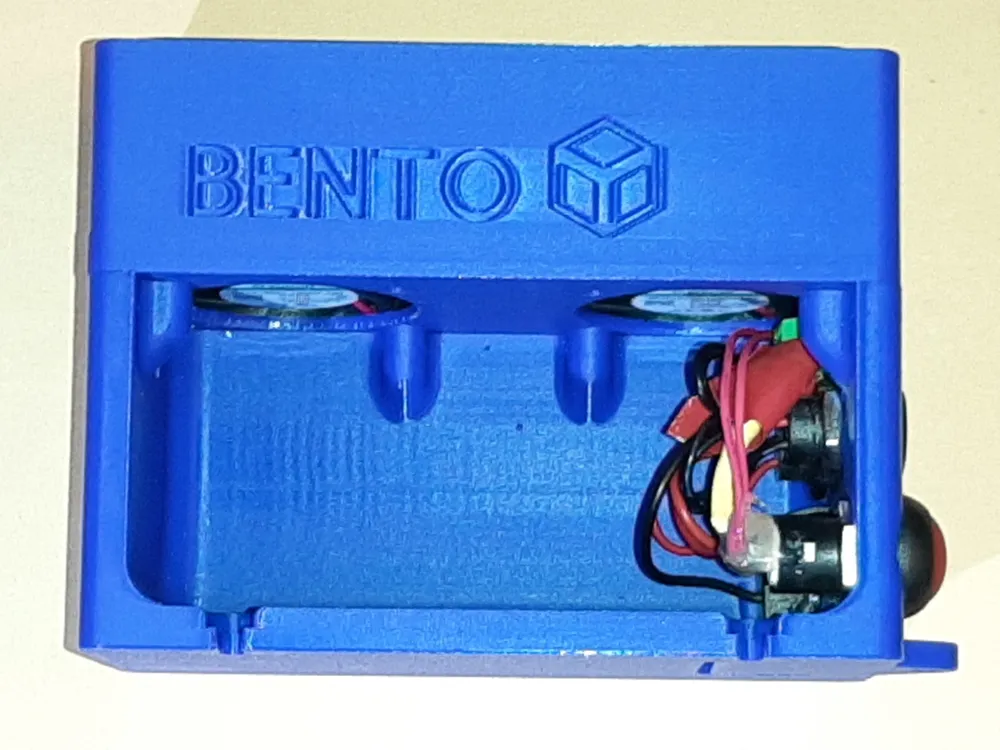
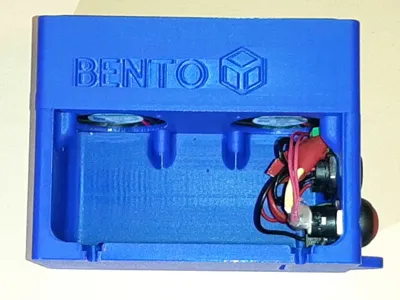
- Additionally, the following was included: 5_bento_basis_connectors.stl
- The modified lower section of the bento box with fans and my extensions
- 1a_cable_route_right_front_v3
- The printer and USB power supply are plugged into a shared power strip equipped with a switch
The bento box is activated via its integrated switch; I only employ the bento box when printing with ASA
Assembly
- See photographs
- 3D Printing
Given the potential for elevated print chamber temperatures, printing in ASA/ABS or PC is recommended
Note:
While I previously recommended PETG, following today’s four-hour PC print, I must revise this recommendation. The metal rails become excessively warm for PETG. I now print the components in PC (polycarbonate), boasting a heat deflection temperature of 117°C according to Bambu Lab
- Bento Box
- The “BentoBox V2.0 Activated Carbon Filter” by “thrutheframe” served as the foundation, with modifications to the lowest element
My gratitude for this exceptional model https://makerworld.com/en/models/12786#profileId-24358
- The “BentoBox V2.0 Activated Carbon Filter” by “thrutheframe” served as the foundation, with modifications to the lowest element
- Materials
- USB-A socket
- USB-C socket
- Switch with LED, 18mm mounting hole (source unavailable)
English
- When reconstructing the bento box, it was imperative to me that the power supply not involve any modification of the X1C, and that the printer remain entirely unaltered
- Connection via a standard USB cable was the only feasible option
Cable routing was to be implemented via the poop chute
- My implementation of the box incorporates an on/off switch with LED, and three USB ports—one USB-A and two USB-C—all connected in parallel
- One USB port serves to connect to the power supply, while the other two will facilitate future expansion such as supplementary lighting
The USB cable is inserted into one of the bento box’s USB ports, then routed externally to the USB power supply, ensuring no interference with the printer at any point
To this end, four distinct components were designed:
- 1a_cable_route_right_front_v3
- Guides the cable from the box upwards, over the cross-member
- 1b_cable_route_right_rear_v3
- Continues the routing to the rear, above the cross-member
- 2_cable_route_near_pooper_v3
- Secures the cable to the rear wall
- 3_cable_rout_through_pooper_v3
- The USB cable is routed externally through the poop chute via a dedicated cable channel
- 4_cable_rout_outside
- The cable is diverted from the pooper; from here, cable routing to the USB power supply is unrestricted
- Additionally, the following was included: 5_bento_basis_connectors.stl
- The modified lower section of the bento box with fans and my extensions
- 1a_cable_route_right_front_v3
- The printer and USB power supply are plugged into a shared power strip equipped with a switch
The bento box is activated via its integrated switch; I only employ the bento box when printing with ASA
- Assembly
See photographs
- 3D Printing
- Given the potential for elevated print chamber temperatures, printing in ASA/ABS or PC is recommended
Note:
While I previously recommended PETG, following today’s four-hour PC print, I must revise this recommendation. The metal rails become excessively warm for PETG. I now print the components in PC (polycarbonate), boasting a heat deflection temperature of 117°C according to Bambu Lab
- Bento Box
- The “BentoBox V2.0 Activated Carbon Filter” by “thrutheframe” served as the foundation, with modifications to the lowest element
My gratitude for this exceptional model https://makerworld.com/en/models/12786#profileId-24358
- The “BentoBox V2.0 Activated Carbon Filter” by “thrutheframe” served as the foundation, with modifications to the lowest element
- Materials
- USB-A socket
- USB-C socket
- Switch with LED, 18mm mounting hole (source unavailable)
License

You shall not share, sub-license, sell, rent, host, transfer, or distribute in any way the digital or 3D printed versions of this object, nor any other derivative work of this object in its digital or physical format (including - but not limited to - remixes of this object, and hosting on other digital platforms). The objects may not be used without permission in any way whatsoever in which you charge money, or collect fees.


Comment & Rating (20)