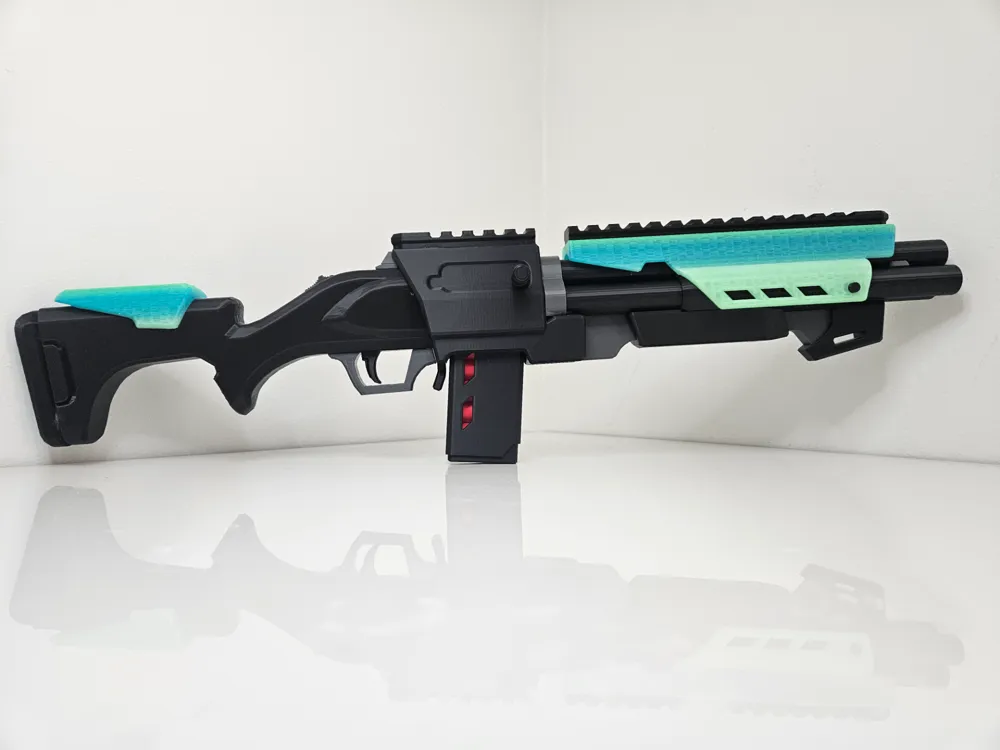
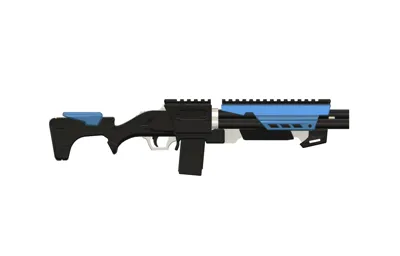
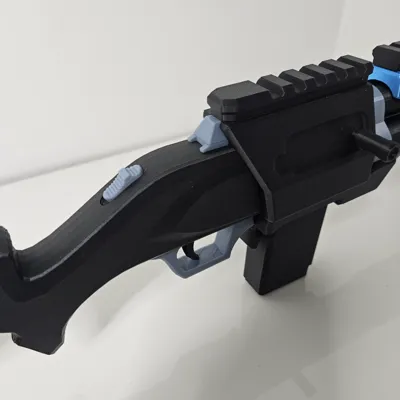
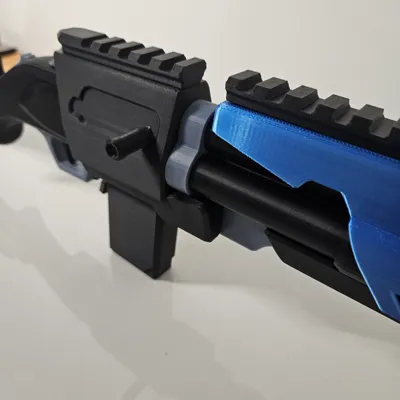
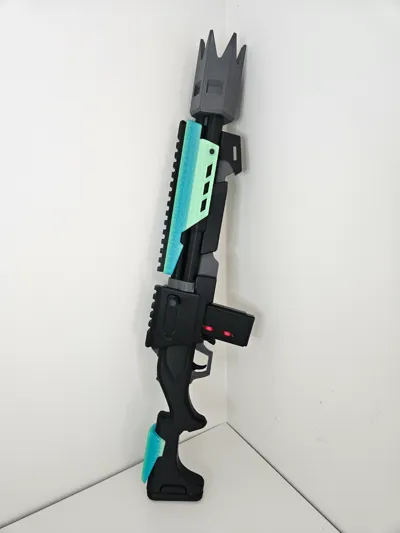
Fortnite Gatekeeper Shotgun Model Glue Assembly


Print Profile(6)


Description
Membership
Models are for personal use only unless you join my $5 No-Limit Subscription. Sell physical prints of my models for as long you're subscribed!
Check out all of my Fortnite Guns!
- 2026: Fortnite Twin Mag SMG Electric Water Gun
- 2026: Fortnite Wrecker Revolver
- 2025: Fortnite P90 Compact SMG
- 2025: Fortnite Mammoth Pistol
- 2025: Fortnite Holo Twister Rifle
- 2025: Fortnite Scoped Burst SMG
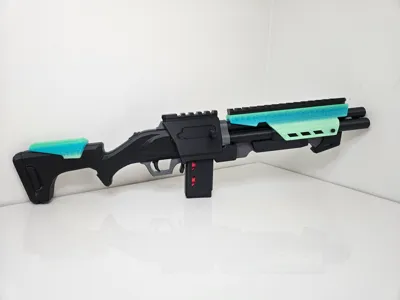
- 2025: Fortnite Havoc Shotgun
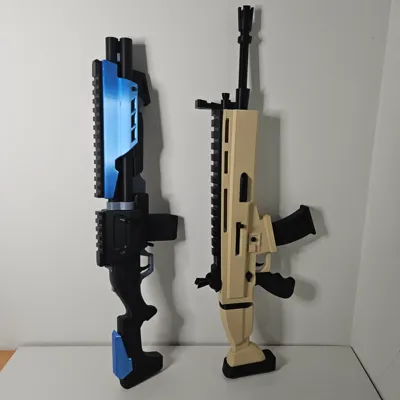
- 2024: Fortnite Gatekeeper Shotgun
- 2024: Fortnite Scar
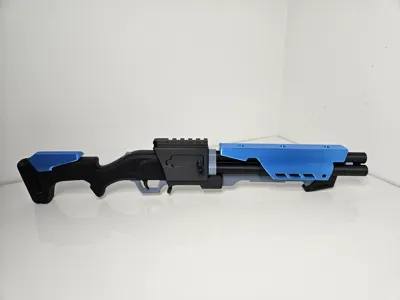
Countless hours of modeling, testing and printing. The end result is quite amazing!
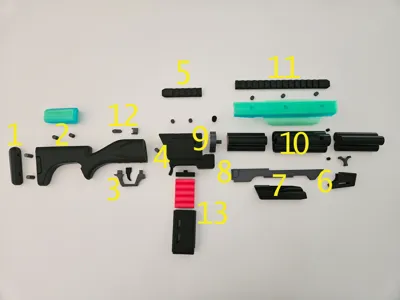
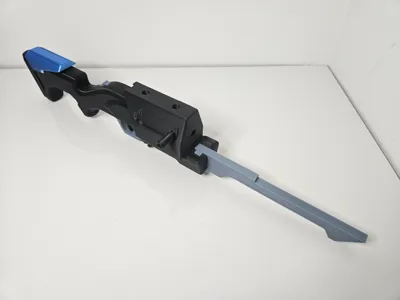
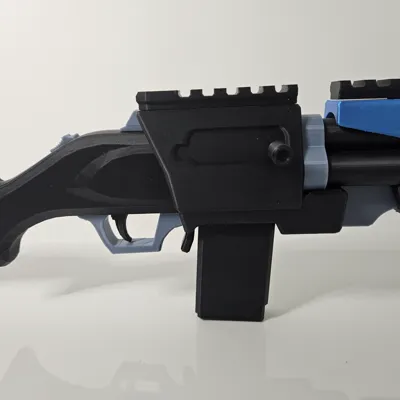
Plate 1 - Grey Parts - Pins/Barrel Support Bar/Trigger Guard/Safety
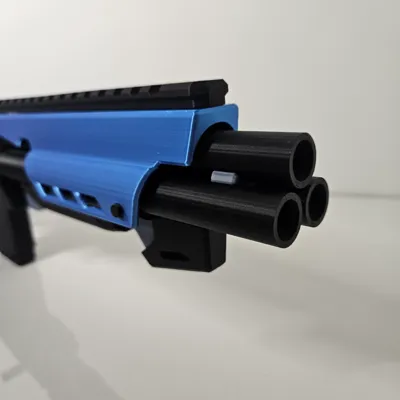
Plate 2 - Any Color - Chin Rest + Barrel Shroud
Plate 3 - Black Parts - Rails, Mag, Trigger
Plate 4 - Black Parts - Barrel, Chamber
Plate 5 - Black Parts - Stock
Plate 6 - Red Rounds - Bullets
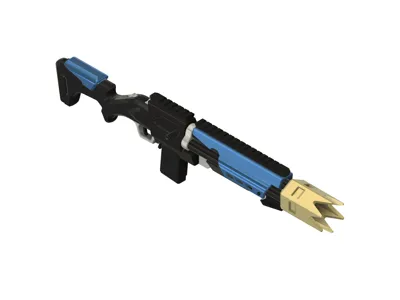
Attachment #1 - Muzzle - Model Here
Every part and plate has been tested multiple times. You can print stress-free using my print profiles custom made for each plate. Pick your colors and hit print without worry! I used: Grey - Blue - Black - Red. You could probably combine all 3 black plates into 1-2 if you get crazy with the object organization. Long total print time but if you love Fortnite it will be worth it!
Experience required. Reserve at least one hour for assembly. I recommend gel super glue to avoid dripping. I super glued, clamped and let each joint dry/came back to it every 5 minutes over the course of two hours. You will be much happier if you take your time with super glue than if you rush. It can be quite messy if you get it on parts of the print that don't need to be glued.
Glue the 3 black barrel pieces together to prepare for the most important part. Do steps 8-9-10 almost as one step - aim downsight and hold it straight for best results. The first time I printed, I did step 8 and came back later to do 9-10, but the support bar dried crooked and it never got straight. If you build the barrel, do 8-9-10 as one step and hold things straight as they dry, you will have the best results.
I could have created more risky parts that max out my X1C and cut down the number of pieces but wanted to make it more accessible for everyone. Make sure you put the “barrel support bar” in before the ”barrel clover” And make sure you put the trigger in before the trigger guard.
What Fortnite item should I chop up next?
Boost Me (for free)
If you have any left, I would greatly appreciate you boosting my model. They go a long way!
License
You shall not share, sub-license, sell, rent, host, transfer, or distribute in any way the digital or 3D printed versions of this object, nor any other derivative work of this object in its digital or physical format (including - but not limited to - remixes of this object, and hosting on other digital platforms). The objects may not be used without permission in any way whatsoever in which you charge money, or collect fees.
Comment & Rating (210)