Caliburn 4 - 2023 - EU Edition (metric)


Print Profile(1)

Description
Also check out my new version of the LYNX Blaster
CALIBURN 4 - EU Edition
NOTE! Please print this blaster quite colorfully, so that it differs greatly from real weapons. This is not a children's toy and please do not shoot at people or use it indoors!
UPDATE 08.09.2023:
Thanks to “scr1tch“ for the tip on screw dealer GEDEX. I have expanded the BOM accordingly to save as much as possible on shipping costs.
UPDATE 18.08.2023:
I have made minor adjustments to the files “PGV_L” and “PGV_R”. The distances to the pump part “4DoomS” were minimized to remove the wobble. The new files are named PGV_Left_tight_EU and PGV_Right_tight_EU and can be used as an alternative.
UPDATE 08.08.2023:
Minor changes to the front grip (4DoomS_EU), so that the 4x M5x8 screws can now be omitted. 4x M5x10 can now also be used. The BOM has been adjusted and the STEP file has also been re-uploaded.
I became aware of the original Caliburn 4 Blaster from Captain Slug some time ago, but put the project on hold due to a lack of inch-based accessories.
However, after the popular streamer CHAOSDRUCKER presented the old Caliburn in the German Edition, I decided to undertake the project and redraw the complete blaster in variant 4 using metric units. My thanks still go to Chris a.k.a. CHAOSDRUCKER for researching the correct spring and for the motivation he provided to realize this project.
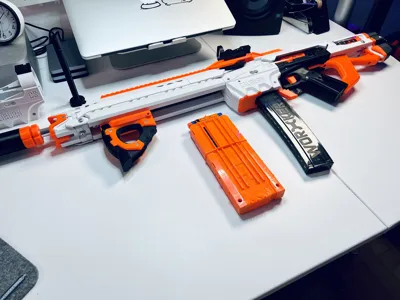
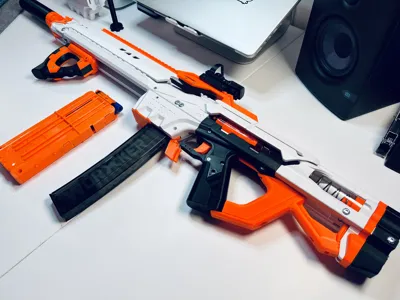
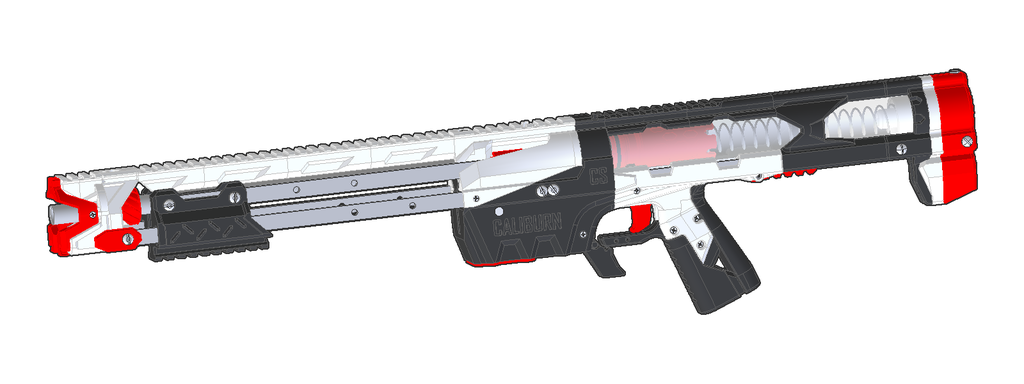
Furthermore, I have also integrated the RMAX Barrel Shroud including the Rail Riser, a different Foregrip and the SCAR Suppressor. Both the sear and the trigger are designed for a spring mount but can also be replaced with the original version using a rubber band (included in the files). The images/renders show the Caliburn 4 both with and without the integrated Barrel Shroud. This is an optional add-on and not a must-have.
Here is a good comparison of the Caliburns:
Caliburn C4 vs Caliburn:
I have endeavored to use mostly M3 and M5 heat-set inserts and ensured that all hardware is readily available from DIY retailers to keep costs down. I purchased the aluminum tube and all screws, nuts, and dowel pins individually from my local HORNBACH.
Bill of Material (BOM):
- 8x 12x3 mm aluminum flat profile / flat bar 370mm - alternatively directly to 400mm - eBay
- Acrylic tube 40/36mm 1m tube - alternatively cut directly to size - eBay
Cut to:
- 1x 185mm
- 1x 75mm
- 1x aluminum tube 15x1mm 1m (as barrel)
- 5x sealing ring 36/30 - 3mm line thickness (with suppressor 5x, without 3x)
- 3x sealing ring 13/10 -1,5mm line thickness
- 1x spring, if sold out alternatively these two springs #1 - K25 + spring #2 - K31.
The two springs (K25 & K31) are inserted into each other to be as close as possible to the original offered.
Comment & Rating (10)