TamaPoke — A Pokemon Pokéball Tamagotchi


Print Profile(3)


Description
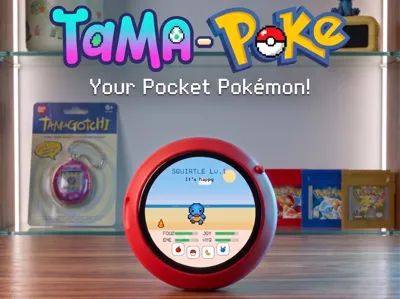
TamaPoke — A Pokéball Tamagotchi (ESP32-S3 round AMOLED)
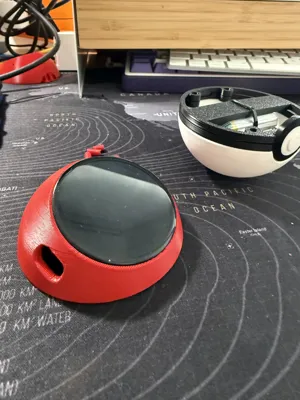
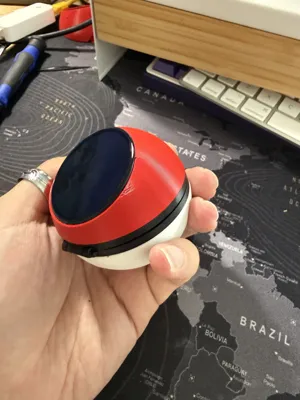
Raise a Gen-1 Pokémon inside a real Pokéball. TamaPoke turns a Waveshare round AMOLED board into a pixel-art virtual pet: it hatches from an egg, you choose a starter, then you feed it, play with it, keep it clean and watch it grow, evolve and — one day — say goodbye. Everything happens on a glowing round screen set into a 3D-printed Pokéball that sits on your desk and tilts the display toward you.
This model is the 3D-printed enclosure that houses the electronics. The game firmware is open source (links at the bottom).
🙏 Based on / Credits — please read
This enclosure is a remix built on top of the excellent "Pokeball" model by yoyothechicken on MakerWorld:
👉 https://makerworld.com/es/models/839922-pokeball
I build on its clever closing system — the front magnets, alignment pins and button — and its print-in-place hinge ring. I modified the lid (dome) to embed the round screen and hold the electronics, and added a few small parts (screen mount, two ring variants, and a power-button cover). All credit for the original Pokéball shape and the whole opening/closing system goes to yoyothechicken — if you build this, please go like and follow their model first. ❤️
License note: the original is licensed CC BY-NC-SA (Attribution – NonCommercial – ShareAlike), so this remix is shared under the same license. Pokémon is © Nintendo / Game Freak. This is a personal, non-commercial fan project — not affiliated with or endorsed by Nintendo.
💡 Already have this board? It can do more!
The same Waveshare ESP32-S3 AMOLED screen can also become a Live ADS-B aircrafthttps://makerworld.com/es/models/2907695-capsule-radar-live-flight-radar-desk-gadget
|  |
AMOLED screen can also become a marine ships radar.https://makerworld.com/es/models/2972002-capsule-radar-marine-live-ais-ship-radar Same screen, a ship's radar. |  |
✨ What it does
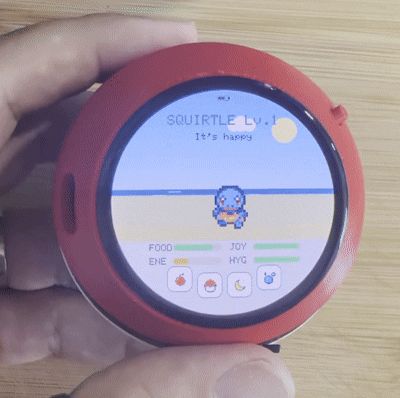
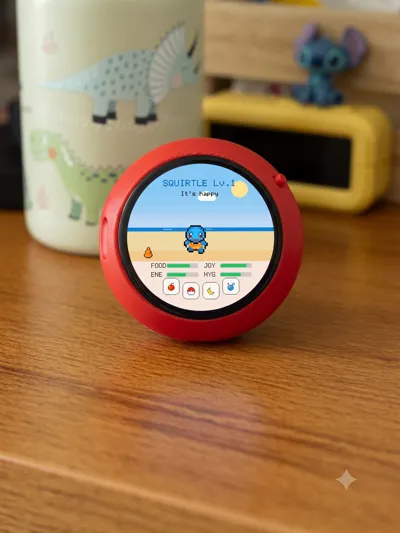
- Round AMOLED screen embedded in the dome, tilted toward you like a tiny desk pet
- Full life cycle: egg → pick a starter → growth → evolution → farewell
- 6 languages (English default, plus ES / FR / DE / IT / PT)
- Touch controls, sound effects, battery + night-sleep handling
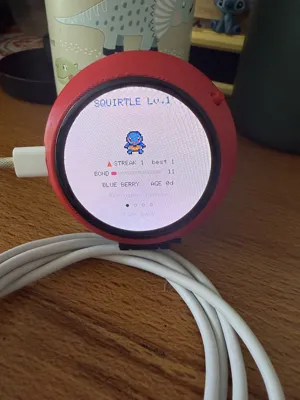
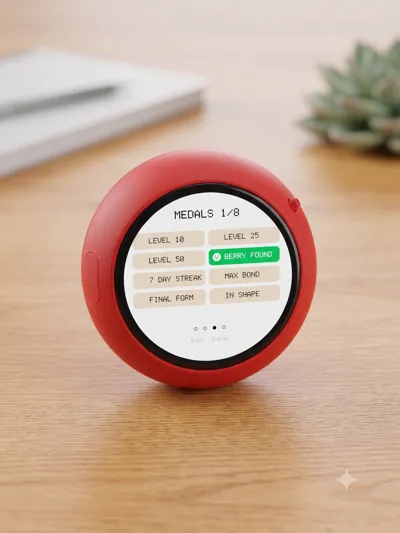
- A Progress page (XP to next level, levels to evolution, care mistakes)
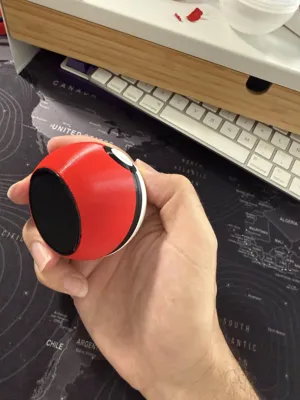
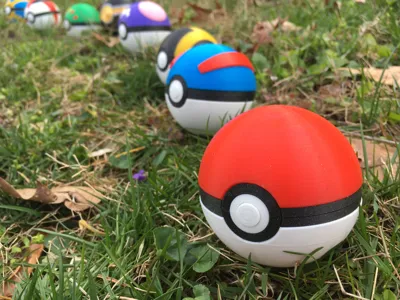
- Classic Pokéball look: red top, white bottom, black band, front button
🎮 How to play (quick version)
- Pick a starter (Bulbasaur / Charmander / Squirtle), then raise what hatches from each egg. Four needs — food, joy, energy, hygiene — drain over time; feed, play, bathe, pet and let it sleep.
- Levels up by the hour (real time, even while off). Each egg rolls a rarity: ~70 % common · ~27 % rare · ~3 % legendary (legendaries after you've registered 25+; better odds with a daily care streak). Shiny ≈ 1/48 (better with care).
- Evolution needs the right level and good care at that moment — every slip-up delays it. It never evolves by itself: a button appears and you tap to watch it.
- Three endings, all by your choice and witnessed on screen: 💛 farewell (a final form that lived its 3 days — blesses your next egg) · 💔 run-away (total neglect — curses the next egg) · 👋 release. Then a new egg begins.
- Catch & evolve them all: 151 + shinies, a Pokédex, medals, bonds and streaks. 6 languages (EN default + ES/FR/DE/IT/PT).
Full game manual with the exact numbers: see the project README.
🧰 Bill of Materials (BOM)
Electronics
| Item | Notes |
|---|---|
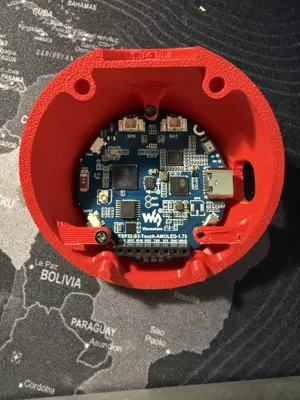
| Waveshare ESP32-S3-Touch-AMOLED-1.75 | The brain + screen. Round 1.75" AMOLED (466×466), capacitive touch, AXP2101 PMU, ES8311 audio, RTC, 6-axis IMU, microSD, USB-C. Board ≈ Ø46 mm. Pick the Standard version (no case) or the -G (GPS, also fits). Avoid the "-B" — it comes with a protective case that won't fit; you'd have to remove it. (The separate "1.75C" is a different board — not this one.) |
| 3× M2 × 4 mm screws | Mount the board/screen to the top dome. |
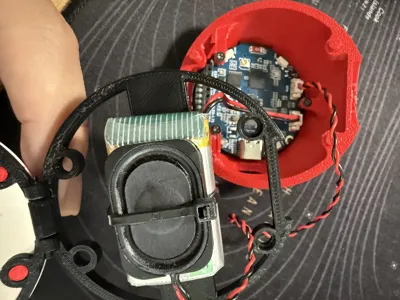
| 1S LiPo battery (optional) | The one I use: 3.7 V 1100 mAh LiPo (Amazon.es) — model 102540, with protection board. ≈ 42 × 25.5 × 11 mm, micro JST 1.25 connector matching the board's BAT port. Without it the Pokéball just runs while plugged into USB. |
| Small speaker (optional) | Rectangular ≈ 30.5 × 20.5 × 6.7 mm, MX1.25 connector matching the board's SPK port. Without it there's simply no sound. |
| USB-C cable | Any straight cable — a slot in the case lets you plug it directly into the board to charge (no right-angle adapter needed). Also used for flashing. |
| microSD card | Holds the sprite set (recommended for the full 151-mon library). Any small card works. |
| 4× disc magnets 6 × 2 mm | Snap-shut closure. 6 × 1.75 mm (6×2 nominal) discs in the counterbores. Mind the polarity! |
Printed parts

- Top dome (modified lid) — holds the board, with the screen window + 3 screw bosses
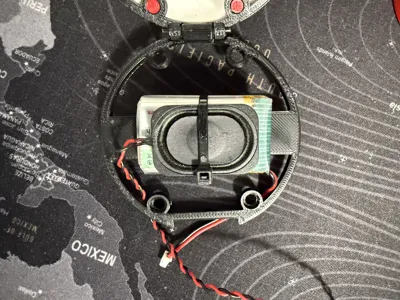
- Bottom dome (base model lid) — holds the optional battery + speaker
- Power-button cover — a small cover with a button that presses the board's PWR switch from the outside
- Hinge ring — two variants (pick one):
- Self-assembling (print-in-place) — easiest, but may not move freely if your printer's tolerances are tight
- Filament-hinge — a separate ring that uses a short piece of filament as the hinge pin; more reliable if the print-in-place one seizes
- From the base model #839922: button (inner + outer), alignment pins (4×: two 8 mm + two 6 mm)
Filament
- 🔴 Red — top dome
- ⚪ White — bottom dome
- ⚫ Black — equator band + button
Tools
- A computer with Chrome or Edge (to flash the firmware via the browser)
- A USB-C cable (also used for flashing)
- A small M2 Phillips screwdriver
- No soldering required — everything connects through the board's connectors
🖨️ Printing — no AMS needed
You do NOT need an AMS / multi-color setup. Each part is a single color, so just load the matching filament and print each part on its own:
- Top dome → red
- Bottom dome → white
- Band + button → black
Suggested settings (tune to your printer):
- Layer height 0.2 mm, walls 2–3, infill 15 % (matches the base model's profiles)
- Supports: the top dome needs supports under the screen window / board seat. The bottom part prints with little or no support.
- Print the domes rim-down (flat side on the plate) for the cleanest curved surface.
- Hinge ring — print ONE of the two:
- Self-assembling (print-in-place): set your elephant-foot compensation correctly or it can seize. If it doesn't move freely once printed, use the other ring instead.
- Filament-hinge: print it, then push a short piece of 1.75 mm filament through as the hinge pin — works even if your tolerances aren't perfect.
- PLA/PETG both work; no brim usually needed.
🔩 Assembly (overview)

- Flash the firmware first (browser installer — see below) while the board is still easy to reach.
- Load the sprites (one click in the installer, ~10 min) onto the microSD card.
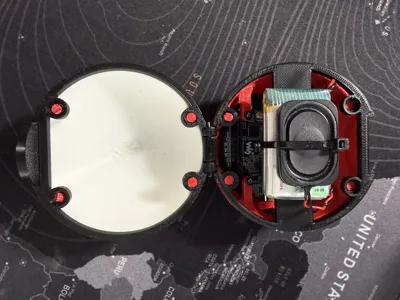
- Mount the screen: drop the board into the top dome so the screen faces out through the window, and fix it with the 3× M2 × 4 mm screws.
- Power-button cover: fit the printed cover over the board's PWR switch so you can power it on/off from the outside.
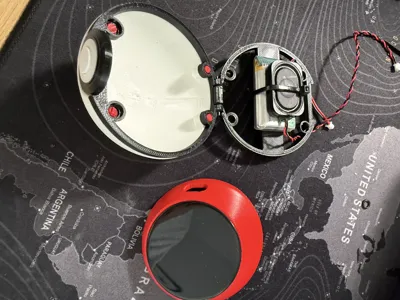
- (Optional) Bottom dome: place the battery and speaker in their pockets and plug them into the board's BAT and SPK connectors. (Skip either if you're not using it.) To charge, plug a straight USB-C cable through the side slot — no need to open the ball.
- Pins: insert the 4 alignment pins into the lid holes — 8 mm pins in the back, 6 mm pins in the front (as in the base model).
- Magnets: press the 4 magnets into the counterbores. Test polarity so the halves attract — don't glue anything until you've verified the ball snaps shut!
- Hinge: clip each dome onto your chosen ring (self-assembling, or filament-hinge with a 1.75 mm filament pin); the ball now opens/closes like a clamshell, held shut by the front magnets.
Button: push the inner button into the outer button and glue the assembly to one hemisphere of your choice.

- Done — power on and meet your Pokémon. 🎉
⚠️ Handle the screen ribbon with care. The AMOLED flex cable is delicate; seat the board gently and never flex or pull the display ribbon, or you can kill the panel.
🔋 Battery & power — make it last
- Short-press the PWR button = screen on/off. Long-press (~4 s) = full power-off.
- The trick for battery life: when you're done playing, long-press to power it off completely — the AMOLED and the chip then draw almost nothing, so a single charge lasts far longer.
- You don't lose any progress: a real-time clock keeps running on microamps while it's off, so your Pokémon keeps "aging" in the background (hunger, level, evolution…) and catches up the moment you switch it back on (up to ~2 weeks).
- So treat it like a phone: power it off when you're not playing, top up the battery now and then, and your pet lives on. 🔋
💾 Firmware & sprites
The game firmware is open source and flashes straight from your browser — no Arduino IDE, no toolchain, no drivers to hunt down.
How to install (≈ 10–15 min, mostly waiting)

- Plug the board into your PC and open the web installer in Chrome or Edge: https://socquique.github.io/TamaPoke/web/
- Click Install firmware and pick the board's serial port → it flashes in seconds.
- Click Load sprites to stream the bundled sprite pack onto the microSD card over USB (this is the slow part, ~10 min for all 151).
- Unplug, screw it together, close the ball, and play.
What the game includes
- The 151 Gen-1 Pokémon (shinies too), pixel-art animated from the microSD
- Hatch from an egg → choose your starter → feed / play / clean / sleep → grow → evolve → say goodbye (evolution, release and run-away endings, each with its own animation)
- Touch UI, sound effects (with the optional speaker), real-time clock with a night-sleep cycle, and battery monitoring
- A Pokédex and a Progress page (XP to next level, levels left to evolve, care mistakes), plus a mini-game to train your Pokémon
- 6 languages — EN (default), ES, FR, DE, IT, PT — switchable in Settings
- Factory-reset to start a brand-new Pokémon whenever you like
The firmware ships with a small set of built-in sprites, so it still boots and plays even without an SD card — the SD just unlocks the full animated library.
- Source code & docs: https://github.com/socquique/TamaPoke
📜 License & attribution
- Enclosure: remix of "Pokeball" by yoyothechicken (#839922), licensed CC BY-NC-SA. This remix keeps the same CC BY-NC-SA license (ShareAlike).
- Firmware / source code: MIT — see the repo.
- Sprites: Pokémon © Nintendo / Game Freak; pixel art from community sources (e.g. PMD SpriteCollab, CC BY-NC). Personal, non-commercial use only.
Built with way too much love for a 1.75-inch Pokémon. Have fun and tag your builds!
Comment & Rating (58)