Blood Bowl Team Box - A1 Mini Compatible


Print Profile(1)

Bill of Materials
- 5x2mm Magnets x 12: Amazon Link: https://tinyurl.com/2ryjaaps
Description
This model set is based upon https://makerworld.com/en/@Cilemno's model: https://makerworld.com/en/models/1968139-blood-bowl-magnetic-team-box?from=search#profileId-2115963. First I want to say thank you for creating your model, it's a great share for the community! As I'm running an A1 Mini, the existing files didn't fit on my build plate but were so close I decided to model my own version inspired by the linked files. These are sized to be printed on an A1 mini bed (including the purge tower for multicolor prints).
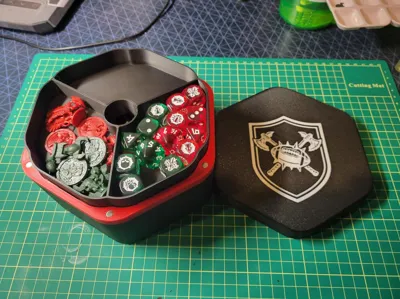
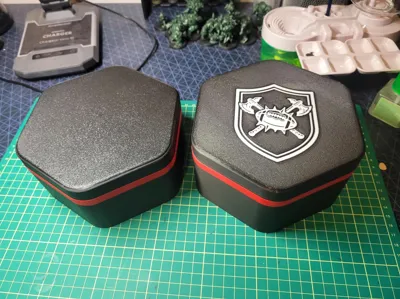
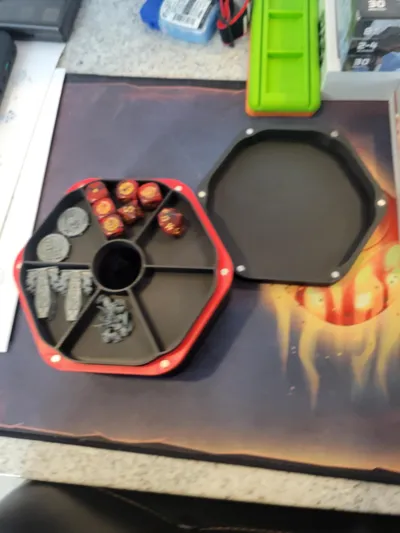
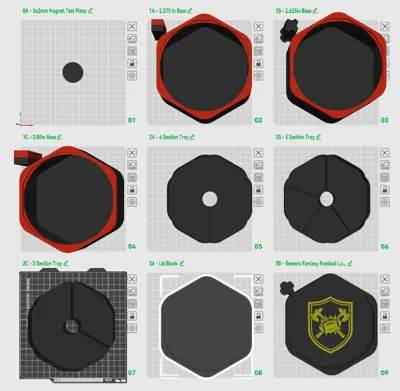
There are a handful of files in this print profile. If you look at the names of the plates there's 4 different sections. Section 0 is a test piece to confirm the magnets will fit before printing the full assembly. To make a complete box you will need Quantity 1 of items 1 (Box Base), 2 (Tray) and 3 (Lid).
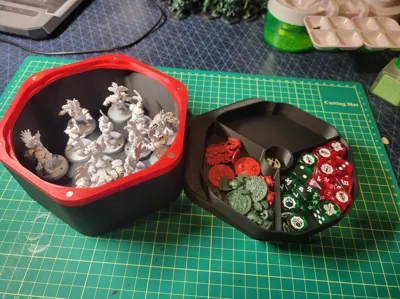
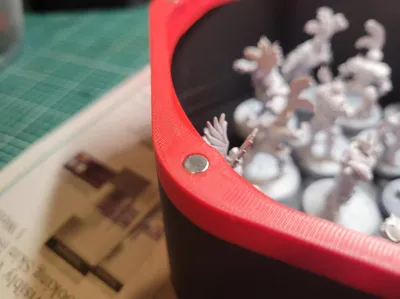
I have 3 box base files. The numbers associated with them: 2.375, 2.625, 3.00in is measured from where the model would sit inside the box to the top of the box where the magnets would sit. Please note: The tray sits 0.188in below the top of this, so if you're creating space for your mini's be mindful that the height a model can fit at inside the box is 0.188in less than the dimension specified.
For the trays, there are 3 different styles. 6 compartments, 5 compartments or 3 compartments.
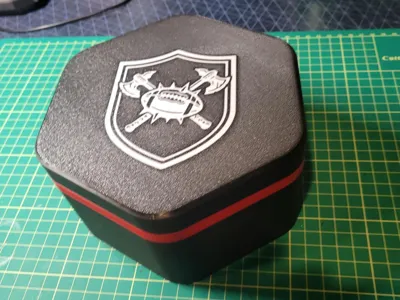
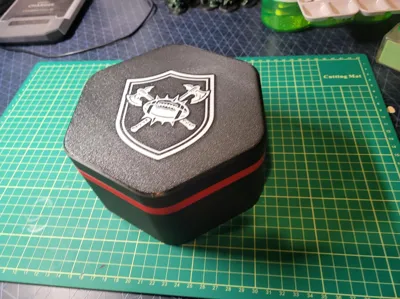
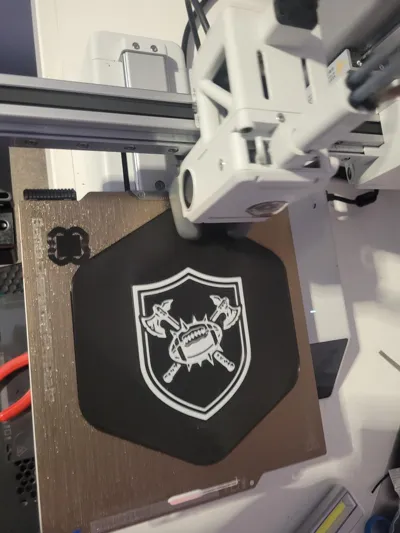
Finally for the lids there's 2 styles. One being a generic solid colored lid, and the second having a generic logo attached to it. If you'd like to import your own logo to print on the lid it's fairly simple to do (steps listed below at end of description).
Just a few notes about the print itself, with these print settings there's going to be a few lines of filament on the main box on the underside of the colored portion that do droop ever so slightly. I'm sure I could find settings to tighten this up but I've mainly been using defaults and for the minimal amount of sag and how hard it is to notice I'm alright with this. Also the tray fits quite snug into the lid once the lid has been placed on there, so when you lift off the lid the tray will likely come with it. There's a handy hole to use to poke the tray away from the lid. If this is a huge issue to you please leave a comment but I haven't minded this so I've left it how it is. You'll just need to ensure you align the lid when pushing it down vs having one side of the lid all the way down before the other.
Design is my interpretation of the original so I've done a few things my own way. I've sized the magnets for 5x2mm magnets.
When inserting the magnets double check your polarity so that the lid will attach to the base. I found using an old pair of tweezers allowed me to set a magnet on the desk have it stick to the tweezers the apply a drop of super glue inside the hole and use the tweezers to position the magnet in place. it's a tight fit so there isn't much super glue required.
Finally this is just a file I made as I was inspired to create to fit my printer of choice. I've made it as a fan of the game and wanted to share it with the community. Hope everyone enjoys this set of models.
How to create your own logo for the lid:
- Create/Find a .svg file. If you do not have one, you can use a graphics program or AI to generate an image, there's free programs out there like affinity by canva that will allow you to clean up that image and turn it into an .svg file.
- Open the .3mf file in bambu studio.
- Using the blank lid, and right click on the lid itself and click center.
- Right click on the lid and select add part, then select .svg
- Navigate to and select your .svg file and click open
- Use the slider to adjust the size to what you'd like
- For operation select the “modifier” option (this will cause the SVG file to intersect the lid without needing to adjust the depth of the imported logo
- On the left hand side where you have objects select the svg file in the tree and right click and “Change Filament” to an option that isn't your base color
- Finally adjust the lid to have it as close as possible to the edge of the plate, with 2 colors you now have a prime tower you now need to fit in the plate alongside the lid. It'll be tight but it's doable.

Comment & Rating (4)