F-16 Landing panel - Home Cockpit

Print Profile(1)
Description
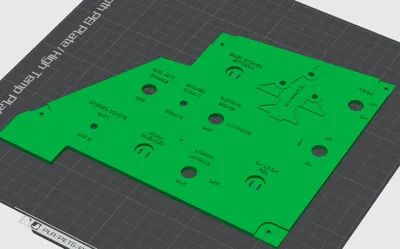
F-16 Viper Home Cockpit – Landing Panel (Part 2)
This is the Landing panel for a DIY F-16 Viper home cockpit. Following the SNSR PWR module, this is the second part of my modular, beginner-friendly cockpit series designed for the flight simulation community!
Key Features of This Design:
- No PCB Required (Plug & Play): This panel features integrated custom slots/pockets specifically designed for standard 6mmx6mmx5mm tactile push-buttons. You can mount and wire your buttons directly into the panel casing, completely eliminating the need for custom PCB manufacturing or complex soldering.
- Landing Gear Status LED Ready: Includes dedicated, precisely positioned placements for LED indicators (Wheels/Gear status matrix), allowing you to easily wire up visual confirmations for your landing gear deployment.
- Custom Button Caps Included: The project comes with a separate, additional file for the button caps (caps/covers). This ensures you don't have bare electronic components showing, giving your cockpit a highly realistic, finished tactical look.
Who is this project for? It is tailored for home builders looking for a budget-friendly, high-fidelity alternative. There is no need for laser cutting, engraving, or multi-color AMS systems. The clean text is recessed directly into the 3D model.
Technical Specifications & Fitment:
- Main Toggle Switches: Designed to fit standard, widely available toggle switches with a 12mm and 6mm thread diameter.
- Mounting Holes: Side mounting points are perfectly sized for standard M3 screws.
- Dimensions Note: While tailored to be as close to the real jet as possible, please allow for minor variations due to individual 3D printer calibration variances.
Printing & Post-Processing Recommendations:
- Material & Color: Print the main panel in matte black PLA to reduce glare. For the LEDs and indicators, standard 3mm or 5mm LEDs will sit perfectly in the integrated channels.
- Bringing out the Text: To make the recessed labels pop, fill them in using a fine-tip white paint pen (acrylic or oil-based), then gently wipe the surface clean.
Download, customize your tactile switches, and enjoy a seamless landing workflow! Let me know your thoughts in the comments
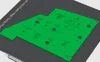
!Sorry for bad quality of photos but my phone isn't capable to make better I will try to solve this next time!
Comment & Rating (0)