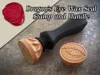
Dragon's Eye Wax Seal Stamp - Head and Handle


Print Profile(2)
Description
Wax seals are fantastic at adding a level of class to letters, in sealing envelopes, or for attatching tags to brithday and christmas presents. Personally I plan on using them for creating immersive TTRPG props for my D&D game, so that I can hand them printed notices (like these free ones). Unfortunately, having a wax seal stamp design for every occasion, affiliation, or character can get expensive… so why not design and 3D print them? This is my first attempt at creating a design using one of my illustrations for Fantastical Geographic's debut.
This design uses measurements taken from a proper wood and metal wax seal stamp so that the proportions of your seal will be similar, but also so that you can simply swap out the head and handle as you see fit as these are modeled separately. Or if you have a lot of metal stamp heads already you could simply want some fancy handles to accompany them instead of swapping things out.
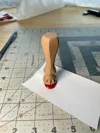
The head design and print profile have been optimized for 0.2mm nozzles as my experiments showed this yielded the best results. The head prints face up and uses ironing to create a smooth stamping surface for easy release, however, it is IMPORTANT to note that your ironing settings may need adjusting as this varies depending on printer, filament type, filament brand, and filament color! I've opted for PLA as it's the most accessible for many printers.
If you are interested in reading my experiments I will be uploading a full write-up on my website of how I achieved the cleanest wax seal and release of the stamp (link to come). The TLDR is:
- 0.2 mm nozzle
- Head printed face up with ironing on
- 0.08mm layer height.
- 50% Infill
- 100% cooling
- Release Agent - A thin layer applied with an old brush
- Pre-cooling - Place the stamp in the freezer for 10-15 minutes (make sure to apply release agent first)
- Wait - Leave the stamp in the wax for about 1 minute before gently peeling off
Additional Notes:
I have included a 0.4mm nozzle profile, however, I was not able to get the ironing as smooth as the 0.2mm. It is there primarily for printing the handle, which doesn't require the high detail.
These results were achieved with a tuned PLA filament profile for my machine. Your mileage may vary.
Boost Me (for free)
If you like this design and want to see more, boosts will help fund R&D of future wax seal stamps!
License
You shall not share, sub-license, sell, rent, host, transfer, or distribute in any way the digital or 3D printed versions of this object, nor any other derivative work of this object in its digital or physical format (including - but not limited to - remixes of this object, and hosting on other digital platforms). The objects may not be used without permission in any way whatsoever in which you charge money, or collect fees.
Comment & Rating (0)