


Print Profile(2)
Description
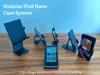
Give your iPod nano a new life with this set of modular extensions!
Work in progress, let me know if you have module ideas/requests.
How it works?
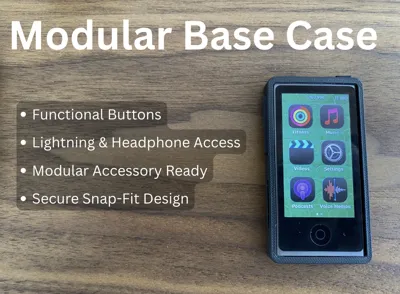
- Start by printing the Base Case in PLA, which allows access to all the buttons and ports
- Case adds rails to the sides that allow modules to attach
- Pick from the various modules to attach
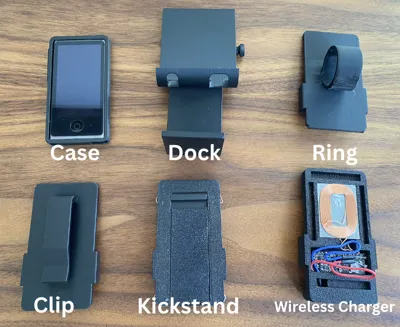
Modules
Case Installation:
Place volume bar button and power button into their corresponding slots in the case. Slide the iPod in from one side and snap the other end in.
General Module Installation:
Learn how to use mechanism all modules use to attach to iPod.
- To Install, align one side of the module with the groove on the case, snap the other side on.
- To Uninstall, slide the module toward the bottom of the iPod until it clicks off.
- Watch video:
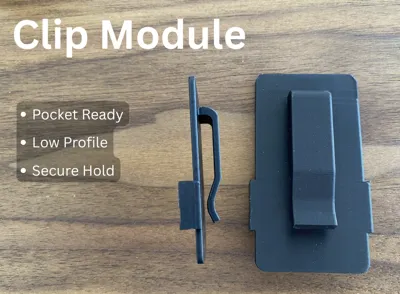
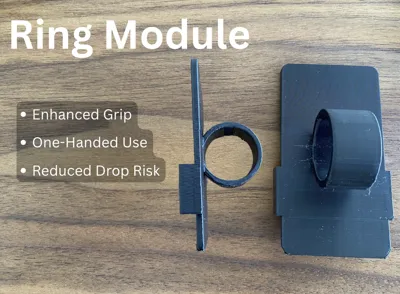
Clip & Ring Modules
- Print with PLA with supports, ensure top Z-distance is at a tuned number and print with a clean plate for best adhesion.
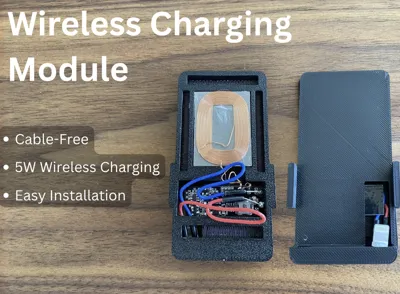
Wireless Charging Module
WARNING: This module requires external electrical components and assembly. Use at your own risk. I am not responsible for any damage to devices, batteries, electronics, property, or personal injury resulting from the use, assembly, modification, or misuse of this design. Verify all wiring and connections before use.
- Bill of materials:
- Wireless Charging Receiver (Rectangular 5V)
- Lightning Breakout Board (Model D with only V and G pads)
- Any wireless charging transmitter
- Soldiering materials (Iron, wire)
- Assembly
- Soldier the 5v pad of the wireless charging receiver PCB to the V pad of the lightning cable breakout board.
- Do the same with GND
- Slide the lightning cable through the hole in the module, fit everything in the case and snap on the cap.
- Watch video for more details:
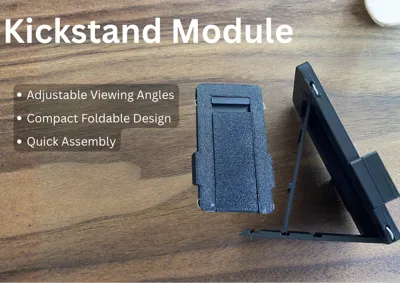
Kickstand Module:
- Parts:
- Three 3D printed pieces
- Multiple small paper clips
- Pliers
- Assembly:
- Place the 2 panels in their correct positions
- Thread paper clips through the holes, bending them at both ends and feedback back into the shallow holes in the case
- Watch Video:
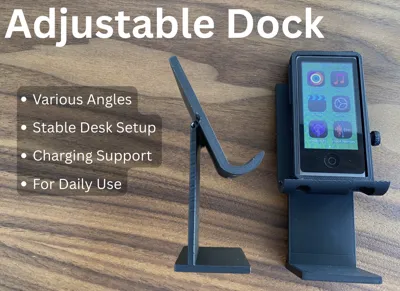
Adjustable Dock:
- Parts:
- Three 3d printed parts
- Small Paperclips
- Pliers
- Assembly, similar to kickstand:
- Align the hinges of the 2 main parts
- Slide the paperclip through and trim the end, bend the other end into the shallow hold to secure.
- Use screw to tighten in desired position
- Watch Video:
If you like this project, feel free to support me!
I'm open to feedback and module ideas!
Boost Me (for free)
License
You shall not share, sub-license, sell, rent, host, transfer, or distribute in any way the digital or 3D printed versions of this object, nor any other derivative work of this object in its digital or physical format (including - but not limited to - remixes of this object, and hosting on other digital platforms). The objects may not be used without permission in any way whatsoever in which you charge money, or collect fees.
Comment & Rating (2)