Parametric Window Trim, Dowels and Caps


Print Profile(0)
Description
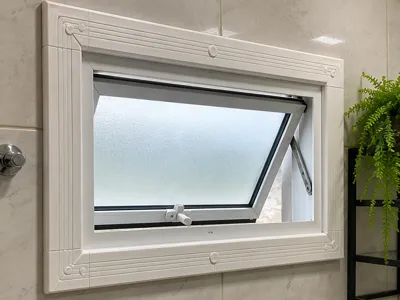
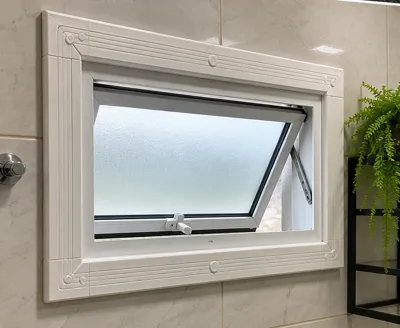
Parametric Window Trim / Casing (L-Shaped & Straight) with Dowels and Caps
Main Features
- Fully Parametric Cross-Section Profile: Control the total width, base support width, and height. Easily enable or disable the external extension tab (useful for "hugging" and passing over protruding tiles. If the wall and window are perfectly flush, simply disable the extension to create a completely flat rear base)
- Three Corner Finish Types:
1. *Traditional Rounded*: Smooth and elegant curve
2. *Rounded with Technical Step*: Ideal for 3D printing, creating a clean transition on the first layer
3. *Straight Chamfer*: Classic 45° bevel finish
- Adjustable Decorative Grooves: Activate 1 to 8 longitudinal grooves on the visible face, configuring width, depth, spacing, and the curve radius at the L-corner
- Joining Dowel System: Guide holes and printed conical dowels ensure perfect alignment of straight-to-curve connections during gluing
- Smart Hidden Fastening: Through-hole with a recess to hide the screw head (optimized for 3.5 x 30 mm screws or adjustable)
- Alignable Grooved Caps: Included circular caps cover the screws. The top of the cap features the same decorative grooves as the main piece. Since the cap is round, you can freely rotate it when inserting to match the visual alignment of the design!
How to Use in the Customizer
1. Choose the Display Mode:
- `Print Bed`: Arranges the L-piece, straight piece, and all necessary dowels/caps horizontally upside down for direct STL export
- `Exploded Project`: Displays an exploded view of the assembly for you to understand the 3D mounting
2. Adjust the Profile Dimensions and Lengths of the vertical, horizontal, and straight pieces
3. Customize the Corner Finish and Decorative Grooves
4. Configure the clearances and fastening diameters in Fixing Holes and Caps and **Joining Dowels according to your printer's tolerance
5. Download the generated STL files
Print Recommendations (No Supports!)
- Orientation: The parts are generated ready for upside-down printing (visible face in contact with the print bed `Z=0`). This allows you to take advantage of your PEI sheet's texture (textured or smooth) as the final visible texture of your trim
- Supports: Not required. The flat ceiling of the screw recess is designed for direct printing using short bridging, and the joining dowels have chamfers that eliminate the need for supports
- Perimeters: A minimum of 3 perimeters is recommended to provide excellent structural strength in the dowel cavities and screw tightening
- **Infill: 15% to 20% (Gyroid or Grid pattern)
- Material: PLA for indoor windows with low sun exposure, or PETG / ASA for outdoor windows or humid and sunny locations
Installation and Assembly Guide
1. Clean print burrs (especially in the dowel cavities)
2. Insert the dowels into the guide holes. Apply a small amount of super glue to the joining faces and assemble the straight piece and the L-piece
3. Position the assembled trim over the window and secure it using the fastening screws
4. Insert the corresponding finishing cap into each hole and rotate it with your finger until the grooves are perfectly aligned
License
You shall not share, sub-license, sell, rent, host, transfer, or distribute in any way the digital or 3D printed versions of this object, nor any other derivative work of this object in its digital or physical format (including, but not limited to, publishing derivative works outside the Makerworld platform or hosting on other digital platforms). The objects may not be used without permission in any way whatsoever in which you charge money or collect fees. Subject to the above restrictions, derivative works may be published only within the Makerworld platform, and all such derivative works must be licensed under the same SDFL‑C license, without modification or additional terms. You may download the digital versions of this object, 3D print it, and display images, videos, or usage demonstrations of 3D printed versions of the object on personal social media platforms or Makerworld official channels, provided that no digital versions of the object are shared or distributed.
Comment & Rating (0)