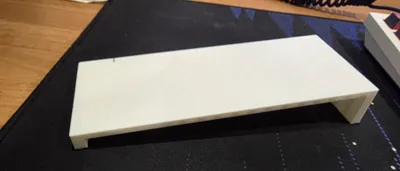
Customizable Portable AC Window Insert Panel


Print Profile(1)
Description
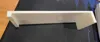
Customizable Portable AC Window Insert Panel (Magnet-Join, Channel-Seating)
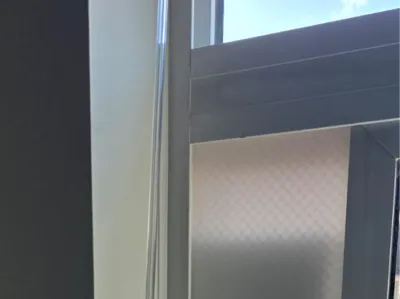
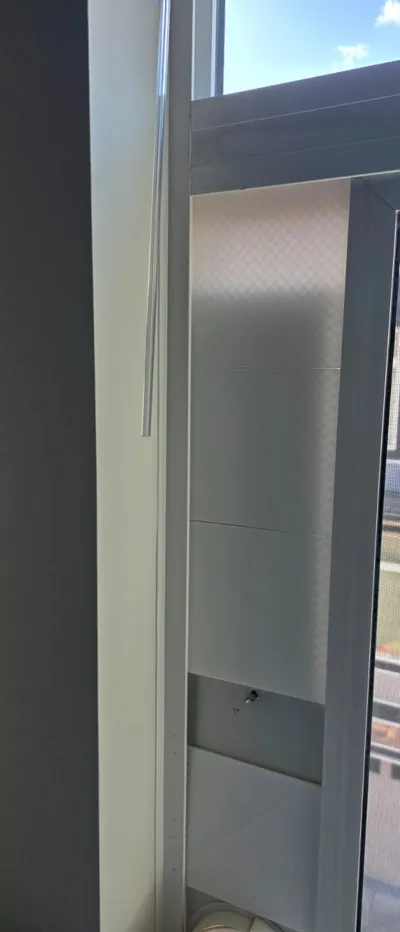
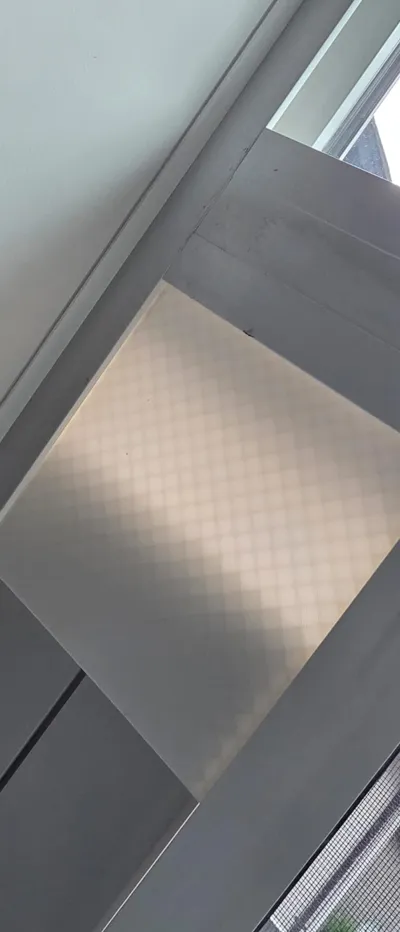
Turn a leftover window gap into a sealed, rigid fit for your portable air conditioner. This is a parametric side panel that fills the space above (or beside) your AC's window bracket. The panels seat into the window's own channels with two purpose-sized side rails, stack to any height, and snap together with a single magnet at each seam. No glue gun marathons, no flimsy plastic accordion brackets.
If the stock bracket that came with your AC doesn't reach, leaks air around the edges, or just looks bad, this prints a clean, solid alternative that fits your window because you set the dimensions.
Why this design
Most window kits assume your opening matches their one size. Real windows don't cooperate. This model fixes that three ways:
- Two independent side rails. Sliding windows usually have a deeper channel on the fixed-frame side and a shallower one on the sliding-sash side. You set each rail thickness separately so both edges seat snugly instead of rattling.
- Stacks to fit. Print as many segments as you need and chain them to reach your exact opening height. Each segment stays inside your printer's bed.
- Magnet seams. A recessed magnet at each joint pulls the next panel into alignment and holds the seam closed, so the stack behaves like one piece.
Make it yours (Customizer)
Hit Customize and set these to your window:
| Parameter | What it does |
|---|---|
| Total width | Overall width across the opening |
| Height | Length of one panel segment (keep under your bed size) |
| Body thickness | Stiffness of the flat face; go thicker for wide spans |
| Left / right rail thickness | Match each to its window channel so the edges seat |
| Rail insert depth | How far each rail reaches into the channel |
| Magnet diameter / thickness | Match your magnets |
| Pocket shape | Round for disc magnets, square for block magnets |
| Pocket clearance | Loosen the fit if your magnets are tight |
The defaults render a 7.3" wide, 7" tall panel with a 1.3" and a 0.6" rail and a 10mm magnet pocket. Those defaults fit my window, not necessarily yours. Measure first.
What you'll need
- Filament: PLA works indoors; PETG or ASA if the window gets direct sun and heat
- Magnets: round discs sized to your customizer setting (default 10mm diameter x 1.8mm). One per panel end, so two per seam
- Super glue or two-part epoxy for the magnets
- Optional: foam weatherstrip tape (often included with your AC kit) for the final air seal
Before you print: measure your window
This is the step that decides whether it fits. With the AC bracket removed:
- Opening width. Measure the gap the panel will span. Set Total width to this, plus a little so the rails tuck into the channels.
- Each channel. Measure the depth/width of the channel on each side. These two numbers set the left and right rail thicknesses. They're often different, that's normal.
- Remaining height. Measure the gap your panels need to fill, then divide by your chosen panel height to get how many segments to print. If it doesn't divide evenly, customize one shorter segment to land exactly.
Print settings
- Orientation: flat, room-facing side down. No supports needed.
- Walls: 3-4 perimeters for a stiff panel
- Infill: 10-15% (gyroid or grid)
- The magnet pocket faces sideways out the panel ends; print as-is and glue the magnet in after.
Assembly
- Print your segments. Print the demo STL/3MF first to confirm the rails seat before committing to the full set.
- Glue the magnets, watching polarity. Stack all your magnets together first and mark the top with a marker. Glue them so that the two magnets meeting at any seam attract instead of repel. Get this wrong and the panels push apart.
- Slide the bottom segment into the window channels, then stack the next one so the seam magnets grab.
- Set your AC bracket in place and close the window onto the assembly.
- Run foam weatherstrip tape down any edge that still shows daylight for a tight seal.
Notes and tips
- The seam uses one magnet centered on each panel end, meeting as a pair. A single small disc pair isn't very strong on its own, so the window channels do most of the holding while the magnet keeps the seam aligned and closed. If the stack feels loose, bump the magnet size in the customizer.
- For a sunny, hot window, print in PETG or ASA so the panel doesn't soften or sag.
- This panel blocks the opening and supports the AC; it is not a structural security barrier. Don't rely on it to keep a window secured.
If you print one, post a Make. I'd love to see it in different windows, and your measurements help other people dial in their own.
Comment & Rating (0)