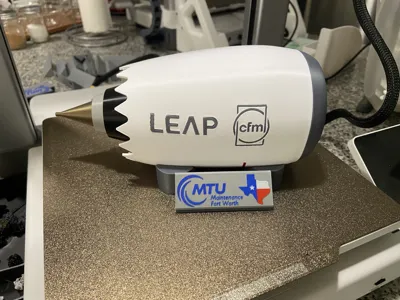
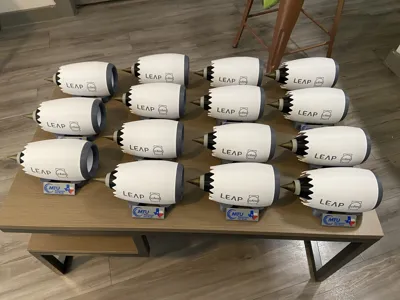
CFM LEAP 1B Engine


Print Profile(3)


Description
(No Bearing option Included)
⚠️ CAUTION — Please Read Before Printing or Assembling
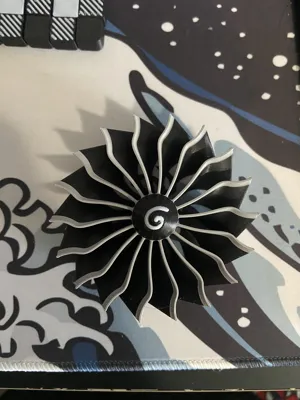
This model contains sharp edges and fine geometric features that can cause cuts or injury if handled carelessly — particularly on the fan blades and nozzle components. Please handle all parts with care during and after printing.
Improper assembly may require reprinting of certain small parts. Take your time during gluing steps — rushing is the most common cause of mistakes on this build.
Sections
- Story & Background
- Engine Info
- Printing Tips & My Modifications
- Assembly Instructions
- Final Notes
1) Story & Background
This model was originally designed for a special MTU event in the DFW area — a tribute to the engineers and technicians who work on and around one of the most advanced jet engines flying today. It was built for a friend who works there, and for the incredible team around them.
Building this model meant diving deep into the real engineering behind the LEAP-1B, and coming out the other side with an even deeper respect for what CFM International has achieved. It was a labor of love from first sketch to final print, and sharing it with the maker community feels like the right next step.
2) Engine Info
The CFM International LEAP-1B is the exclusive powerplant for the Boeing 737 MAX, designed and produced by CFM International — a 50/50 joint venture between GE Aerospace and Safran Aircraft Engines, established in 1974. It represents a massive leap forward in efficiency and sustainability over its predecessor, the CFM56.
MTU & the LEAP-1B This model was created for an MTU event — and MTU's connection to this engine runs deep. MTU Aero Engines is directly involved in MRO (Maintenance, Repair & Overhaul) services for both the LEAP-1A and LEAP-1B, helping keep this massive global fleet airworthy and operational.
3) Printing Tips & Modifications
I made targeted modifications on a per-component basis rather than applying global settings — for example, on the engine body I adjusted print speeds for better surface quality and used support enforcers and blockers on specific areas to avoid unnecessary supports elsewhere.
If you use your own print profile, you will still get a good result. However, if you have a Bambu A1 like mine, you'll get the best results using my specific print profile. Since the A1 is a Cartesian (bed-slinger) printer, outer surface quality can sometimes suffer — my speed adjustments help mitigate this, though it may not be perfect.
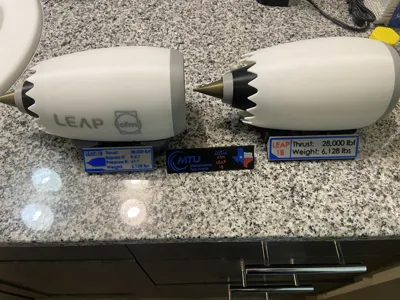
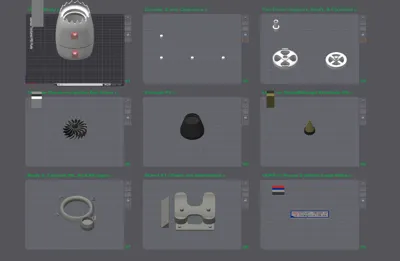
Alternate Parts & Customization
I have also uploaded an alternate parts profile for those who want additional options or a cleaner look. This includes:
- Clean engine variant — a version free of decals for a sleek, minimal finish
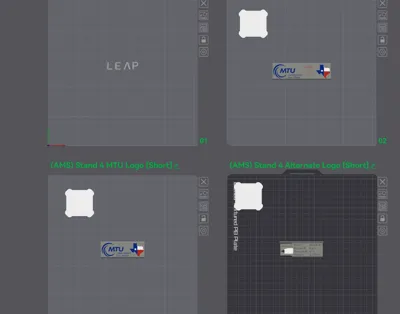
- Alternate display stands — additional stand styles as shown in the figures below
- Blank logo plates — fully blank plates that you can customize by importing SVGs directly in Bambu Studio or your preferred CAD software
Bearing Options
The shaft supports are designed to accommodate several bearing configurations. Choose whichever works best for you:
| Option | Specs | Notes |
|---|---|---|
| Bambu-sourced bearing (6000ZZ) | ID/OD/W: 10 × 26 × 8 mm | Recommended |
| Common Amazon bearing | ID/OD/W: 8 × 22 × 7 mm | Easy to source |
| 3D printed bearing | — | Works, but not ideal |
| Custom / your own bearing | — | Blank shaft support included |
| Bearingless option | Surprisingly works well |
A blank shaft support is included if you'd like to fit your own bearing or design a custom solution. All alternate parts and bearing profiles are included in the alternate parts profile attached to this upload. If you use a bearing, the shafts are pressure fit where the blade shaft diameter is 12 mm.

Nozzle recommendation: I have uploaded multiple print profiles ( 0.2mm and 0.4mm). A 0.2mm nozzle will give you the best results for the lettering and logo details.
4) Assembly Instructions
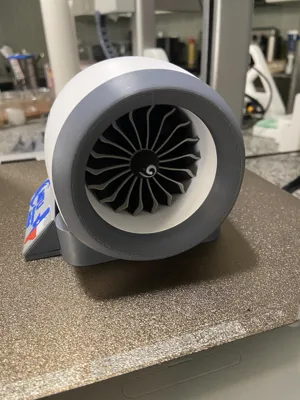
Step 1 — Fan Core Sub-Assembly (Shaft + Flywheel + Fan Support)
Start by assembling the three core components: the blade support shaft, the flywheel, and the fan holder.
- Orient the shaft correctly — the flat side faces a specific direction as shown in the photo. ⚠️ If installed backwards, the fan blades will not seat in the correct position.
- Apply a small amount of glue into the alignment hole only — do not over-apply. Applying glue here (rather than on the shaft body) prevents glue from migrating to the shaft collar, which must remain free to spin.
- The completed fan core must be able to rotate freely — confirm this before the glue sets.
Step 2 — Install Fan Core into Engine Body
- Apply glue to the designated glue area on the engine body interior as shown in the photo.
- Insert the fan core sub-assembly into the body.
- Align the notches on the shaft holder with the corresponding notches inside the engine body — this is critical for correct positioning. Do not proceed until the notches are fully seated and glue has cured.

Step 3 — Fan Blades & Dowels
- Once the engine body assembly is fully cured, apply glue to the alignment hole of the fan blades and install them.
- Insert the dowels into their holes around the face ring — these may require a small amount of glue depending on fit tolerance from your printer.
Step 4 — Remaining Assembly
The rest of the assembly is largely self-explanatory — components are designed to fit together intuitively. Take your time and dry-fit each part before committing to glue.
Step 5 — Seam Alignment (Aesthetics)
For the best finished look, align the seam lines of the outer cowling sections with one another at the bottom of the engine. This small detail makes a big visual difference in the final display piece — as shown in the photo.

5) Final Notes
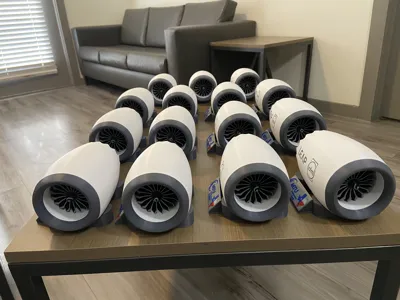
Several customization options are included to personalize your build:
- Display stands — multiple styles to show off the engine
- Logo variants — alternate branding plates and logo options
This model is shared for personal, non-commercial use only. If you are interested in selling prints of this model commercially, please leave a comment or reach out — I may look into setting up a Patreon where commercial licensing and exclusive content could be made available.
If you make this, I'd love to see it — drop a photo and leave me a comment!
Boost Me (for free)
If you like this model, please leaving me a boost
License
You may create derivative works based on this object, provided that all such derivative works are published exclusively on the MakerWorld platform and include proper attribution to the original creator. You may not share, upload, host, distribute, or publish this object—or any derivative work of this object—on any other digital platform, marketplace, or distribution channel. Commercial use of this object and any derivative works is strictly prohibited. This includes, but is not limited to, selling, renting, sublicensing, or using the object in any context in which you receive monetary compensation or other financial benefits.
Comment & Rating (0)