Brooklyn Bridge Sunset - Hueforge


Print Profile(2)

Description
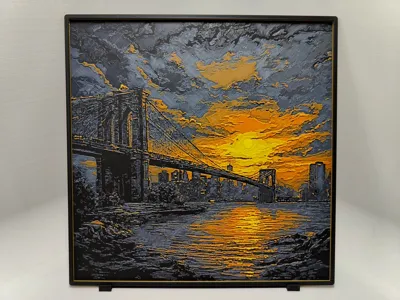
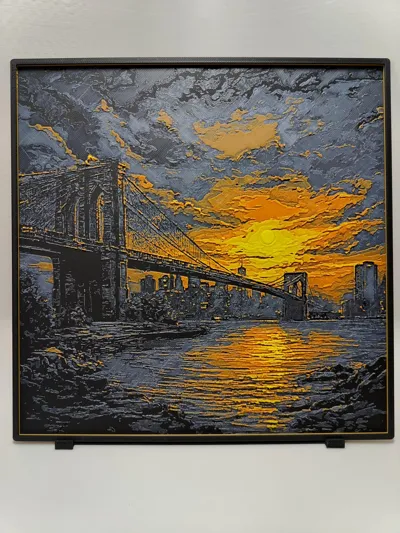
This is 4 colour Hueforge of Brooklyn Bridge during sunset.
I uploaded two sizes 200x200 X1/P1/A1 and size 180x180 for A1 Mini.
And .STL with thicker version with no border size 200x200. Swap instructions down below.
At layer #25 (2.08 mm) there is swap for black for the black border, but you can change the colour to any you like.
Do not adjust the thickness (Z) in your slicer!! The layers will not come out right. You can adjust the other dimensions (X,Y) though to make it bigger or smaller, just not the thickness.
If you want stand for this print check out my Simple vertical stand.
For my Hueforge pictures with border choose the version with 3 mm gap.
If you like this picture, you can look at my other pictures with sunset here in this collection:
https://makerworld.com/en/collections/8672734-sunset-hueforge
Boost Me (for free)
I print all of my creations myself.
If you like my work, pls send me a boost, it will help me make more.
Feel free to PM me if you have some idea for a nice picture.
Thank you.
Instructions:
Print at 100% infill with a layer height of 0.08mm with a base layer of 0.16mm
Filaments Used:
PLA BambuLab Basic Black Transmission Distance: 0.6
PLA BambuLab Basic Blue Gray Transmission Distance: 4
PLA BambuLab Basic Orange Transmission Distance: 6.4
PLA BambuLab Basic Yellow Transmission Distance: 5.6
This print uses 4 unique filaments
Swap Instructions:
Start with Black
At layer #8 (0.72mm) swap to Blue Gray
At layer #11 (0.96mm) swap to Orange
At layer #18 (1.52mm) swap to Yellow for the rest.
At layer #25 (2.08 mm) there is swap for black for the black border, but you can change the colour to any you like.
Thicker .STL
Swap Instructions:
Start with Black
At layer #10 (0.88mm) swap to Blue Gray
At layer #13 (1.12mm) swap to Orange
At layer #20 (1.68mm) swap to Yellow for the rest.
License
You shall not share, sub-license, sell, rent, host, transfer, or distribute in any way the digital or 3D printed versions of this object, nor any other derivative work of this object in its digital or physical format (including - but not limited to - remixes of this object, and hosting on other digital platforms). The objects may not be used without permission in any way whatsoever in which you charge money, or collect fees.
Comment & Rating (2)