Desk radar (flight radar) (updated V9) 15.06.2026


Print Profile(2)
Description
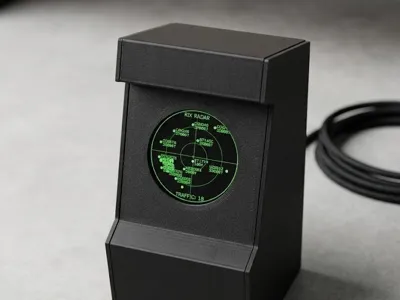
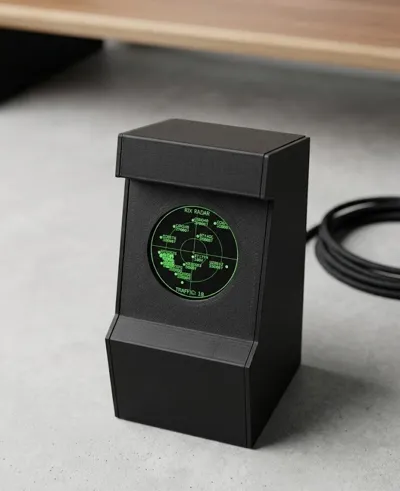
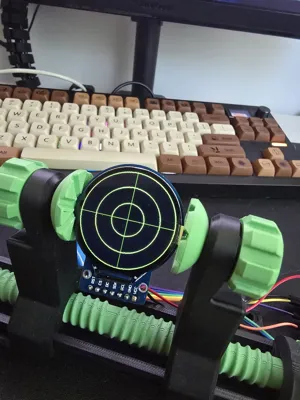
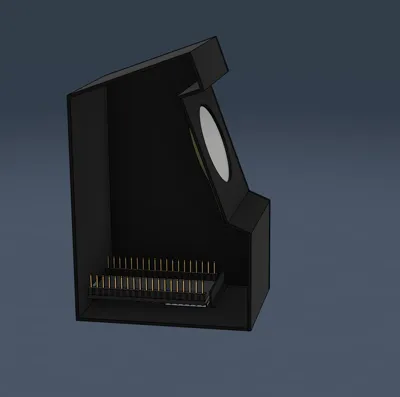
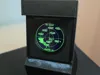
The desk Flight radar. Version 9 - easy assembly.

SOCIALS.
![]() My DISCORD: homerrjsimpson
My DISCORD: homerrjsimpson
 My GITHUB: https://github.com/arvis91/deskradar
 My Etsy store https://gegelvshop.etsy.com, if You don`t want to DIY it :) or want to finance future projects.
Boost Me (for free)
If You like this project, You can support me for free, by Boosting this project!
***********************************************************************************************************************************
PARTS LIST. (about 8-11Euros)
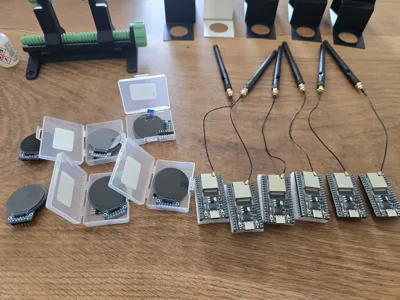
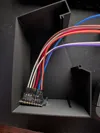
- ESP32 or ESP32U (THE BRAIN),
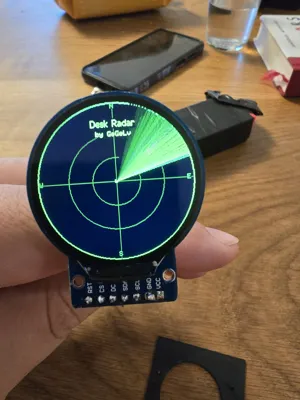
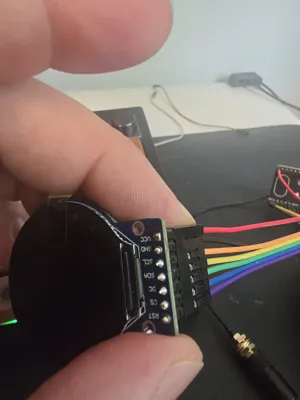
- 1.28 inch TFT VER 1.0, 240x240 , IC:GC9A01 (THE DISPLAY),
- Connecting cables.
INSTSRUCTIONS. (please look at the detailed instructions PDF).
Connect the pins based on the pinout.

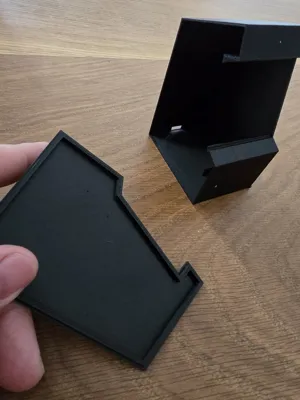
Gently the display in to the screen housing.

Slide in the entire screen with its housing, in to the radar housing.

Slide in or angle in the ESP board (depends on your esp size), the models most easily will fit an ESP32 and ESP32U.

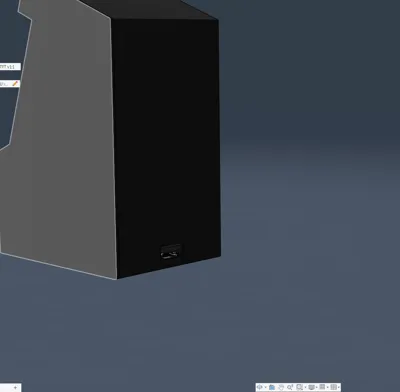
5.Make sure that te usb-C port is aligned and so are the boot and reset buttons.


6.Snap in the side (don`t glue it ,before You have tested if the screen displays correctly).
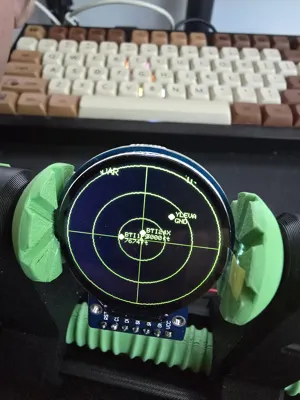
7. Plug in the usb-c and upload the code via arduino Ide. (Once again, detailed information how to do that is in the PDF).
8.Connect to the devices WI-FI with your phone (the easiest).

9. Once connected Type in the 192.168.4.1 in the phones Web brower (WHILST CONNECTED TO THE DEVICE).
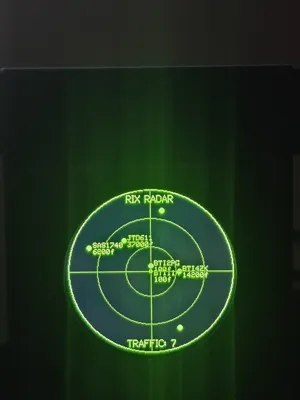
Display should show this image:

10. Set up the Device.

11. Enjoy Your Desk radar.
F.A.Q.
- Can other controllers be used?
- Yes, but it might not have a snug fit and the boot button holes might not align.
- Can other displays be used?
- Yes, but the code and housing display mounts are suited specially for this display, however we have tried different displays too, and it works. It depens on the model, the sizes and other parameters.
- What is the default refresh rate?
- Currently for guest user it is 20 seconds, for Registered free user, it is 10 seconds.
- Is it easy to edit wifi and other settings?
- Yes, the settings page is easy to use and allows to customize it in few minutes.
- My device says authenticating, but nothing else happens.
- Most likely there is mistake in the credentials form opensky user, it is case sensitive and some phones automatically start the word with the large letter.Or just try guest user (leave those wo areas blank.
Important, you need a free acount and api key from the: https://opensky-network.org/ ,it is completely free, there are no trials or whatever. In this website you will get the api key you need to input the code. and it will work. If you have any questions, please check the PDF for detailed instructions.
SPECIAL THANKS.
This project has brought me some new friends, which is the biggest reward i could have hoped for. People helped and participated. With ideas, suggestions and morale boosts.
Thanks to:
In no particular order, as in my chatwindow.
Bart from Netherlands,
Brian from USA or Canada,
Ronan form France,
avolagus (he did the entire Instructiosn PDF),
Rick from USA,
Jamie from Netherlands and many others.
Comment & Rating (144)