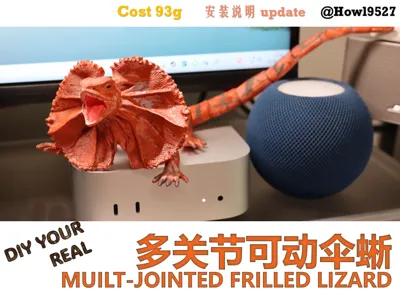
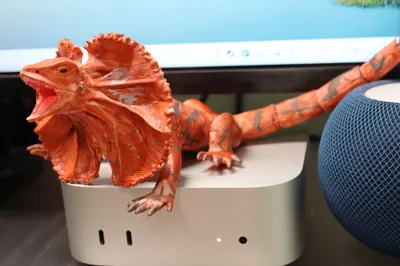
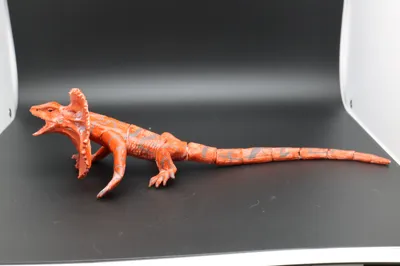
So realistic! Articulated Australian Frilled Lizard: Rich surface details/minimal supports/low layer lines/no large flat surfaces/hybrid articulated joint structure/hand-painted texture


Print Profile(1)
Description
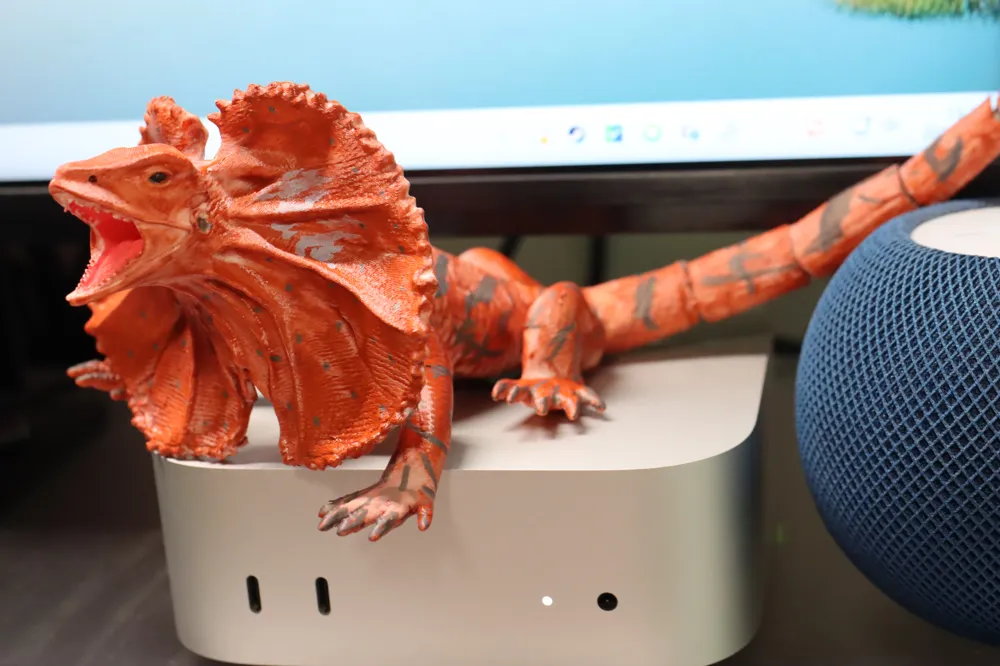
Frill-necked lizard (*Chlamydosaurus kingii*), belonging to the Agamidae family, is an arboreal lizard found in northern Australia and New Guinea, which, when threatened, displays a large frill around its neck for deterrence
A realistic articulated model inspired by the frill-necked lizard
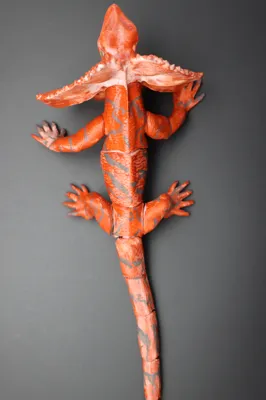
The body and limbs are assembled with multiple ball joints, allowing for a wide range of motion, featuring low layer lines, and being easy to paint
The tail is Print in Place with multiple hinge joints, making it flexible and dynamic
Choose your base filament color, then combine it with personalized hand painting to create this lifelike and highly playable model
Design Features:
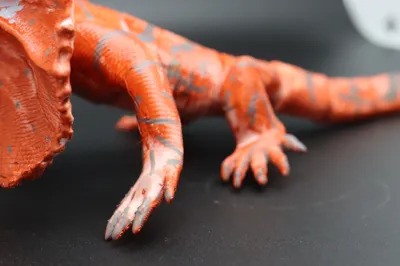
- The texture and colors in the photos need to be hand-painted, difficulty is moderate
- All ball joints can be individually resized to adapt to different printer accuracies and filament sinkage rate
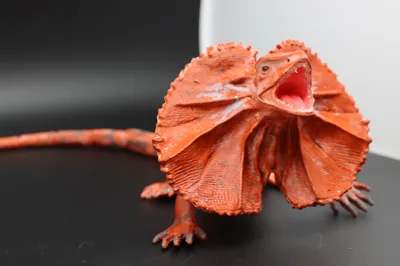
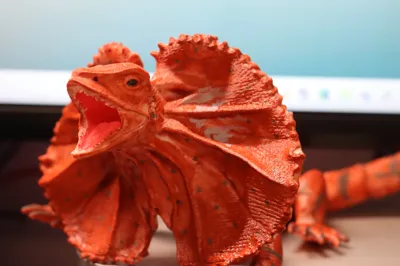
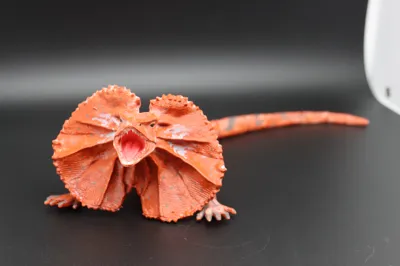
- Includes two heads: one in a deterrent pose (open mouth) and an optional closed-mouth pose
Please check out other works in this contest's favorites, continuously updated!Click here for mainland China Click here for international

Boost Me (for free)
Your likes, collections, comments, and follows are the biggest motivation for me to continue creating free models!
If the finished product surprises you, please do not hesitate to use free boost coupons!
Printing & filament Instructions (Print profiles have been tested and adjusted, please do not change unless necessary)
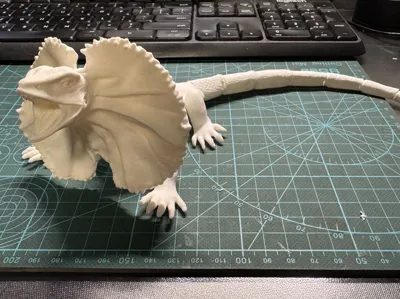
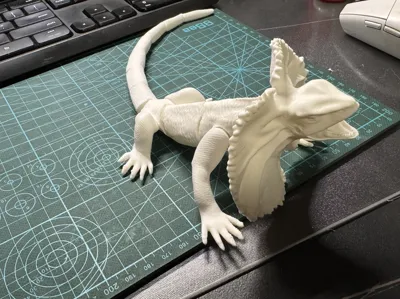
- The body is Print in Place, while the limbs and head are separate parts, connected using single or double ball joints
- Defaults to lightning infill for material saving and efficiency
- Recommended filament:
- For all parts: The base color corresponding to the desired appearance, if hand painting is planned, white PLA Matte is recommended
- Each ball joint can be adjusted individually. If it cannot be installed or if the resistance is not suitable after installation, you can Alt-click the corresponding ball joint to enlarge it by a certain magnification (e.g., adjust from 100% to 105%)
Support Removal & Installation Instructions
- Support removal is not difficult, but be aware that the tail is connected by hinges, please do not pry the printing plate perpendicular to the tail direction, as excessive adhesion might cause hinge breakage. It is recommended to loosen the tail section first with a scraper
- The hinge joints are delicate, please handle them gently
The ball joints can be firmly pressed into place. This model further improves the modeling method, allowing for full-angle rotation while being less prone to loosening

Painting Instructions & Suggestions
- Recommended color scheme for this model:
- Print with white filament, first lightly apply a brick red coat all over, then partially apply a thicker coat on the upward-facing areas of the body; once dry, switch to an acrylic fine-tip pen, paint the eyeballs black, and naturally draw body textures with colors like gray and dark gray
- Do not worry about mistakes; if you mess up a part, simply reprint that part
- Follow the rule of painting from light to dark. For delicate areas (eyeballs), be especially mindful of ink bleeding that may occur due to FDM layer lines (especially with dark pens), and use a dabbing method for coloring. It is recommended to print extra eyeballs in case of mistakes
- For the body, acrylic paints are recommended. If acrylic pens lack gradient effects, you can blend the edges with a wet tissue
- Acrylic paint application:
- Thin base coat: Add a small amount of water to acrylic paint, mix well, then brush it onto the model's surface. Repeat several times to blend beautiful colors
- Thick color: Apply acrylic paint directly to the model's surface without adding water
- Acrylic pen application:
- For leopard print spots, use a black acrylic pen to dab them on. You can refer to the uploaded images or unleash your creativity
- Acrylic paint application:
License
You may create derivative works based on this object, provided that all such derivative works are published exclusively on the MakerWorld platform and include proper attribution to the original creator. You may not share, upload, host, distribute, or publish this object—or any derivative work of this object—on any other digital platform, marketplace, or distribution channel. Commercial use of this object and any derivative works is strictly prohibited. This includes, but is not limited to, selling, renting, sublicensing, or using the object in any context in which you receive monetary compensation or other financial benefits.
Comment & Rating (1)