Home
All Models
Following
MakerLab
Contests
Crowdfunding
Explore
Maker's Supply
CyberBrick
Community
Forum
Privacy
Terms
Guidelines
FAQ
Cookie Settings
Hot Searches
© 2026 MakerWorld
Search models, users, collections, and posts
Log In
阿奇
@
user_1872543044
396
Followers
6
Following
538
1.9 k
5 k
668
Follow
Social Media Links
Bio
Show original
Bilibili Aqi Design Sharing SOLIDWORKS tutorial creator
Achievements
Featured Creator
1 model is featured by MakerWorld.
Home
Collections
3D Models (8)
Laser & Cut Models
Crowdfunding (0)
Posts (1)
Pinned Models
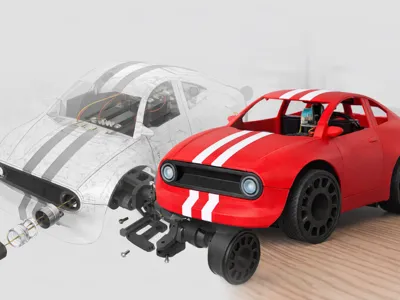
Seal MW RC Car: This remote-controlled car can drift, move laterally, and rotate in place
750
106
1.7 k
40
Recent Models
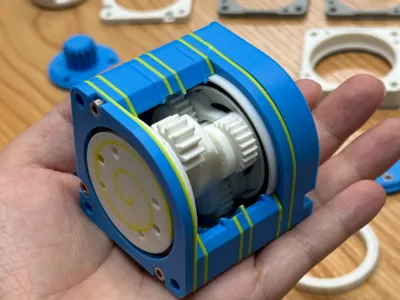
Two-stage planetary gearbox teaching model
19
4
24
2
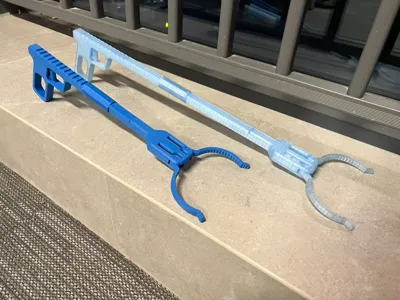
Manual clamp, fully 3D-printed, weight: 100 g
62
10
76
38
Xiaozhi curved screen enclosure
11
2
159
0
Explore All 8 Models
Recent Article
Not Just a Toy — It’s a Mechanical Design
At first glance, this looks like a simple 3D-printed four-wheel-drive car. After finishing the entire process—from printing to assembly to tuning—I realized the real fun isn’t driving it, but understanding the design behind it.Inside, the structure is surprisingly complete: independent suspension, differential, drivetrain—nothing essential is missing. It’s essentially a scaled-down interpretation of a real car’s mechanical system.The exterior isn’t an afterthought either. With a full body shell and a lighting system, this is clearly more than a “print-and-display” model.A Quick IntroductionThis model was designed by wuguigui. It’s a four-wheel-drive car featuring a double-wishbone independent suspension, which is one of the main reasons I decided to print it in full.Beyond Basic Specs: What Really MattersInstead of following a manual-style review, I want to focus on what actually determines the experience: printing behavior, assembly logic, and system tuning.Printing Difficulty ≠ TimeIt Reflects the Designer’s AttitudeAll parts printed successfully on the first attempt, without failures caused by geometry itself.That matters more than it sounds.It means the designer genuinely considered FDM printing constraints during modeling.Many popular models online look impressive in screenshots but ignore realities like:support removaloverhang behaviorreal-world print stabilityThe result is often a visually appealing model that’s frustrating to print.This one is different. From part segmentation to load direction, the design clearly respects the printer. That alone deserves credit.Assembly Difficulty ≠ HassleIt Reveals Design MaturityThe full assembly took me about 6 hours.The instructions themselves are excellent—clear steps, logical order, nothing confusing. So why did it still take that long?One reason:101 screws. All manual.If you plan to build this, an electric screwdriver is strongly recommended. Without one, the time cost multiplies quickly.There’s still room for improvement, though. Some parts look nearly identical, making them easy to mix up during assembly.Simple additions—part numbers, directional markers, or keyed geometry—could significantly improve the experience.One common pitfall: Certain suspension components have a specific orientation, but that’s not immediately obvious.I only realized four parts were installed upside down near the end, which meant disassembling and redoing the work.This highlights a broader point:A mature 3D-printed design should think one step ahead for the actual assembler.The assembler isn’t a trained technician— it’s usually someone who opens the box and starts building immediately.That said, discovering and correcting mistakes is also part of the joy of 3D printing.Tuning Difficulty ≠ ProblemsIt Shows System FriendlinessFor the drivetrain, I used motors from the CyberBrick kit.On the first test, the car moved backward when commanded forward—a common issue. The fix was trivial: swapping motor logic in the CyberBrick software.The steering uses a CyberBrick 9g digital clutch servo (180°). Initially, I experienced gear binding.Reducing both the maximum and minimum servo angles by about 20° in software solved it completely.After tuning, steering became smooth and reliable.A Pleasant Surprise: Lighting DesignThe lighting system goes beyond basic illumination.It includes turn signal logic similar to real cars, with independent control over headlights and indicators.The implementation is clever: opaque filament surrounds a transparent cylindrical structure, blocking the center and allowing light only through the outer ring.The result is a clean circular glow.This is a textbook example of using material properties to solve a visual design problem.Playability ≠ “It Moves”Is It Worth Printing?After tuning, performance on flat surfaces is stable: forward, backward, turning—all behave as expected.The speed is slightly limited by the motor choice, but swapping to a faster motor would easily change the character.More important than speed is the experience.Building and playing with this car feels like going back to childhood—taking toys apart, understanding how they work, and putting them back together.It’s also a great project for parents and kids to build together, naturally introducing:mechanical structurestransmission logicengineering thinkingThese lessons are hard to get from off-the-shelf toys or classrooms.Design Highlights: A Designer’s PerspectiveSo what can we actually learn from this model?Suspension StructureMost small cars use the standard “spring + shock absorber” approach.This design is different.It behaves more like a deformable support structure, inspired by a parallelogram mechanism.Because opposite sides remain parallel, the wheel maintains its orientation while moving vertically— like standing on a stable elevator rather than a tilting arm.There is some spring friction noise, but it doesn’t affect functionality.DifferentialWhen two wheels rotate at different speeds—or even opposite directions—the key component is the differential.It allows torque transfer while accommodating speed differences during turns.Here, that entire mechanism is fully 3D printed.Embedding a complete mechanical principle into a small printed toy is impressive in itself.Universal Ball JointBecause the suspension allows vertical travel, the drivetrain must accommodate angular changes.That’s handled with a ball joint.One subtle detail: one side of the ball joint is flattened, intentionally designed to sit on the print bed.This is a small but telling example of meeting motion requirements while respecting printability.Basic Parameters (For Reference)Pure print time: ~ 1 day 14 hoursTotal print time (with supports): ~ 1 day 19 hoursSuccessful in one full print runAssembly time: ~ 6 hoursPrinter: Bambu Lab A1 + AMS Total spools: 7 Materials:Red PLA LiteBlack / White PLA BasicBlue PLA TranslucentAll parameters were based on the original 3MF files. For plates 03 and 04, I manually added tree supports to reduce risk during long multi-color prints.Final VerdictThis is not a model built to show off—it’s a model built to make sense.If you enjoy not just printing, but understanding how things work, this one is absolutely worth your time.
Explore All Posts