Coffee Station Hario Mini Mill & V60


Print Profile(4)

Bill of Materials


- Hario Filter Size 02 x 1:
- Hario Dripper V60 Size 02 x 1:
- Hario Mini Mill x 1:
Description
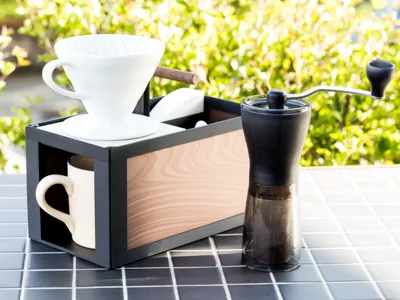
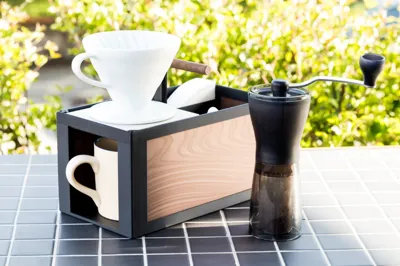
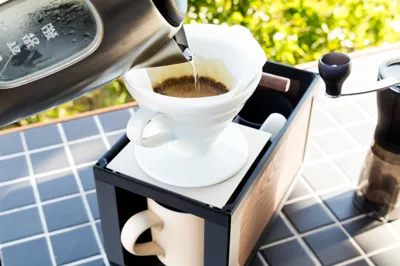
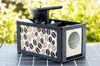
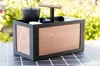
Portable Coffee Station for Hario Mini Mill and V60 Dripper Size 02
Your Minimalist Brewing Companion ☕
Do you love great coffee but dislike bulky machines?
This portable coffee station is designed for coffee enthusiasts who value simplicity, aesthetics, and functionality.
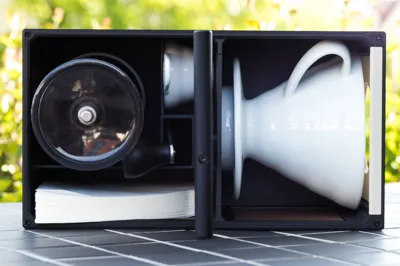
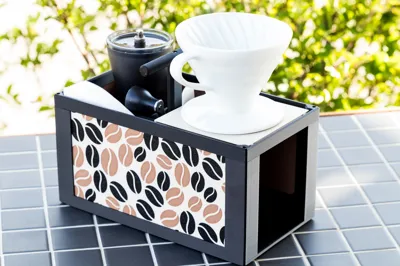
It neatly stores and transports your grinder, dripper, and filters—everything you need for a perfect brew, wherever you are.
Whether you're at the office, traveling, or just enjoying a quiet moment, this station keeps your coffee ritual effortless and stylish.
Story
I like to drink coffee a lot and i am no fan of big coffe machines you find in every office. To solve this with elegance, i designed this station.
It is my daily companion at the office but also on travel. My mill, dripper and filters are always stored and portable.
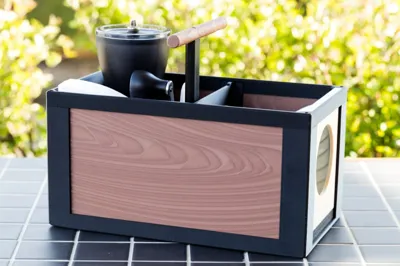
To give this idea the cherry on the top, i added a holder for the dripper inside the box.
The only thing missing is some hot water and good coffee beans.
I used and tested this station for over a year now and decided to share it with you!
------------------------------------------------------------------------------------------------------------------
Build up Description
This coffee staion is easy to print and to assemble. You need only a few screws. This design comes with the option to customize the box the way you like. In the pictures you see two suggestions. One vectorized grafik and one very special print tecnique to simulate real wooden structrue (many thanks to PandaN and his work https://makerworld.com/de/models/868884-add-wood-grain-effects-to-your-models-using-a-smal#profileId-820403)
Content
- Partlist
- Customize Instruction
- Picture
- Wood
Assembly Instruction
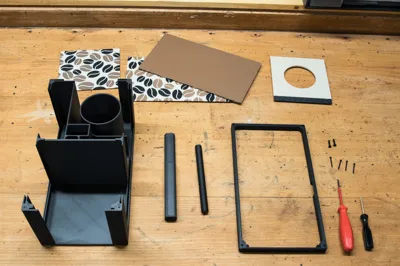
1. Partlist
The box itself consists of eight printed parts:
- Main body
- Top Frame
- Center Part
- Grip
- Dripper Holder (Print in Place)
- 2x Large Panel 222.5 mm x124 mm(Customizeable)
1x Small Panel 117.6 mm x 124 mm (Customizable)
Screws:
- BT3x20 Self Tapping Screw, Bambu Lab AA201 (Alterantives: BT3x18 AA202 or BT3x16 AA110)
BT2x20 Self Tapping Screw, Bambu Lab AA097 (Alternatives: BT2x18 AA194 or BT2x16 AA096)
Allen keys (they are included in your Bambu Lab printers toolbox 😉 ):
- Size H1.5
- Size H2
The fitting parts to make your coffe are:
- Hario Mini Mill
- Hario V60 Dripper Size 02
- Hario Filter Size 02
2. Customize Instruction
a. Main Parts
In the main profile there are all components included, to print in simpel colors.
- The Frame parts are suggested with the color black.
- The panels can be printed in a single color you like.
The dripper stand is a dual color print in place part. You can choose the colors of the top and bottom part as you like. I recommend the bottom color same as the frame and the top color same as the panels.
a. Picture Panels
You can add any picture you like to the panels by using the Maker Lab Image to Keychain generator. Choose a picture with a ratio of about 1:2 or 3:4. It is easier to scale it up/ down to the needed panel size.
- Open the generator and upload a picture
Edit the parameters for “Plate & Thickness” to:

Make sure the thickness is 2mm!
Image thickness can be reduced to 0.8mm to reduce filament waste
Activate Facdown Mode to increase print quality, in particiular with a textured pei plate.
- Download the 3mf of your vectorized pciture.
- Open the "Custom Panel Picture" print profile in this design.
Import the vectorized picture to the print profile. Choose “Import geometry only”.

- Move and scale the imported part, that it is a little bigger than the pink parts. It will be cuttet to the rigth size after slicing!
Merge the importet picture with the existing part "Assemble"

- Delete the pink panel. It is named “DeleteMe.stl”.
- Repeat step 6 to 8 for the other panel as well. You can copy the imported picture or import another.
- Select the right filament types and colors for your pictures.
Slice and print. Large Panel 2x, Small Panel 1x
b. Wooden Panels
First, i found the idea and the modificator for the wood pattern in this profile here: https://makerworld.com/de/models/868884-add-wood-grain-effects-to-your-models-using-a-smal#profileId-820403. Many thanks to PandaN for this great idea! I love it! My next Boost Tokens goes to you!
For the wooden panels you can just print my suggestion in the print profile. But you can also create your own pattern for a unique design. The adaption is very easy, to find a good looking pattern is not. Read the description and comments in the origin design for help.
In the uploded print profile.
3. Assembly Instruction
License
You shall not share, sub-license, sell, rent, host, transfer, or distribute in any way the digital or 3D printed versions of this object, nor any other derivative work of this object in its digital or physical format (including - but not limited to - remixes of this object, and hosting on other digital platforms). The objects may not be used without permission in any way whatsoever in which you charge money, or collect fees.
Comment & Rating (0)