Battery Box – AA / AAA / 9V


Print Profile(1)

Description
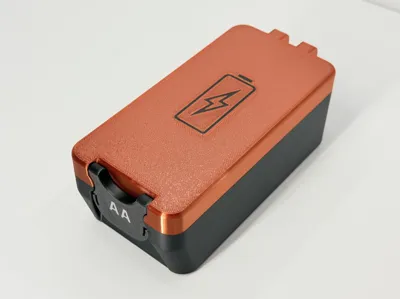
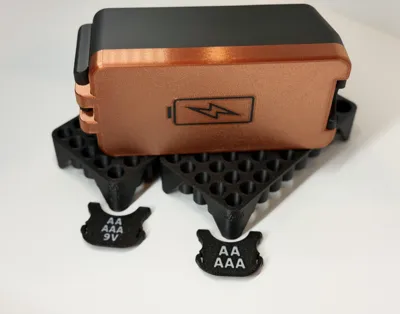
Battery Box - AA / AAA / 9V — Built with BoxLoc
Built on the same BoxLoc foundation as the Ammo Box lineup, this Battery Box variant brings that familiar design into everyday battery storage. It uses the same lid, latch, and base components, keeping everything consistent while adapting the interior for a more flexible, mixed-use setup.
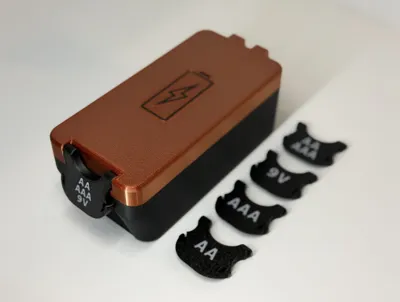
In this initial release, it supports AA, AAA, and 9V batteries through a range of interchangeable inserts, making it easy to organize a single type or mix and match as needed. Swappable labeled latches keep everything clearly marked, so you can identify contents at a glance. Additional inserts are planned for future release.
The design carries forward the same refined details found across the BoxLoc system — smooth rounded edges, a secure sliding hinge, and a crisp latch with an integrated finger lip for confident handling.
Highlights
- AA, AAA, and 9V battery support
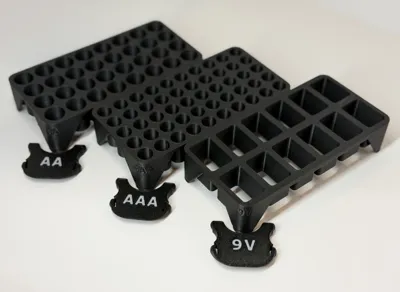
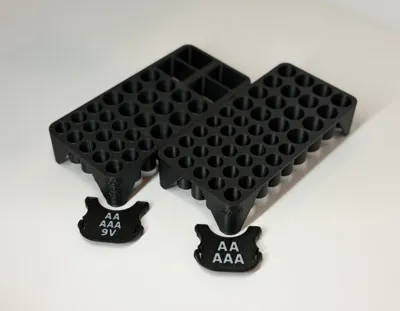
- Interchangeable insert options (AA, AAA, 9V, AA+AAA, AA+AAA+9V)
- Swappable labeled latches for quick identification
- Removable inserts for easy loading and organization
- Rounded edges for comfort and clean presentation
- Refined rear hinge for smooth, secure motion
- Crisp latch with integrated finger lip
- Stands on multiple sides for flexible storage
- Hardware-free assembly — no tools, screws, or glue needed
- Built on the BoxLoc platform — shared components with Ammo Boxes for consistency
Assembly Instructions
- Join the lid and base
- Align the lid’s hinge tabs with the grooves on the bottom of the base.
- Gently slide the lid upward into the hinge slots.
- Once you feel resistance, wiggle the hinge slightly along the pivot joint as you move it upward to help it seat properly.
- Continue until the lid clicks securely into place and pivots smoothly.
- Attach the front latch
- Position the latch so the rounded side inserts into the lid at a slight angle.
- Lightly squeeze the top of the latch to help it pop into place.
- Make sure the flat side faces outward, so the finger lip curves toward the box.
- While the latch will technically fit either way, this orientation provides the best comfort and clearance when opening or closing.
- Ammo Tray Installation
- Place the insert tray into the box and press firmly down on all four corners to lock the legs into place. You’ll know it’s fully seated when the top surface sits flush all the way around.
- Ammo Tray Removal
- Remove one round from a corner, then insert the end of a pencil (or similar tool) into the empty hole to gently pry the tray upward at an angle. Once it starts to lift, you can continue with the pencil or grab the exposed edges to fully remove the tray from the box.
NEW - Support & Commercial Use Memberships
Supporter and limited commercial license memberships are now available on Patreon @ (https://patreon.com/Layer51).
Boost Me (for free)
Like this model? Be sure to send a boost, so I can keep making more.
Thank you for the support.
License
You shall not share, sub-license, sell, rent, host, transfer, or distribute in any way the digital or 3D printed versions of this object, nor any other derivative work of this object in its digital or physical format (including - but not limited to - remixes of this object, and hosting on other digital platforms). The objects may not be used without permission in any way whatsoever in which you charge money, or collect fees.
Comment & Rating (87)