Breakwater Bronco Build for SCX24, Ascent18, TRX4M


Print Profile(1)
Description
Boost Me (for free)
Love contributing to the crawler community!
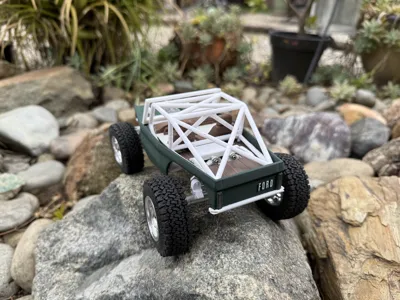
This is a "builders' kit so bear with me…lol.
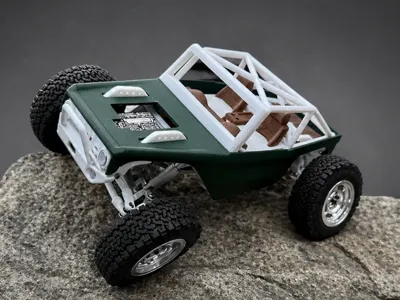
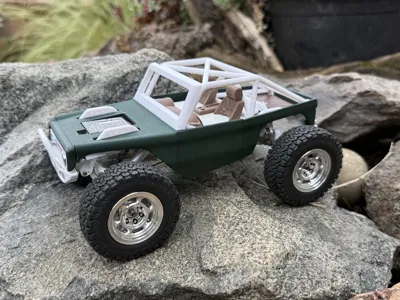
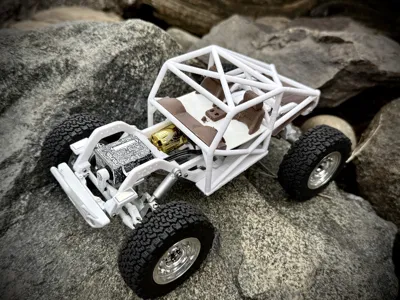
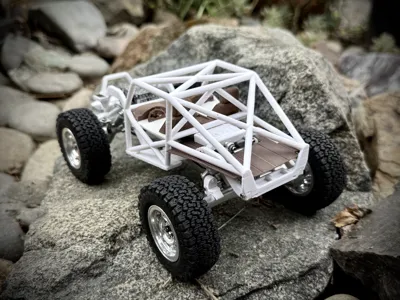
M2 screws used to attach skid, rails and tube chassis. M1.6 for rear chassis/rails attachment. M1.4 for the rest. I recommend drilling a hole larger than the screw size on the frame everywhere they pass through NOT WHERE THEY SCREW INTO (i.e. 1.5mm hole for M1.4 screw). Grille is screwed from inside but can glued if preferred. Bumper brackets attach via top hole with screw from inside going into frame rail and one from outside frame rail going through bracket into bumper mount. Third bracket hole rearward is for bumper mount locator post. Bumper bracket is for any scx24 bumper mount, if none is wanted, use a round brace to connect the frame rails. Used 8mm chrome panel indicator LEDs for headlights. Used 0402 LEDs (orange and red) for running lights and taillights. Install taillight housings with E6000, then drill hole big enough for wire, secure led, then glue on clear lens. Wire channel on tailgate to protect them along with centered and recessed place for resistor. Wire channels to run wires out of the way of harm located under hood (glue in place, I use 30ga wire) and behind grille. Pogo-pin connector used to supply power from chassis to body for easy body removal.
Magnets are 10x5x2mm, glue in. (I used super strong 7lb magnets from amazon)
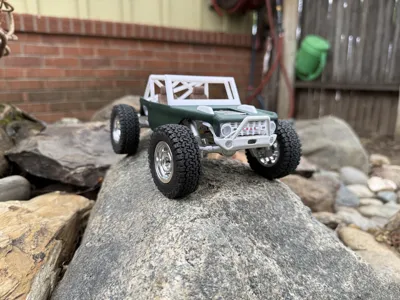
Windshield screws in from underneath, 3 center screws first then the 2 outside angled ones.
Used .5mm Lexan for windshield, trace with supplied window template.
Used CA glue for wipers and mirror.
Interior fits snug ("snaps" in) and will stay in place without glue once installed. It will probably need to be trimmed a little to fit your needs.
Wood bed is customizable by moving or deleting negative parts pre-slice.
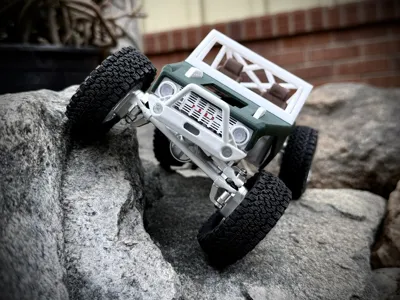
Upper links will need to be longer, almost the same length as the lowers. 2 Chassis and body options (1 for 3S lipo room), adjustable servo and shock cutouts pre-slice, (move negative shapes front to back to adjust shock hole position. Move grey pieces up/down and in/out to make flush to adjust for servo cutout position then change color to match.) (1 option with no servo cutout).
I'm sure I am forgetting something…lol.
Let me know if you have any questions or ideas for improvement!
Calicrawler/Unicorn Crawlers
Thanks to “Timmay!” for written permission to post this…very cool.
Definitely check out the OG Horse by him.
License
You shall not share, sub-license, sell, rent, host, transfer, or distribute in any way the digital or 3D printed versions of this object, nor any other derivative work of this object in its digital or physical format (including - but not limited to - remixes of this object, and hosting on other digital platforms). The objects may not be used without permission in any way whatsoever in which you charge money, or collect fees.
Comment & Rating (34)