King Slime | Dragon Quest


Print Profile(2)
Description
If you like my stuff and got a Boost, why not toss it my way? Every bit I get
helps me to do this full time.
Boost Me (for free)
Press this button to use a Boost Token to give me a free dollar!
And if you're interested in purchasing a Commercial License Membership, check it out here!
Membership
Click here to get the rights to sell prints of my models yourself!
Sorry for the interruption; on to the Meat and Potatoes!
Intro
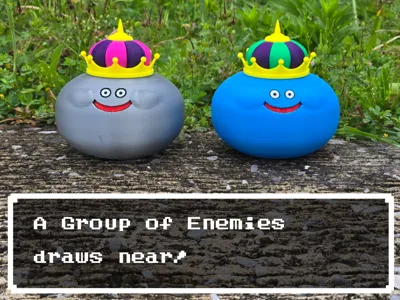
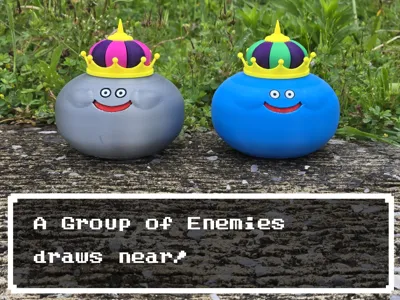
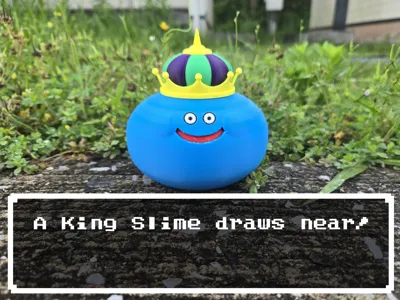
A King Slime draws near!
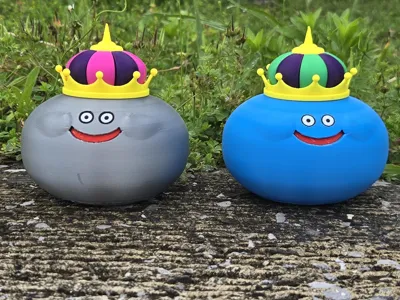
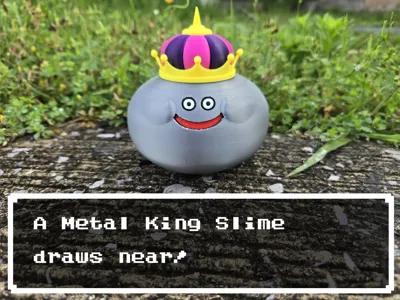
This is a faithful recreation of the King Slime from the Dragon Quest series, specifically based off of the one found in Dragon Quest XI. I’ve created a version for use by single-extruder printers as well as ones that can print in multicolor. Since Metal King Slimes look identical to regular King Slimes, you can print them out just by swapping the colors accordingly.
I personally have used the King Slime to show off the multicolor print, and the Metal King Slime to show off the single extruder print. Of course, you can swap the colors freely to print whatever monster you so choose–or if you’re interested, versions I didn’t print myself, like an orange King She-Slime or a green King Cureslime! Be sure to post photos if you do.
I would add, however, that in order to make sure the single-extruder version printed all the pieces properly, I did have to make the black ring around the eyes a little thicker than the AMS version.
If you’re interested in all the other slimes I’ve adapted (and potentially other DQ enemies in the future!), check out a collection of them here!
Parts List
Files:
- AMSKingSlime3mf - A 3mf designed for printers that can do multiple colors at the same time, colored after the original King Slime for the BambuLab A1 Mini
- AMSKingSlimeSTEP - A STEP file used in the above 3mf
- SingleExtruderKingSlime3mf - A 3mf designed for printers that can only do one color at a time, colored after the Metal King Slime for the BambuLab A1 Mini
- SingleExtruderKingSlimeSTEP - the STEP file used in the above 3mf
Filaments:
All filaments used are BambuLab Basic PLA.
- Jade White - Eye whites
- Black - Pupils
- Yellow - the gold trim and tip of the Crown (I wish I had Gold; the 3mfs include it)
- Red - Mouth
- Cyan - King Slime Body
- Silver - Metal Slime Body
- Bambu Green - green cloth parts of the King Slime Crown
- Indigo Purple - purple cloth parts of both Slimes’ Crowns
- Magenta - magenta parts of the Metal King Slime’s Crown
Printed Parts:
- King Slime
- Body (Cyan, Black, Jade White, Red) - needs support at the roof of the mouth
- Crownspikes (Gold)
- Crowntop (Gold)
- Purplefelt (Purple)
- Greenfelt (Bambu Green)
- Metal King Slime
- Body (Cyan) - needs support at the roof of the mouth and the eye sockets
- EyeWhites (Jade White)
- Pupils (Black)
- Mouth (Red)
- Crownspikes (Gold)
- Crowntop (Gold)
- Purplefelt (Purple)
- Greenfelt (Magenta)
Non-Printed Parts:
- glue
Assembly
Intro:
Assembly should be relatively simple; even on the AMS version I’ve separated out the Gold parts of the crown from the cloth parts and the body to make it as easy as possible to print and assemble. The fact that the supports on both versions have some internal parts can make them a pain to get out, but I’ve given the parts a decent amount of space between them to make sure everything fits together smoothly.
As I mentioned above, in order to make it printable with a 0.4 nozzle, I made the black rings around the single extruder’s eyes a bit thicker. As such, I personally recommend the AMS version if you have the ability to print it.
Instructions:
- Print out all pieces, and remove all supports. If you printed the AMS version, skip to step 5.
- Insert the Eye Whites into the Pupils, such that the Pupils both surround the outside and stab through the center of the Eye Whites. The notches on the sides of both of them should line up.
- Insert the Mouth into the Body, with the flat side facing inside. It shouldn’t be flush with the outside of the body; you need to push it farther in. As such, you may want to have some form of skinny tool that can push it in without damaging the part.
- Insert the Eyes into the Body, lining up the notches in the Eyes with the ones inside the Body.
- Put the Cloth part(s) of the Crown into the Crownspikes. If you have the single extruder version, they should be aligned so that they can only go where they’re supposed to, so don’t worry about putting them in the wrong way. The last part might be a tight fit, but don’t be afraid to push it in there. The AMS version has them all joined together, so you don’t need to worry about that.
- Glue the CrownTop in the top of the Crown assembly.
- Glue the Crown onto the top of the Body.
- Enjoy your completed King Slime!
Conclusion:
Thanks for reading to the end!
This was a fun little side project that I hope everyone will enjoy. Truth be told, the Slime series seems to be pretty popular, so I hope people will find this one to be as fun as the others!
If you have an idea for which Dragon Quest monster I should do next, lemme know!
And of course, please do post makes if you end up creating it.
Until next time!
Comment & Rating (2)