


Print Profile(3)
Bill of Materials


Description
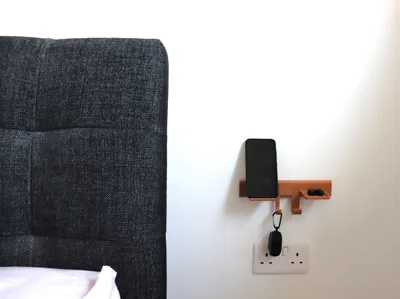
Engineered Modularity. Industrial Strength. Gallery Aesthetic.
Infinite Scale: From compact hooks to wall-to-wall installations, the system resizes to any custom length with seamless 10mm grid precision.
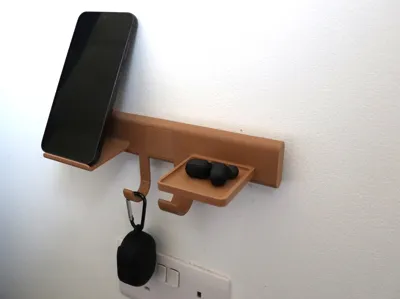
The Gallery Rail is a high-performance organization ecosystem designed to bridge the gap between industrial utility and modern home decor. Born from the mechanical logic of professional tool organizers, this system allows you to build a custom-length entryway "gallery" that is as strong as it is beautiful.
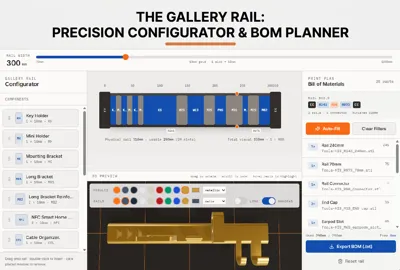
Design Your Perfect Setup!
Don’t guess—plan! I’ve built a custom Gallery Rail Configurator (https://thegalleryrail.lovable.app/ <only works on desktop>) to help you design your wall before you even hit “Print.”
How to use:
- Custom Widths: Enter your available wall space and the app will calculate the perfect combination of R07S, R14S, and R24S rails.
- Drag & Drop: Visually place hooks, shelves, and tech docks to see how they look.
- Zero-Waste Printing: The app automatically generates a Bill of Materials (BOM), telling you exactly which files and how many R00 Connectors you need.
- Auto-Fill Logic: Use the "Auto-Fill" button to perfectly calculate the Aesthetic Fillers needed to give your rail that gap-free, furniture-grade finish.
Experience your custom Gallery Rail before you hit print. Our 3D engine uses live data from the configurator to assemble a high-fidelity representation of your layout.

Key Design Pillars
1. Infinite Expansion with "Zero-Snag" Alignment
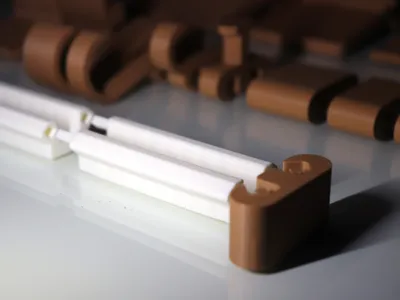
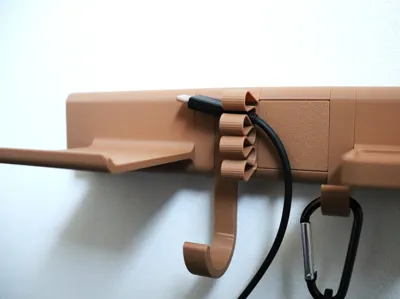
Forget fixed-size racks. The Gallery Rail features a precision-fit tongue-and-groove connection system enhanced by a dedicated Rail Alignment Connector.
- The Spline Connector: A precision-printed internal joiner that bridges the seam between rails. This ensures perfect X/Y alignment, allowing modules to glide effortlessly across joints without catching.
- Modular Segments: Print as many rail sections as you need to fit your specific wall dimensions.
- Hardware Compatibility: Designed specifically for Countersunk (CSK) screws. To ensure modules slide freely over mounting points:
- Max Head Diameter: 8mm
- Max Head Height: 3.5mm

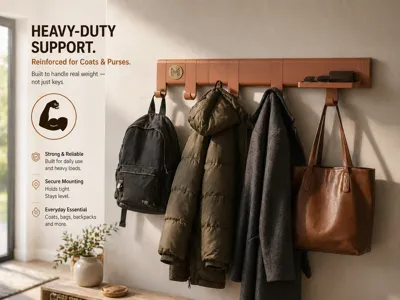
2. Maximum Shear Strength (Side-Print Optimization)
Every hook and attachment in this system is optimized for Side-Orientation Printing.
- The Grain Advantage: By printing on the side, the filament layer lines run parallel to the gravitational load. This eliminates the #1 cause of 3D-printed hook failure: layer-line shearing.
- Functional Integrity: Confidently hang heavy bags, winter coats, and bulky lanyard sets without worrying about the hooks snapping.
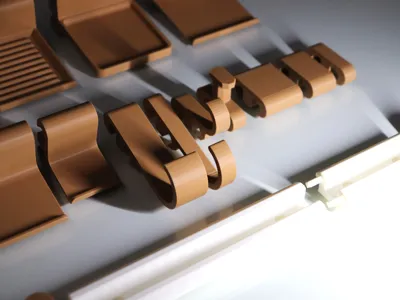
3. Curated Lifestyle Add-ons
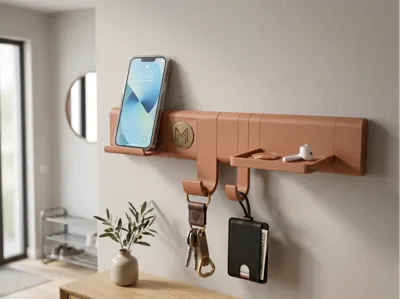
This isn't just a row of hooks; it is a "Valet Station" for the modern home:
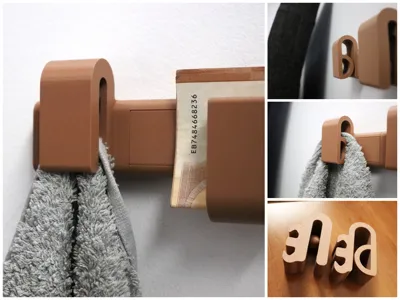
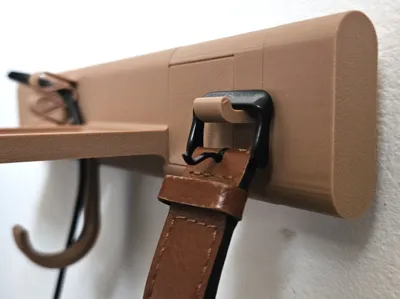
- The 'Docking Peg' (T-Hook): A minimalist interface for keyrings that feels like a precision dock.
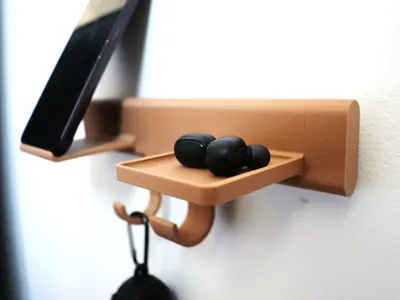
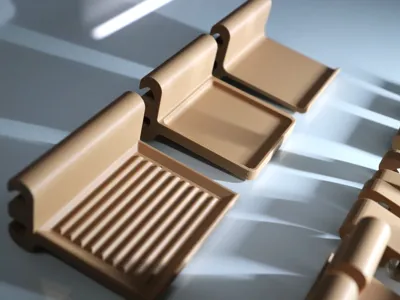
- The Wide-Strap Ledge: Features a radius curve to support delicate bag straps and textiles without creasing them.
- The Multi-Valet Tray: A consolidated ledge for wallets, and accessories.
- Smart NFC: A dedicated module with a hidden internal cavity for an NFC tag. Tap your phone as you grab your keys to trigger "Leave Home" or "Arrive Home" automations.
The Grid System: 10mm "Slot" Logic
The Gallery Rail operates on a standardized mathematical grid, making it incredibly easy to plan your layout and ensure a perfect fit every time.
- Standardized Unit: The system is divided into 10mm Slots.
- Logical Naming: * Rails: Named by slot count and total width (e.g., R07S_70mm is a 7-Slot rail).
- Modules: Named by the number of slots they occupy (e.g., M1S_Key_Holder occupies exactly 1 slot).
- The "5-Slot" Rule: To ensure a rock-solid assembly, the left and right connectors of each rail segment occupy 1 slot each. This means an R07S rail provides 5 usable slots (50mm of active mounting space) for your modules.
Why this matters:
This grid system allows for Infinite Combinations. Whether you need a 10-slot wide mail station or a 3-slot minimalist key dock, the math always lines up. Seams stay tight, and the aesthetic remains balanced.
How to Build Your Gallery:
- Measure your wall space in 10mm increments.
- Print the required number of rails and one Rail connectors for every seam.
- Mix & Match your modules (M1S, M2S, M3S) until your slot total matches your available rail space.
- Slide & Lock everything into place for a custom, professional finish.
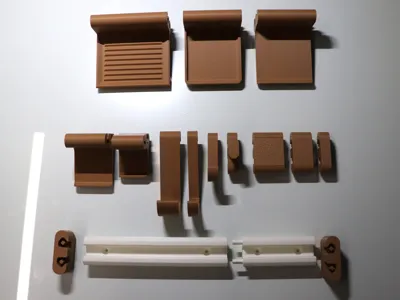
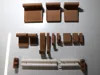
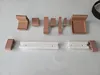
Component Directory
Check Gallery_Rail_BOM_List.pdf for full Build of Materials list
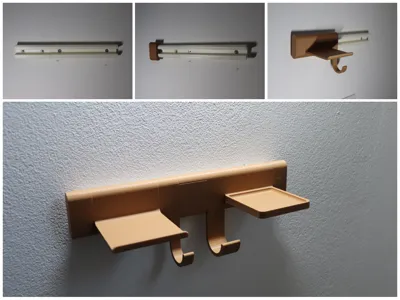
1. The Foundation (Rails & Connectors)
The skeletal system for your gallery. All rails are based on a 10mm modular grid.
2. Functional Modules & Heavy-Duty Hanging
Engineered for everything from tech to heavy outerwear.
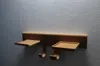
3. The Ledge Series (Strap & Item Support)
Wide-profile ledges optimized for bags, belts, or folders.
4. Smart Tech & Finishing Touches
Integrated automation and aesthetic gap management.
Pro Tip: Use the Aesthetic Fillers to occupy the exact number of empty slots between your functional modules. This hides the internal mounting rail and gives the system its signature "solid-piece" look.
Smart Tech Integration: The NFC Module
The Tools-HIS_M3S_NFC is more than just a placeholder; it’s the brain of your entryway. It consists of a Base that slides into the rail and a Snap-fit Cover that houses the tech.
Assembly Instructions
- Prepare the Tag: Take a standard 25mm NFC sticker or disc.
- Seat the Tag: Peel and stick (or drop) the NFC tag into the internal circular recessed slot of the NFC Cover.
- Join the Parts: Align the cover with the NFC Base and slide/snap it into place.
- Install: Slide the completed module into your Gallery Rail.
Simple Steps to Program Your Gallery Rail
You don’t need to be a coder to use this. You just need an app to "write" an instruction to the tag.
1. Get the App
- iPhone: Use the built-in Shortcuts app (Automation tab).
- Android: Download MacroDroid. It is one of the most powerful and user-friendly automation tools for Android.
2. Create an Automation (MacroDroid Workflow)
- Open MacroDroid and tap Add Macro.
- Trigger: Tap the (+) on the red Trigger bar and select NFC Tag.
- Scan: Tap "Write New Tag" and touch your phone to the Gallery Rail NFC module. Name it (e.g., "Entryway Dock").
- Action: Tap the (+) on the blue Actions bar and choose what you want to happen.
Documentation (2)
License
You shall not share, sub-license, sell, rent, host, transfer, or distribute in any way the digital or 3D printed versions of this object, nor any other derivative work of this object in its digital or physical format (including - but not limited to - remixes of this object, and hosting on other digital platforms). The objects may not be used without permission in any way whatsoever in which you charge money, or collect fees.
Comment & Rating (11)