Mini r1 body


Print Profile(1)
Description
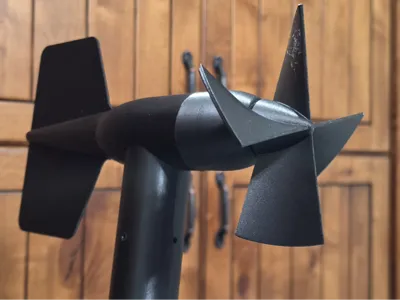
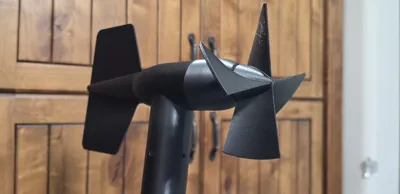
this is the newest anemometer I am making this is a prototype still if it has problems please tell me
this is a fully working 3d printed RM Young anemometer. to make it work wind 30awg enameled copper wire around the coil holder until it reaches the edge of the coil holder it should be wound evenly around the coil holder. for the propeller magnets use alternating north and south pole with the 5mm x 5mm x 5mm cube magnets
calibration formulas
prop 29.4 CAL=0.2192 X frequency HZ
18cm for low speed 0.179 X frequency HZ
14cm hd prop CAL=0.3726 X frequency HZ
18cm_prop CAL=0.224 X frequency HZ
13cm CAL=0.186 X frequency HZ
14cm_normal_prop=0.213 X frequency HZ
I made a tutorial video on it it will be on my Youtube @StormChasingwithMatthew1 https://youtu.be/3MJ4zv5NhVw?si=QCs0Uwpua84gH2QN
for the medium body anemometer print the nosecone with a weight of 51 grams and print the body with 3 wall loops with a infill pattern of rectilinear at 15% infill and no supports in the threads of the nosecone
for the long body print part 1 of it at 3 wall loops at 15% infill. print long body part 2 at 2 wall loops at 15% infill print long body part 3 TAIL_FOR_18cm_prop_rmy_15MM at 3 wall loops at 15% same for TAIL_FOR_18CM_PROP_1MM_THICK infill print long body part 4 at 100% infill
JOIN THE DISCORD https://discord.gg/Ypw3dtD9Hq FOR HELP. IF YOU JOIL PLEASE SAY THAT YOU CAME FROM THINGIVERSE
PARTS list
1/2in outer diameter 0.35in inner diameter hollow steel rod from hardware store 6003zz beaings 3/16in steal rod or 5mm for metric also from hardware store 5x8x2.5mm bearings for if using a metric 5mm rod or FR156ZZ Flanged Ball Bearing 3/16" x 5/16" x 1/8" if using 3/16in rod
5x8x2.5mm bearings https://a.co/d/1MscCF
FR156ZZ Flanged Ball Bearing 3/16" x 5/16" x 1/8" if using 3/16in rod https://a.co/d/0fjGRS7U
I made a tutorial video on it it will be on my Youtube @StormChasingwithMatthew1
for the Screan box you would use 2 4-Digit Digital Tube Display Module: The Driver Ic Is Tm1637 for the displays and a 12mm momentary push button
30 AWG Magnet Wire, 30 Gauge Enameled Copper Wire https://a.co/d/1WSCkNI
working code change the CAL to the calibration of your prop
... CHANGE-LOGv-0.07 added change logs and updated file names and STL files uploaded new photos.v-0.08 Updated the HOLDER_FOR_MAGNETIC_SENSOR.stl. and updated propeller_magnets_use_alternating_north_and_south_pole_with_the_5mm_x_5mm_x_5mm_cube_magnets.stl. for better lower wind speed measurements updated on Aug 31 2025V-0.09 fixed off center tail for the long body and fixed the post mount. added 18cm prop rmy prop added. updated dimensions for the long body "TAIL FOR 18cm prop rmy 1,5MM THICK PRINT AT 15%INFILL AND 3 WALLS.stl" this makes it balanced for the vane part of the sensor. updated on October 4 2025V-0.091 fixed HOLDER_FOR_MAGNETIC_SENSOR.stl because it was too large and might rub on the magnets for the propeller. updated on October 11 2025V-0.1 made a the anemometer fully working with windspeed and direction changed from 42awg wire to 30awg. added code to the description. October 12 2025V-0.11 added Screan box V-0.12 added anemometer black anti iceing 3/21/2026
License
You shall not share, sub-license, sell, rent, host, transfer, or distribute in any way the digital or 3D printed versions of this object, nor any other derivative work of this object in its digital or physical format (including - but not limited to - remixes of this object, and hosting on other digital platforms). The objects may not be used without permission in any way whatsoever in which you charge money, or collect fees.
Comment & Rating (7)