Mini Bonsai Garden Kit Card


Print Profile(2)
Bill of Materials


Description

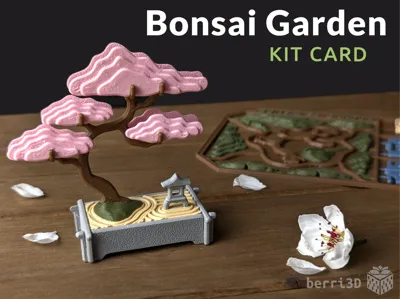
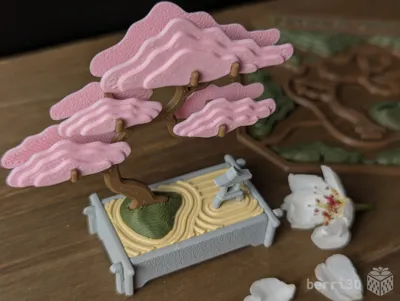
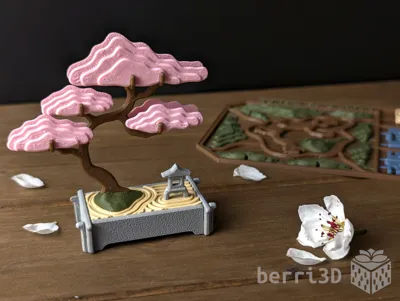
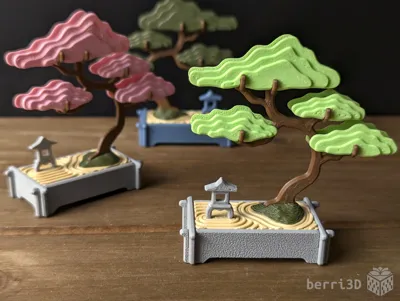
This kit card builds a miniature Bonsai garden complete with tray, raked sand, and a yukimi-dōrō (snow viewing stone lantern).
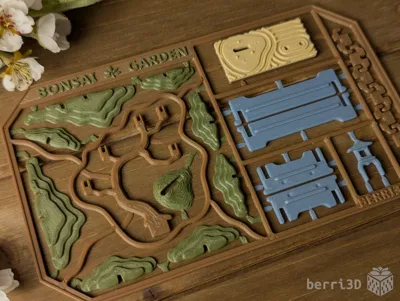
- Print with or without sprue (frame)
- Easy to assemble (no glue)
- Suitable for letter mail at less than 5mm thick (check restrictions)
- Printable assembly instructions
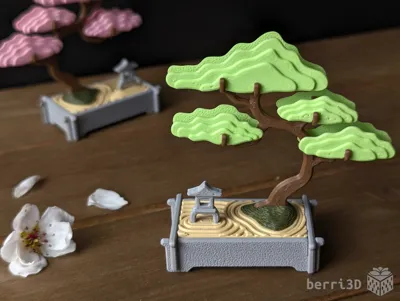
Although I designed this as a pine tree, it also looks enchanting in Sakura Pink or Apple Green. Both colours remind me of springtime here on Vancouver Island with our profusion of cherry blossoms and flowering bigleaf maples.


Table of Contents
Most people don't have problems with my models as I rigorously test everything I create. But for the few that do, having solutions and tips ready-to-go is quicker than waiting for me to answer ☺️
If you're already familiar with printing kit cards, you can skip most of the following (except Special Considerations) and go straight to section 2 for the assembly guide.
- Special Considerations – if you read nothing else, please read this section
- Assembly – diagrams and building tips
- Print Information – best practices, tips, process settings, filament recommendations
- Text Customization – how-to for those who haven't done it before
- About – design inspiration, commercial licensing, etc.
1. Special Considerations – please read before printing
- ⚠️ Small parts. Choking hazard. This is a miniature. It is not suitable for children.
- ⚠️ Flush cutters or sharp pointed scissors required. If you don't want to cut out parts, print the separate parts instead.
- ⚠️ Clean build plate required. Small details will get dragged if the plate isn't clean. Print profiles contain settings which will help adhesion but cannot perform miracles 😥. Please see this wiki article for correct plate washing procedure.
- ⚠️Important: Matte PLA isn't suitable for the trunk and the clips as it's softer than Basic PLA. Testing showed that that these parts were prone to bending out of shape during assembly whereas the same pieces printed in regular PLA held up much better.
- A delicate touch is required to build this kit card as it's quite small and the parts may break or bend with too much force applied.
- Textured build plate recommended when printing kit cards. The sprue points are fragile and can break upon removal from a high-tack plate such as smooth PEI or some of the newer “blue” plates.
2. Assembly
General Tips
|
Assembly Guide is also available as a downloadable paper-printer ready PDF. See the Documentation section below.
⚠️ Be sure to support the bottom of the branches with your thumb while sliding on the clips and boughs. Too much pressure may cause them to break or deform.

3. Print Information
🎨 Suggested Filaments
For best results, I recommend basic PLA (not silk or matte) for all parts except for the boughs, rock, and sand. Matte filaments produce “softer” parts which may deform or bend where they shouldn't. Silk filament can be brittle or have fit issues.
I’ve tested this model extensively using the following filaments. Test prints were made using calibrated and non-calibrated (default) profiles on a Bambu X1C and were found to have a good fit between parts. Your results may differ due to filament colour/type/brand, and printer.
| Brand | Type | Colour(s) |
| Bambu | PLA Basic |
|
| Bambu | PLA Matte |
|
🖨️ Print Process Settings
Models were prototyped on a Bambu X1C with a 0.4mm nozzle. These are the process settings I used and which are contained as part of the print profiles. Please note that changing layer height, using a smaller nozzle, or scaling models up may result in poor print quality such as parts not fitting together.
| Setting | Value | Reason |
|---|---|---|
| Layer height | 0.2 | Part fit was designed with this value. |
| Wall generator | Classic | Prototyped with this generator. Changing to Arachne may make parts not fit. |
| Wall order (first layer modifier only) | outer/inner | Printing the outer wall first gives any tiny inner walls something to stick to. Only applied to the first layer as it's inadvisable to use for the entire model. |
| Only one wall on top surfaces | Not Applied | Results in a nicer top surface to the parts. |
| Elephant Foot Compensation | 0 (off) | Chamfers have already been applied to the parts. This setting shrinks the first layer too much on top of the chamfers so it should be off. |
| Seam position | Default/Painted | Manually painted to avoid areas where a seam would weaken the part. Overriding this placement will result in parts more likely to bend or break. |
| Wall loops | 3 | Increases strength. Decreasing may result in parts not fitting or breaking. |
| Sparse infill density/type | 10% / gyroid | As this isn't a weight-bearing model, less infill results in faster printing. |
| Object flow ratio (applied to the “flourish” on the text panel only) | 0.9 | Small detail requires less material to avoid looking blobby |
| Top Surface Pattern (trunk and sand only) | Concentric | Results in a more pleasing top surface for these parts |
| Initial layer speed | 20 mm/s | Slower speed allows complicated first layers enough time to cool and adhere. |
| Initial layer infill speed | 50 mm/s | Slower speed allows complicated first layers enough time to cool and adhere. |
| Outer wall speed | 100 mm/s | Slower outer wall speed is better for overhangs and overall surface quality. You can increase this speed but the quality may not be as nice. |
| Fuzzy Skin (rock only) | Default | This adds a nice bumpy texture. |
📏 Adjusting Fit of Build Cards
How well a build card fits together depends heavily on your machine, filament brand, and filament type/colour. I do my best to make models that assemble smoothly across a range of filaments, but as there are too many variables to account for, tuning by the end user (that's you) may be required.
- Multicolour kit cards → Adjust flow rate up or down.
- Separate parts → two methods depending on which part isn't fitting. If everything is too tight, use contour compensation. If one type of part fits but another doesn't, use either:
- Parts that slide together (sides) → change X-Y contour compensation by ± 0.03; OR
- Parts that insert into holes → change X-Y hole compensation of the part with the hole by ± 0.03
Note: these values are guidelines only and may need further tweaking.

4. Customizable Text
The text on this kit card can be changed within Studio. Make your own greeting or even translate it into a different language! You will need to download it into Bambu Studio (not Handy) to change it there. If you've never done it before, this video is a good all-round primer on how to do it. Just remember to check the Preview tab to see how the sliced font looks. If it doesn't look good on-screen, it won't print any better 😥
Note: the leaf decoration on the text plate can be deleted or moved around. You can find it in the Object browsing window just under the custome text field.

5. About
While this model might appear to be “just” a kit card, it was heavily inspired by the fusion of cultures. As a child of multiculturalism myself, it felt fitting to create something with roots in more than one world.
Bonsai itself is the result of cultural exchange between China and Japan, dating back to at least the 6th century, when travelers brought miniature landscapes known as penjing from the mainland. Penjing is the ancient Chinese art of arranging trees, plants, and structures in miniature, and it predates bonsai by several centuries.
After exploring both traditions, I chose elements from each to create my own interpretation. In particular, I was drawn to shuihan penjing, or “water-and-land penjing,” which combines trees, rocks, figurines, and water into one cohesive landscape where the more you look, the more you see.
Tree and form
- The tree is inspired by the craggy coastal pines that dot the coasts of my home on Vancouver Island. An informal upright (moyogi) style felt like the best way to capture their wind battered and salt-lashed character.
Rock and moss
- Here in the Pacific Northwest of Canada, we have over 800 varieties of moss which thrive in our humid coastal rainforests. Moss is everywhere and no garden, lawn, or shaded rock is without it. As many bonsai also feature carpets of moss, it seemed fitting to include it.
Sand as water
- Shuihan penjing often incorporates water. As water and PLA don’t mix particularly well, I chose to represent it using a sand pattern inspired by karesansui (Japanese dry gardens). In such gardens, gravel or sand is raked to resemble the ripples of water.
Lantern
- The lantern is based on a Japanese yukimi-dōrō (“snow-viewing lantern”), These lanterns are low and wide, designed to collect snow on their tops, and are traditionally placed near water so its reflection can be enjoyed. I have a similar lantern in my own garden. Though mine would be more of a “rain” lantern here in the wet pacific!
The result is less a traditional bonsai (a single tree in a tray) and more a miniature landscape layered with cultural meaning and personal connection. Like shuihan penjing, there is more to it than at first glance.

🥰 How to Support me
If you appreciate the work I did to bring this model to you, please consider supporting me on Ko-fi. Even a small tip will help offset the cost of prototyping filaments. Alternatively, a like or a boost is another easy way to say “hey, you don't entirely suck.”

⭐ Licensing
If you wish to sell my models, you may purchase licensing rights through my official Ko-fi page.
This model is shared using my own Personal-Use License which supplements (but does not replace) MakerWorld’s Standard Digital License. My license is fundamentally the same (no public remixes, no file sharing, no selling) but includes specific exceptions and allowances not covered by the Standard Digital License.
Licenses offered through third-party websites (e.g. Cubee3D) are not authorized and are not valid.
Boost Me (for free)
🚀= 💪🐹 👍 = 🦵🐹 My models are created on a smoking hot Compy386 powered by Hunrod the Unusually Swole Hamster™. Every boost and like makes Hunrod stronger.
Documentation (1)
License
You shall not share, sub-license, sell, rent, host, transfer, or distribute in any way the digital or 3D printed versions of this object, nor any other derivative work of this object in its digital or physical format (including - but not limited to - remixes of this object, and hosting on other digital platforms). The objects may not be used without permission in any way whatsoever in which you charge money, or collect fees.
Comment & Rating (7)