Skadis Direct-Feed Spool Holder


Print Profile(6)


Bill of Materials


Description
Boost Me (for free)
If this model helped you, please support my work by giving me a boost. Thank you!
Hello everyone!
If you’ve been printing with extremely soft flexible filaments like TPU 90A, you might have run into under-extrusion issues or tangles when trying to pull it through multi-material systems like the AMS HT. The best solution for printing soft TPU is to eliminate as much friction as possible by mounting the filament directly above the printer.
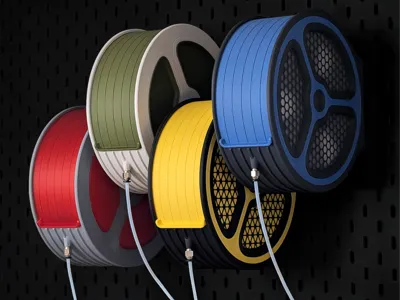
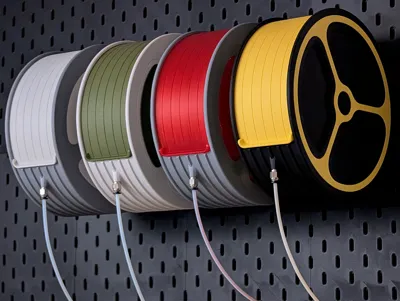
Introducing the Skadis Direct-Feed Spool Holder
Friction Free Feeding for TPU Prints
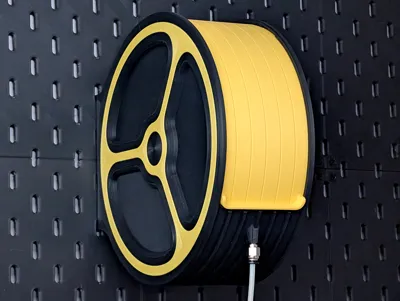
This dispenser mounts securely to your IKEA Skadis board right above your machine, allowing the filament to feed straight down to the extruder for the smoothest possible path.
Key Features:
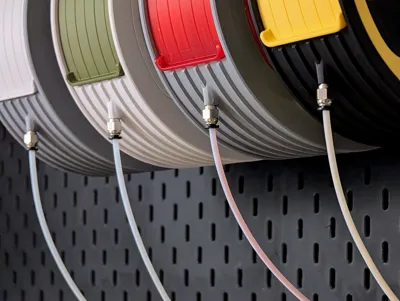
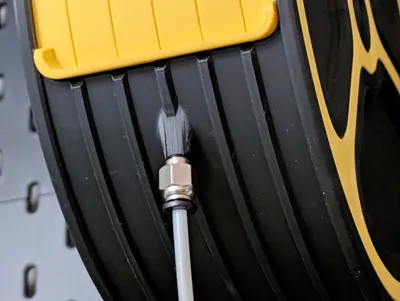
- Direct PTFE Path: The bottom of the housing features a threaded port for a standard pneumatic fitting, allowing you to run a PTFE tube directly to your toolhead.
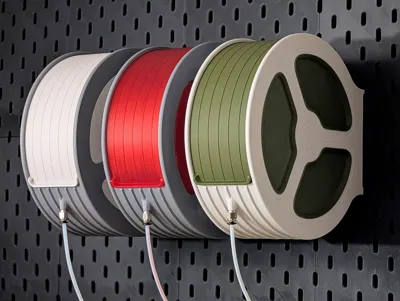
- Spool Rollers (Bambu & Sunlu): The included bearing-based rollers fit perfectly into the centre hubs of standard Bambu Lab and the new Sunlu spools. (Use the customisation tool to generate some for other spool sizes)
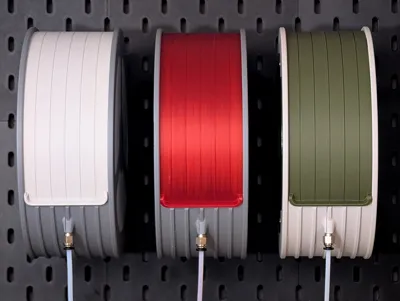
- Modular Two-Tone Aesthetic: Customise the press-fit side panels to colour-coordinate your workshop.
Printing Profile & Specs
I have optimised the print profile to ensure the locking mechanisms and overhangs print cleanly.
- Material: Sunlu PLA+ is recommended for the main body for that extra durability and dimensional accuracy.
- Print Time: Approximately 12 hours to print all components.
- Layer Height: 0.2mm (default).
- Speed Settings: * Inner and Outer Walls: 150 mm/s.
- First Layer: Slowed down to 50 mm/s using a concentric initial layer pattern for a clean, reliable base.
- Overhangs: Slowed down to 20 mm/s to ensure part prints perfectly without sagging.
- Supports: Almost entirely support-free! You will only need to enable supports for one small section on the lid.
Assembly Instructions
Assemble the Main Body: The main housing is printed in two separate halves. to connect them, align the slot and groove on the rims, then carefully rotate the top half into place until it locks securely into the bottom half, if it starts to bind up check it isn't misaligned. You can use a little force at the end but the rest should be done with a slow constant motion.


Side Panels: align the side panels to the cut-outs of the main body and press them firmly until they click into place. The lip should be flush to the main body.

Install the Lid & Hardware: Feed the lid through the slot until it snaps in place then screw your pneumatic fitting directly into the bottom port.


Prep Your Spool: Insert the printed roller hubs (with bearings installed) into both sides of your filament spool.

Attach optional Filament clip, which doubles as a handle for easier spool removal

Mount & Feed: Hook the empty housing onto your Skadis board, drop in your prepped spool, and feed the filament down through the PTFE tube!


I'm continuously upgrading my home and workspace, so please follow @moss3d for new uploads.
_______________________________________________________________
IKEA SKADIS CUSTOMISERS


License
You may create derivative works based on this object, provided that all such derivative works are published exclusively on the MakerWorld platform and include proper attribution to the original creator. You may not share, upload, host, distribute, or publish this object—or any derivative work of this object—on any other digital platform, marketplace, or distribution channel. Commercial use of this object and any derivative works is strictly prohibited. This includes, but is not limited to, selling, renting, sublicensing, or using the object in any context in which you receive monetary compensation or other financial benefits.
Comment & Rating (131)