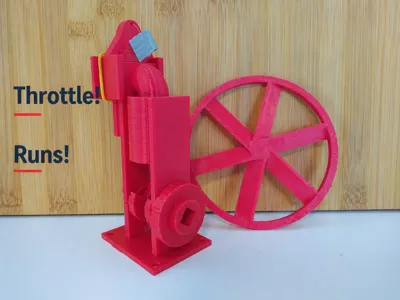
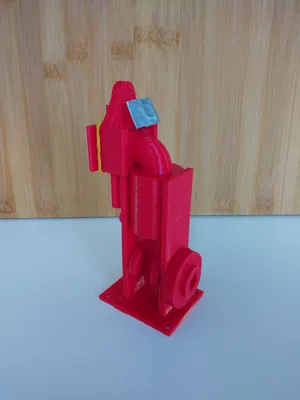
Small Vacuum/Air powered engine V3 + Throttle


Print Profile(5)
Bill of Materials

Description
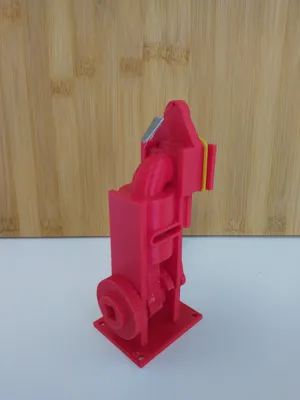
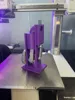
This here is my third iteration of my single cylinder vacuum powered engine! Whether it is just to play around with, or to show to someone, this is a great model to show how these little vacuum engines work! Maybe you personally could even learn something too from building it, physically holding it, and running it. Assembly video is at the bottom of the description. NOTE: The first four groups that are numbered, are all the parts for this engine, the rest are just split up, incase you need the separate files.
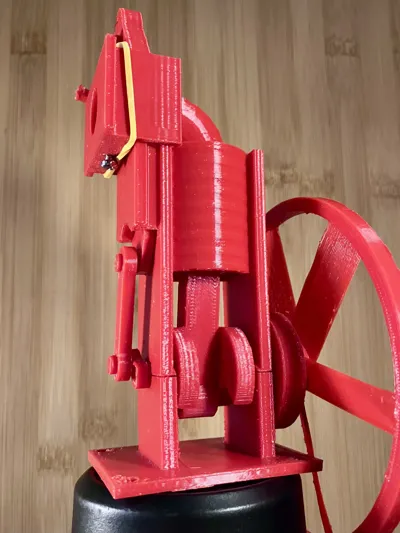
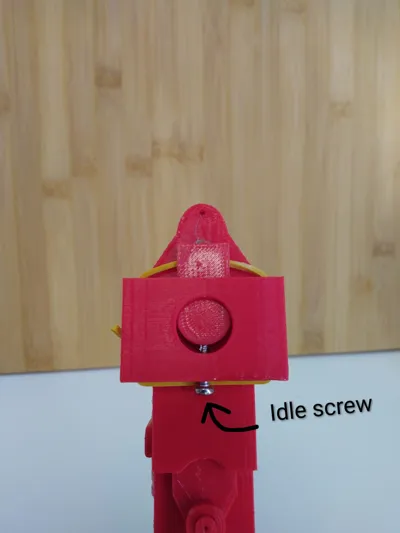
Other than the printed parts, you also need: A small fishing wire, a rubber band, a 1cm screw(~3.5mm wide) for idle
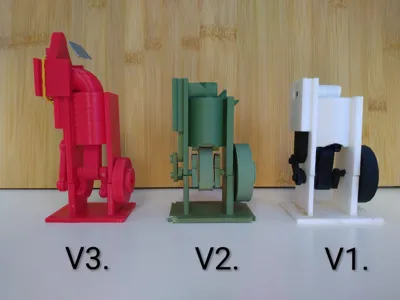
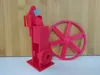
This is the V3 version, which now includes:
- Most importantly, a throttle configuration! This throttle consists of a basic, but reliable pull cord mechanism, where the user must pull a small handle to rev the engine! It also includes an adjustable idle screw to help the individual user tune to their liking(Note, engine can be ran without the use of the throttle assembly)
- Even better design quality, improving alignment of many parts
- Single port(if chosen to print)
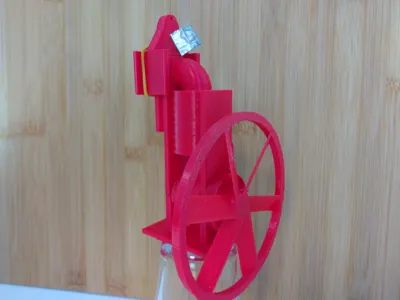
- A larger fan, which serves for a smoother running, and moves more air!
- Better and smoother airflow for the engines own intake, that curved pipe is now slightly wider, helping it breath with every revolution of the engine.
Tips and tricks for assembling and running this engine:
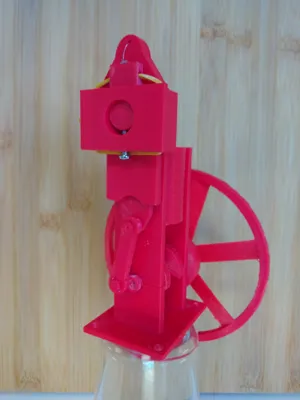
- Use something to seal in between the engines intake, and your vacuum, to prevent leaks, help hold the engine in place, and give the best possible performance. I would 100% recommend something like a legoh tire on the pipe of your vacuum
- Play around with any sort of lubrication(while making sure it doesn't get inside your vacuum as you might break it), I personally like soap, as it is easy to wash off, and doesn't immediately flow away. Put if you want actual oil, I would recommend thick grease, so you dont get your entire model oily as you would with regular oil.
- Most filaments should work for this model, except TPU (; I used some PETG, because my printed does well with it.
- Always with these models, you should find a way to break them in before you try starting, whether that means a little bit of sanding on moving parts, or just spinning the engine over by hand to help it out.
- Look for 1.5mm+ walls, bottom/top also. And 30%+ infill, play around with what you think is right.
- When inserting the idle screw, you should definitely consider carefully heating it up, like with a small hand lighter, right before screwing it in to prevent possibly cracking the plastics
- Feel free to glue the little tabs together when assembling the engine if they seem loose.
Boost Me (for free)
Big thanks to everyone who downloads these models, even that alone means a lot! Boosts are always a great surprise, and I really appreciate them!
Assembly video:
License
You shall not share, sub-license, sell, rent, host, transfer, or distribute in any way the digital or 3D printed versions of this object, nor any other derivative work of this object in its digital or physical format (including - but not limited to - remixes of this object, and hosting on other digital platforms). The objects may not be used without permission in any way whatsoever in which you charge money, or collect fees.
Comment & Rating (55)