Lightweight Foldable DnD DM Screen


Print Profile(4)

Bill of Materials
- 1.5x4mm button magnets x 64: Less can be used if not all slots are occupied, or if less than 4 panels are used
- Super Glue x 1: Used for magnets
Description
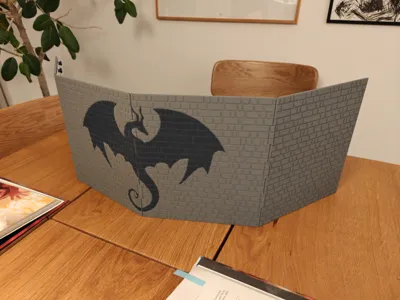
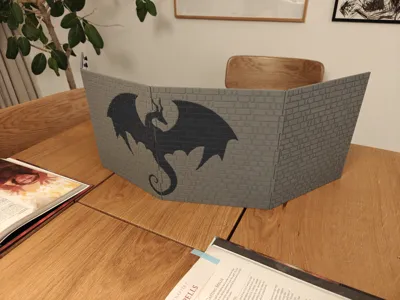
Lightweight Foldable DM Screen - Medieval Stone Wall with Dragon Motif
A lightweight, low-filament DM screen that folds completely flat for easy storage and transport. Designed for Dungeon Masters who want a sturdy, good-looking screen without burning through an entire spool of filament.

Why This Screen?
Most 3D-printed DM screens I found on MakerWorld either used a huge amount of filament, took forever to print, or required a tablet insert. I wanted something different — a screen that's light enough to toss in a bag, durable enough to survive game night, and folds flat so it doesn't take up shelf space between sessions.
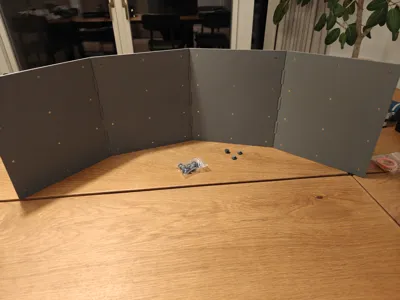
The full four-panel setup with the dragon motif uses only ~541g of filament. No screws, no special hardware — just printed parts, short lengths of 1.75mm filament as hinge pins, and optionally some small magnets.
Features
- Folds completely flat — all panels collapse into a neat stack for storage and transport
- Modular width — print just two side panels for a compact setup, or add as many center panels as you want for a wider screen
- Medieval stone wall texture on the front face
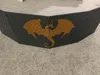
- Dragon motif version (AMS/multi-color) or blank version included
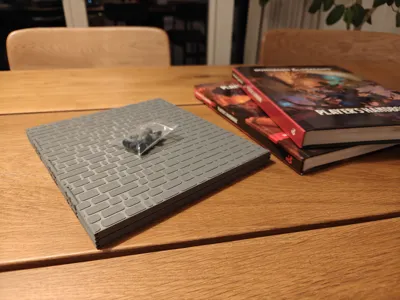
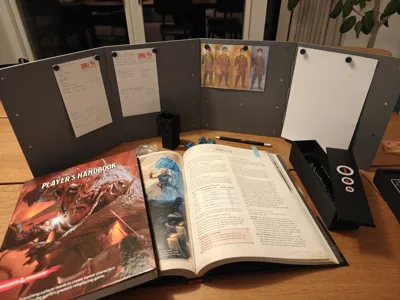
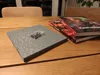
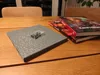
- Magnetic note system — each panel has slots on the back for up to 12 button magnets (1.5×4mm), with matching printed magnetic pins to attach notes, character art, or reference sheets to the inside of the screen
- No screws required — panels connect using printed hinge connectors and 1.75mm filament pins, secured with a drop of super glue
- Low filament usage — ~541g for the full four-panel dragon version
What's Included
- Left and right side panels (blank and dragon motif versions)
- Center panel(s) (blank and dragon motif versions)
- Hinge connectors — top, middle, and bottom variants
- Special dragon motif connectors for the top and middle positions between illustrated panels
- Magnetic pin caps and cylinders
Print Settings
- Material: PLA
- Layer height: 0.2mm
- Nozzle size: 0.4mm
- Supports: No supports are neede
- Infill: 15%
- Estimated print time: ~17 hours for the full four-panel dragon motif version
- AMS/Multi-color: Required for the dragon motif version; not needed for the blank version
Assembly
Panel Hinges
There are three connector types: top, middle, and bottom. Place the appropriate connector between each pair of panels, then thread a single length of raw 1.75mm filament through the entire section — passing through both panels and all three connectors in one continuous run. This filament acts as the central hinge axis. Trim flush at both ends and secure with a small drop of super glue at each opening.
For the dragon motif version, two special connectors are used at the top and middle positions between the panels that carry the dragon artwork.


Magnets (Optional)
Insert 1.5×4mm button magnets into the slots on the back of each panel. Important: all magnets within a single panel should face the same direction. The adjacent panel should have all its magnets flipped (opposite polarity), alternating from panel to panel. This ensures the panels stack and fold neatly without repelling each other.

Magnetic Pins
Drop a 1.5×4mm magnet into the printed pin cylinder, then glue the lid on with super glue. Use a small amount of glue and avoid letting the magnet contact the glue directly while it dries. The magnet inside the pin is intentionally left loose (not glued to the bottom), so it can freely flip to match whichever polarity the panel beneath it has. This means every pin works on every panel — no need to keep track of which pins go where.

Tips
- PETG filament is preferred for the central axis for the hinges, since it's slightly more flexible, but PLA works fine too
- When gluing the central axis in place at the top and bottom, just a tiny drop at each end is enough — you want it fixed in place, not glued shut
- The magnetic pins work great for attaching notes, quick-reference sheets, character art, or small maps to the DM side of the screen
- Want a narrower screen? Use a single central panel, or skip the center panels entirely and just use the two side pieces. Want it wider? Print extra center panels and connectors
License
You may create derivative works based on this object, provided that all such derivative works are published exclusively on the MakerWorld platform and include proper attribution to the original creator. You may not share, upload, host, distribute, or publish this object—or any derivative work of this object—on any other digital platform, marketplace, or distribution channel. Commercial use of this object and any derivative works is strictly prohibited. This includes, but is not limited to, selling, renting, sublicensing, or using the object in any context in which you receive monetary compensation or other financial benefits.
Comment & Rating (29)