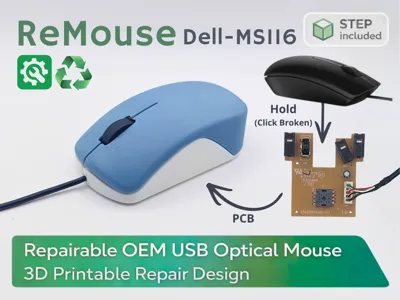
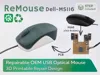
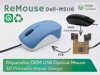
ReMouse Dell MS116


Print Profile(2)
Description
Boost Me (for free)
Thank you so much for your boost! Your downloads and boosts allow me to keep offering my models for free. Your support means a lot to me and helps me create even more. 🙏
🖱️ ReMouse MS116 – Repairable OEM USB Optical Mouse

ReMouse Project is a 3D-printable replacement shell designed to repair OEM USB optical mice instead of throwing them away.
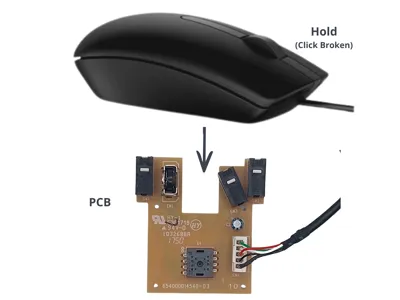
In schools and shared environments, mouse buttons often fail while the internal electronics are still fully functional.
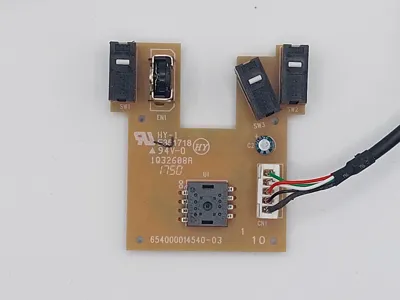
This project allows you to reuse the original PCB, USB cable, scroll wheel, and screws, replacing only the broken plastic shell.
The design is intentionally simple, robust, and efficient, focused on repairability, durability, and future adaptability.
Why ReMouse

Most OEM mice are discarded due to simple mechanical failures, usually broken click buttons, while the internal PCB still works perfectly.
ReMouse Project aims to:
- extend the lifespan of everyday electronic devices,
- reduce electronic waste,
- promote a repair-first mindset instead of replacement.
This project fits naturally into eco-responsible practices, educational workshops, repair cafés, fablabs, and schools.
The manufacturing of a standard office mouse represents around 3 kgCO₂e, according to estimates based on the ADEME carbon database. (source)

| Repair cost | Based on the sliced parts shown here (65.99 g of filament and 3 h 42 min of print time), the estimated repair cost is about €1.86, using Bambu Lab PLA Basic and the current French regulated electricity price.
Total estimated repair cost: €1.86 (excluding machine wear). | ||||||||||||
| CO₂e | Based on 65.99 g of PLA and 3 h 42 min of printing, the estimated carbon footprint of this repair is about 200 gCO₂e. This estimate combines a generic virgin PLA footprint of 2.02 kgCO₂e/kg with a measured average Bambu print power of about 87 W and an electricity carbon intensity of 226.4 gCO₂/kWh. Compared to a new Dell MS116 estimated at 2.57 kgCO₂e, this repair can avoid roughly 2.4 kgCO₂e. | ||||||||||||
Project Impact Summary
| |||||||||||||
Beyond repair, ReMouse also gives a second life with a bit of personality.
- The shell color can be freely chosen, allowing you to add some visual “pep” to an otherwise generic OEM mouse.
- Ideal for color coding, classroom identification, or simply making repaired devices look fresh again.
The overall shape remains minimal and ergonomic, focusing on comfort and efficiency rather than unnecessary complexity.
STEP File Included (Design Modifications Allowed)
The STEP file is included to allow:

- design customization and modification,
- adaptation to other OEM mouse variants,
- educational or technical use (analysis, improvement, demonstrations).
The STEP file is provided to encourage learning, experimentation, and improvement, especially for teachers, makers, and fablabs.
⚠️ If you publish a remix, please make sure to strictly respect the license associated with this model, including:
- derivative works must be published exclusively on MakerWorld,
- no commercial use,
- no independent redistribution of the model or its derivatives.
(see license settings above)
Dell MS116 PCB Compatibility

Assembly
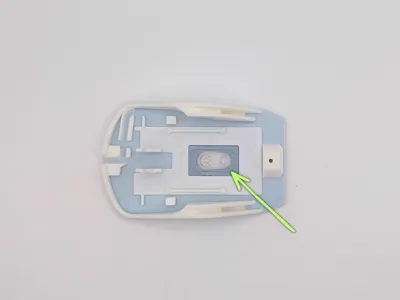
Step 1 — Install the optical sensor lensPlace the optical sensor lens into the designated slot in the mouse base. ⚠️ Important: the lens has an orientation. |  |
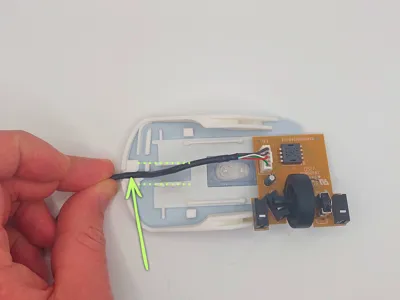
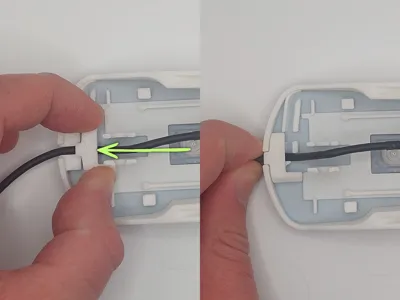
Step 2 — Route the USB cableInsert the USB cable into the guide located at the front of the mouse base. |  |
Step 3 — Install the cable clampInsert the cable clamp from the top of the mouse base. |  |
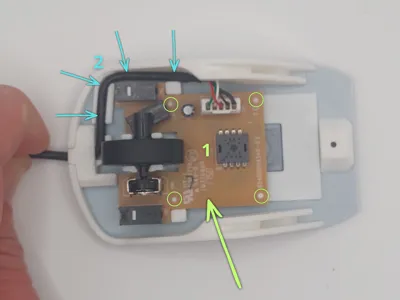
Step 4 — Install the PCB and position the cableRemove the cable from between the scroll wheel supports. Install the PCB onto the four mounting posts (circled in green) provided for this purpose. Once the PCB is in place, insert the cable into the base guide along its entire length, as shown in the image (blue arrows). |  |
Step 5 — Install the top coverPlace the top cover of the mouse as indicated by the green arrow. Then push the shell in the direction indicated by the blue arrow until it snaps into place (click). |  |
Step 6 — Secure the baseTighten the original MS116 mouse screw into the designated hole, as shown in the image. |  |
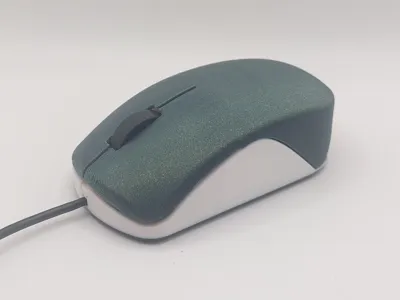
Your ReMouse MS116 is now assembled and ready to use. Thanks to this 3D printable repair design, you can repair and extend the life of your Dell MS116 mouse instead of replacing it. |  |
Available versions
 Remouse Dell MS116 |  |
Discover my other models


License
You may create derivative works based on this object, provided that all such derivative works are published exclusively on the MakerWorld platform and include proper attribution to the original creator. You may not share, upload, host, distribute, or publish this object—or any derivative work of this object—on any other digital platform, marketplace, or distribution channel. Commercial use of this object and any derivative works is strictly prohibited. This includes, but is not limited to, selling, renting, sublicensing, or using the object in any context in which you receive monetary compensation or other financial benefits.
Comment & Rating (4)