Sharpener: Chisels, Planes, and Drill Bits


Print Profile(1)
Description
Boost Me (for free)
If you find my work useful please give it a boost! It really helps me to afford prototyping.
This is a sharpening system for chisels, plane blades, and drill bits. I got the idea from the YouTube video below (not mine) and decided to make a printable version that will also do drill bits. The video will show you how it's used and the importance of using the right sandpaper. The sharpening guide has labeled guides for chisel and plane blades at 25° and 30°. It also has guides for 118° and 135° drill bits.
Needed Materials:
- Drill press
- 3M Cubitron II Stikit Film Disc 80+ to 220+ (not an affiliate link unfortunately)
- Any suitable stropping material
- leather
- canvas
- denim
- nanofiber cloth (lens cloth)
- even paper can work
- magazine pages and newspaper are common makeshift strops
- Glue (superglue works well)
- Stropping compound
- Easy to find on amazon or a hardware store
Printing:
- Smooth plate strongly recommended for best sharpening results
- PLA works fine
- It's cost, stiffness, accuracy, and resistance to warping while printing make it ideal
- The only downside to PLA of this application is heat so be careful of heat buildup when sharpening
- Print the chuck fit test first to make sure the sharpeners will fit in your drill press chuck
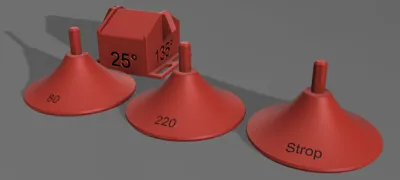
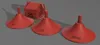
- Print the 3 sharpeners and guide
Usage Notes:
Setup:
- I highly recommend watching the YouTube video above (not mine) as it will help you know how to use the system
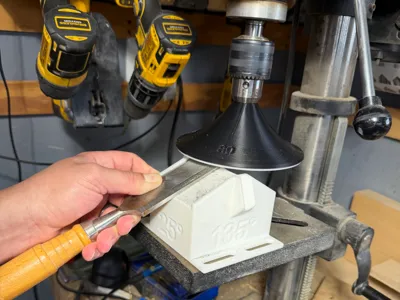
- Stick your 80 grit and 220 grit sandpapers to the “80” and “220” sharpeners and glue your stropping material to the sharpener marked “Strop”
- Critical: Check that your drill press deck is perpendicular to the chuck
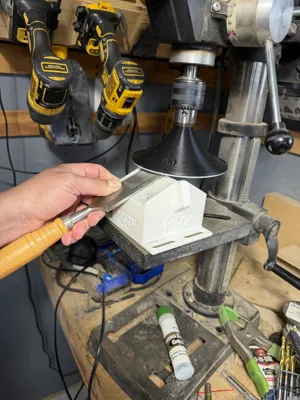
- Fully seat the sharpener into the chuck so that the chuck housing is in contact with the flat on the top of the sharpener's cone
- This helps minimize flex in the plastic and ensure a consistent angle
- Do not overtighten the chuck
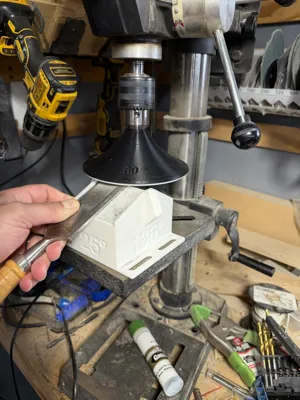
- Check which angle guide to use by placing your blade on the guide and pushing it to the sharpening surface while the drill press is off and see which is closest
- Most chisel and plane blades are 25° but some plane blades are 30° or 32°.
- Most drill bits are 118° but some are 135°
- Start with a cheap chisel until you get the hang of it
- Generally you will do the 80 grit first, then the 220, then the strop
- Sand perpendicular to the handle
- Strop away from the handle (very important for safety)
Profiling:
- If it's your first time sharpening a particular blade with any system, do the flat side first before sharpening the bevel
- If the flat isn't truly flat you will never get good results with any system
- No guide needed for the flat side, just put the flat of the blade flat to the sharpening surface
- It doesn't take long, you just have to do it until you see consistent sanding marks near the edge and then move to the next grit
- no need to strop for this
- If it's your first time sharpening a particular blade with this system or if the blade is really damaged, it's called profiling the blade and it will take a bit longer (maybe 3 mins at 80 grit, then normal time for the 220 and strop)
- Consistency is key, just keep sanding until you see a consistent bevel
- Use light pressure when sanding and monitor the blade for heat buildup
- Because this may take a few minutes, you need to make sure the blade doesn't get hot enough to deform your guide
- You can dip the blade in water periodically to cool it off quickly, just make sure to dry it after
- If you use too much pressure
- More deformation in the sharpener which makes for an inconsistent edge
- More heat which is bad for the plastic guide at moderately high temps and the edge at even higher temp
- You will do the 80 grit first, then the 220, then the strop
Honing:
- If you have sharpened a particular blade with this system before and it's just dull, not damaged, then it's called honing and you should be done with the entire process in less than 2 minutes
- If you're just doing a honing job, heat is not going to be a problem
- Again, consistency is the key
Stropping:
- Apply stropping compound to the strop
- Reminder: Strop away from the handle (very important for safety)
- Don't use the guide to strop.
- Just put the bevel flat to the strop for a short time for maybe 10 seconds
- Then tip the chisel ever so slightly to a deeper angle for another handful of seconds
- We are just polishing the edge
- If it look smooth your done, if not, repeat
- Stropping generates the most heat so be careful not to burn yourself
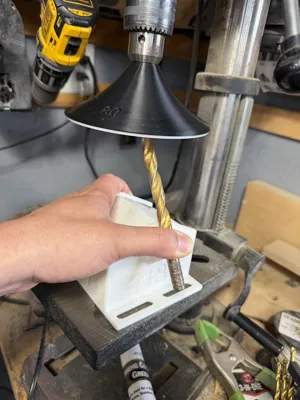
For drill bits:
- Either put the shank to the guide or wrap the flutes in a scrap of paper to make it easier to keep centered in the guide
- You only need to sharpen the lead cutting edge of the flutes near the tip
- Do not strop (for safety reasons) unless you can turn the strop backward in relation to the bit like by putting the bit in a hand drill and turning it backward on a stationary strop
Boost Me (for free)
If you appreciate my work, please give it a boost! It really helps when prototyping.
License
You shall not share, sub-license, sell, rent, host, transfer, or distribute in any way the digital or 3D printed versions of this object, nor any other derivative work of this object in its digital or physical format (including - but not limited to - remixes of this object, and hosting on other digital platforms). The objects may not be used without permission in any way whatsoever in which you charge money, or collect fees.
Comment & Rating (7)