10"-Rack - Plug-in system! Any height!


Print Profile(1)
Bill of Materials

Description
My 10" rack WITHOUT screws!
There are plenty of 10" rack models out there now.
I have also designed such a “normal” 10" rack:
https://makerworld.com/en/models/1601846-10-rack-enclosure-10-per-side-3-4-5u-high#profileId-1688552
But - why do these things always have to look so technical?
Do you want something like that in your living room?
And do you really want to process all these quantities of hammer nuts and screws?
What if you screwed a device into the wrong place? Disassemble everything again?
That's why I designed something new and present my Jogirack!
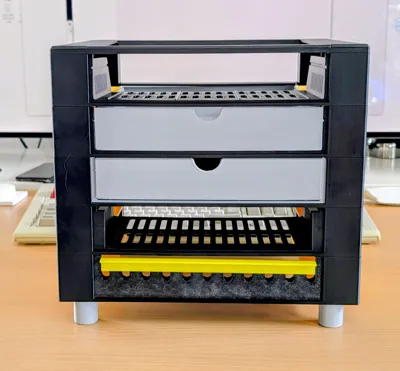
10" rack for universal use, suitable for all objects (panels / inserts) that adhere to the standard.
Without screws - just plug in!
Either for network and computers, for your compact IT rack!
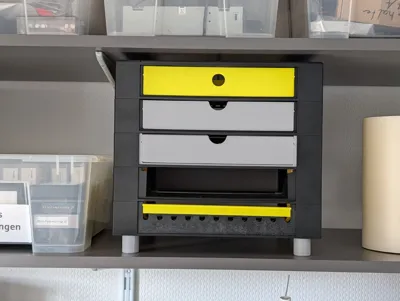
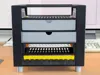
Or even as a cabinet - with the drawers as a piece of furniture!
Or mixed - the thing is absolutely flexible!
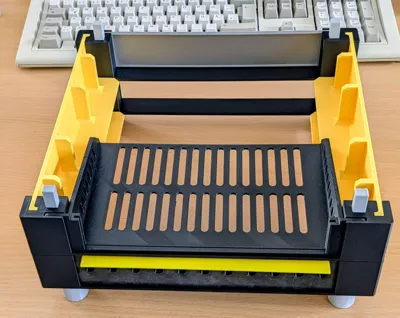
The principle:
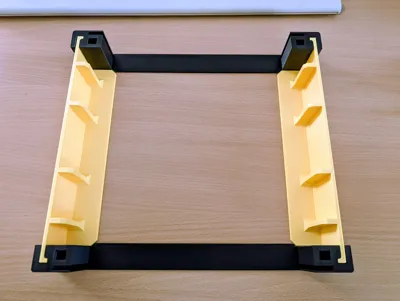
We always build one level.
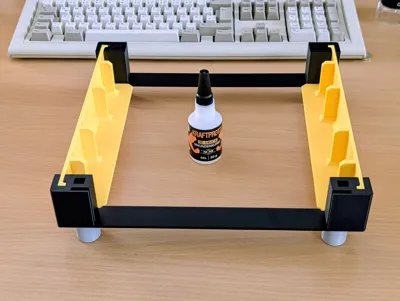
One level consists of 2 front parts and 2 side parts (see photo)
The parts are absolutely symmetrical. The rack can be loaded from the front and from the back.
There are 4 parts per level.
Print the parts and glue them together with a drop of adhesive (superglue - e.g., Kraftprotz Gel, or UHU Hart)
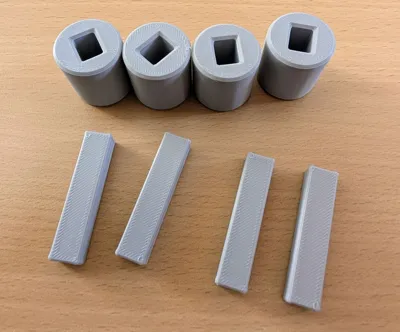
For connecting the level, 4 pins of 47mm each are required.
At the very bottom, there are 4 feet. These are important!
The pins always correspond to one RU.
Glue the feet + pins together and insert them from below into the first level.
This means one pin is always exactly ½ RU within the level, and each subsequent level is connected again with 4 pins.
Attention - Only glue the feet and the first level together.
All levels installed above simply plug in!
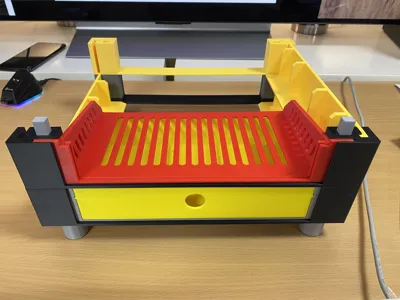
The inserts and panels used are then interchangeable.
Caution!
Be very careful when removing the long parts from the print bed (front, side panel).
The parts are very thin in relation to their length - if you lever too hard, they will break.
Wait until the print plate has completely cooled down.
Use a scraper and bend the print plate.
Work slowly and carefully!
This print file contains the basic enclosure.
Of course, extensions are also available.
Over time and upon request, I can develop more.
In principle, all 10" parts that adhere to the standard are usable.
(Maximum thickness of the front panel 3mm)
The panels and inserts are not screwed, but simply plugged in.
The inserts rest continuously on the side parts, which enormously increases the load capacity (with most racks, the inserts only hang at the front of the panel. With conventional metal panels this is OK, with 3D-printed panels, support is better)
The total width of the rack is 29.5cm. The depth is 27cm.
I have designed all parts so that they can also be printed with an X1C or comparable build volume.
I tested and printed on my H2D and my X1C.
The first model shown consists of 5 levels and was printed in PETG.
The height of one level is 48mm, which results from 1RU (45mm = 44.5mm standard +0.5mm tolerance) - standard dimension! + 3mm for the lower cross connector.
The mounting width for 10" parts is 254mm.
This is the width of the front panel.
Actually, it's even 256mm, but 254mm width is standard and the rest is a bit of tolerance.
The open area inside is 222mm wide.
This is the open width that can be maximally used by the inserts (without front panel).
Here too, I adhere to the standard.
The front panel can be up to 3mm thick.
The usable depth is approximately 250mm.
Longer is also possible, then a part simply protrudes from the back of the rack.
The rack can be used identically from the front and from the back.
Advantage of the plug-in method:
You can start with 1RU and add 1RU, 5RU, or 10RU as needed! Always in 1RU increments, always one level.
You have to test how much weight the thing can hold, but in principle, the system is infinitely expandable.
Thanks to the screwless design, you save the following amount of material:
Per RU, 6 hammer nuts each on the front and back, inserts are usually held with 4 screws.
This means 12 hammer nuts and 8 screws per level.
For a 5RU rack, 60 hammer nuts and 40 screws
When changing inserts, you can simply lift a part of the rack at the desired point, slide the new part in between, and plug it in. The same applies to removing or replacing.
Absolutely flexible!
And, of course, without screws!
Equipped only with drawers, the part doesn't look like a rack at all.
It can also be used as a small cabinet or box for small parts.
It is based on 10" dimensions and is therefore absolutely flexible - a 5RU part as a rack for IT and next to it a 5RU part as a cabinet for small parts? No problem!
However, one disadvantage must be mentioned in advance: it is stably constructed and requires a corresponding amount of time for printing!
I recommend PETG-HF
The following components are specially designed for my rack but fit universally for all standard 10" racks:
Rack drawers for 10" racks, 12cm / 20cm
https://makerworld.com/en/models/1678536-rack-drawers-for-10-racks-12cm-20cm#profileId-1777984
Insert for Sodola 2.5GBit switch (switch with 160x25mm)
https://makerworld.com/en/models/1607521-10-rack-mount-for-switch-160x25mm-sodola-2-5gbit
Universal rack insert / rack tray with 150mm depth:
https://makerworld.com/en/models/1613569-10-rack-mount-universal-15cm-deep-214mm-internal
Various panels/covers for the sides:
https://makerworld.com/en/models/1597576-10-rack-panels-for-10-racks-jogis-10-rack
Universal rack insert with customizable front panel for e.g. a switch, 130mm deep:
Cable gland for 10" rack with cover:
https://makerworld.com/en/models/1638840-10-rack-panel-1u-for-cable-management#profileId-1731450
Rack panel for 2 fans with 80mm (standard PC fan), honeycomb grill:
https://makerworld.com/en/models/1632349-10-2u-rack-panel-for-2-fans-80mm-pc-fan#profileId-1724203
Universal rack tray with interchangeable panel (compatible with the 13cm model):
https://makerworld.com/en/models/1613638-10-universal-rack-mount-12cm-deep#profileId-170245
(Caution - only 1RU inserts can be used in the basic version. For higher inserts / panels, use the extensions)
Boost Me (for free)
Do you like the rack? I would appreciate a boost!
License
You shall not share, sub-license, sell, rent, host, transfer, or distribute in any way the digital or 3D printed versions of this object, nor any other derivative work of this object in its digital or physical format (including - but not limited to - remixes of this object, and hosting on other digital platforms). The objects may not be used without permission in any way whatsoever in which you charge money, or collect fees.
Comment & Rating (0)