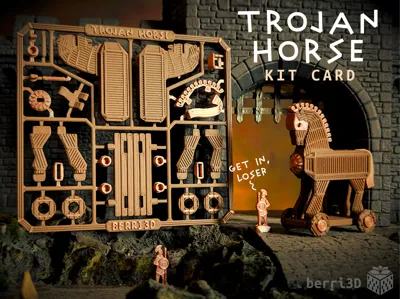
Miniature Trojan Horse Kit Card


Print Profile(3)


Description

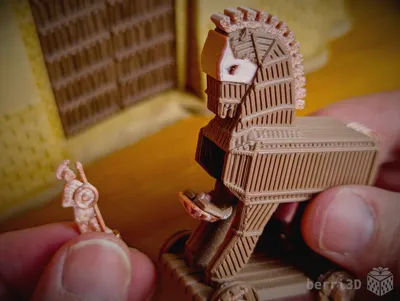
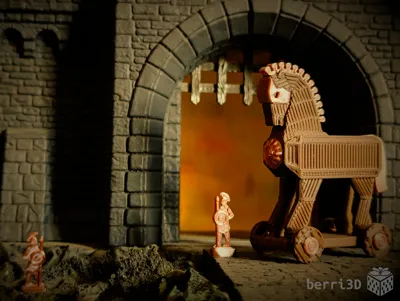
This kit card is inspired by one of the most famous legends of Greek mythology, the Trojan Horse. Although miniature sized, the wheels move and the compartment opens. Check the RAW files for bonus models: mini soldier pack (reinforcements) and the very 2d “Gates of Troy” as shown in this big budget reenactment:
Because of the detailed nature of this model, please at least skim the following. While most people shouldn't have problems with printing or assembly, I'm a firm believer in more information is better than none. If you've built kit cards before and are familiar with the ins and outs of 3d printing, you can jump to section 3 for the assembly guide. Red text indicates must-know information.

Table of Contents
- Before Printing – if you read nothing else, please read this section
- Print Information – best practices, process settings, filament, etc.
- Assembly Guide – diagram and parts list
- Troubleshooting and FAQ – solutions to specific issues
- About the Model – historical background
⚠️ 1. Before Printing ⚠️
Not a toy. Contains small parts. Choking Hazard. Ages 12+ with supervision.
- Clean build plate is a must. This is a miniature and has a complicated first layer with many small perimeters. As long as your build plate is clean, you shouldn't have problems with dragging parts.
- Flush cutters or sharp pointed scissors required. Tiny parts can be damaged by twisting them out by hand. If you don't wish to use a tool, parts not attached to the sprue can be found in the relevant print profile.
Custom supports must be removed before assembly. There are four supports per horse half. The small ones tend to fall off on their own but the large chest supports will likely require a small amount of force to remove. They should easily snap off by hand or with a gentle twist of pliers. See the Assembly Guide below for more details.
- Be careful when removing complete cards from the plate. Parts can and will snap off prematurely if care is not taken. See Best Practices for tips on how to remove kit cards without breaking.
2. Print Information
💡 Best Practices
- Print individual pieces first: This will help save you filament by identifying fit issues before committing to a full multicolour plate.
- Be careful when removing from plate: sprue connectors can break prematurely, especially if you're not gentle when removing. Tips to avoid breakage:
- Use a textured plate
- Let the plate cool completely
- Flex plate gently. Go slowly and bend in all directions until they pop off.
- If they're still attached after this, use a plastic scraper and gently leverage the sprue up near the stuck area while flexing the plate.
📏 Adjusting Fit
How well a kit card fits together depends heavily on your machine, filament brand, and filament type/colour. I do my best to make models that assemble smoothly across a range of filaments, but sometimes tuning by the end-user (that’s you) may be required.
- Too loose/too tight: To tweak the fit between the parts, it may be necessary to adjust flow rate in small increments up or down for any troublesome colours.
- X/Y Hole/Contour Compensation: Due to the small perimeters this model uses, adjusting this setting can be problematic leading to tiny features (sub 0.42 wide) not printing correctly. In this case, I recommend adjusting flow rate as above.
🖨️ Print Process Settings
Note: this model was prototyped using a Bambu X1C and as such, I don't know if my settings will work for non-Bambu printers. You may need to do some tweaking on your end to fit your printer's capabilities. Non-Bambu printer? Look me up on Printables where this model is also posted.
These are the settings I used to prototype the model and create the print profiles/3mfs.
| Setting | Value | Reason |
|---|---|---|
| Layer height | 0.2 | Default; chosen as best overall balancing quality and print speed. |
| Wall generator | Classic | Default; prototyped with this generator. Changing to Arachne may make parts not fit. |
| Bridge Flow | 1.1 | Together with reduced bridge speed, this value creates smoother less-droopy bridges. |
| Only one wall on top surfaces | Not Applied | Results in a nicer top surface to the parts in this model. |
| Detect thin walls | On | Due to the small scale of this model, this setting is required so that walls thinner than nozzle width are printed correctly. |
| Sparse infill density | 10 | As this isn't a weight-bearing model, less infill results in faster printing. |
| Sparse infill pattern | Gyroid | Strong in all directions and is offset from layer below (no nozzle scraping) |
| First layer speed | 20 mm/s | Slower speed allows complicated first layers enough time to cool and adhere. |
| Outer wall speed | 100 mm/s | Slower outer wall is better for overhangs. You can increase this speed but the quality may not be as nice. |
| Bridge speed | 30 mm/s | Together with an increased bridge flow, slowing the bridge speed leads to less drooping. |
📋 Suggested Filaments
I’ve tested this model extensively using the following filaments. Test prints were made using calibrated and non-calibrated (default) profiles on a Bambu X1C and were found to have a good fit between parts. Your results may differ due to filament colour/type/brand, and printer. Photos were taken primarily using Bambu Dark Brown Matte and Rose Gold Silk+.
| Brand | Type | Colour |
| Bambu | Matte PLA | Dark Brown |
| Bambu | Silk+ PLA | Rose Gold |
| Bambu | PLA Basic | Cocoa Brown |
| Polymaker (Polyterra) | Matte PLA | Earth Brown |
| Spectrum | Silk PLA | Spicy Copper |
3. Assembly Guide
Do not use pliers to remove parts or sprue points as they will damage them. Flush cutters are the best tool for the job but sharp pointed scissors will do if you have nothing else. Instructions are also available in a print-friendly PDF; see the documentation section below.

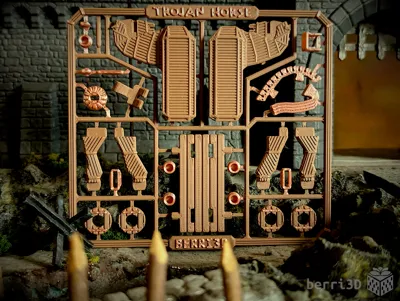
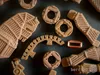
Parts List
- Horse
- Body L x1
- Body R x1
- Trap door x1
- Trap door pin x1*
- Shield x1
- Shield button x1*
- Leg LF x1
- Leg RF x1
- Leg LR x1
- Leg RR x1
- Cart
- Deck x1
- Wheel x4
- Bushings x4*
- Other
- Mini Mycenean x2
- Mini Mycenean stand x2
* Extras of these parts are included in the sprue and on the separate parts plate
4. Troubleshooting and FAQ
General
- There are little Mycenaeans inside: I suggest putting them outside before they unlock your front door while you’re sleeping.
- They say they want to invite more friends over: bonus packs of mini Mycenaeans can be found in the RAW file.
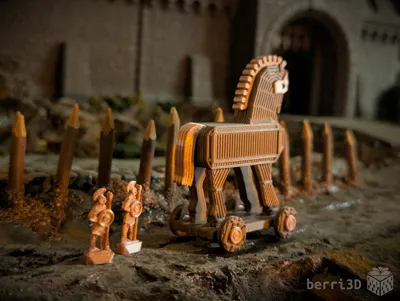
- “Gates of Troy”: In true Monty Python fashion, I created a very basic background model for some of my photos, loosely based on the gates featured in Troy, the 2004 movie. It's not to scale, is very cardboard cut-out flat-ish, but the doors do work and they're high enough for the horse to roll through. If for some reason, you want to print it, you'll find it as a bonus RAW file download. Note that the gate in the photos has been painted with a wash to make it less big beige blob.
Slicers, Files and Settings
- Single colour versus multicolour sprue: while these two look the same, they are fundamentally different. The former is a single mesh and the latter has separated bodies with special “hooks” to lock them together with the frame. This is my version of beam interlocking but with more predictability. Why am I telling you this? If you plan to paint this model in a different way than mine, use the the Multicolour Sprue to start with. Colours of parts can be changed in the Objects tab of Studio.
- Where STL: I prefer 3mfs as they help me organize complex models which often contain dozens of parts. Additionally, they allow me to pre-position parts and assign colours precisely – I use a combination of separate bodies and slicer tricks to ensure every colour is printed efficiently and without “straying” into areas they shouldn't be. If you have the right-know how, you can still extract the STLs which is why I do it this way.
Printing
- White stress marks after sprue removal: Some filaments lighten when cut or twisted. If these areas bother you, you can restore the colour by briefly passing a small flame near the area for 1 to 2 seconds. Warning: Too much heat will lead to deformation/melting. Test first on the leftover sprue. Keep your fingers safe by using pliers to hold the part.
- Parts broke off sprue when removing from plate: Some filaments are more brittle than others. See “Best Practices” above for tips on how to safely remove the kit from the plate. If you still have troubles, try changing Elephant Foot Compensation to 0 which will result in a stronger first layer (but may also result in a tighter fit of parts).
Assembly
- Broken door: Too much force on a tight pin can split the door. If you printed the multicolour version, try the pin in the spare parts window as it’s printed in a different colour and may fit better. Use slow firm pressure and a bit of twisting.
- Broken mini Mycenaean: The stand can be a very tight fit and lead to broken legs if too much force is used when putting it together. I find that sandwiching the flat body between your fingers and pressing it into the stand against a hard surface helps. Slow pressure, a bit of wiggling, and it should go in. If you need replacements, the RAW file has bonus packs.
- Other broken/lost part(s): Some spare parts can be found on the sprue in the upper left corner. All other parts are available separate from the sprue and can be reprinted as needed.
- Shield won’t slide onto door: Ensure the centre button is trimmed neatly and fully pressed in; otherwise, it won’t clear the slot.

5. About the Model
This kit card was originally intended as an entry in the Bambu Lab Greek Mythology contest. I missed the deadline by a wide margin and am finally posting it now. While no longer needed as context for the contest, it seemed a shame to not also include the accompanying exploration of the myth and historicity thereto.
The Myth
The Trojan Horse was the ancient Greek army’s solution to convincing the citizens of Troy to let them come inside the walled city. After ten years of war, the army left the massive wooden horse behind, loudly proclaimed “we’re leaving now!” and then sailed off into the sunset, presumably forever. The Trojans, blessing their fortune that the army was gone AND they left behind such a lovely bit of arts and crafts, pulled the horse inside, slammed the gates, and proceeded to have a massive party. Under cover of night, the army (who was actually hiding around the corner), returned to find the gates wide open, thanks to the 30-odd warriors they had stuffed thanksgiving-turkey-style into the belly of the horse. And thus it was that Troy fell and some 3200 years later we’re still telling the story.
 Mykonos Vase, earliest depiction of the Trojan Horse – Travelling Runes, CC BY-SA 2.0, via Wikimedia Commons |
Fact or Fiction?
That Troy existed is true. The excavated remains can be found in present-day Hisarlık, Türkiye. That evidence of arrowheads and a fire found in the ruins can be dated to around the time the war was said to have happened is also true. However, these two points do not provide conclusive evidence of an actual factual war.
What we know of the war was from literary greats such as Homer and Virgil who themselves wrote their works based on stories passed down through oral tradition over the span of centuries. As with many things, the story likely changed significantly with each retelling. For all we know, it could have started as a particularly bloody spat over a goat.
Additionally, even if the conflict was real, the Trojan Horse may not have been a horse at all. Some historians have speculated that it was either a creative interpretation of a siege engine (for example, a battering ram with the head of a horse) or a mistranslation (it may have actually been a boat).
Historical Depictions
Despite questions of authenticity, the Trojan Horse has inspired countless artists, writers, and would-be kit card creators over the centuries. *cough*
The earliest surviving literary mention of the horse can be found in Homer’s Odyssey which was written around 750 BCE. Even then, it’s only mentioned in passing as if the story was already well-known. The most complete description of the horse actually comes from Virgil's own epic poem, The Aeneid, published almost 800 years after Homer.
The Greeks grew weary of the tedious war,
And by Minerva's aid a fabric rear'd,
Which like a steed of monstrous height appear'd:
The sides were plank'd with pine; they feign'd it made
For their return, and this the vow they paid.
Thus they pretend, but in the hollow side
Selected numbers of their soldiers hide:
With inward arms the dire machine they load,
And iron bowels stuff the dark abode.
– excerpt from Book IV of The Aeneid, as translated by John Dryden
Virgil's poem has been copied down through the centuries, sometimes accompanied by miniature paintings or woodcuts depicting scenes found therein. My favourite depiction has to be the Limoges enamel pictured below because the look on the horse is hilarious. “Poke me again buddy and see how that ends for you.”
 |
| Plaque Depicting the Trojan Horse from the Aeneid – Master of the Aeneid Series, CC0 1.0, via The Cleveland Museum of Art |
Design Process
To say I put a lot of thought and consideration into this design is an understatement. It’s easily the most over-researched/engineered model I’ve made to date. I explored every rabbit hole even remotely related to this project including: 1200 BCE metallurgy, the history of the wheel, Athenian symbology, historical depictions in pottery (such as the Mykonos vase, pictured above) and literature, modern depictions in paint and film*, and discussions of the historicity of the Trojan War.
The “look” of my model was inspired by Turkish architect İzzet Senemoğlu’s replica* which was built in 1975 for the Troy Historical National Park, located in the modern day province of Çanakkale in the Republic of Türkiye. Visitors can climb inside Senemoğlu’s horse (located just inside the gates) as well as explore the sprawling ruins of the ancient city.
 |
| Troy (and a Trojan Horse) – Jorge Láscar, CC BY 2.0, cropped and flipped from the original, via Wikimedia Commons |
* Not to be confused with the 2004 movie prop horse which was gifted to the city of Çanakkale where it still stands on the waterfront.
🥰 How to Support me
If you appreciate the work I did to bring this model to you, please consider supporting me on Ko-fi. Even a small tip will help offset the cost of prototyping filaments. Alternatively, a like or a boost is another easy way to say “hey, you don't entirely suck.”

⭐ Licensing
If you wish to sell my models, you may purchase licensing rights through my official Ko-fi page.
This model is shared using my own Personal-Use License which supplements (but does not replace) MakerWorld’s Standard Digital License. My license is fundamentally the same (no public remixes, no file sharing, no selling) but includes specific exceptions and allowances not covered by the Standard Digital License.
Licenses offered through third-party websites (e.g. Cubee3D) are not authorized and are not valid.
Boost Me (for free)
🚀= 💪🐹 👍 = 🦵🐹 My models are created on a smoking hot Compy386 powered by Hunrod the Unusually Swole Hamster™. Every boost and like makes Hunrod stronger.
Documentation (1)
License
You shall not share, sub-license, sell, rent, host, transfer, or distribute in any way the digital or 3D printed versions of this object, nor any other derivative work of this object in its digital or physical format (including - but not limited to - remixes of this object, and hosting on other digital platforms). The objects may not be used without permission in any way whatsoever in which you charge money, or collect fees.
Comment & Rating (27)