Motorized Zaku Head


Print Profile(1)

Bill of Materials


Description
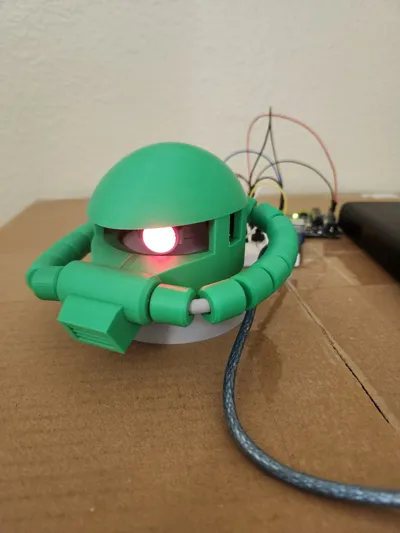
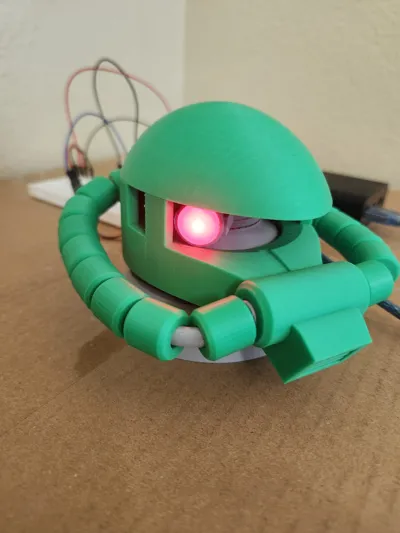
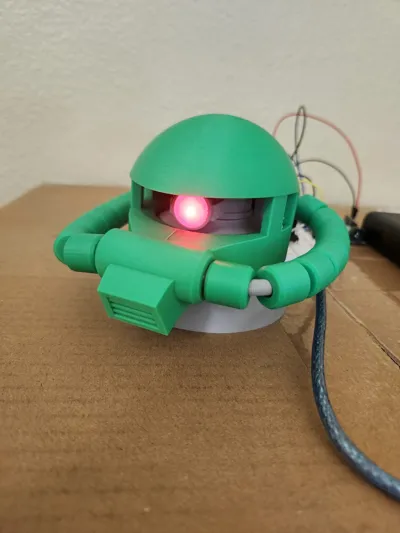
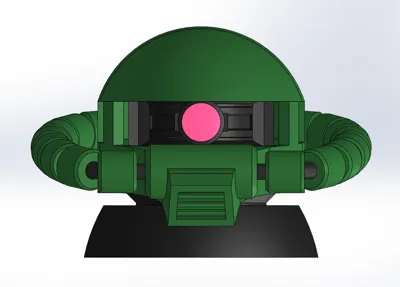
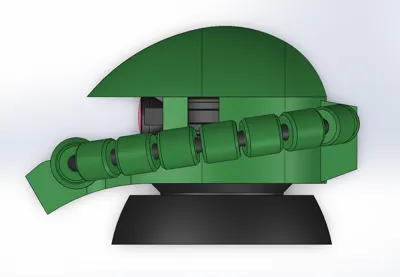
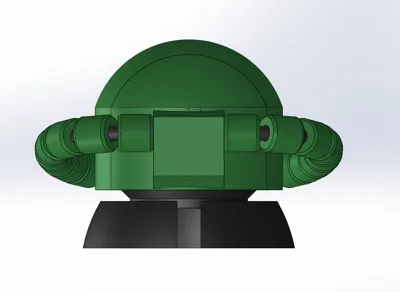
This is a motorized Zaku head with LED mono-eye inspired by Zaku II from Mobile Suit Gundam. The idea for this project was inspired by the YouTube channel つとむニキ / TsutomuNiki(www.youtube.com/@TsutomuNiki), whose builds gave me the motivation to try making my own motorized version. The head rotates using a small servo motor, and the mono-eye lights up with an LED for a cool display effect. It’s a fun mix of 3D printing and beginner-friendly electronics, and makes a great desk or shelf display. The model is designed to be easy to print and assemble with basic hobby electronics. If you build one, I’d love to see your makes—feel free to share photos or suggestions for improvements!
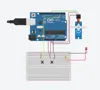
Servo motor (SG90):
- Red → 5V
- Brown/Black → GND
- Yellow/Orange (signal) → Pin 9
Button 1 (Move Forward)
- One side → Pin 2
- Other side → GND
Button 2 (Move Backward)
- One side → Pin 3
- Other side → GND
Arduino Code:
#include <Servo.h>
Servo myServo;
const int servoPin = 9;
const int btnForward = 2;
const int btnBackward = 3;
int angle = 90; // Start at middle position
void setup() {
myServo.attach(servoPin);
pinMode(btnForward, INPUT_PULLUP);
pinMode(btnBackward, INPUT_PULLUP);
myServo.write(angle);
}
void loop() {
if (digitalRead(btnForward) == LOW) { // Button pressed
angle += 2; // Move forward
}
if (digitalRead(btnBackward) == LOW) { // Button pressed
angle -= 2; // Move backward
}
angle = constrain(angle, 0, 180); // Keep safe range
myServo.write(angle);
delay(20); // Speed control (smaller = faster movement)
}
Documentation (1)
License
You shall not share, sub-license, sell, rent, host, transfer, or distribute in any way the digital or 3D printed versions of this object, nor any other derivative work of this object in its digital or physical format (including - but not limited to - remixes of this object, and hosting on other digital platforms). The objects may not be used without permission in any way whatsoever in which you charge money, or collect fees.
Comment & Rating (2)