Garmin 840 aerodynamic mount - 3T Apto version


Print Profile(1)
Description
IMPORTANT: This Garmin Edge 840 out front mount will ONLY fit onto a 3T Apto bike stem. If you would like to use this mount on other bike stems, see the Handlebar & Stem Compatibility section below for options.
Model Overview
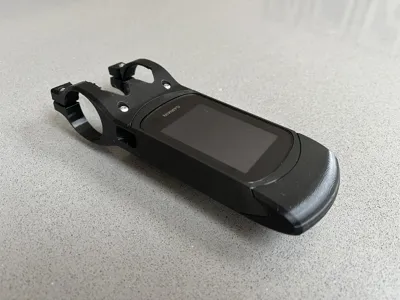
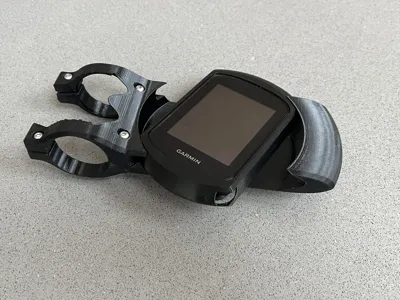
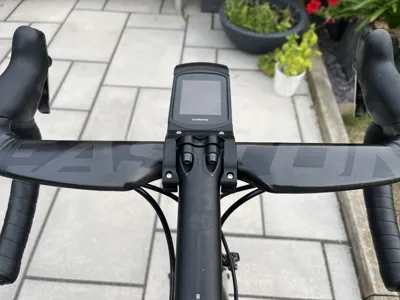
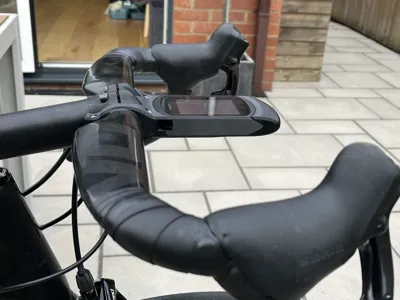
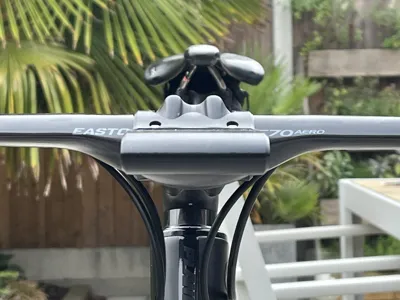
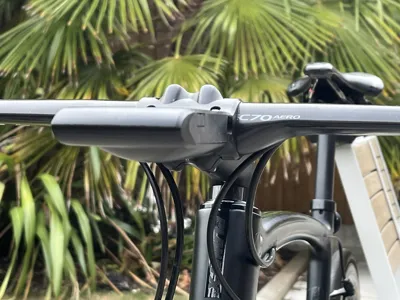
This mount is designed to make the Garmin Edge 840 computer installation on your bike more aerodynamically efficient (lower drag), utilising NACA aerofoil profiles to reduce the drag of the Garmin 840. More information about this design can be found on my blog here:
https://www.morespeedlesspower.com/2025/08/aerodynamic-garmin-edge-840-out-front.html
I am sharing this model because a few people requested it via the comments on my blog.
Testing, Strength and Robustness
I used PETG to print this part. I have ridden with this computer mount 4-5 times and I haven't encountered any problems. It slipped a bit one time, but I fixed that with carbon assembly paste and by tightening the bolts slightly. Don't tighten the bolts too much, otherwise it's likely to break. PETG isn't particularly strong, but it should be good enough with the right torque. Please bear in mind the limited testing I have done (~5 rides), and so if you use this mount please be vigilant: Keep an eye out for any cracks that develop, changes in its rigidness etc. Above all, keep in mind the risks of using a 3D printed part that has had limited testing. I don't want anybody's Garmin to go bouncing down the road.
Stem & Handlebar Compatibility
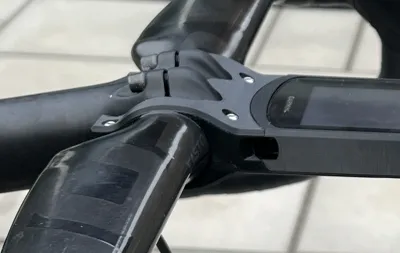
This model is designed to interface with the shape of a 3T Apto stem and handlebars having a 31.8mm round section at their centre (i.e. it won't work with integrated bar & stems). Unless you have a 3T Apto Stem, this model almost certainly won't work due to insufficient space for the stem face plate. I realise that this makes the model incredibly niche, not suitable for most bike owners, so I have done two things:
1) I have created a ‘generic’ version of this model that has more space for the stem face plate and a wider cut-out for the stem. This will be suitable for many stems, but not all. The link to that generic model is here [to be added].
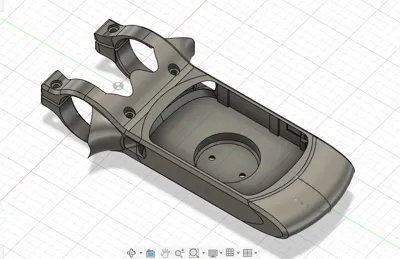
2) Secondly, I have uploaded the CAD model, which I designed in Fusion 360, in case anybody wants to try to adapt the mount design themselves for personal use. Please don't use it for commercial use, or adapt my design and claim it's yours. That wouldn't be cool. I'm sharing this so that like-minded bike riders can use it.
Model Parts
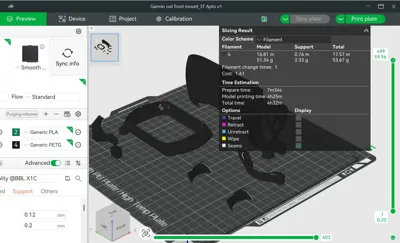
5 parts are needed for this mount, and 2 parts are optional. You will also need some M3 bolt and nuts, as explained below.
This model contains 6 parts: 4 of the essential parts, and the two optional ones. You will also need to print one other essential part, the small Garmin mounting bracket here, which has its mounting holes in the correct position. I made this small Garmin mounting bracket as a separate item because it's likely to be a high wear item and may need to replacing/reprinting after several uses.
The model requires 59g of filament, 54g for this model and 5g for the separate Garmin mounting bracket.
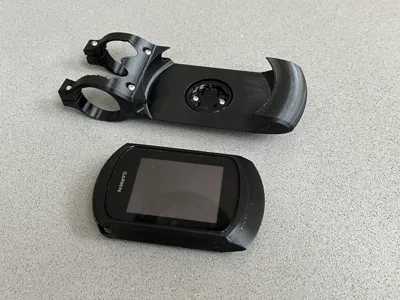
Essential model parts contained in this model:
1) The main body of the mount.
2) The sleeve which your Garmin 840 slips into.
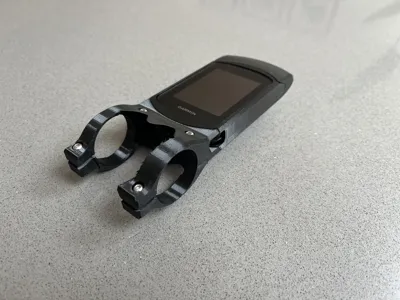
3) Left hand lower handlebar mount.
4) Right hand lower handlebar mount.
Essential model parts not contained in this model:
5) Garmin mounting bracket. As mentioned previously, open this model and print that piece separately.
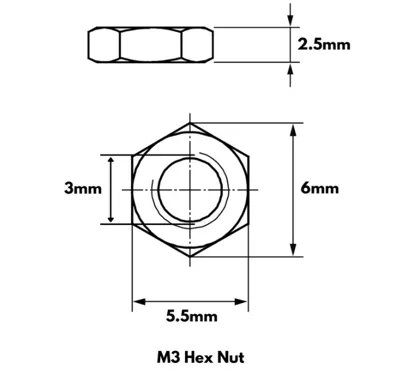
6) M3 nuts and machine screws:
4 x M3 machine screws, with a 20 mm long threaded section. Max head diameter should be 6 mm & max 2 mm depth.
2 x M3 machine screws, with a 5 mm long threaded section. Maximum head dimensions as above.
6 x M3 nuts. See final photo for information about the M3 specification.
Personally, I use stainless stell dome-headed machine screws that I bought from eBay here:
https://www.ebay.co.uk/itm/403741903188
Optional parts:
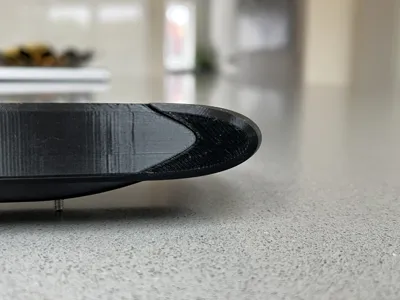
7) Left hand bar fairing.
8) Right hand bar fairing.
These two fairing pieces can be superglued onto the main mount part #1, to blend out the 90 degree intersection with the bar.
Take care to glue them only to the main part, and don't let the glue go onto parts #3 and #4, the lower bar mounts, which must be removeable. Don't glue them to your handlebar either!
Assembly & Use
Firstly, DON'T try to put the sleeve into the mount and rotate it just after you've printed it. It will likely get stuck or break. Read point (2) below:
- First, remove the supports and, if you wish, clean up the surfaces that the supports connected to, using sandpaper, a file, a knife, etc.
- Attach the Garmin mounting bracket (part #5) to the main mount body (part #1), using the two M3x5 machine screws and nuts. It you can't get 5mm long screws, then do what I did and cut down longer screws. Longer screws will stick out into the airflow, which isn't ideal. Having the Garmin bracket fitted into place first is important because the sleeve has to pivot around the central point for it to rotate smoothly - the Garmin bracket ensures that.
- Slip your Garmin 840 into the sleeve (part #2). Back end first works best.
- Put the Garmin 840 & Sleeve into the mount, at 90 degrees then rotate is slowly (see video below). The sleeve has two small tabs on the centreline, at the front and back of the bottom of the sleeve, that are just 0.6mm deep. These tabs are there to add some more friction and to ensure the mount doesn't rotate too easily when out riding. They are likely to be too large, even at just 0.6mm. Try rotating it, and if there too much resistance, don't force it, but remove the sleeve and file/sand down the tabs slightly. You might have to take a couple of tenths of a mm off the height of the tabs, or you might have to remove the tabs completely. It all depends on your printer tolerance and quality, and how much resistance you want.
- Once you're happy with the mount/sleeve interface and the amount of resistance to install and remove your Garmin, then mount the whole thing to your bar, using the two lower handlebar mounts (parts #3 and #4) and 4x sets of M3x20 machine screws and nuts. Use carbon assembly paste to add friction. It can be a bit fiddly, but it should be obvious what to do. Expect to drop and lose a couple of the M3 nuts! Don't tighten the screws too much, because PETG obviously isn't as strong as metal parts or other stronger plastics. I don't have a torque recommendation, sorry, so please just use your judgement.
Buttons: I've designed it so that three of the Garmin buttons are accessible. The two main buttons (start/stop and lap buttons) at the bottom of the Garmin are accessible via cut-outs. If you have big fingers, you may have to use your little finger to press them. The power switch can be operated too, via a flap in the side of the sleeve (the flap keeps the side nice and smooth). The printing of this flap can be a bit iffy, so if it doesn't print nicely, just cut the flap off and have a hole for the power switch instead. The other buttons aren't accessible - My thinking was that I won't need them during a time trial, a race or anytime when riding speed is important.
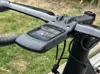
Here is a video of the use of the mount once it is assembly and mounted on the bike:
Finally…
If you have any problems or questions, please let me know. I'll endeavour to answer them, adapt the design if it's easy to do, or even remove the model if anybody discovers a serious problem that can't be fixed easily.
License
You shall not share, sub-license, sell, rent, host, transfer, or distribute in any way the digital or 3D printed versions of this object, nor any other derivative work of this object in its digital or physical format (including - but not limited to - remixes of this object, and hosting on other digital platforms). The objects may not be used without permission in any way whatsoever in which you charge money, or collect fees.
Comment & Rating (0)