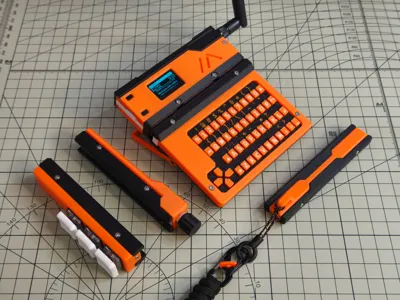
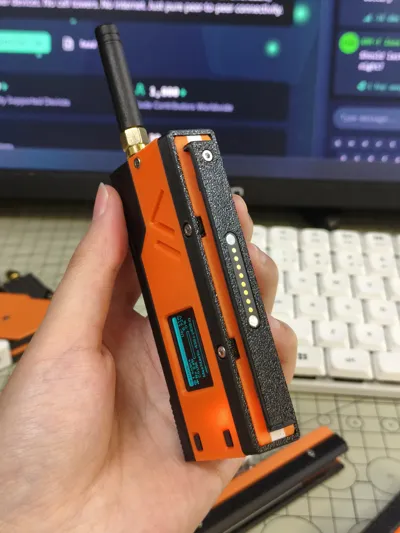
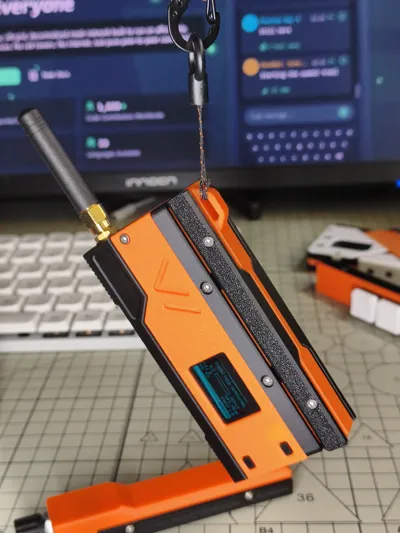
MeshSlide - Modular Meshtastic Case for Heltec V4


Print Profile(1)
Description
MeshSlide - Modular Meshtastic Enclosure for Heltec V4
This print kit is for Heltec V4
Please note, this print kit only includes the MeshSlide body and the SlideZero module; for extension modules like SlideRotary, SlideTriple, and SlideKB, please search my homepage

Features
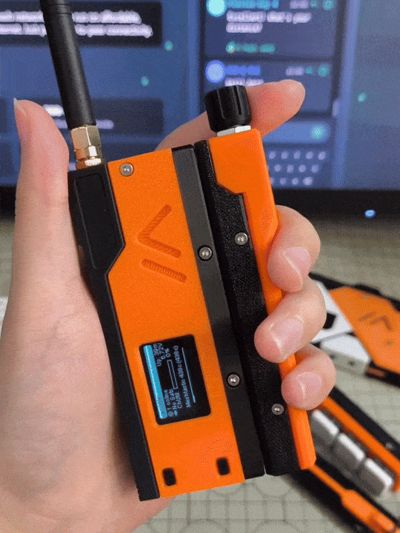
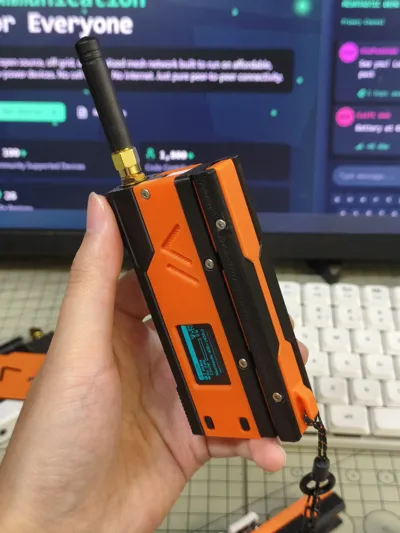
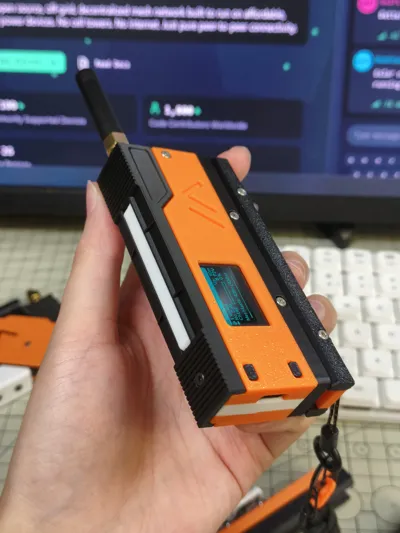
MeshSlide is a modular Meshtastic enclosure designed specifically for the Heltec V4. It features a slide-in pogopin rail that supports hot-swappable extensions
Currently, four extension modules have been designed for MeshSlide:
- SlideZero - A rail contact protection module with a lanyard hole, no functional features
- SlideRotary - An EC11-based rotary encoder module
- SlideTriple - A button module based on Kailh/Gateron low-profile switches
- SlideKB - A full keyboard input module based on CardKB


SlideZero
Placeholder protection module
- Primarily used to cover and protect the rail and pogopin contacts
- Includes a lanyard hole, the position of which can be adjusted by changing the slide-in direction

SlideRotary
Rotary module based on EC11 rotary encoder
- Clockwise/counter-clockwise rotation for scrolling + press for confirmation
- Used for menu navigation and selecting preset messages

SlideTriple
Button module based on Kailh/Gateron low-profile switches
- From top to bottom: Up, Down, Confirm
- Used for menu navigation and selecting preset messages

SlideKB
Full keyboard input module based on CardKB
- Enables full text input using the keyboard
- Features an adjustable stand, switchable between handheld and desktop modes
- Internally reserved space of 76mm x 46mm x 5mm for mounting/wiring, usable for additional sensors

MeshSlide
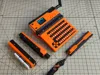
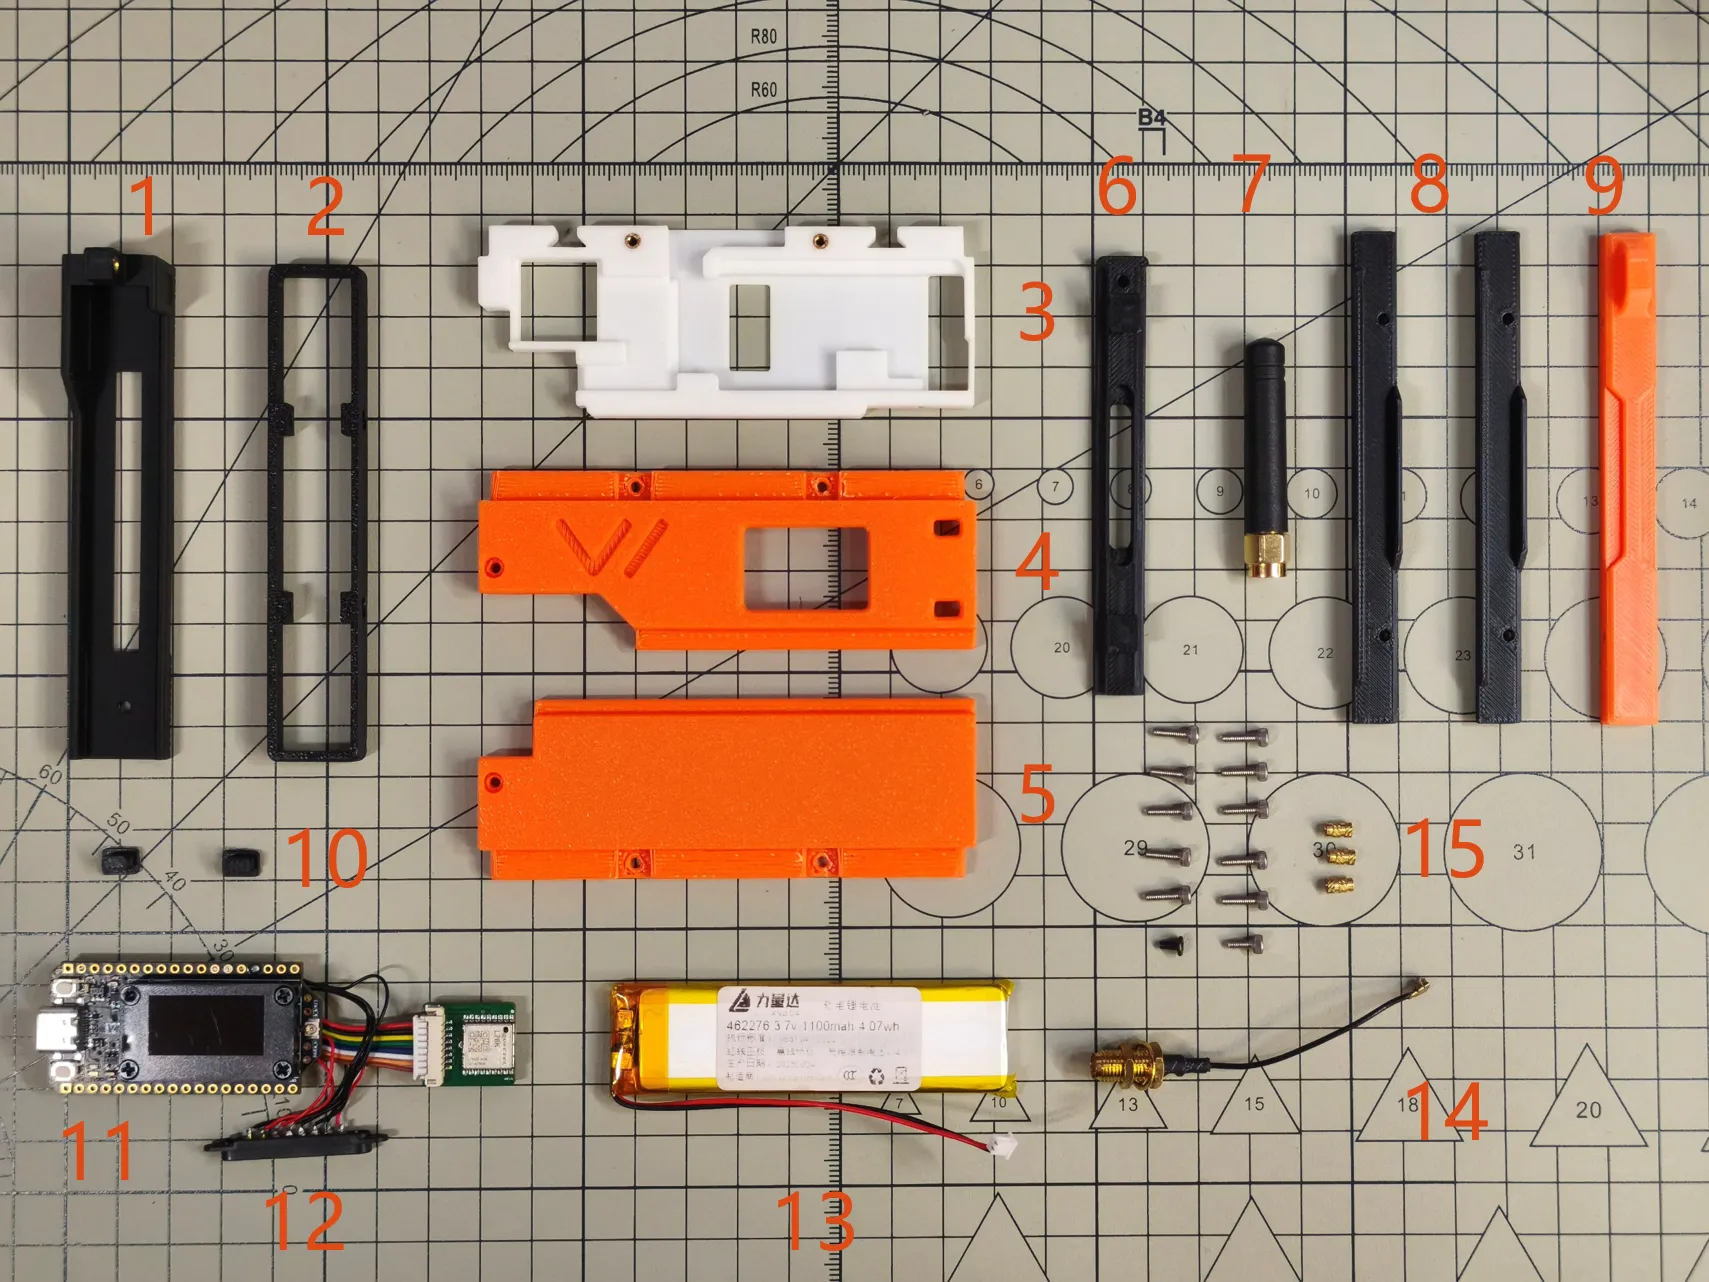
BOM List
This list includes MeshSlide and SlideZero
- 3D printed enclosure S1
- 3D printed enclosure R1
- 3D printed enclosure M1
- 3D printed enclosure U1
- 3D printed enclosure L1
- 3D printed enclosure S2
- Stick antenna
- 3D printed enclosure ZS 2 pcs
- 3D printed enclosure ZM
- 3D printed enclosure B1 2 pcs
- Heltec V4 with L76K GNSS module
- Pogopin magnetic connector 8P female socket
- Battery (size 4.6mm x 22mm x 76mm)
- IPEX to SMA female adapter cable, 5cm length 1 pc
- Fasteners
- Hex socket cap head screw M2x7 10 pcs
- Hex socket cap head screw M2x5 1 pc
- Hex socket flat head screw M2x4 1 pc
- M2x5 double-pass knurled brass nut, 3mm outer diameter, 3 pcs
The specific dimensions of the pogopin 8P magnetic connector are shown in the figure below

MeshSlide Assembly Instructions
Solder the pogopin pins to Heltec V4. The soldered pins are shown in the figure, from left to right: GND, 18(SCL), 17(SDA), 1, 2, 3, 4, 3V3. All extension modules are based on this definition

Embed the M2x5 knurled nuts into 3D printed enclosures M1 and S1

Install the SMA adapter cable into 3D printed enclosure S1, connect the SMA adapter cable to Heltec V4, and install Heltec V4 with the L76K GNSS module into 3D printed enclosure M1

Connect the battery to Heltec V4, bending the cables as much as possible without damaging them

Install 3D printed enclosure L1, install 3D printed enclosure B1. 3D printed enclosure L1 can accommodate a battery with maximum dimensions of 5mm x 24mm x 82mm

Embed the pogopin into 3D printed enclosure S2, then install 3D printed enclosure S2 onto 3D printed enclosure M1

Install 3D printed enclosure U1

Install 3D printed enclosure R1

Install 6 hex socket cap head screws M2x7


Install 1 hex socket cap head screw M2x5

Install 1 hex socket flat head screw M2x4

Install the stick antenna
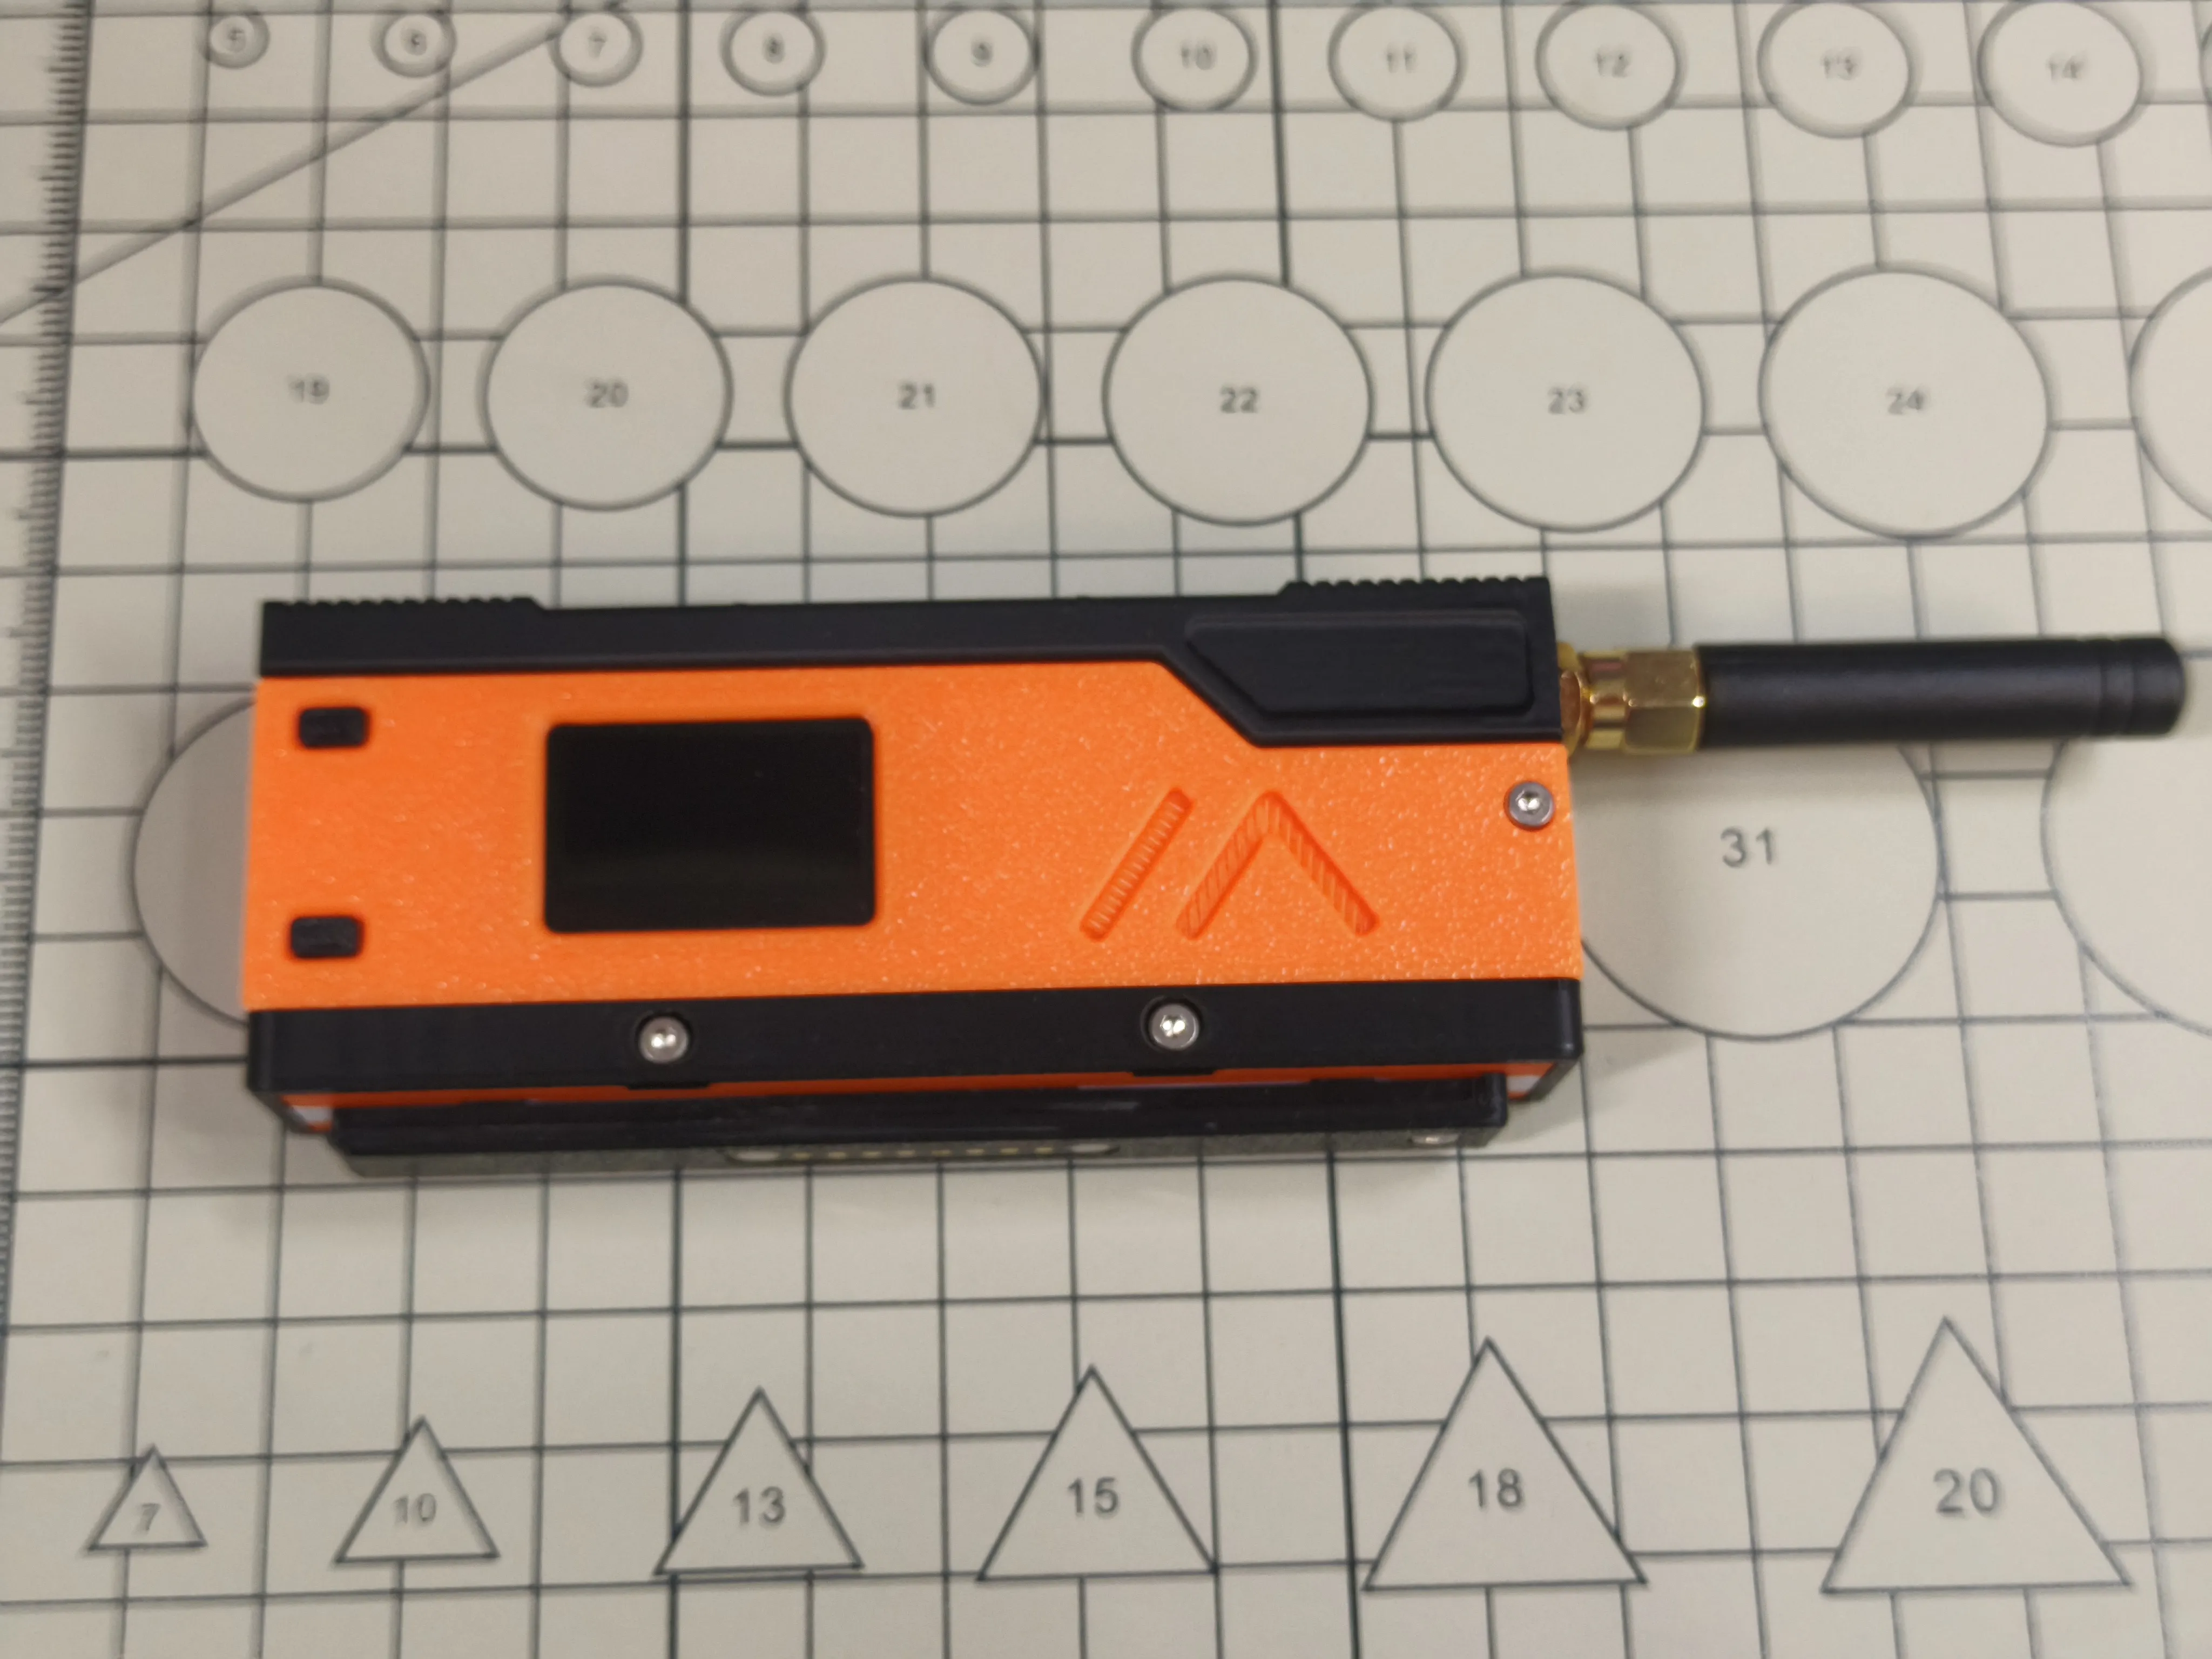
Assembly complete
SlideZero Assembly Instructions
Assemble 3D printed enclosures ZS and ZM using 4 hex socket cap head screws M2x7


Assembly complete
Slide SlideZero into MeshSlide


Software Configuration

Comment & Rating (69)