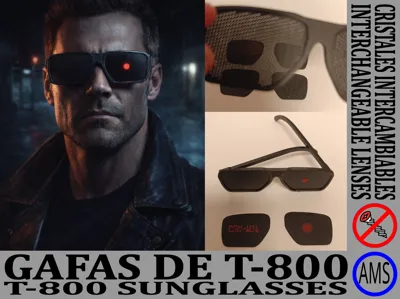
T-800 COSPLAY WITH INTERCHANGEABLE LENSES.


Print Profile(2)


Description
T-800 COSPLAY WITH INTERCHANGEABLE LENSES.
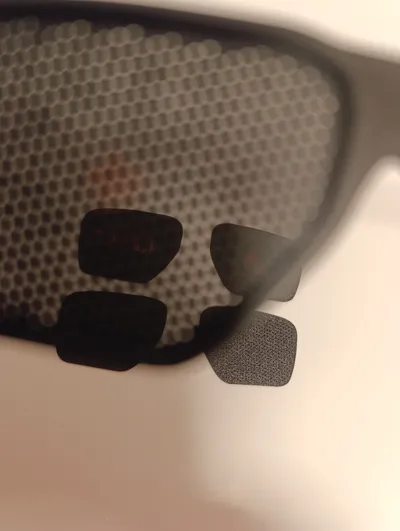
I present to you modular glasses for Terminator cosplay, consisting of a frame, temples, and several plates that simulate lenses, micro-perforated to allow vision through them.
DOWNLOADABLE FILES:
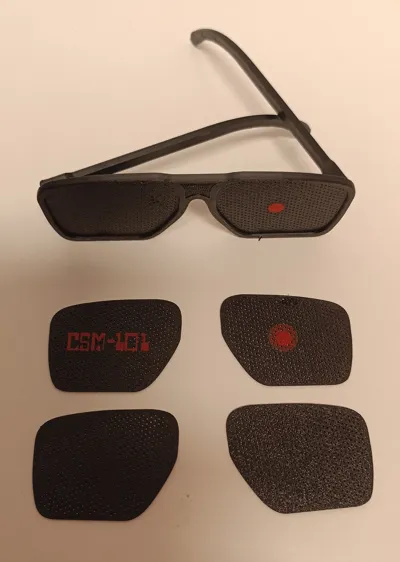
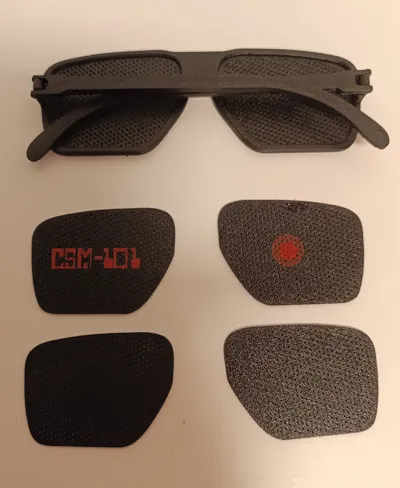
- Left lens with a very defined red dot (In two versions, for 0.2 and 0.4 nozzles).
- Left lens with a defined red dot with a diffuse halo around it (In two versions, for 0.2 and 0.4 nozzles).
- Right lens with the inscription CSM-101 (In two versions, for 0.2 and 0.4 nozzles).
- Left and right lenses, without any inscription.
- Frame.
- Left and right temples.
PRINTING PROFILES:
NUMBER 1: Created for 0.2 nozzle with 0.12 layer height, which contains only the three lenses with inscriptions, with a design specially adapted for these values.
- PLATE No. 1: Left lens with red dot, with diffuse halo.
- PLATE No. 2: Left lens with defined red dot, without halo.
- PLATE No. 3: Right lens with CSM-101 inscription.
NUMBER 2: Specifically designed for 0.4 nozzle and 0.2 layer height, which contains several printing plates:
- PLATE No. 1: Frame and temples.
- PLATE No. 2: Right lens with CSM-101 inscription.
- PLATE No. 3: Right lens with CSM-101 inscription and left black lens, without inscription.
- PLATE No. 4: Left lens with defined red dot, without halo.
- PLATE No. 5: Left lens with defined red dot, without halo. And left black lens, without inscription.
- PLATE No. 6: Left lens with red dot with diffuse halo around it.
- PLATE No. 7: Left lens with red dot with diffuse halo around it. And left black lens, without inscription.
- PLATE No. 8: Fully black right lens.
- PLATE No. 9: Fully black left lens.
- PLATE No. 10: Fully black left and right lenses.
ASSEMBLY:
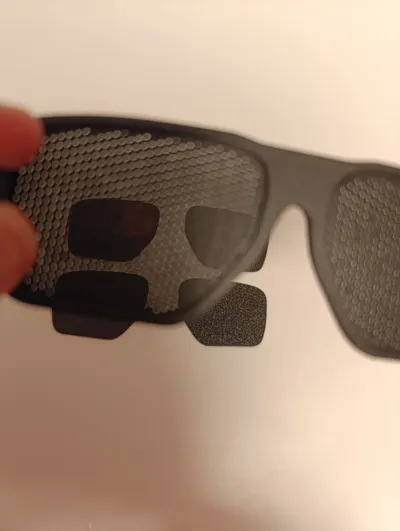
Once the frame, temples, and chosen lenses are printed. The assembly is simple, all parts snap into place. Fit the perforated lenses from the outer (front) area of the frame, so that the temple fitting elements do not get in the way. If necessary, slightly stretch the ends of the frame, and try not to bend the lenses beyond the tolerance limit, as they could break. Afterward, fit the temples into their connections at both ends of the frame.
Soon I will publish a video on YouTube related to the assembly of the glasses.
MATERIALS:
I personally recommend using PETG, which, thanks to its greater flexibility, will facilitate the assembly of the perforated lenses without risk of fracture. But if you wish, you can also use PLA.
RELATED VIDEOS
Below is a link to a video hosted on YouTube, where you can see the assembly process:
License
You shall not share, sub-license, sell, rent, host, transfer, or distribute in any way the digital or 3D printed versions of this object, nor any other derivative work of this object in its digital or physical format (including - but not limited to - remixes of this object, and hosting on other digital platforms). The objects may not be used without permission in any way whatsoever in which you charge money, or collect fees.
Comment & Rating (0)