Search models, users, collections, and posts

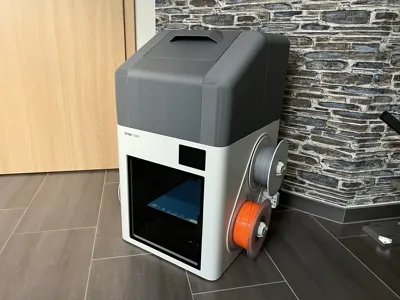
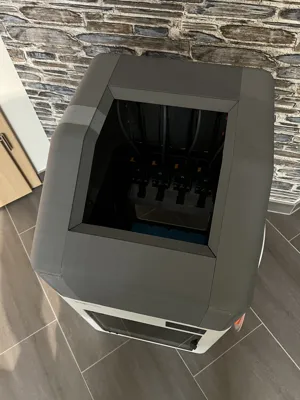
Snapmaker U1 cover / enclosure

Print Profile(1)

All
H2D
H2D Pro
H2S
H2C

0.24mm layer, 2 walls, 10% infill
Designer
47.2 h
8 plates
5.0(3)

Open in Bambu Studio
Boost
93
249
45
6
249
18
Released 

Bill of Materials

Bambu Filaments
Select all
Matte Nardo Gray (11104) / Refill / 1kg

Description

Product Description

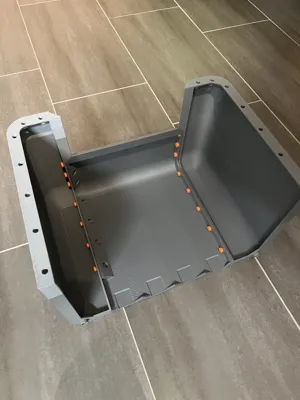
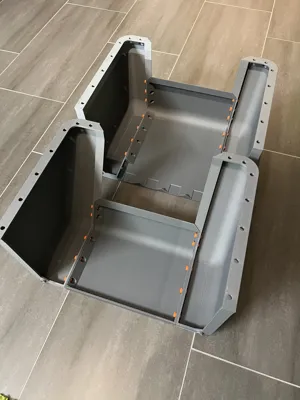
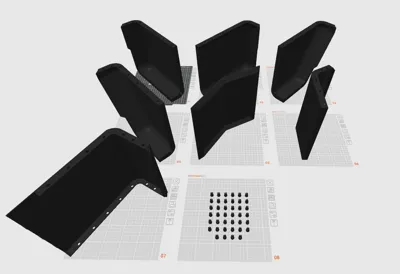
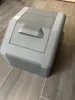
This listing offers a fully 3D-printed enclosure specifically designed for the Snapmaker U1. The enclosure is engineered for easy assembly and requires no additional tools, adhesives, or hardware. All components are printed and assembled through a precise snap-fit system.


The design allows for straightforward installation while maintaining structural stability. Feedback, design ideas for additional Snapmaker models, and suggestions for further improvements are highly appreciated.


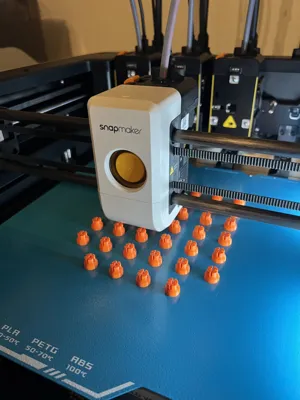
For optimal print quality and to minimize warping, PLA is the recommended material.


If you are satisfied with this model, a positive rating would be greatly appreciated  

Boost Me (for free)

If you want more of this!

Comment & Rating (45)

(0/1000)

Here are some photos of the cover, printed in PLA, connections in PETG. I have also attached a 1-2mm sealing tape at the bottom so that the cover lies really tightly.
The designer has replied
Show original
designer
3
Reply
Vielen dank!
0
Reply
Hi! Is it possible to adapt the files so that they are printable on the Snapmaker U1?
The designer has replied
Show original
0
Reply
Everything is printable on the U1. I myself have also printed the parts on the U1. You just need to rotate the parts correctly ;)
Show original
0
Reply
Unfortunately, I could not upload the Orca print profile Makerworld apparently only accepts g-codes from Bambulab
Show original
0
Reply
Replying to @robin.effgen210 :
Thanks for the info! I just opened a file and it had dimensions up to 300mm according to Orca. But the U1 can't do that, because it has a maximum of 270mm, no matter how you turn it. I'll write you a private message shortly.
Show original
0
Reply
Very nice! After 15 min of preheating I got an temperature increase of about 15 °C (18-33 °C) with temperature still rising. It also seems to hold the temperature pretty well. Print and assembly was relatively easy and straight forward. Only small gaps which I might close with a soldering iron but overall great fit. You will need at least 270 mm of printvolumen to print the parts but automatic orientation does a pretty good job placing them on the plates. A neat bonus is the .STL with the thermostat insert to check temperatures higher up in the enclosure. Overall great design and would definitely print again 10/10!
The designer has replied
2
Reply
thanks!
0
Reply
Print Profile
0.24mm layer, 2 walls, 10% infill
Absolutely a perfect print cover fits and looks great .
The profile uploader has replied
1
Reply
thank you so much!
0
Reply
i can not for the life of me get the back piece to fit without seeing this. this is a real struggle for me. sorry still pretty new and havent printed anything while seeing this. to afraid too lbvs
The designer has replied
0
Reply
Can you send me a picture from the build plate? Maybe I can help you :)
1
Reply
Is the first large piece project I've printed, figured out I had a z axis setting thst needed adjustment on the first but got thru it. printed the lid in translucent petg. Needs a little smoothing in some of the corners and then a paint job to match the U1. Anybody know the color code for the U1 shell? Thanks, great cover reminds me of the old Model 28 Telletype sort of.
0
Reply
just a suggestion but maybe add vents or something so you can install a fan to help with PLA from melting inside since it gets to warm?
The designer has replied
0
Reply
For PLA printing, you can simply remove the lid.
0
Reply
Replying to @robin.effgen210 :
but why? i don't wanna remove anything if i swap from pla to PETG or whatever and back (personally)
0
Reply
Replying to @Nala1 :
The casing is there to retain the heat. If I cut slots into the casing, it becomes useless. There are more Materials than PLA and PETG.
1
Reply
Just asking if you think this would be strong enough to hold a creality space pi x4 ontop
The designer has replied
0
Reply
I Think so.
0
Reply
Replying to @robin.effgen210 :
Thanks
0
Reply
Replying to @user_3586627097 :
Have you tried it? I just got the X4L and wondering if there's space up there
0
Reply
will the parts print on a p1s? trying to get everything set up before it arrives
The designer has replied
0
Reply
no im sorry. Minimum 270x270x270
0
Reply
Replying to @robin.effgen210 :
thanks anyways I guess ill try an find another fully printable one I can print on the p1s
0
Reply
Replying to @Jiimbo3D :
I think you can print it on the u1 but I’m not sure
0
Reply
Is it a place fit or does it have connect pieces To the printer like some of the others where they use the holes to keep it on the printer? And if it's not being held in place by anything other than gravity, What do you do to keep it from vibrating around?
The designer has replied
1
Reply
It has little pins to stay in Place. Nothing moves during print.
0
Reply

License

This user content is licensed under a Standard Digital File License.

You shall not share, sub-license, sell, rent, host, transfer, or distribute in any way the digital or 3D printed versions of this object, nor any other derivative work of this object in its digital or physical format (including - but not limited to - remixes of this object, and hosting on other digital platforms). The objects may not be used without permission in any way whatsoever in which you charge money, or collect fees.