Search models, users, collections, and posts
Magic Swirly Wand
IP Report


Print Profile(0)
Add the first print profile to earn points
Boost
0
0
0
0
0
0
Released
Description
Summary
Fun to play with and makes a great party favor. Small parts. Children 5+ might have fun assembling from parts.
See in action making a bubble, a flower
Easily customize the looks by printing your own designs on the transparency film.
Fun to make too. I had to use all my maker arsenal, 1) UP Plus 3D printer, 2) Silhouette Cutter, 3) HP Color Laserjet printer.
Combined different materials: 1) Laser Transparency Film for strips, 2) Wooden Dowels for the stick, 3) Straws for the spacer, 4) Glue for putting things together, and of course 5) ABS Filament for joiners.
Toy stores have them for about $3 in different names like spin stick, spindle spinner, magic bubble wand, etc. Clearly, it is cheaper to buy, but more fun to make.
Instructions
- (Optional) Print a design on the transparency film.
- Cut the transparency film using the provided dxf file.
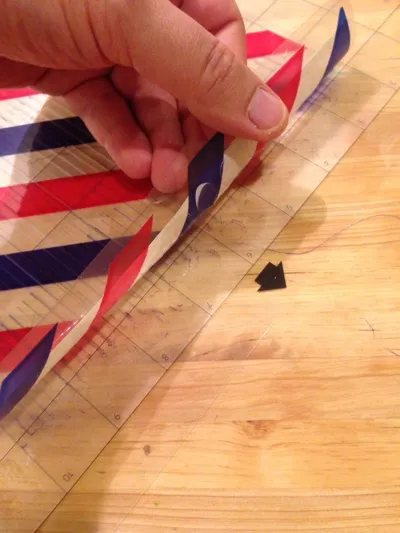
- Before taking the film off the cutting mat, apply painters tape on the tip of the stripes. There are some finely cut parts that might get damaged otherwise. (See photos)
- The strips have a tendency to get messy. Use a dowel or a craft stick to keep them orderly. (See photos)
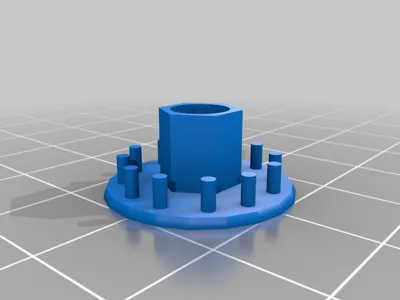
- Print the joiner caps using ABS, 0.15mm layers.
- Assemble parts
- The top cap has a dome and 12 pins. Place a strip on the top cap, aligning the hex cutout with the hex shape of the dome. Push down with the matching cap which has a hollow center and 12 holes around the rim. (Repeat 6 times)
- Lock the top cap with the matching cap. Use glue (superglue) to fix the two pieces together. (TODO: get rid of the glue)
- The bottom cap has 12 pins, a short hex pipe in the center. One by one, place the open ends of the strips that are previously attached to the top cap onto the hex pipe. Push down with the matching cap after each strip. Make sure the pipe looks away from the top cap, so you can hold it with fingertips when the final assembly is done.
- Lock the bottom cap with the matching cap. Use glue (superglue) to fix the two pieces together. (TODO: get rid of the glue)
- Cut a 1.5" piece of the straw to work as a spacer.
- Pass the wood dowel through the bottom assembly, and then through the spacer before pushing its tip into the top assembly.
License
This user content is licensed under a
Creative Commons Attribution-Share Alike
Comment & Rating (0)