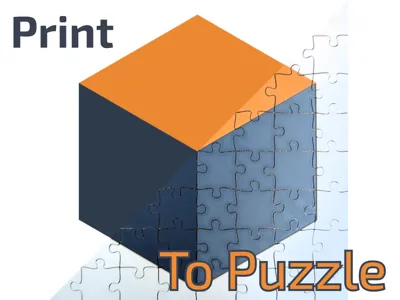
Parametric Custom Jigsaw Puzzle Maker


Print Profile(1)

Description
Transform any flat print into a custom jigsaw puzzle!
This parametric negative-part modifier cuts your HueForge prints, Chroma Canvas art, lithophanes, or any flat model into interlocking jigsaw pieces. Perfect for transforming your Hueforge or Chroma Canvas into a puzzle!
To summarize, this process uses your original model along with a parametrically STL calculated by the script that acts as a negative part modifier in the slicer to cut out the desired pattern. The sample model included in this profile will serve as a starting point from which you can replace with your desired model and cutting pattern.
Features:
- Classic jigsaw tabs with natural variation (no two pieces identical)
- Full parametric: customize dimensions, piece count, gap width, and more
- Option border cut to cleanly trim edges and crop your print
- Works with any rectangular print
- Clean cuts with adjustable kerf (gap between puzzle pieces) for perfect fit
How to Use
Step 1: Download & Open
Download the 3MF file and open it in Bambu Studio. You'll see a sample 200x200mm print with the puzzle cutter already configured as a negative-part modifier.
Step 2: Replace the Base Print
Find the sample model in the Objects browser on the left of the screen.

Right click “Sample_Image_200x200.stl” and replace with your own STL (HueForge, Chroma Canvas, lithophane, etc.).

Ensure the model is positioned at the origin on the build plate.
Step 3: Generate Your Puzzle Layout
Open the Maker Lab parametric version and configure your puzzle:

On the left size of the screen, configure the following:
- Set Dimensions to match the desired dimensions of your puzzle.
- Default: 200mm x 200mm
- Set the Border Width to account for any mismatch between your model and your desired puzzle size.
- For example, if your model was 200 x 200 but you wanted your puzzle to be 180mm x 180mm, you could pick a 10mm border width to cut off the edges of your model.
- Default: 10mm
- Choose Rows and Columns to determine piece count
- Default: 8 x 8 for 64 pieces
- Adjust Gap Width for tighter or looser fit
- Default: 0.3mm (loose fit - set smaller for a tighter fit)
- Change the Seed for different tab patterns
- See below for the different parameter settings and descriptions:
| Parameter | Range | Description |
| Puzzle Width/Height | 10-500mm | Match your print dimensions |
| Columns/Rows | 1-50 | Number of pieces |
| Gap Width | 0.1-2.0mm | Kerf between pieces |
| Extrusion Height | 1-20mm | Height of cutter |
| Border Width | 0-50mm | Frame around puzzle |
| Tab Size | 10-35% | Size of interlocking tabs |
| Jitter | 0-15% | Variation in tab shapes |
| Seed | 1-99999 | Randomized Tab Placement |
Finally, download the generated STL and proceed to step 4.
Step 4: Replace the Cutting (Negative) geometry
In Bambu Studio, Find the sample negative model in the Objects browser on the left of the screen.

Right-click the sample negative part modifier and replace with your new puzzle cutter STL.
The new geometry should be imported centered on your build plate and on your new geometry. Verify that everything looks correct and proceed to step 5.
Step 5: Slice & Print
Slice as normal. The puzzle cuts will appear in the preview.
This profile includes some general settings for Hueforge prints but please review and ensure that the settings are appropriate for your model.
Print and enjoy!
Tips for Best Results
- Gap width: Start with 0.3mm. Increase for looser fit, decrease for tighter
- May need to be careful separating - use a thin knife blade to separate if necessary
- Piece count: Larger pieces (3×3 or 4×4) work best for small prints; go higher for larger prints
- Border width: Use 5-10mm border to create a clean edge and trim away any imperfections
- Extrusion height: Set slightly taller than your print thickness to ensure complete cuts
Troubleshooting
Puzzle pieces too loose
Try gradually reducing the gap width to fine tune the fit between pieces.
Negative model not centered
If the model comes in not centered and/or not laying flat on the build plate, try re-centering the negative geometry:
- Select the negative model in the object tree on the left.
- Click the “Move” button (or press M).
- Ensure the X,Y, and Z parameters are all set to 0.
Compatible With
- HueForge prints
- Chroma Canvas / painting-by-layers
- Lithophanes
- Flat decorative prints
- Any rectangular STL!
Thank you for checking out my models!
I really appreciate the time you've taken to read this far! I love making detailed designs and working with people to bring their ideas alive. If you'd like to support my work, leave me a comment and a photo of your print! I love seeing how these prints come to life. If you want to help me buy some filament for future projects, feel free to give me a boost!
Boost Me (for free)
Thanks so much for your support!
License
You shall not share, sub-license, sell, rent, host, transfer, or distribute in any way the digital or 3D printed versions of this object, nor any other derivative work of this object in its digital or physical format (including - but not limited to - remixes of this object, and hosting on other digital platforms). The objects may not be used without permission in any way whatsoever in which you charge money, or collect fees.
Comment & Rating (7)