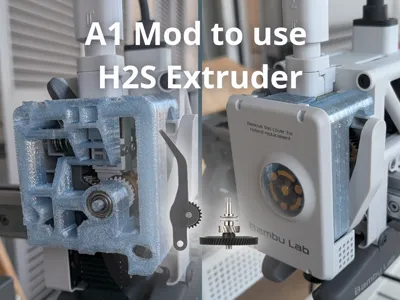
A1 Mod to use H2S extruder


Print Profile(1)

Description
WARNING: This mod is not for beginners, you must have all the required materials and carefully read the instructions before proceeding. You can always go back to the original but be sure you can manage the process before starting. If you want to start easily you can use my A1 Open Cover Mod as a previous step which is an easy mod.
This mod enables the use of the H2S dual gear extruder on the A1 or A1 Mini, providing significantly better filament grip and allowing the printing of lower-Shore TPUs and materials that were previously not possible, such as recycled PET (rPET) (which was my case and the motivation behind this mod).
I’ve tried to describe the process in detail, and while its length may make it seem complex, most of it is actually quite simple. The only step that’s really “not for everyone” is step 2, the notch, which is "needed" to add a new gear to the H2S wheel shaft so the original straight filament path is respected and full compatibility with the AMS is maintained like you can see in the left image below. If you’re comfortable with that step, the rest of the process is quite straightforward.

The torque on this new gear can be very high when the filament gets stuck. Make this gear strong enough has significantly complicated the process. My solution was to cut a small notch in the shaft and use epoxy resin. Several people have suggested using a metal-specific epoxy resin that behaves almost like welding. This might be enough on its own and could make the notch unnecessary, but I haven’t had the chance to test it yet. If anyone tries this approach, I’d really appreciate knowing whether it works as a reliable solution. Any suggestions to improve this would be greatly appreciated and tested.


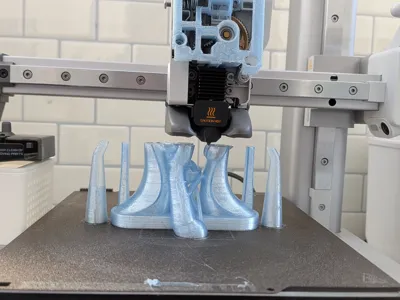
(Failing feeding example without the notch)
The remainder of the process is fairly straightforward. The required materials for the entire process are listed here, along with links to the exact ones I used:
- A1 or A1 Mini (This is important 😉)
- The Official H2S extruder or compatible
- Rotary tool like Dremel with a tungsten head or something able to cut metal (If you want to make the notch)
- Clamps for firmly securing the parts while gluing and cutting the metal
- Epoxi resin or the strongest adhesive you can find
- A syringe with a needle over 1 mm in diameter (to apply the epoxy, as this resin is very thick and won’t flow through a smaller one)
The process is split into 5 steps:
- Disassemble the original extruder
- Create the notch (highly recommended, but the setup can work for weeks without it)
- Add the extra gear to the wheel shaft
- Reverse the order of the lever gears
- Reassemble everything
-----------------------------------------------------------------------------------------------
Step 1: Disassemble the original extruder
The official Bambu Lab guide explains how to perform this step by step, and I can’t explain it any better. Just follow the guide until you can remove the lever (step 6), and stop there without continuing to reassemble it.
Step 2: Create the notch (Optional?)
Some of you have pointed out that there’s a metal-specific epoxy resin that behaves almost like a weld. It’s quite possible that this alone would be sufficient, eliminating the need for the notch, but I haven’t been able to test it yet. If anyone gives it a try, I’d really appreciate hearing whether it works as a viable solution.
Moving forward with the process.. this was the first time I had ever cut metal, so I may not be the best person to explain how to do it. The upside is that if I managed to do it, anyone can, and this is the most complex step of the entire process. The goal is to create a notch as flat as possible on the shaft, removing roughly one third of its thickness (don’t worry about being perfectly precise with the measurement, it’s not strictly necessary, and the size of the part that fits the notch can also be adjusted in the slicer) like in the image and of course main thing is safety first please.

My approach was simply to secure the gear to a board that gave me enough space to cut it manually with the Dremel. I’m sure there are better ways to do this, so if you can, don’t do it like I did, do it properly 🙂. Above all, make sure everything is firmly secured and that you’ve taken all the necessary safety precautions.

Step 3: Add the extra gear to the wheel shaft
The print includes three parts that make up this gear, but only two are required. If you did NOT make the notch in the previous step, use the rounded part so it can fully fit. If you DID make the notch, use the flat part to take advantage of it. You can adjust the size of this part in the slicer to match the notch you created.

If you look at the extra gear, you’ll notice a groove around the central bore that contacts the shaft. The idea is to use a syringe with a needle larger than 1 mm to inject epoxy resin through this channel around the entire shaft and gear, ensuring a much stronger hold. Once that’s done, a bit more resin is applied to the small piece and the gear is completed by inserting it into place.

It’s strongly recommended to test the fit and sizing before performing the final process, as epoxy resin cures quickly and leaves little room for error. The end goal is to obtain a gear like the one on the H2S, but in reverse orientation, as shown in the photo, This way, the original filament path remains untouched.

Step 4: Reverse the order of the lever gears
The H2S lever also needs a modification, but it’s a minimal and straightforward one. Among the printed parts, there’s a tool to remove the shaft that holds the gears (this can be done manually without additional tools). Simply push to remove the shaft completely. Once it’s out, reverse the gear positions and reinsert the shaft to secure them.

Step 5: Reassemble everything
At this stage, we already have all the parts, and the only thing left is to assemble them in the order shown in the GIF and secure them with the screws. I still need to remake the GIF using the new version of the printed module parts, but for now it’s clear enough. Make sure to REMOVE ALL SUPPORTS, there are a few tricky ones inside the cutting blade hole.

(The complete process once the parts are done was already done)
Tips
Warping and other printer effects can affect the tolerances and shapes of your personal print, so be sure everything is aligned and in position as the guide says, and if not, I left usually a way to parametrize the prints to made them as precise as necessary.

Benefits
- Less parts in the cover, makes it easy to change and remove
- AMS Hub direct access without removing any other part
- The Open Frame of the cover enables direct observation of the extruder, gears, and the entire filament path to the nozzle, helping detect clogs and other problems
- CAD design released here if you want to modify something
- Recycled PET and other slippery materials working 100%
- It let's you print low TPU shores
- You can clean the gears without remove anything
- Original cover compatibility if you prefer it covered
- AMS lite fully compatible
- In general better grip in all materials
Finally, I’d like to thank Igor Tylmann for his help and advice, and for creating the bottle recycling machine that inspired this modification, as well as his community, to Amzaldua who gives me the idea of using the H2S extrusor instead of recreate everything from scratch and also to Shauna for being the first to test it outside my controlled environment and for being my guinea pig ❤️
If anyone has ideas to improve the process, they’re more than welcome and open for discussion. I designed this module to be as simple and generic as possible so it can be easily replicated, but I’m sure there’s room for improvement, and I’d love to make it even easier with your help. If you give it a try, thanks a lot and I’d really appreciate a boost if it works :) I’ll do my best to answer all questions and comments quickly.
License
You may create derivative works based on this object, provided that all such derivative works are published exclusively on the MakerWorld platform and include proper attribution to the original creator. You may not share, upload, host, distribute, or publish this object—or any derivative work of this object—on any other digital platform, marketplace, or distribution channel. Commercial use of this object and any derivative works is strictly prohibited. This includes, but is not limited to, selling, renting, sublicensing, or using the object in any context in which you receive monetary compensation or other financial benefits.
Comment & Rating (125)