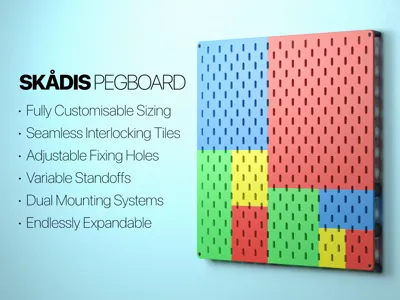
Fully Customisable Skadis Pegboard Generator


Print Profile(7)


Description
Boost Me (for free)
If this model helped you, please support my work by giving me a boost. Thank you!
Fully Customisable Skadis Pegboard Generator
Hello everyone! We all love the IKEA Skådis system, but sometimes the standard sizes just don't fit the space you have. Whether you need a small patch for a specific tool or want to cover an entire wall that doesn't match standard dimensions, I wanted to create a solution that gives you total control.
🔥 LATEST UPDATES
I am constantly refining this system based on your feedback. Here is what is new in the latest versions:
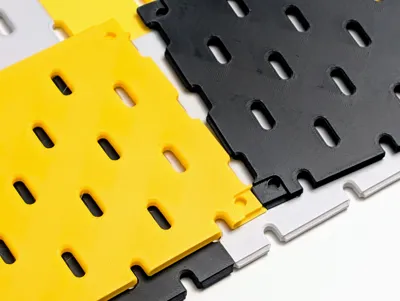
- New Interlocking Connectors: I've completely redesigned the connector system. The new shape is engineered to counter the shear forces that the standard pegs were susceptible to (even if failures were rare, peace of mind is better!).
- Easy Removal Slot: Made a mistake in your layout? No problem. The new connectors feature a small slot that allows you to easily lever them back out with a flathead screwdriver or even a fingernail.
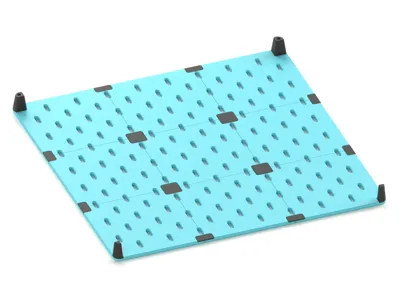
- Modifiable Connectors: You can now specify and adjust the exact standoff height of the connectors within the generator.
- Adjustable Countersink: The countersink on the fixing holes can now be adjusted to perfectly match your specific screws.
- Alternate Generator Added: I have uploaded a second pegboard generator designed to work with different mounting systems by allowing you to modify the position and size of the fixing hole. (Note: My interlocking connectors are not compatible with this alternate option).
Updated Riser: The 4-Pin Connector Riser is now slotted to allow you to attach items around that specific area.

Key Features
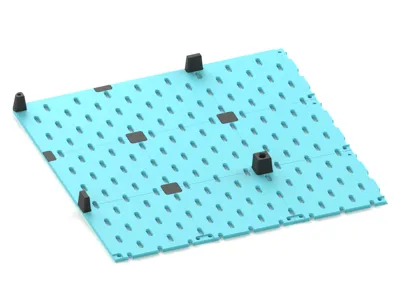
This generator allows you to create bespoke pegboards ranging from a compact 80x80mm all the way up to 320x320mm, designed to be tiled together seamlessly in any combination.
- Seamless Tiling: The generator allows you to create specific "Edge," "Corner," and "Middle" panels that lock together.
- Custom Dimensions: Generate boards to fit your specific printer bed or wall space.
- Toggle Fixing Holes: You can turn mounting holes on or off. Keep them for the corners of your assembly, and turn them off for the centre panels for a cleaner, uninterrupted look.
- Edge-to-Edge Slots: Choose whether the slots stop with a border or run right to the edge for maximum storage density.
Please Note (Printing Advice)
- Cooling: Allow your build plate to cool completely before removing the part to prevent warping.
- Connector Choice: Use tall connectors for standard mounting, unless you need to hook an accessory directly behind that specific spot (in which case, use the flat ones).
- Build Volume Limits: Some 320x320mm borderless configurations will not fit a 320mm build plate due to the joints making them slightly over the limit.
- P1S Users: The 240x240mm pegboard can fit the Bambu Lab P1S, you just need to reduce the Exclusion Zone area in your slicer settings.

Assembly & Installation Guide
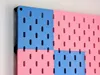
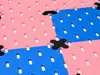
Important: Before you begin, lay your panels out on a large flat surface to confirm your layout and colour pattern.
1. Assembling the Panels
Connecting the Grid: Use the Flush Connectors to bridge the seams between your panels. (While the new connectors have a removal slot, it is still best to be certain of your layout before snapping them all in!).

Standoffs: For larger setups, use these in combination with the Riser Connectors to ensure the correct distance from the wall.

2. Mounting Options I have designed two distinct mounting methods depending on your preference and tools.
Option A: The Hook System (Recommended for Ease)
- Best for: Easy installation and maximum strength.
- The Trade-off: You will lose the use of the specific slots where the hooks attach.
How to Install: Screw the small "Mounting Bases" to your wall at the desired locations. Slide the "Hook" component onto the base. Simply hang your assembled pegboard onto the hooks.

Option B: Direct Screw Mounting (Recommended for Aesthetics)
- Best for: A seamless, professional look where every single pegboard slot remains usable.
- The Trade-off: This method requires precise measuring.
- Hardware Required: 50mm x 3.5mm countersunk screws (or similar).
How to Install: If you generated panels with the "Fixing Holes" option enabled, note that the holes are centred 8mm from the panel edges. Place a Riser behind the fixing hole to act as a spacer. Drive your screw through the panel hole, through the riser, and directly into your wall anchor.

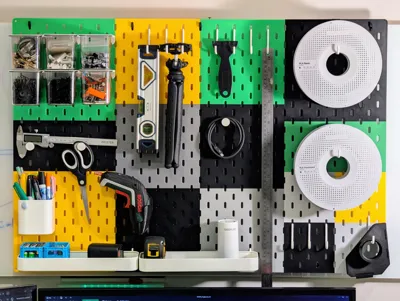
Why Print Your Own?
- Fit Any Space: Perfect for weird alcoves, sides of cabinets, or inside drawers where standard boards won't fit.
- Colour Match: Print in the exact colours of your room or workshop theme.
- Expandable: Start small and print more tiles as your tool collection grows!
Happy Organising!
I'm continuously creating new products so please follow @moss3d to be notified when new models are uploaded


License
You shall not share, sub-license, sell, rent, host, transfer, or distribute in any way the digital or 3D printed versions of this object, nor any other derivative work of this object in its digital or physical format (including - but not limited to - remixes of this object, and hosting on other digital platforms). The objects may not be used without permission in any way whatsoever in which you charge money, or collect fees.
Comment & Rating (459)