Universal DC speed controller PCB enclosure


Print Profile(1)

Description
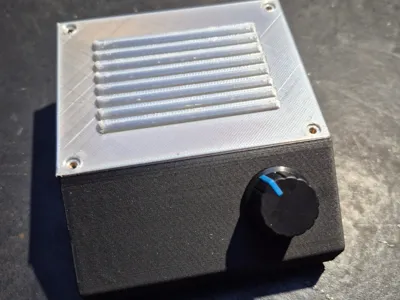
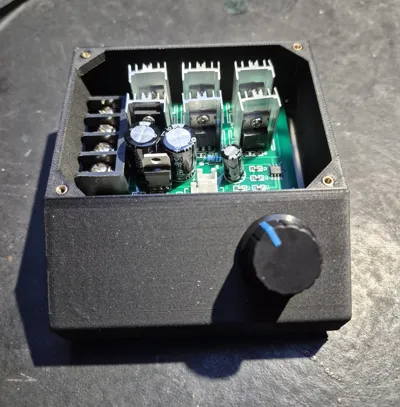
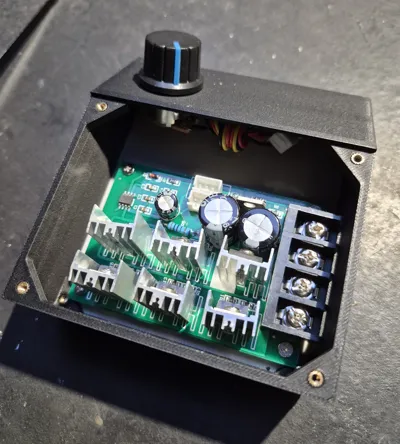
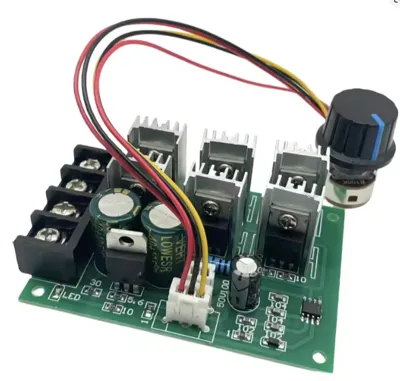
I fully designed and printed this enclosure for a DC9-55V / 0-40A speed controller PCB and its potentiometer A robust, aesthetic, and practical enclosure for your speed controller
It is compatible with the circuit visible in the photos
NB: If you have another PCB with a potentiometer, and the PCB size, hole spacing, and potentiometer hole size (8 mm) are identical, feel free to use this enclosure for another purpose
Compatible PCB dimensions:
Length: 80 mm
Width: 55.70 mm
Hole spacing: 72 mm (length) and 48 mm (width)
Enclosure dimensions:
Total length: 92.60 mm
Total width: 94.60 mm
Height: 37 mm
Fastenings:
- Holes provided for 3.5 mm diameter inserts (3 mm hole)
- Lid, bottom, and PCB are secured with 3.5 mm inserts (to be inserted by heating them into the 3 mm holes)
Required screws:
- Lid and PCB → M2.5 x 5 mm
- Bottom → M2.5 x 6 mm
Project content (4 plates):
Plate 1: Feet
- 4 TPE feet (flexible, not to be put in the AMS)
- Possible to print in other materials if you do not want flexibility
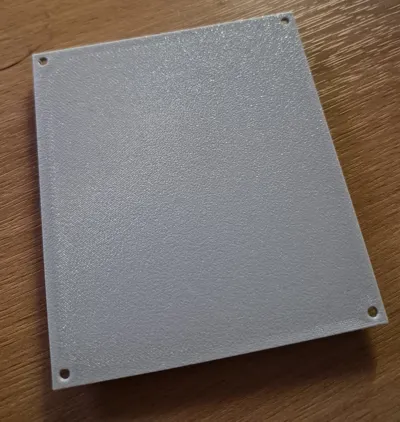
Plate 2: Lid
- Contains 8 ventilation fins
- No support required for printing
- Recommended material: PETG, 100% infill (heat resistance)
Tips: use very dry filament to avoid defects → no problems observed during my prints
Plate 3: Bottom
- Integrated: 4 printed standoffs to support the PCB
- Avoid PLA (heated inserts risk damaging the standoffs)
- Recommended material: PETG
- Fastening: the 4 feet screw through with M2.5 x 6 mm screws
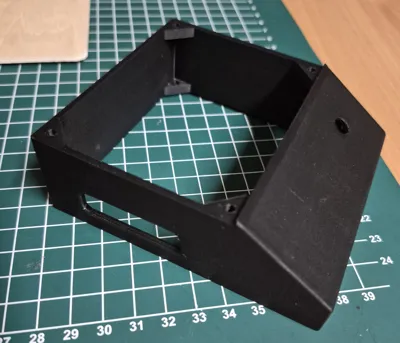
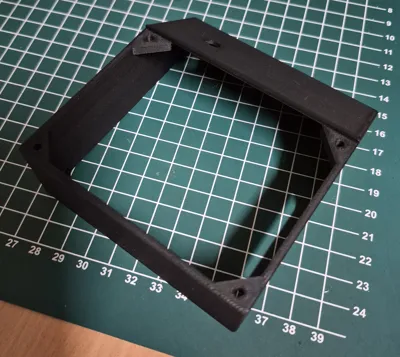
Plate 4: Enclosure body
- Printed in PETG CF (carbon) → very nice finish and lightweight enclosure
- Other materials are possible, but be careful: the circuit can heat up → avoid PLA
Usefulness of supports:
- Lid support
- Maintains the hole for the potentiometer (8 mm) to prevent any deformation
Groove under the box to accommodate the bottom
Recommended: use support filament for the support interface → clean finish and easy removal
Tested with Bambu PLA/PETG support filament → excellent result
Result:
With a very dry filament and the settings as in the project, the rendering is perfect (see photos)
Assembly:
Bonus:
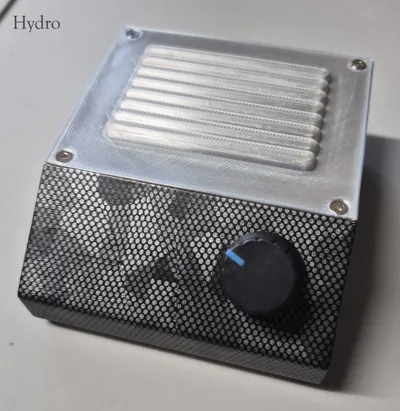
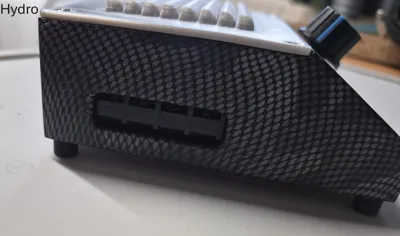
I printed 2 enclosures. The first is straight out of the printer. The second was covered after printing with an effect film, using the hydrographic principle (the enclosure is submerged in a tank of water containing the hydrographic film. Thanks to a chemical activator, the pattern transfers onto the object. It was then removed from the water and carefully dried. The result is visible in the photos marked "Hydro")
Happy printing everyone!
Boost Me (for free)
Your boosts, comments, and shares are more than just a click: they encourage me to refine my models and offer useful parts Thank you infinitely for your support!
For one-time support and to help me create more, you can also buy me a coffee here:

License
You shall not share, sub-license, sell, rent, host, transfer, or distribute in any way the digital or 3D printed versions of this object, nor any other derivative work of this object in its digital or physical format (including - but not limited to - remixes of this object, and hosting on other digital platforms). The objects may not be used without permission in any way whatsoever in which you charge money, or collect fees.
Comment & Rating (0)