
Twin AMS 2 Pro / AMS HT Drawers (+H2 cart plans)
Print Profile(7)



Bill of Materials
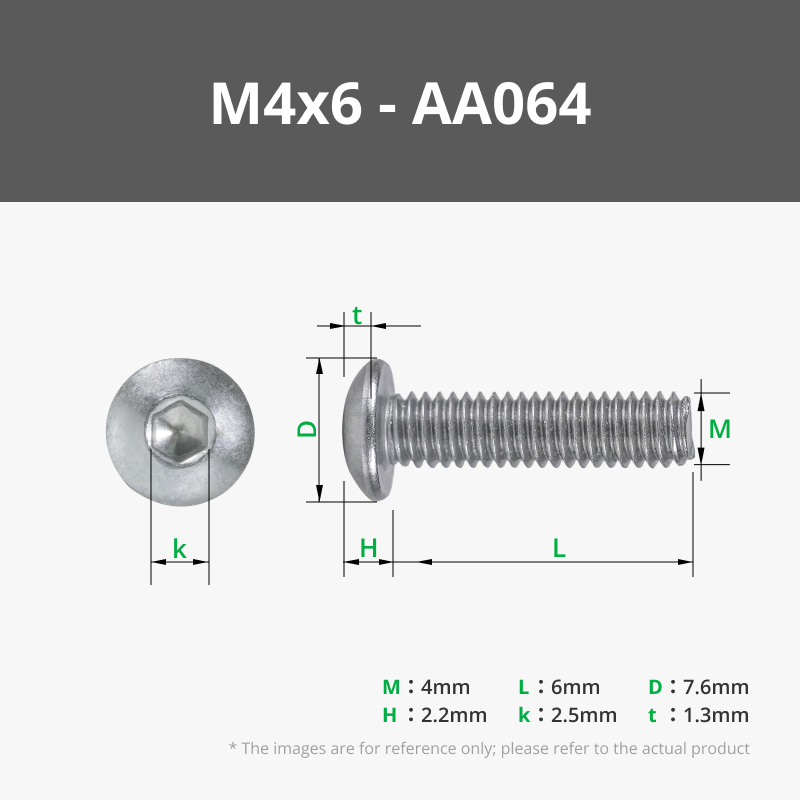
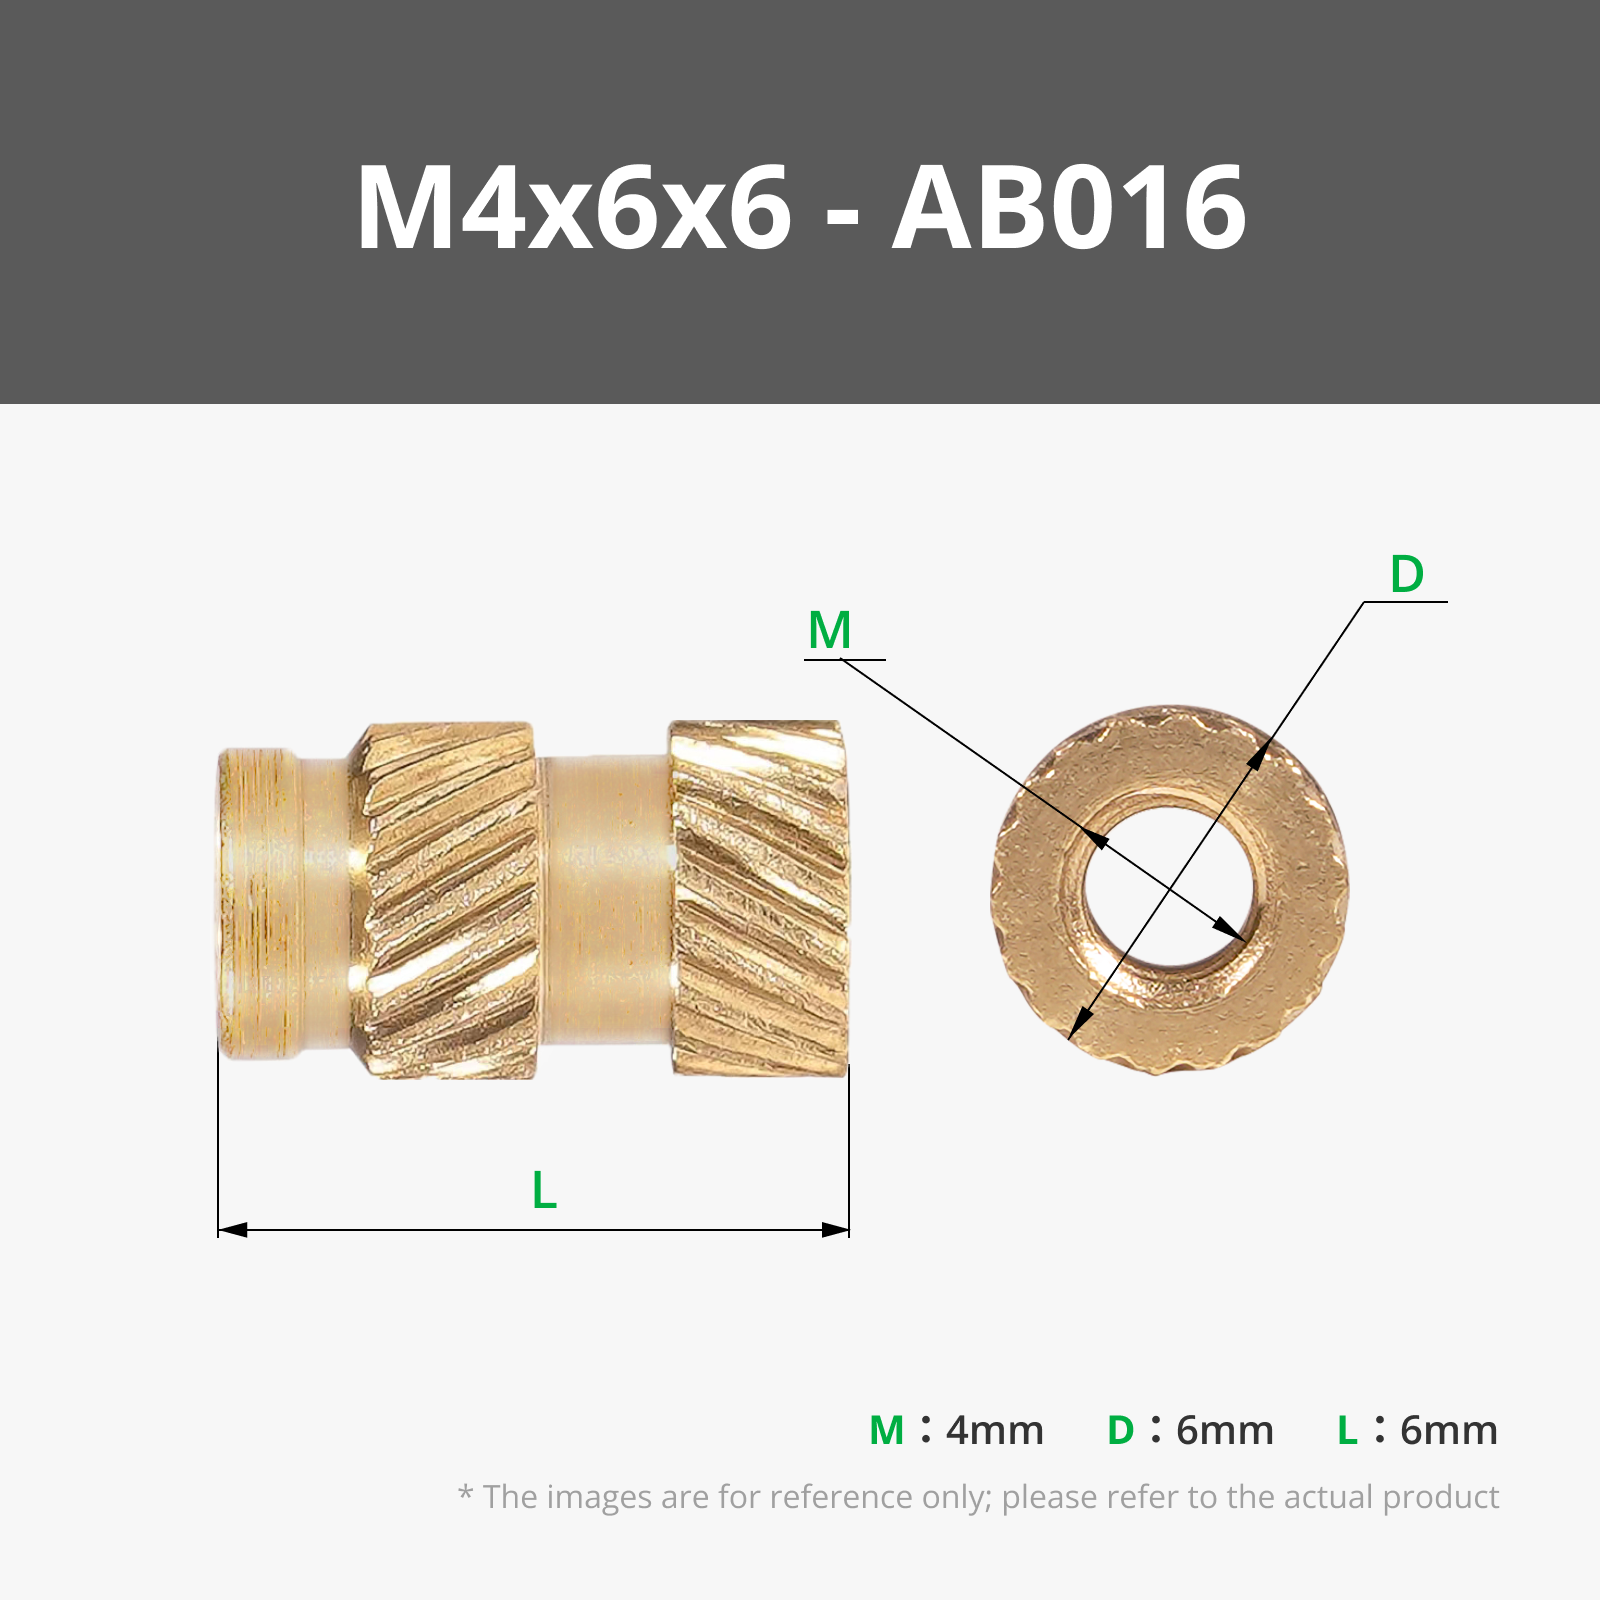








- 400mm Full Extending Drawer Guides. Thickness 13mm max. / wideness max 50mm x 8: i used exactly these ones: https://amzn.eu/d/441gfL6
Description
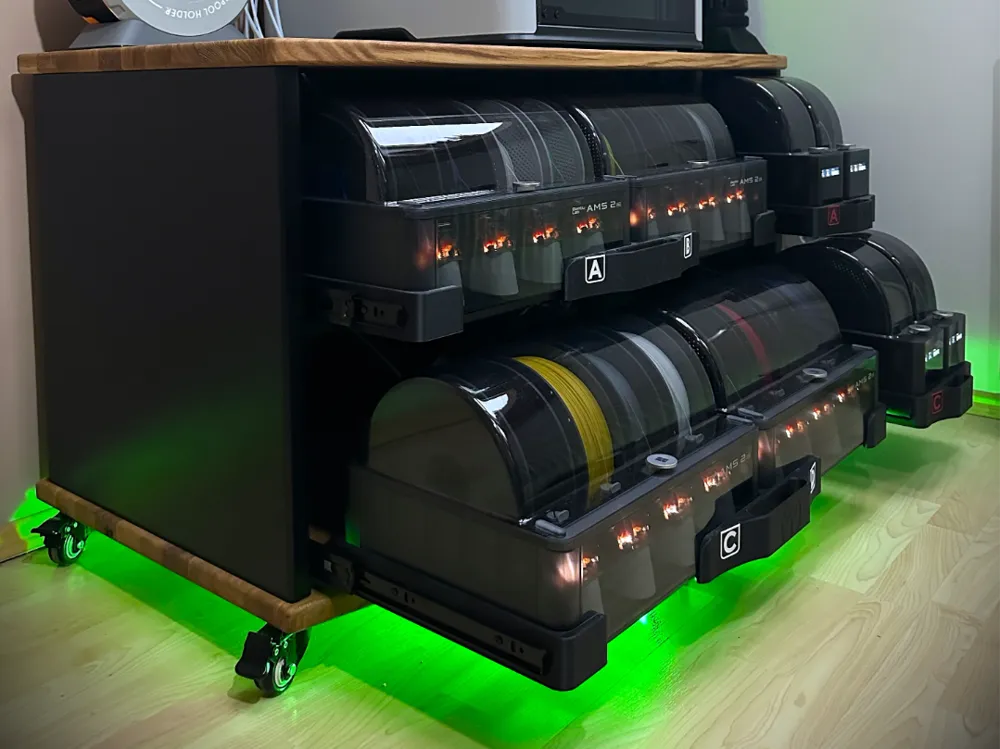
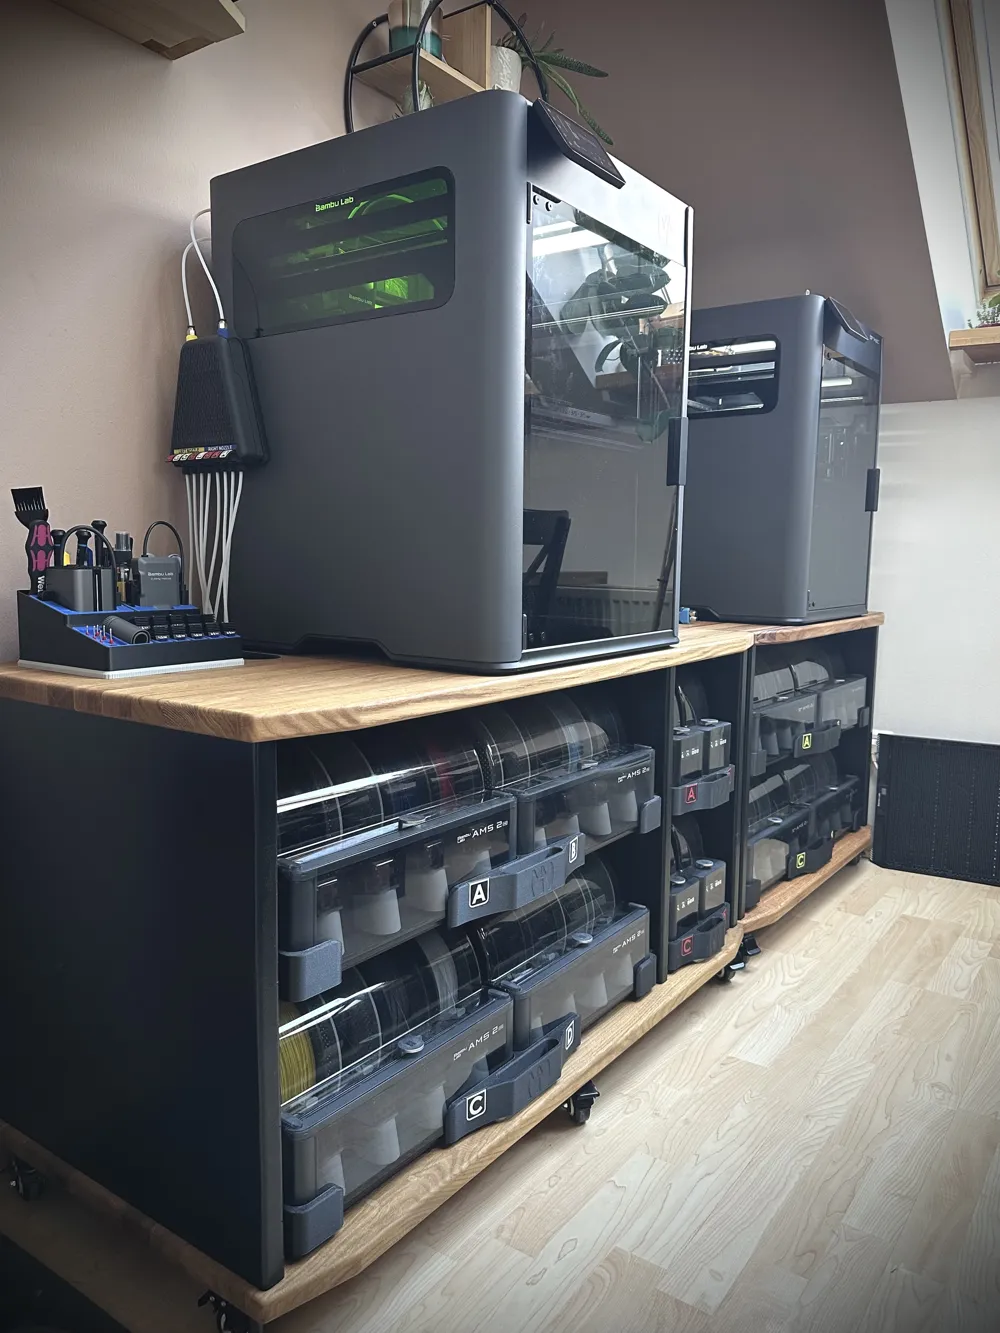
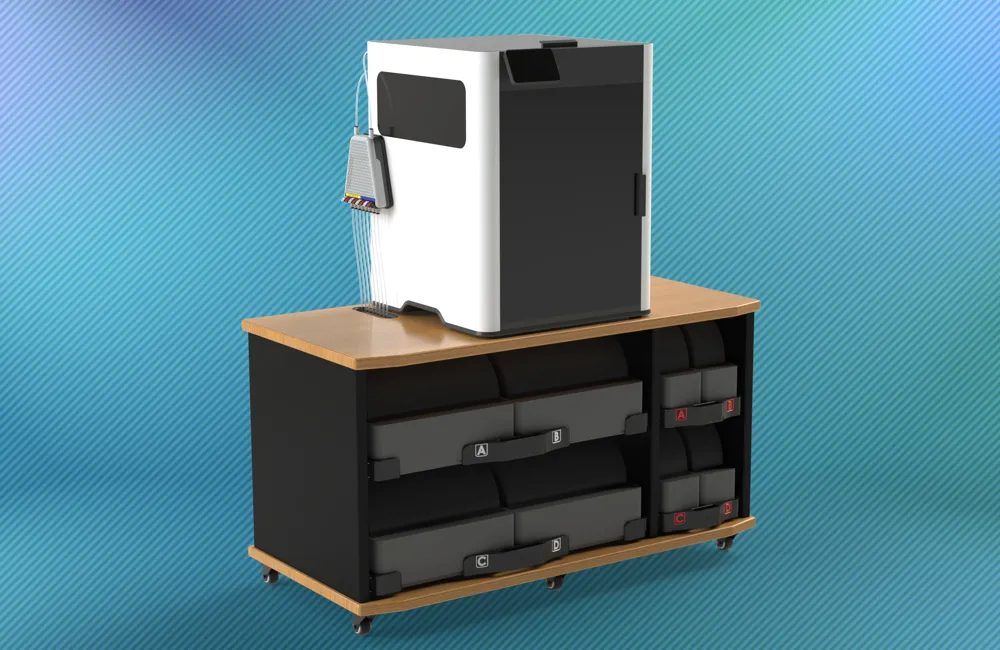
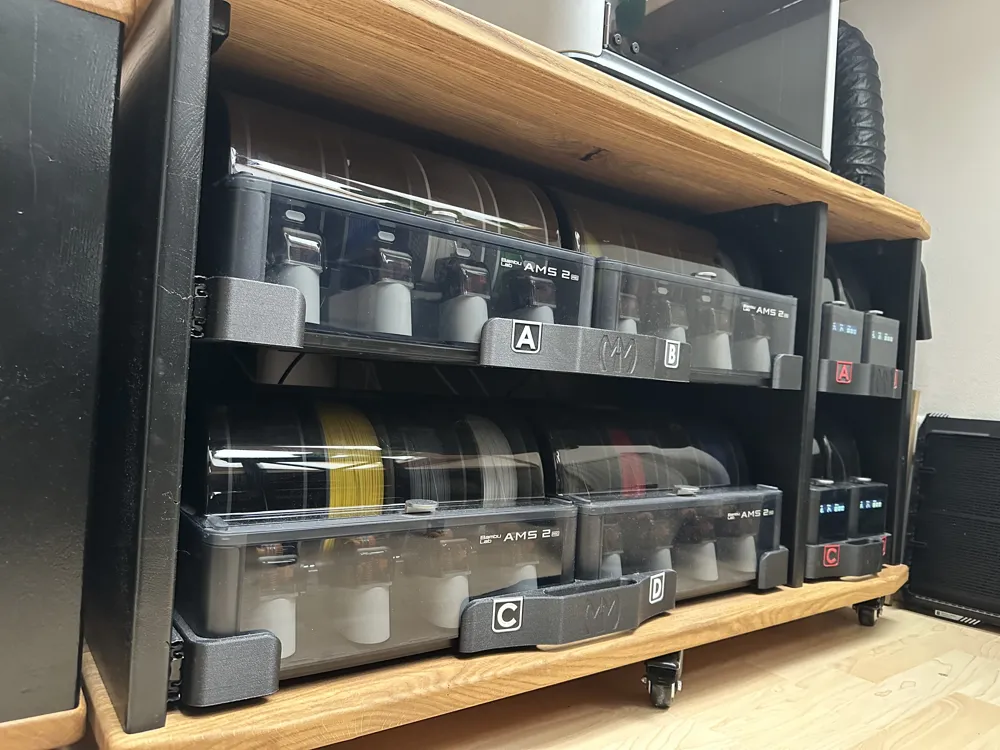
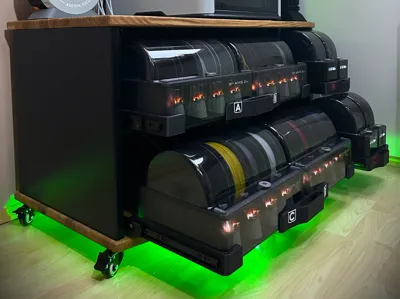
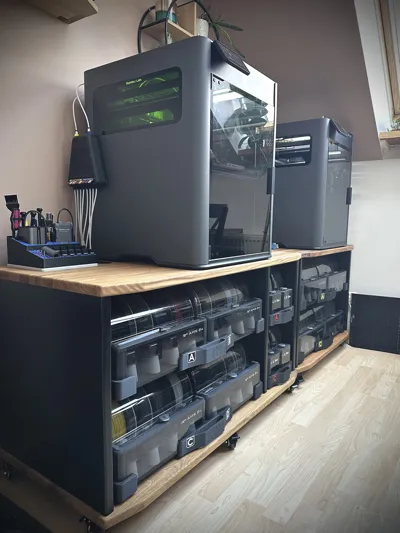
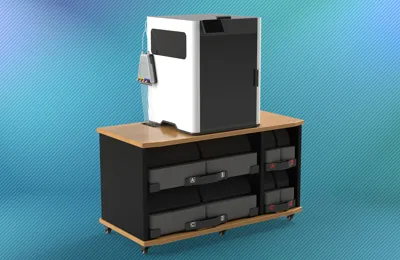
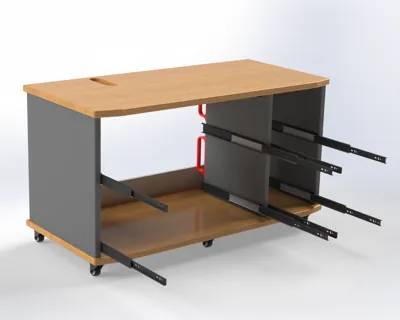
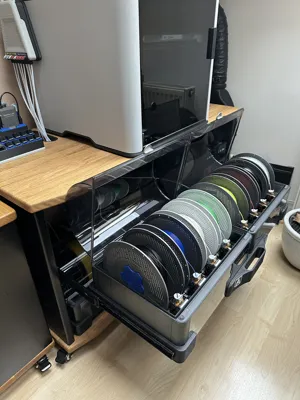
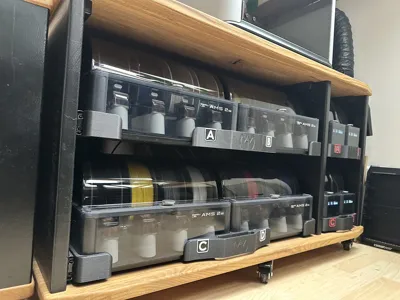
As promised, here's my version of a mobile multi-AMS rig for my H2D.
This is the setup that I already had very precisely in mind when I designed the two versions of my "H2 Nozzle Management System".
It is the device that's hanging on the left side of my H2D and can be found here: https://makerworld.com/en/models/1387281
It's newer sibling (not seen in these pictures) is here: https://makerworld.com/en/models/1502592
In this model description, I will mainly discuss the AMS drawers themselves.
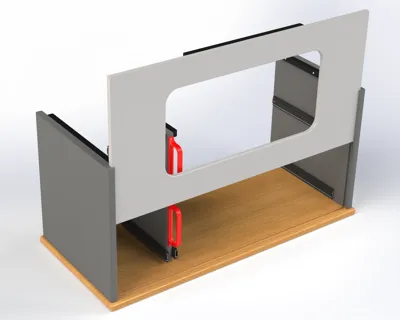
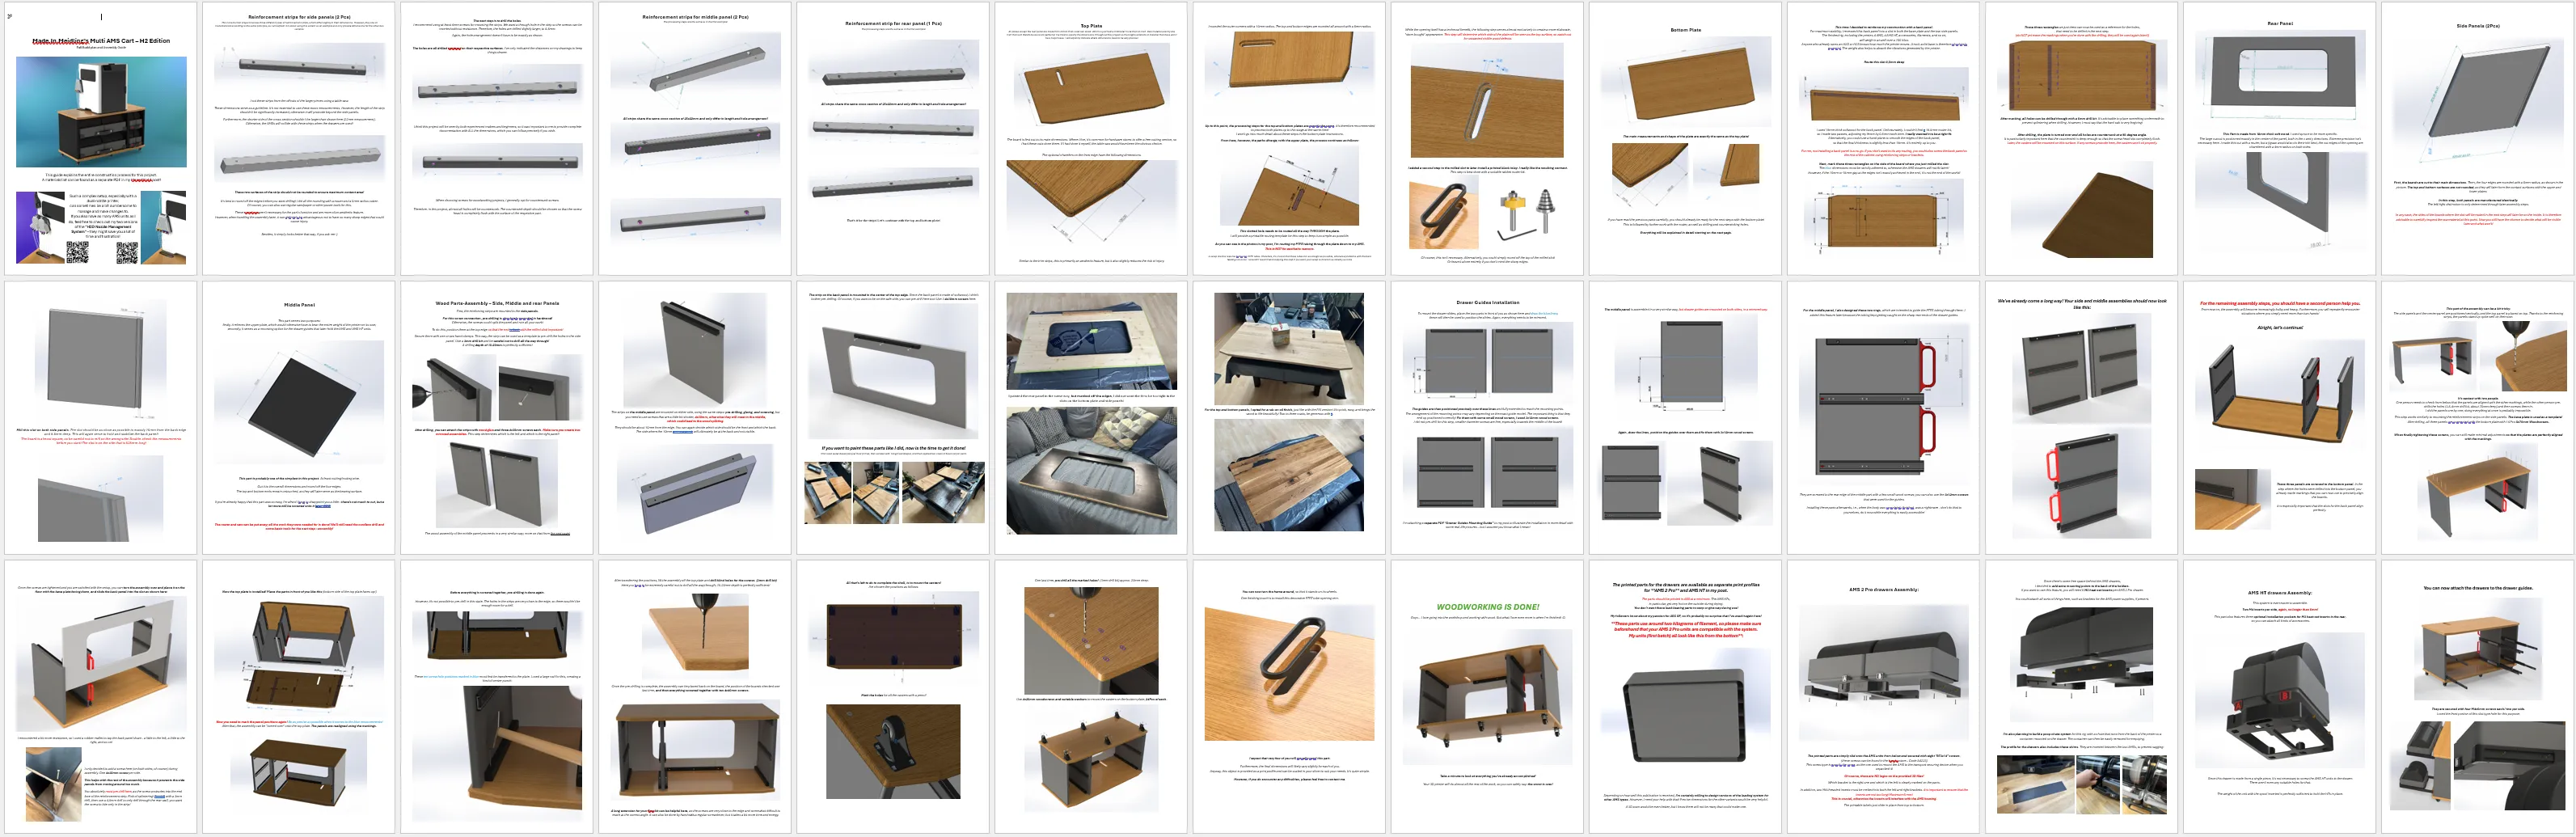
The complete documentation, with all the details for building my rig, can be found as a PDF with over 40 pages of documents under "Assembly Guide."
Boost Me (for free)
These documents represent a great deal of work and attention to detail. I would be delighted if some of you would take the time to read them.
A bit of support from the community is always great help for me!
Please stick around for more awesome models!
Maybe you'd like to follow me and see what the future holds! Your likes and boosts are also much appreciated.
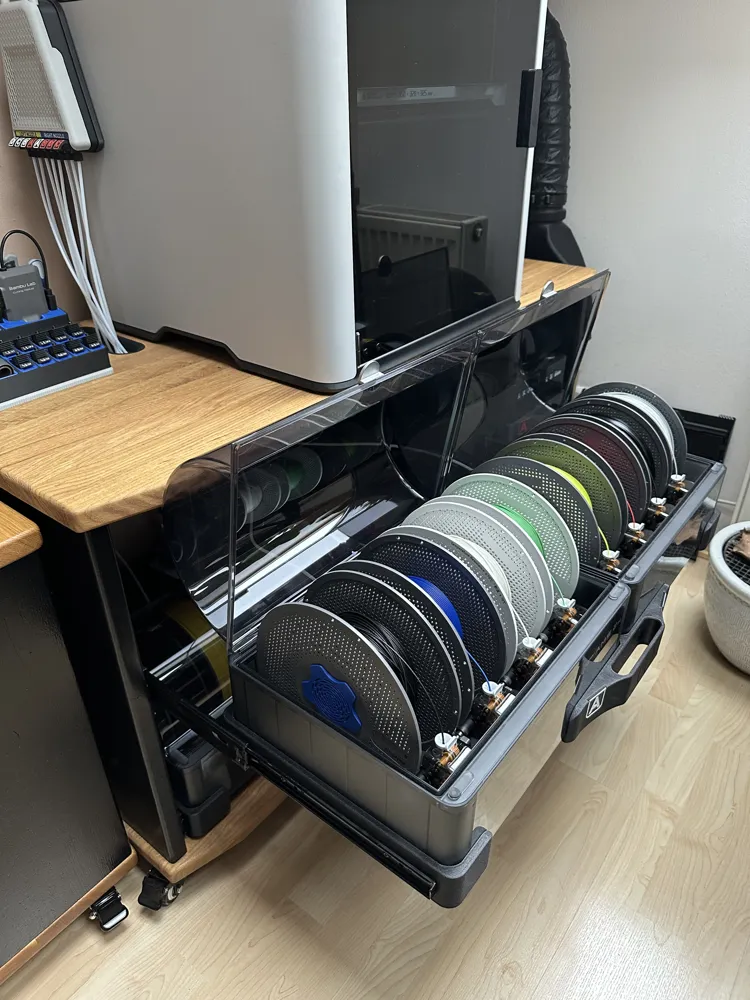
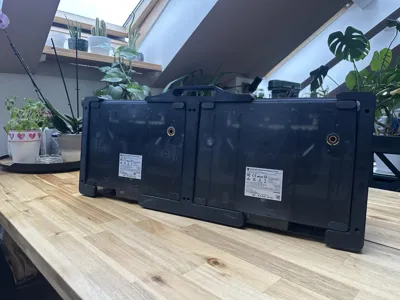
Unlike in my P/X series multi AMS rig, this time I decided to build front-opening drawers.
Due to their sheer size, the drawer connector parts can only be printed with an H2 printer or other larger printers.
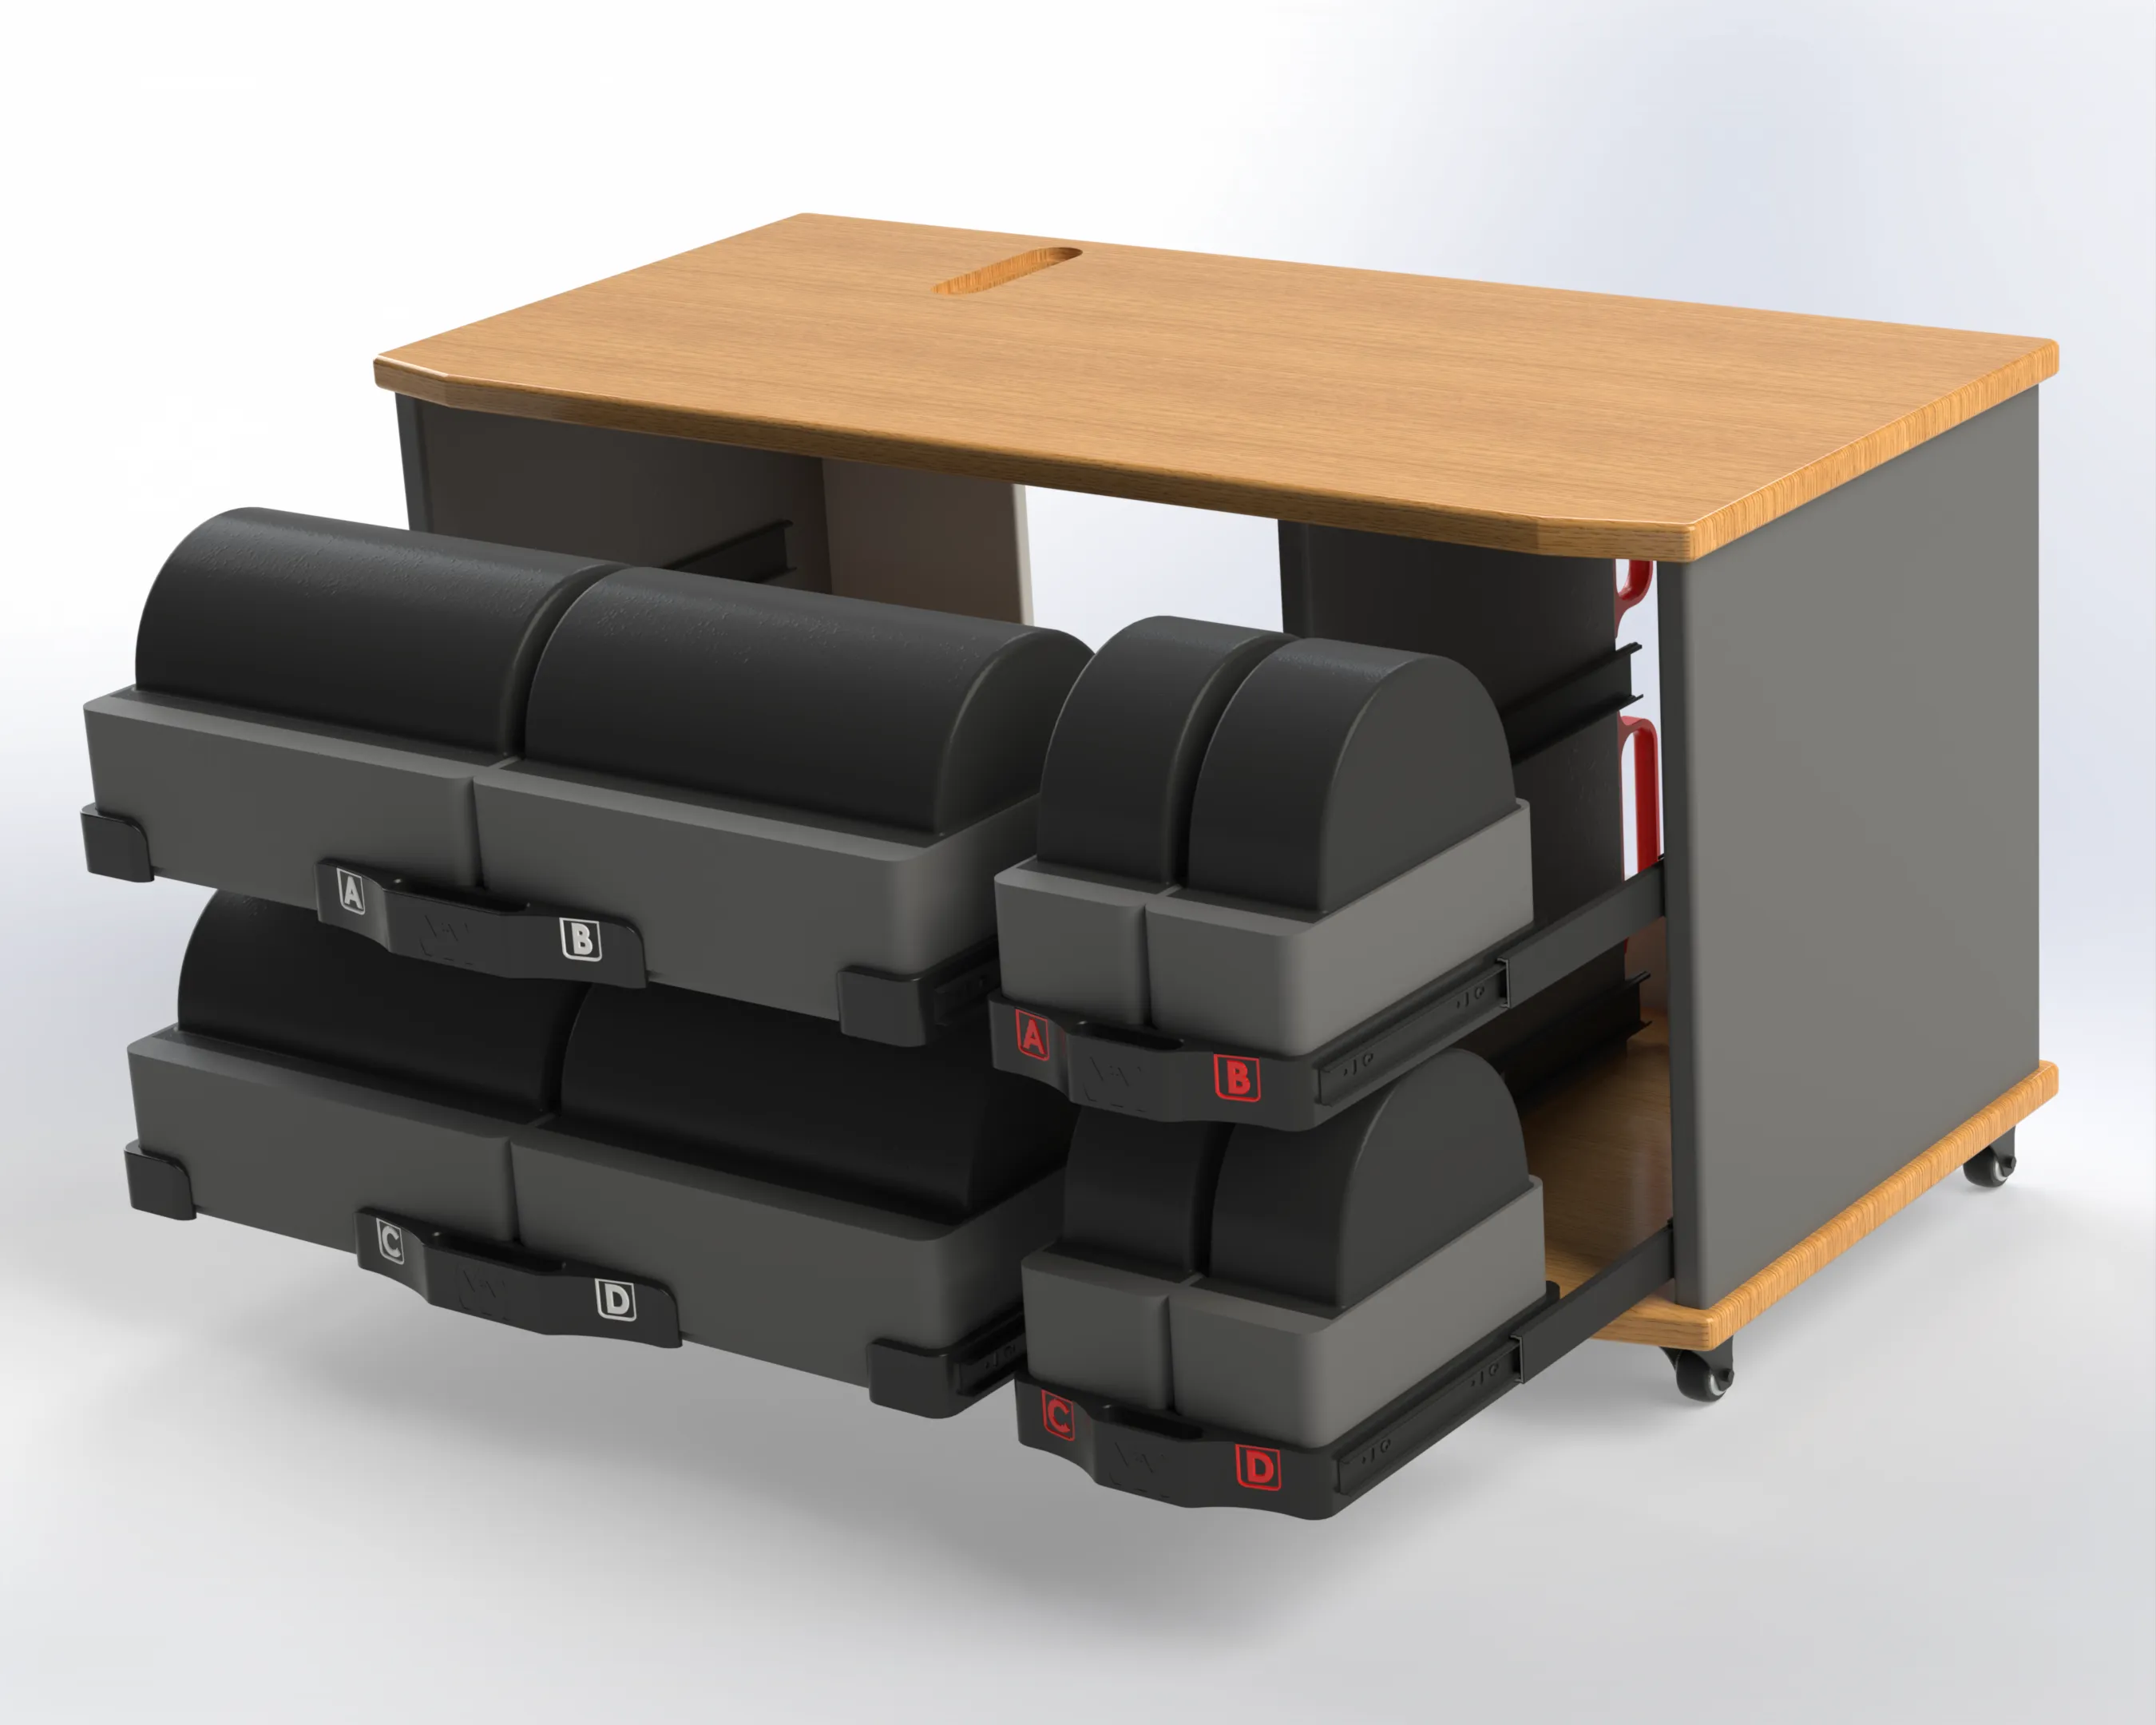
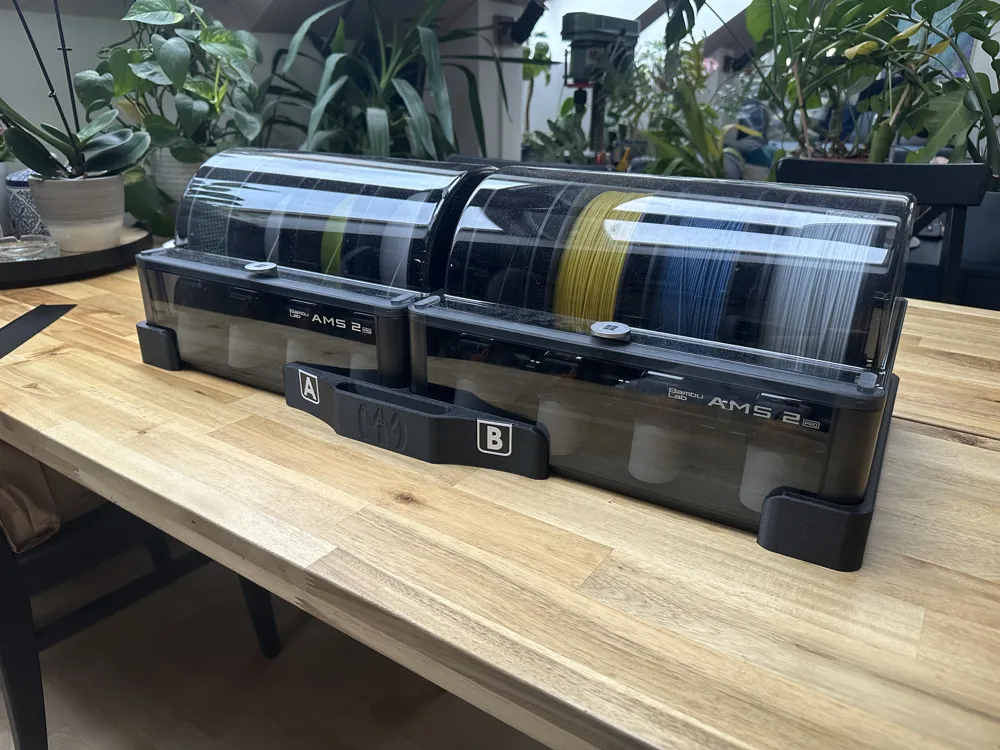
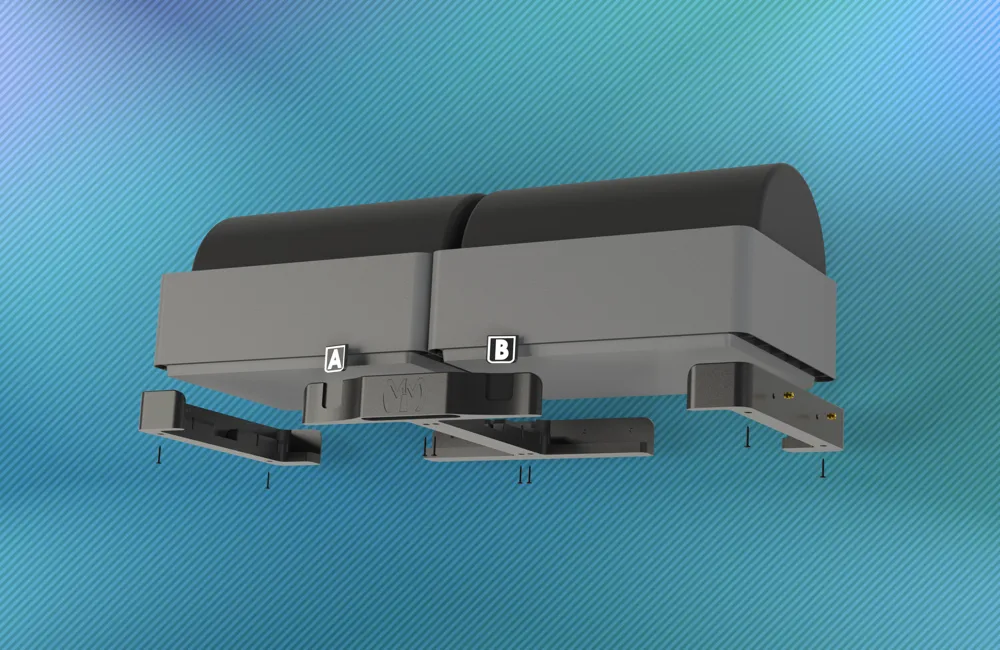
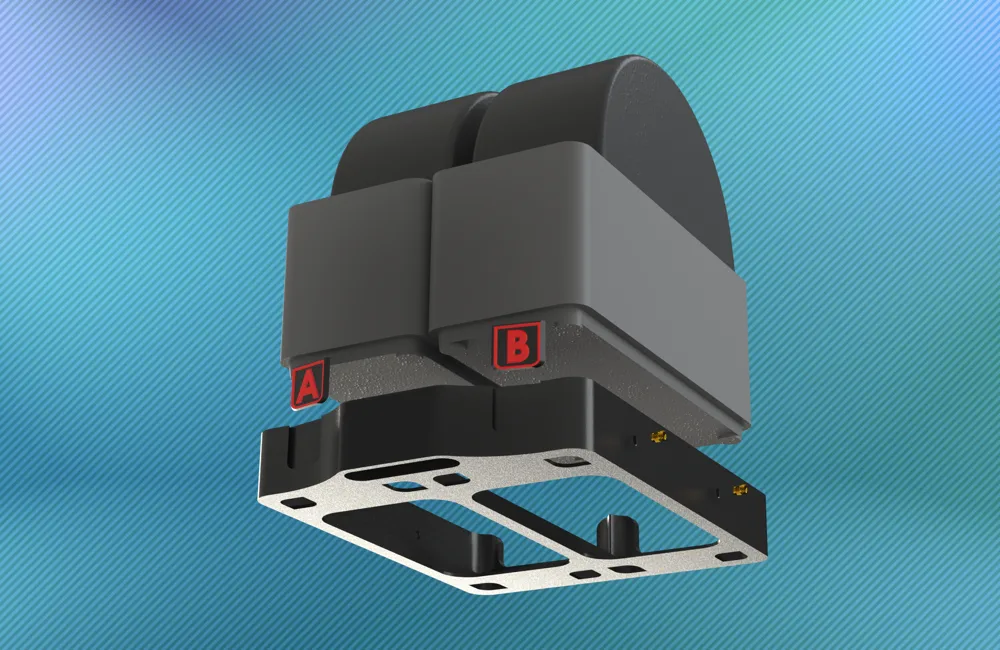
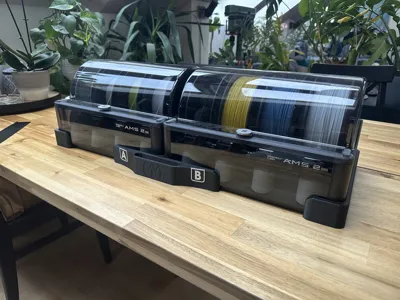
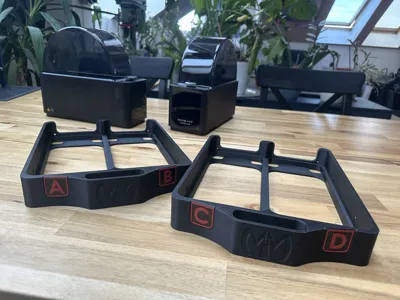
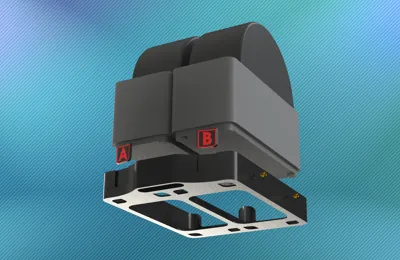
This drawer system tightly connects either two AMS 2 Pro or two AMS HT units into one package.
The close-fitting arrangement saves space. However, there should be at least 10-15 centimeters of free space behind the drawers.
I also wouldn't recommend a completely enclosed housing, as the warm air released during drying wouldn't have anywhere to escape.
#######################################
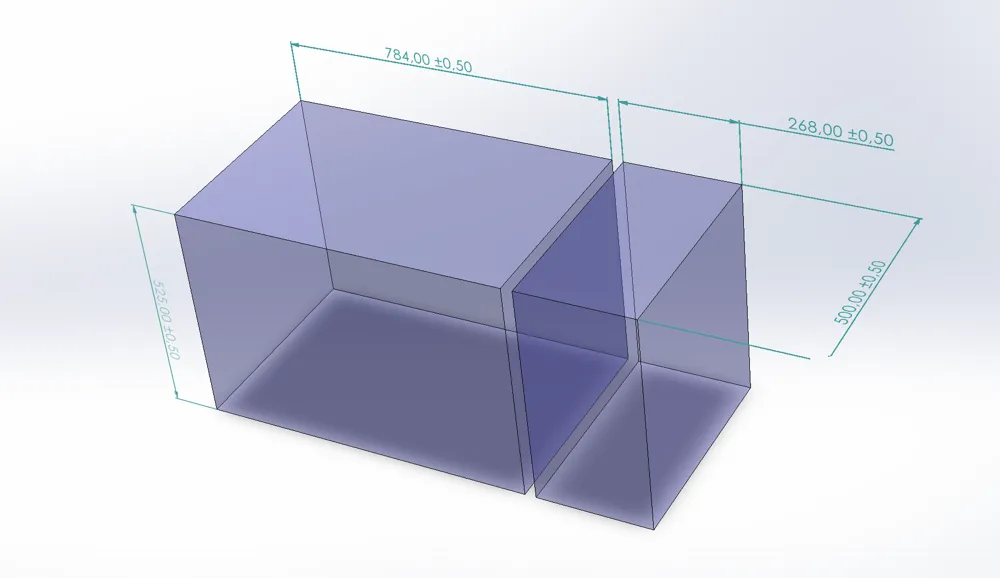
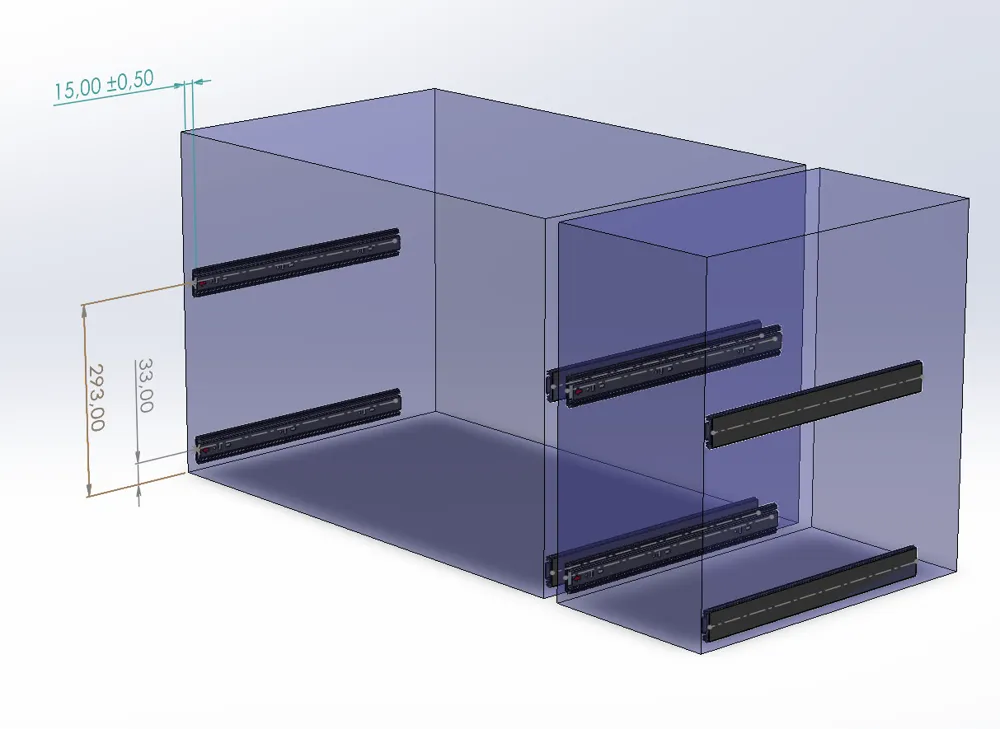
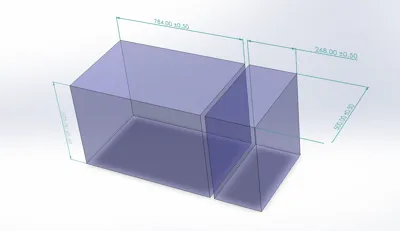
If you don't need my detailed guide and just want to know which inner dimesion your cabinet should have:
The width of the gap in which the AMS 2 Pro drawers are installed, including the recommended drawer slides, is 784 mm.
The AMS HT drawers, including the rails, require an installation dimension of 268 mm.
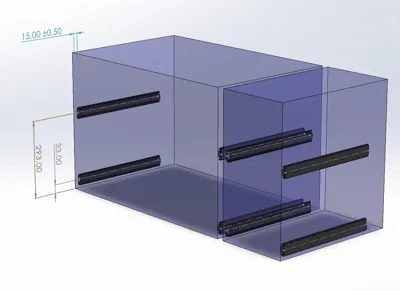
The individual drawer levels are 260mm high. You should mount the drawer runners at least this distance apart if you are installing multiple levels!
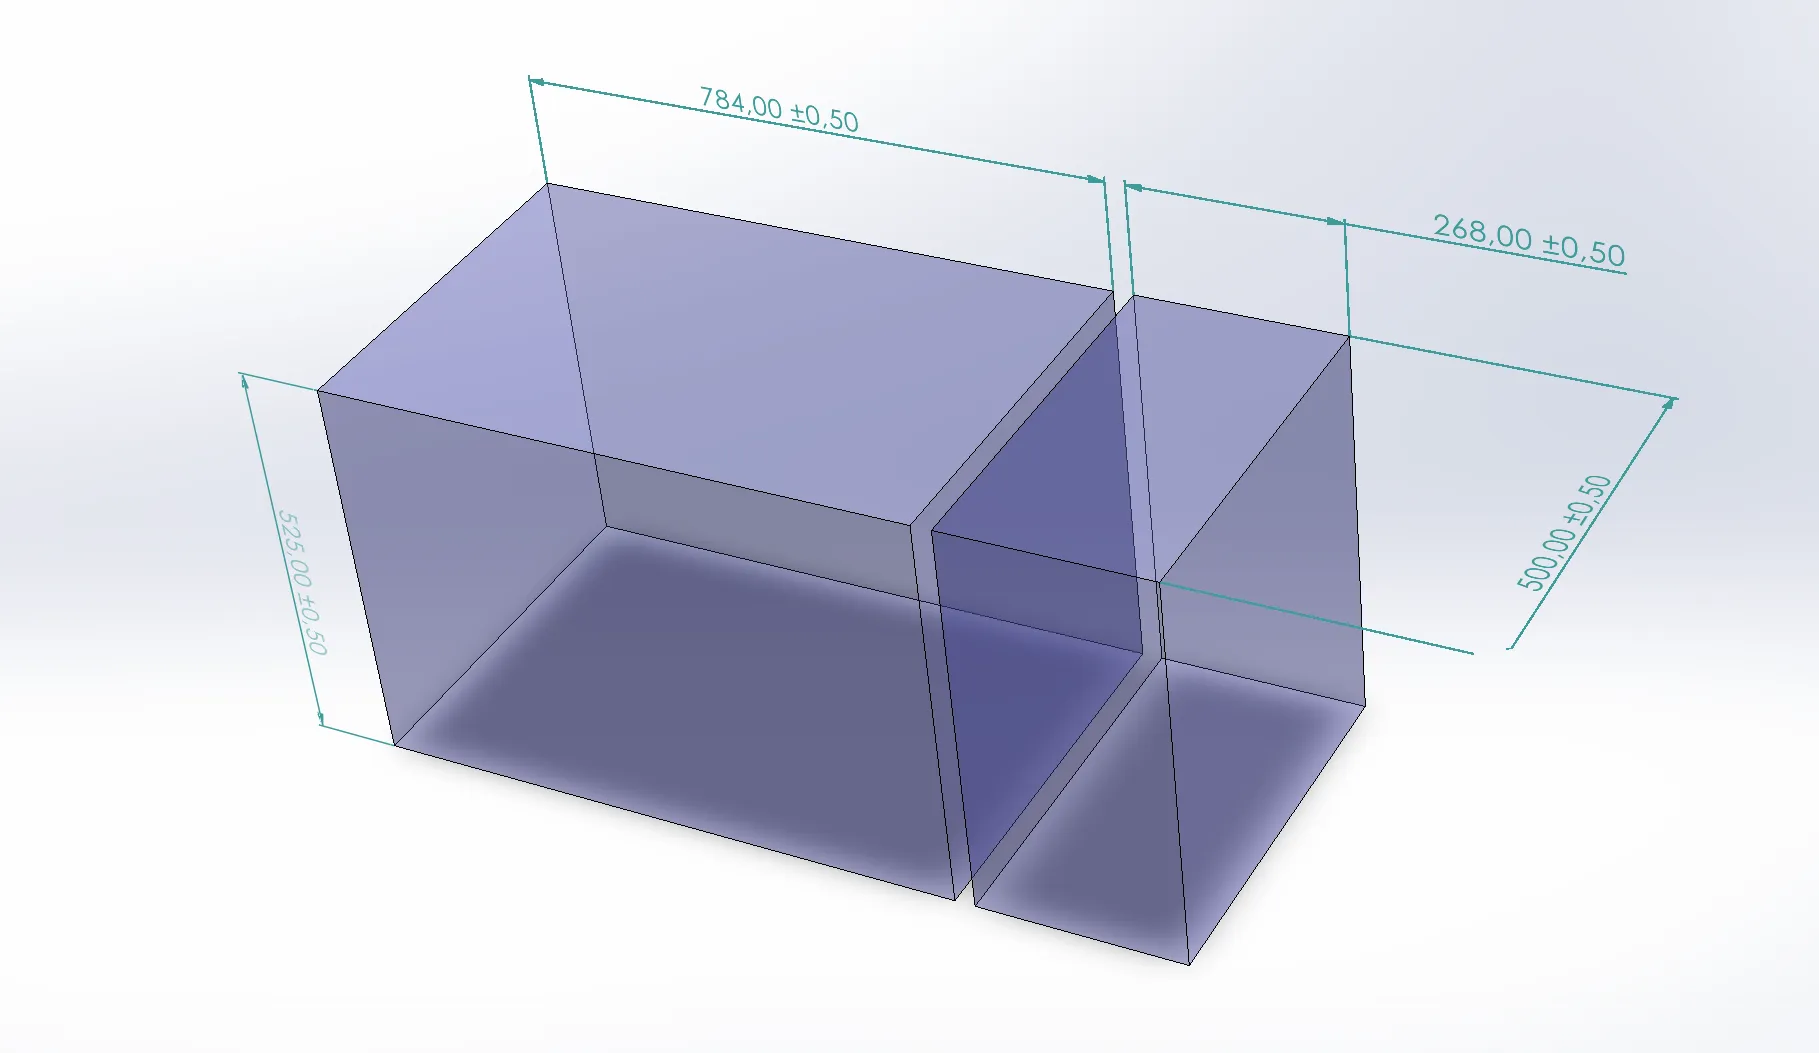
Furthermore, the depth of the installation location should be at least 450-500 mm.
I'll show you exactly where to mount the guides further down!
######################################
!!!Update 30.11.2025: the AMS 2 Pro Drawers Profile has been updated today, the drawer system now fits both AMS 2 Pro versions!!!
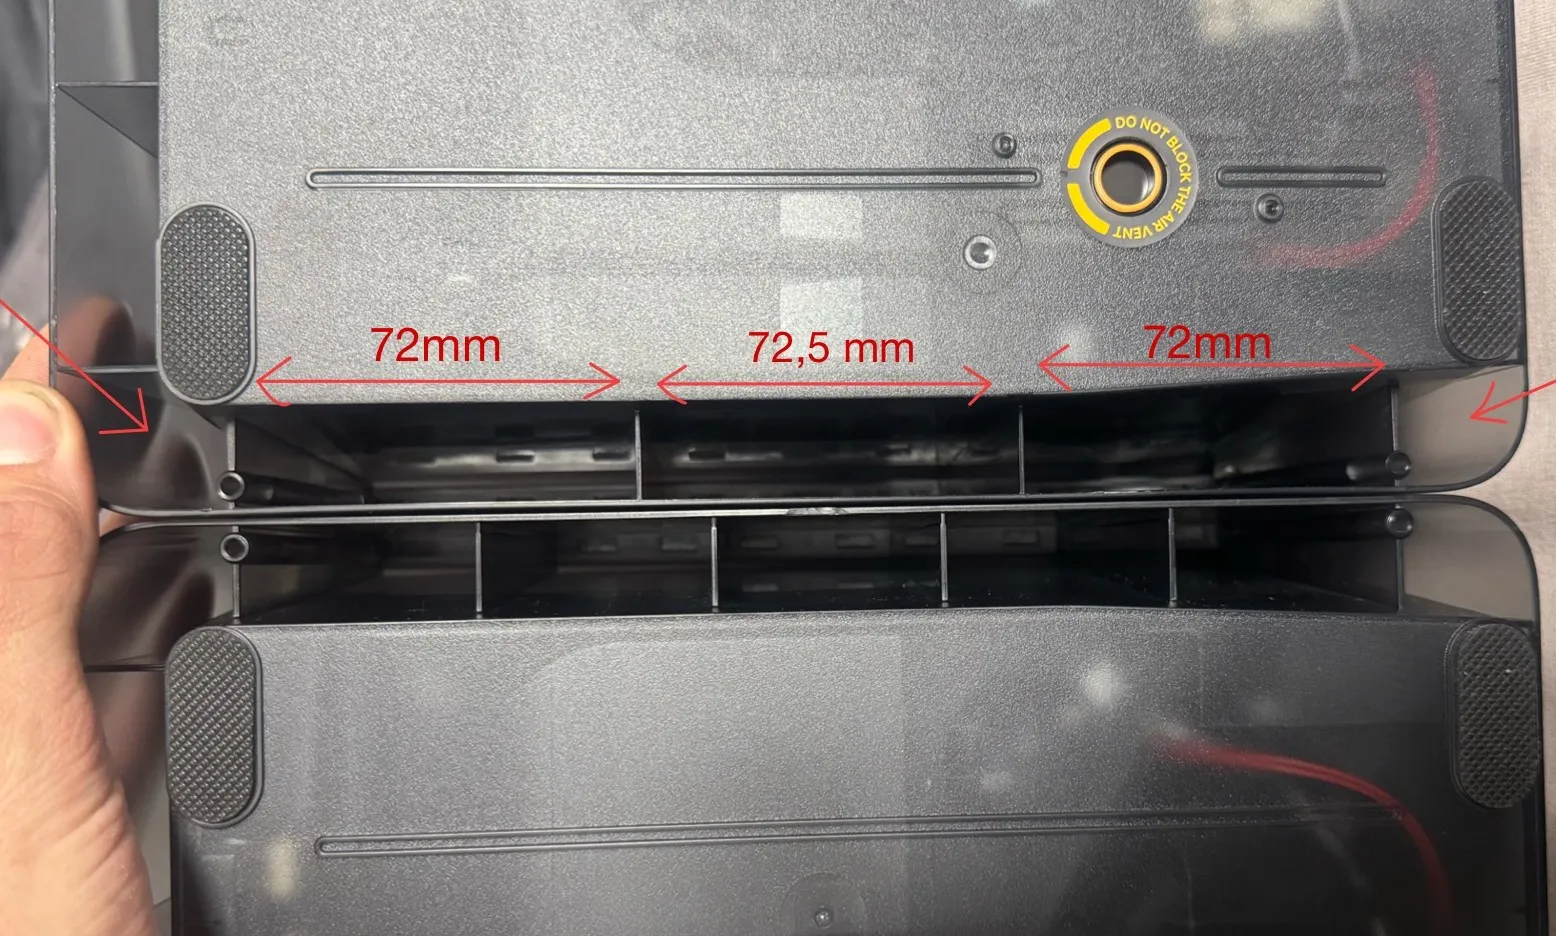
Another member of the community was so kind to send me all the details about the new version - thank you @PrintRoot.
This new version of the AMS connectors fits both the old and the new AMS 2 Pro versions. So you don't need to worry about this issue for now (we'll see if further versions of the AMS follow...). It's also perfectly possible to install one old and one new version of the AMS per drawer level. The slots in the mounts of my system simply fit both reinforcement rib configurations.
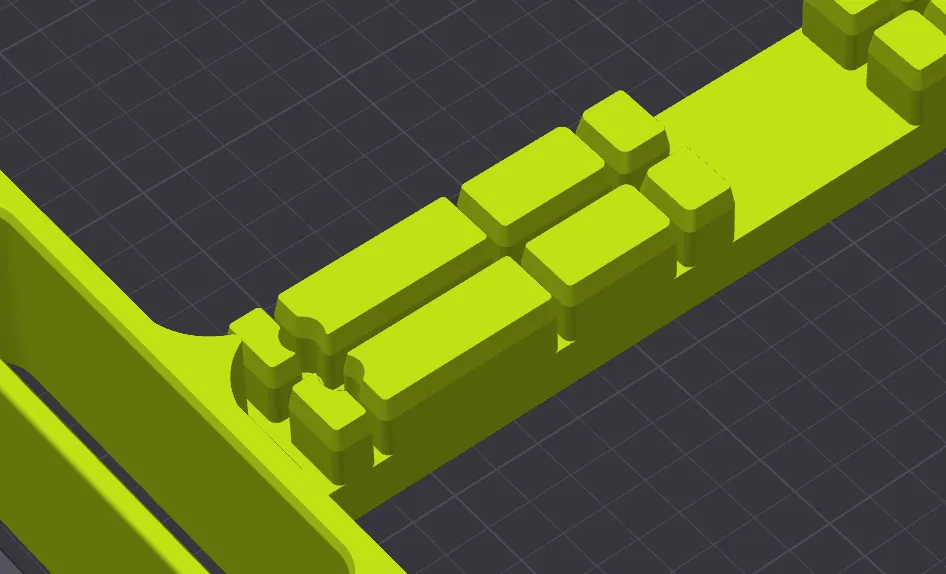
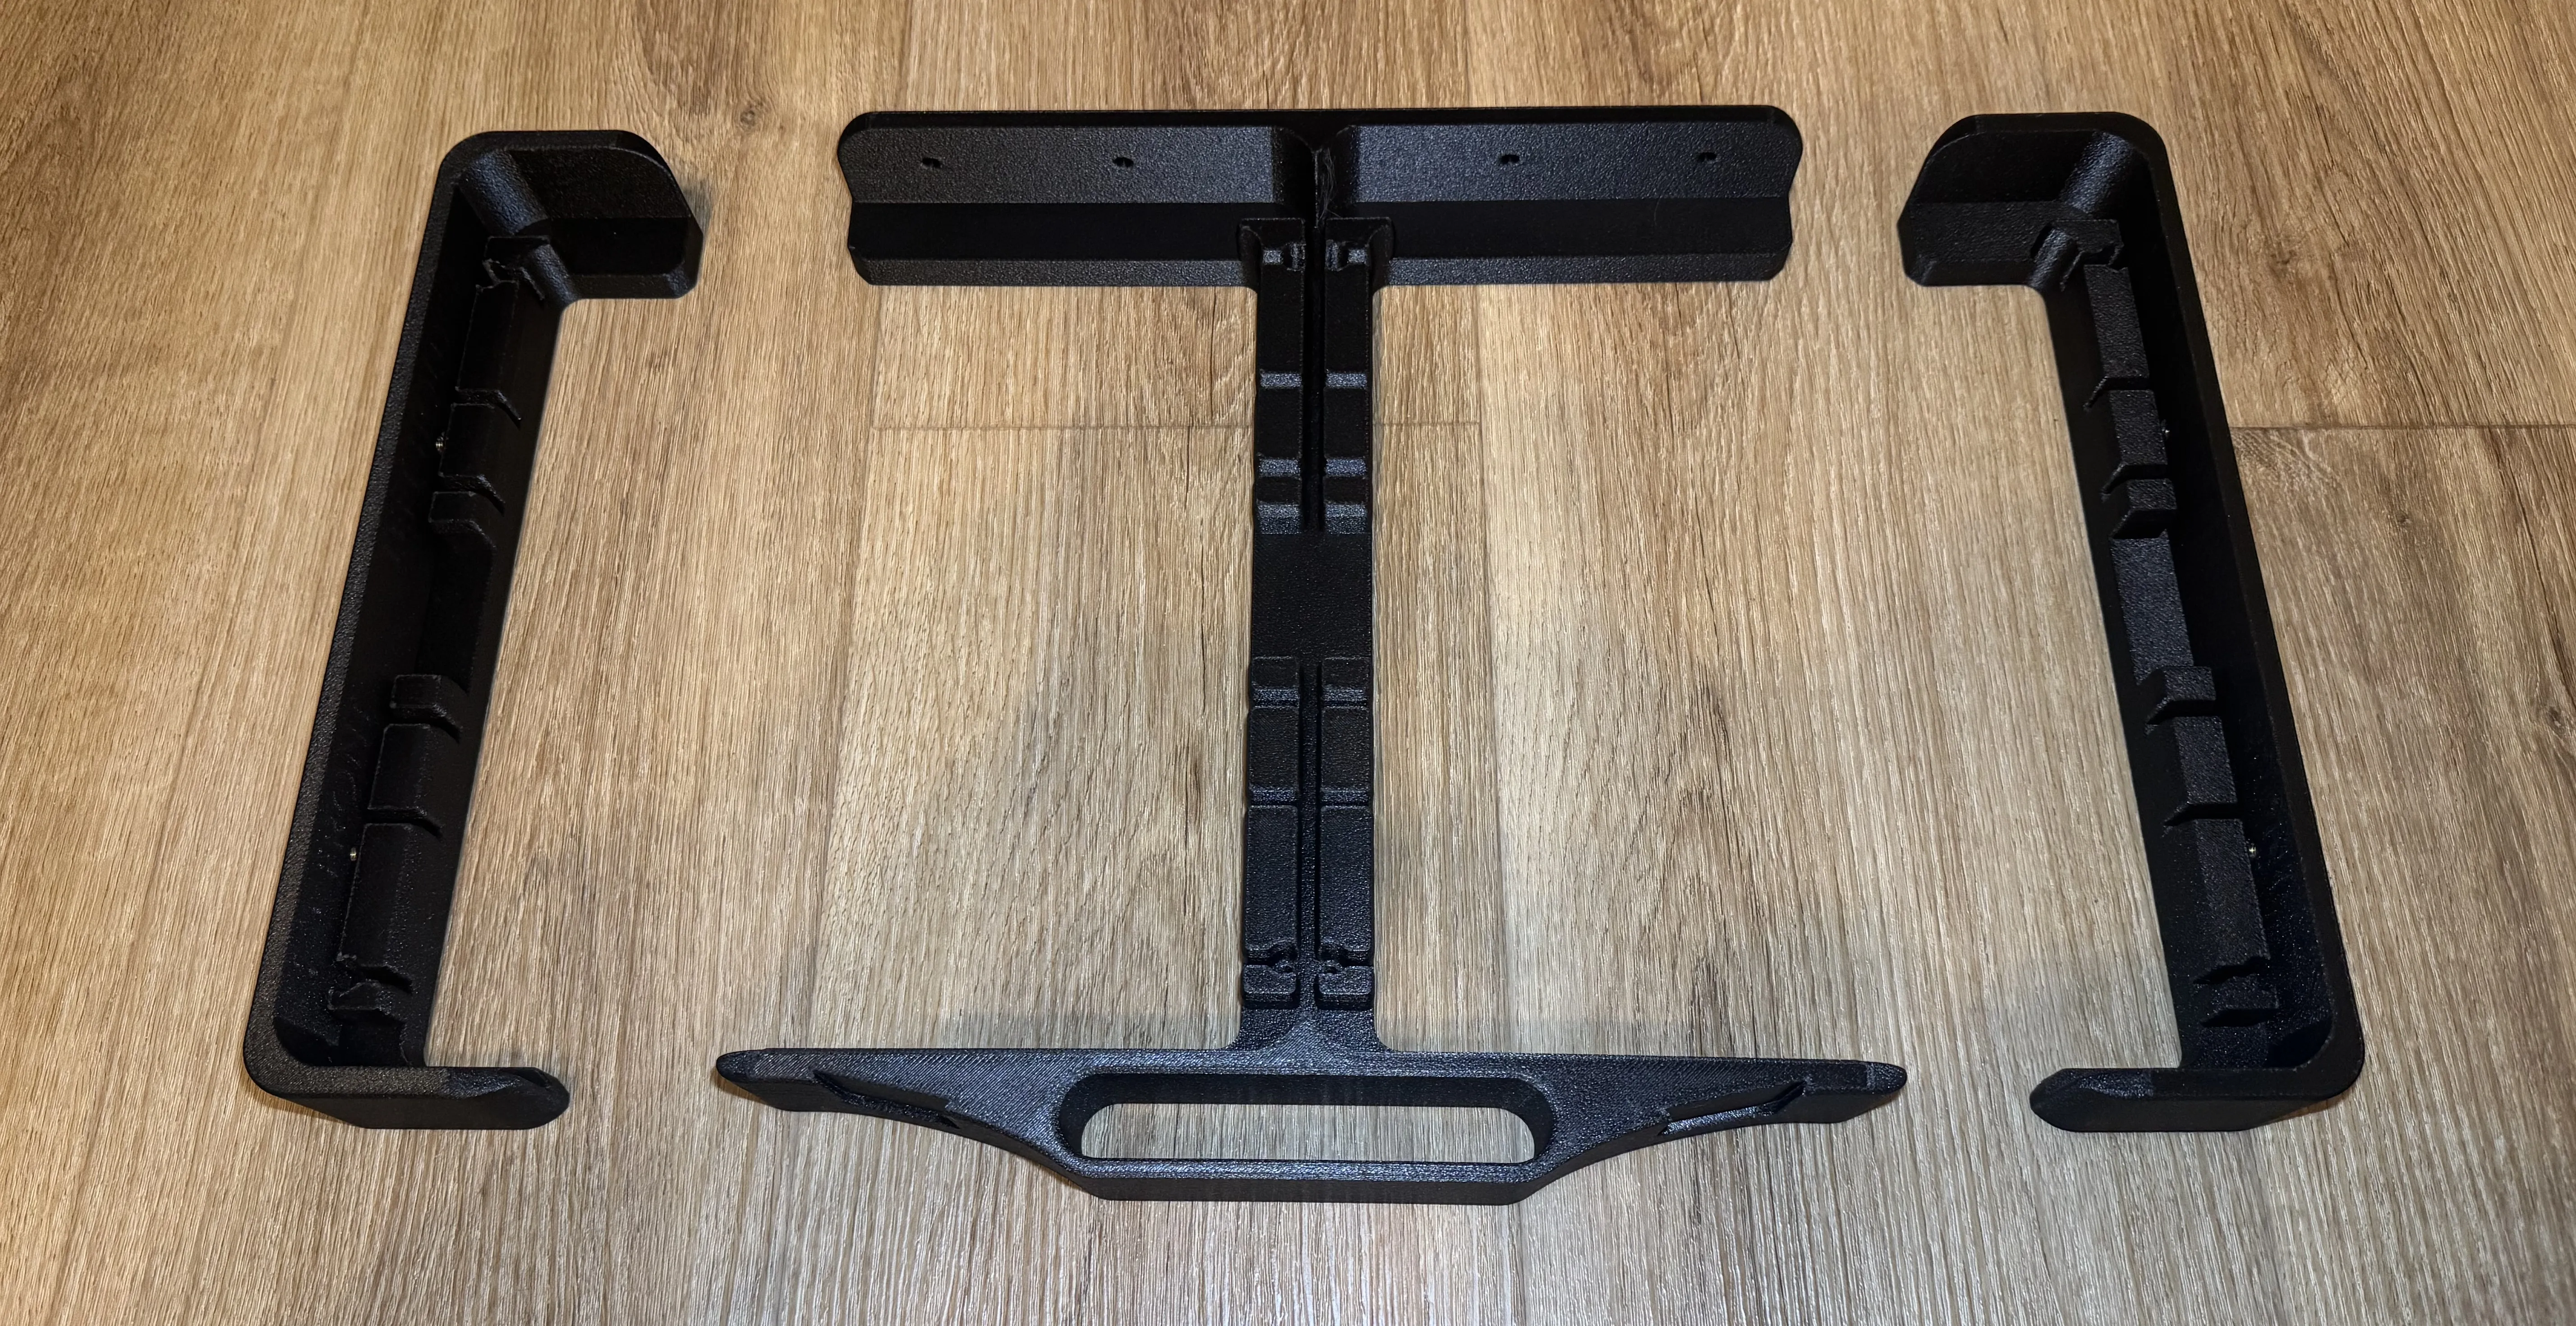
For both the Twin AMS and Twin HT drawers, I've incorporated additional pockets for heat inserts on the back.
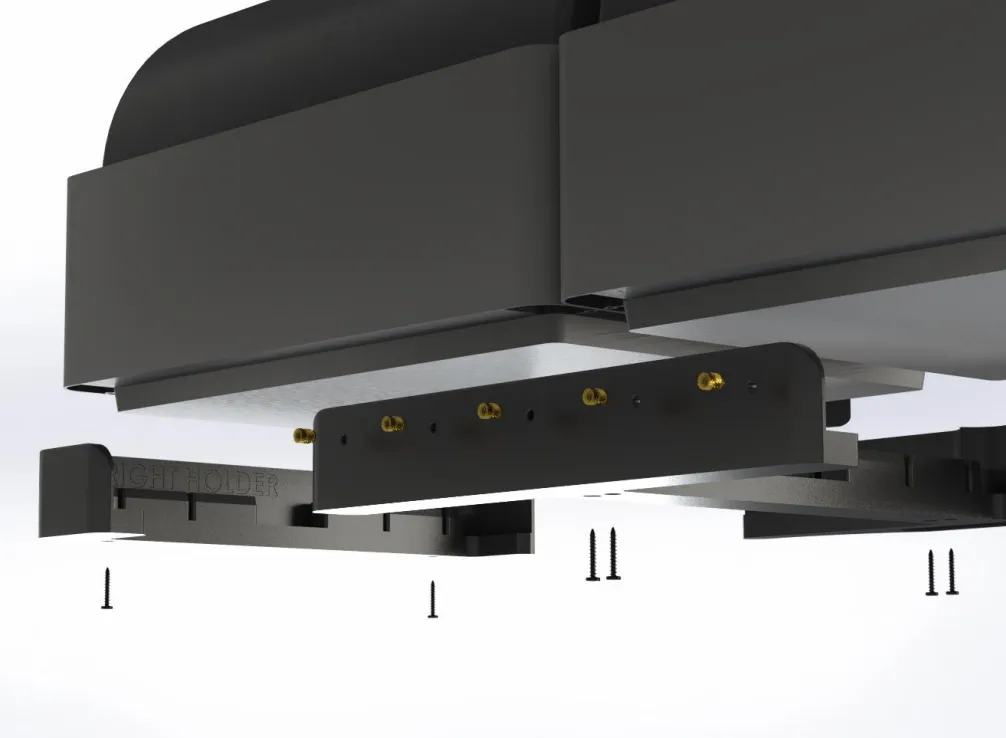
This allows you to attach other items to the back of the drawers if desired. I'm planning a future poop system consisting of a chute and a container that attaches to the back of one of the drawers.
################
####PRINTING####
################
Both the AMS 2 Pro and AMS HT can get pretty toasty when you're drying your filament!
You want to print this from a material thats both stiff and temperature resistant.
Of course, there are NO logos on the provided 3D files!
I chose my all time favourite ABS GF again.
The big drawer parts don't have any small details, so the default profiles
are made for a .6 nozzle!
These parts came out nothing short but amazing!
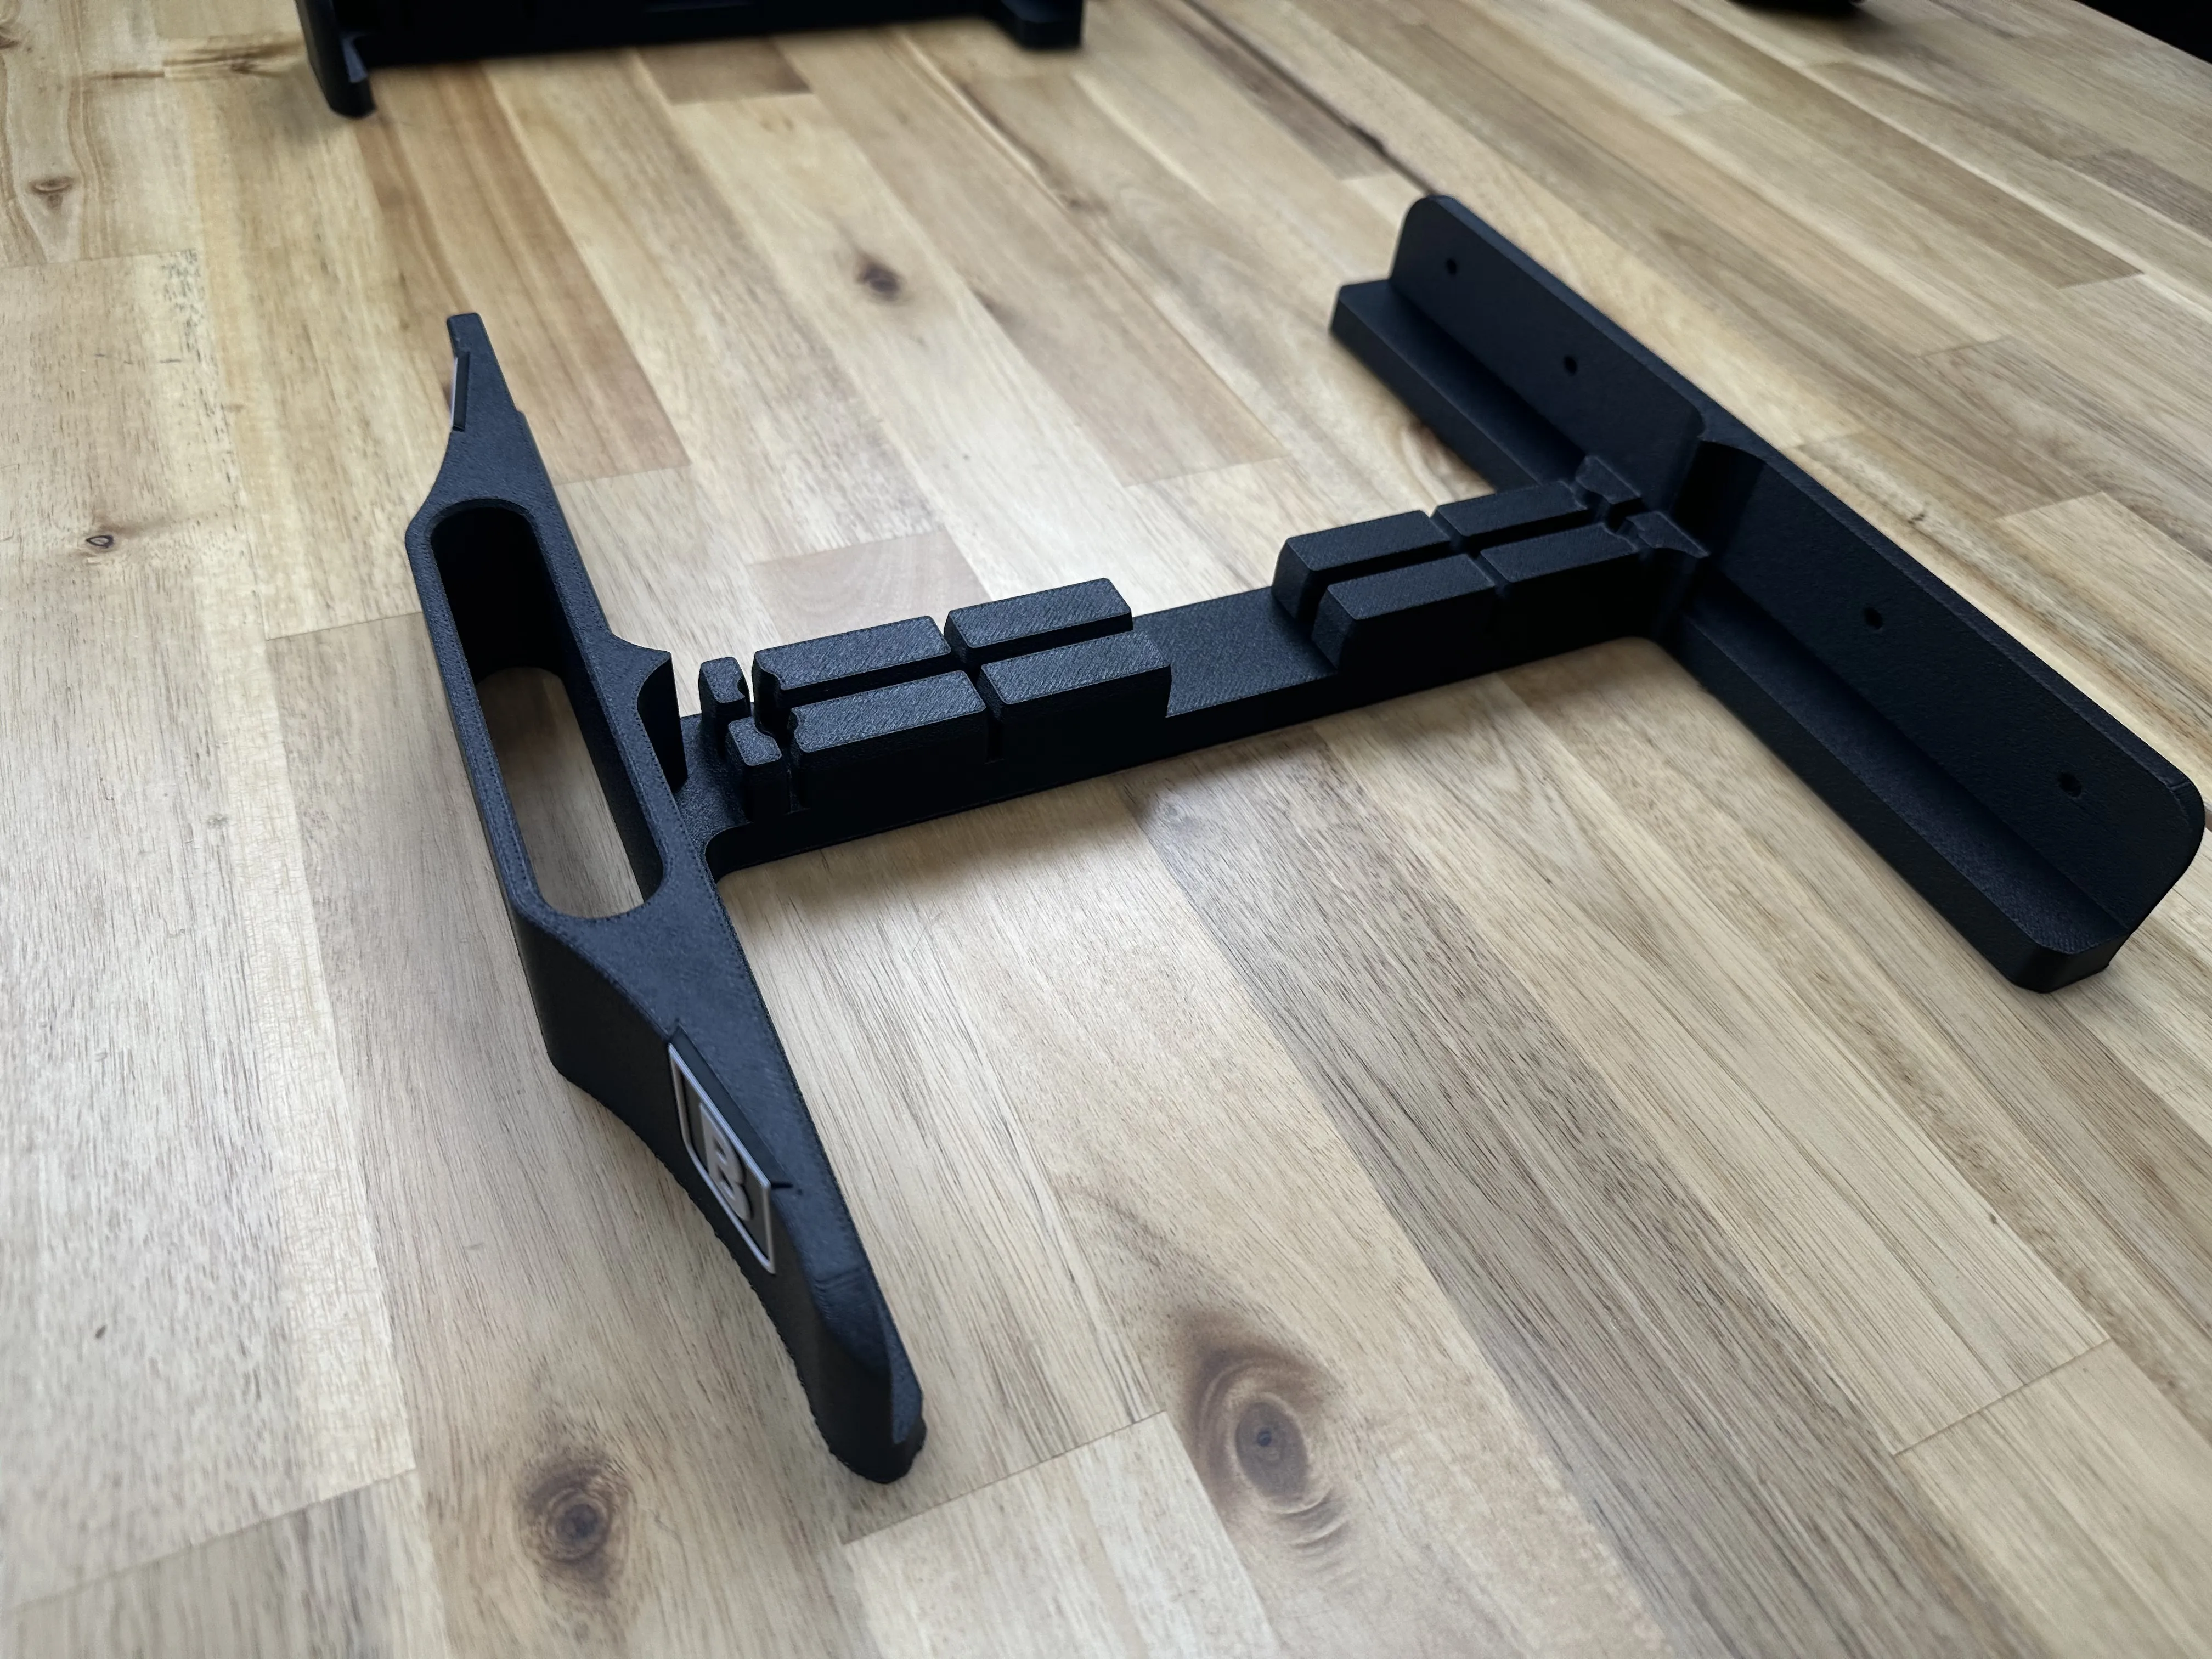
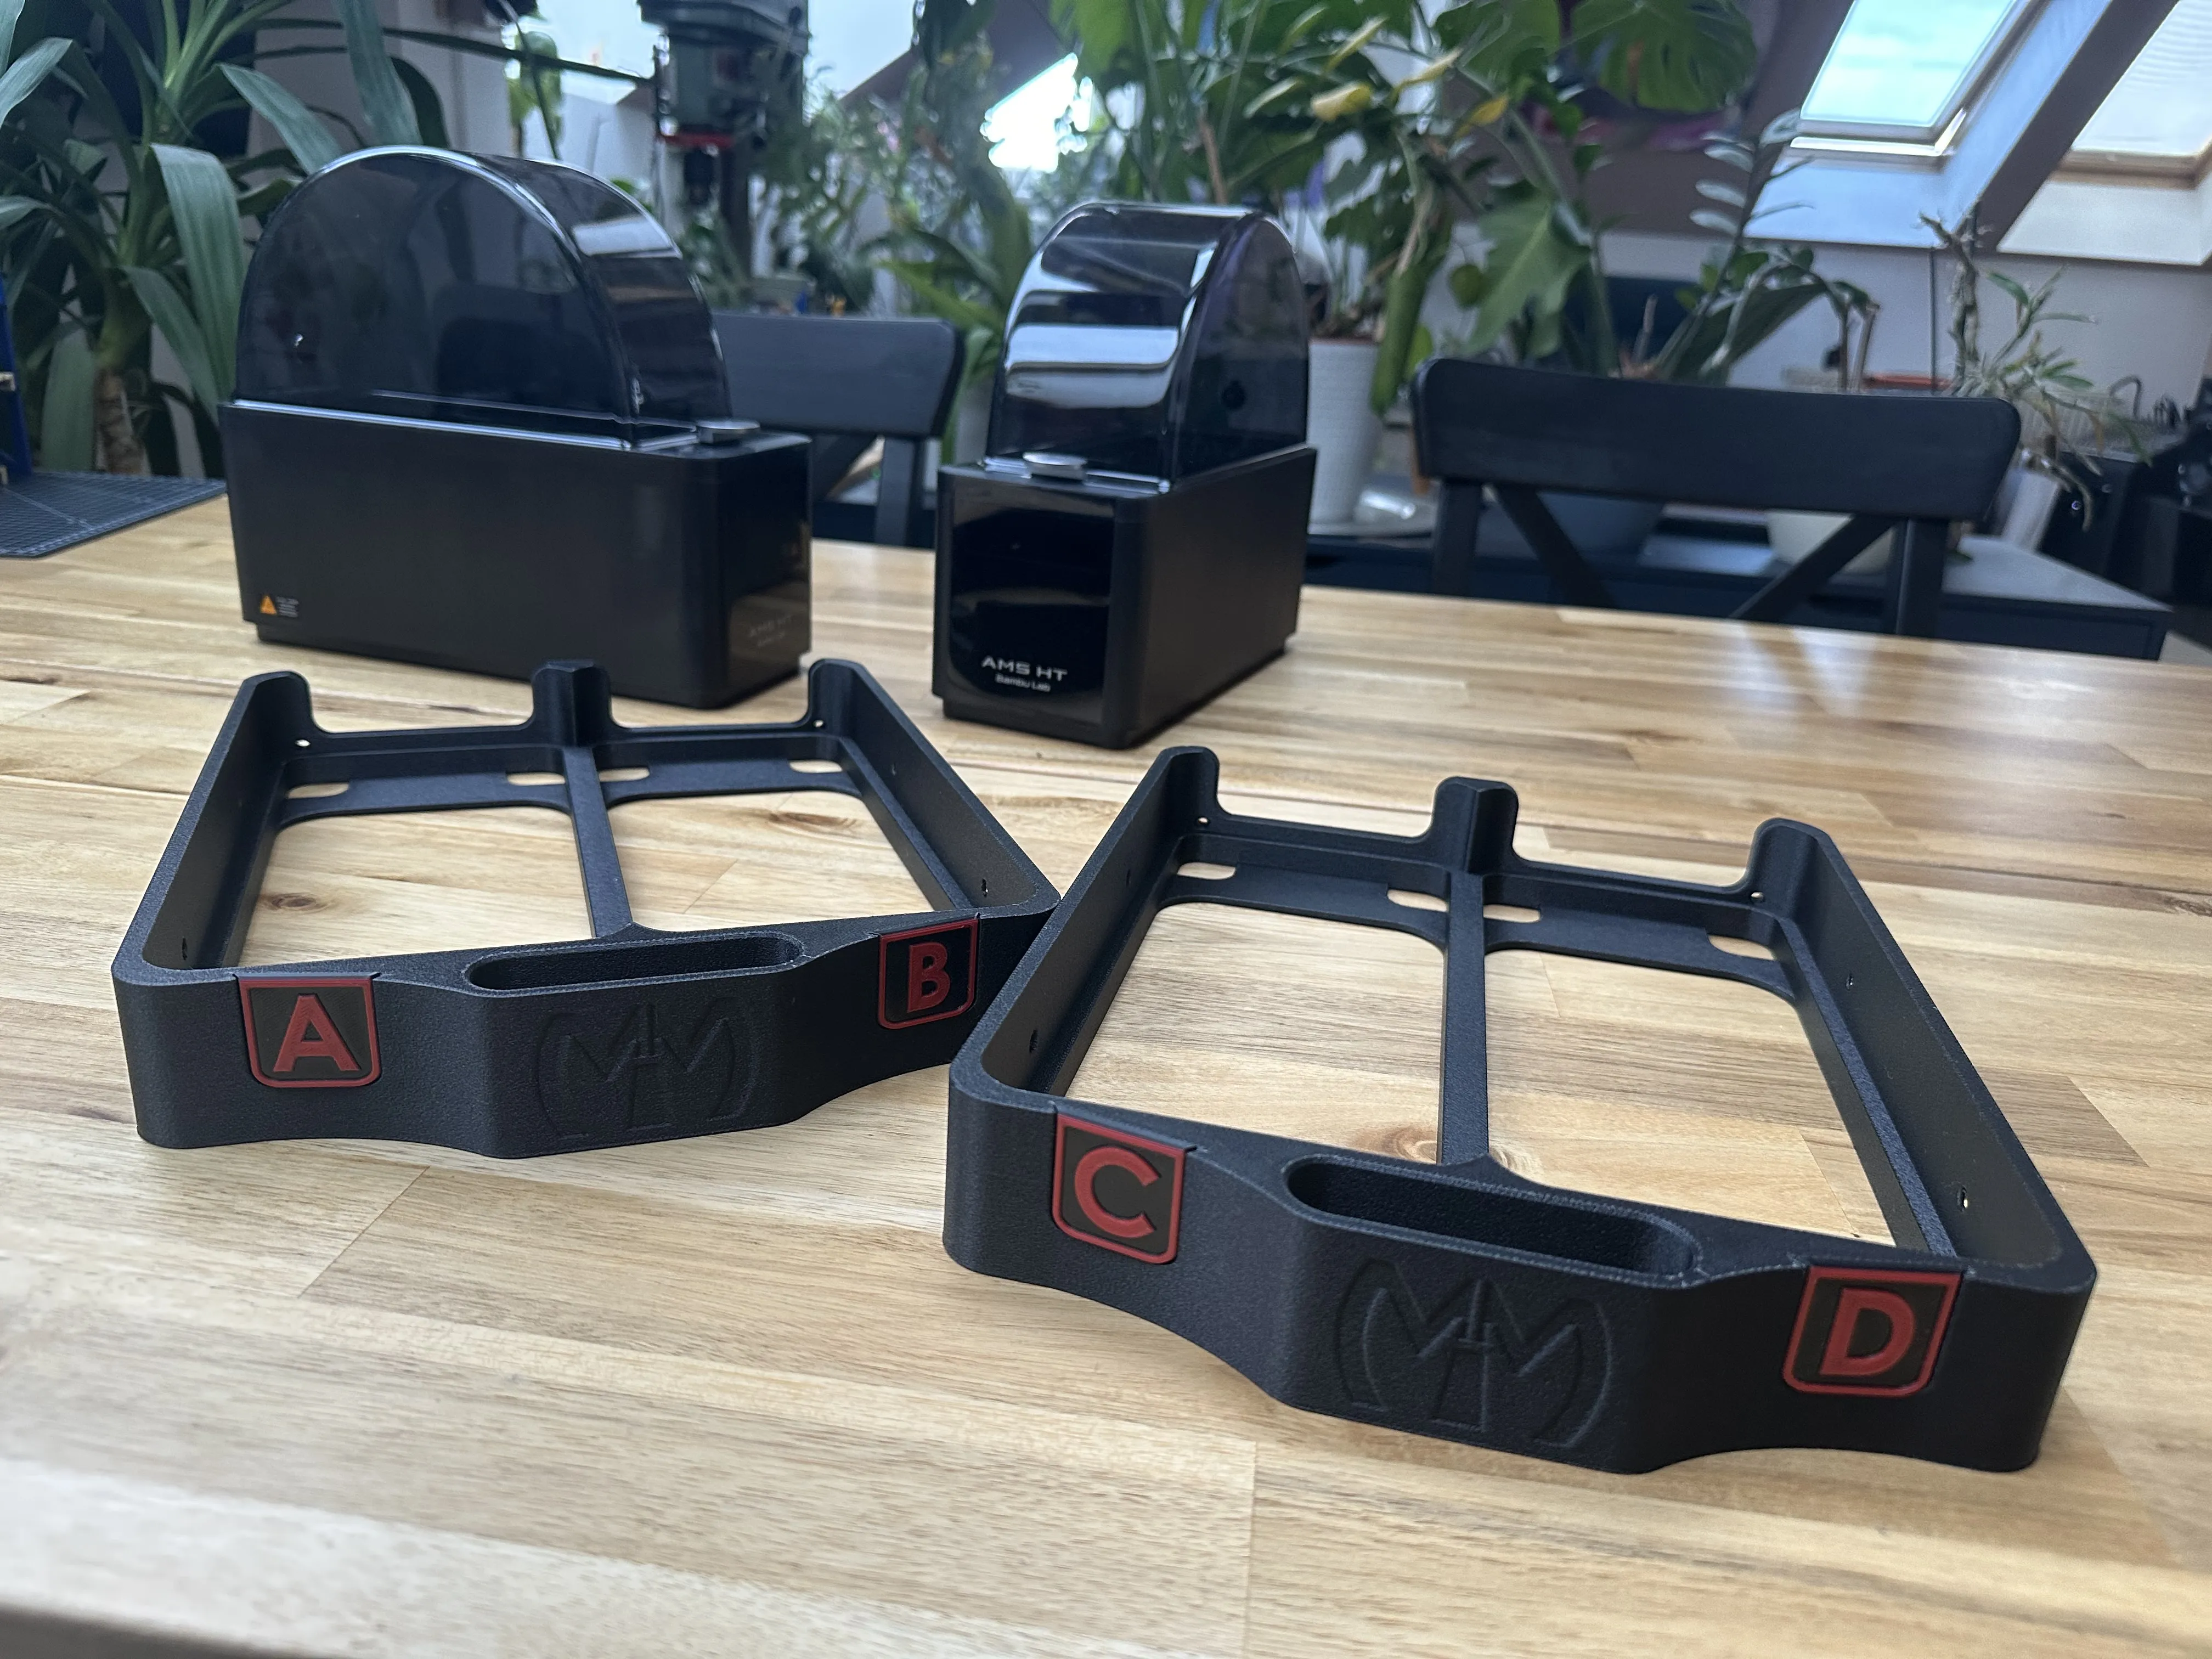
I've had this rig in use for a few months now, and the drawers are NOT sagging one tiny bit!
for stress testing, i even ran them like this for a while, which is basically the worst case scenario:
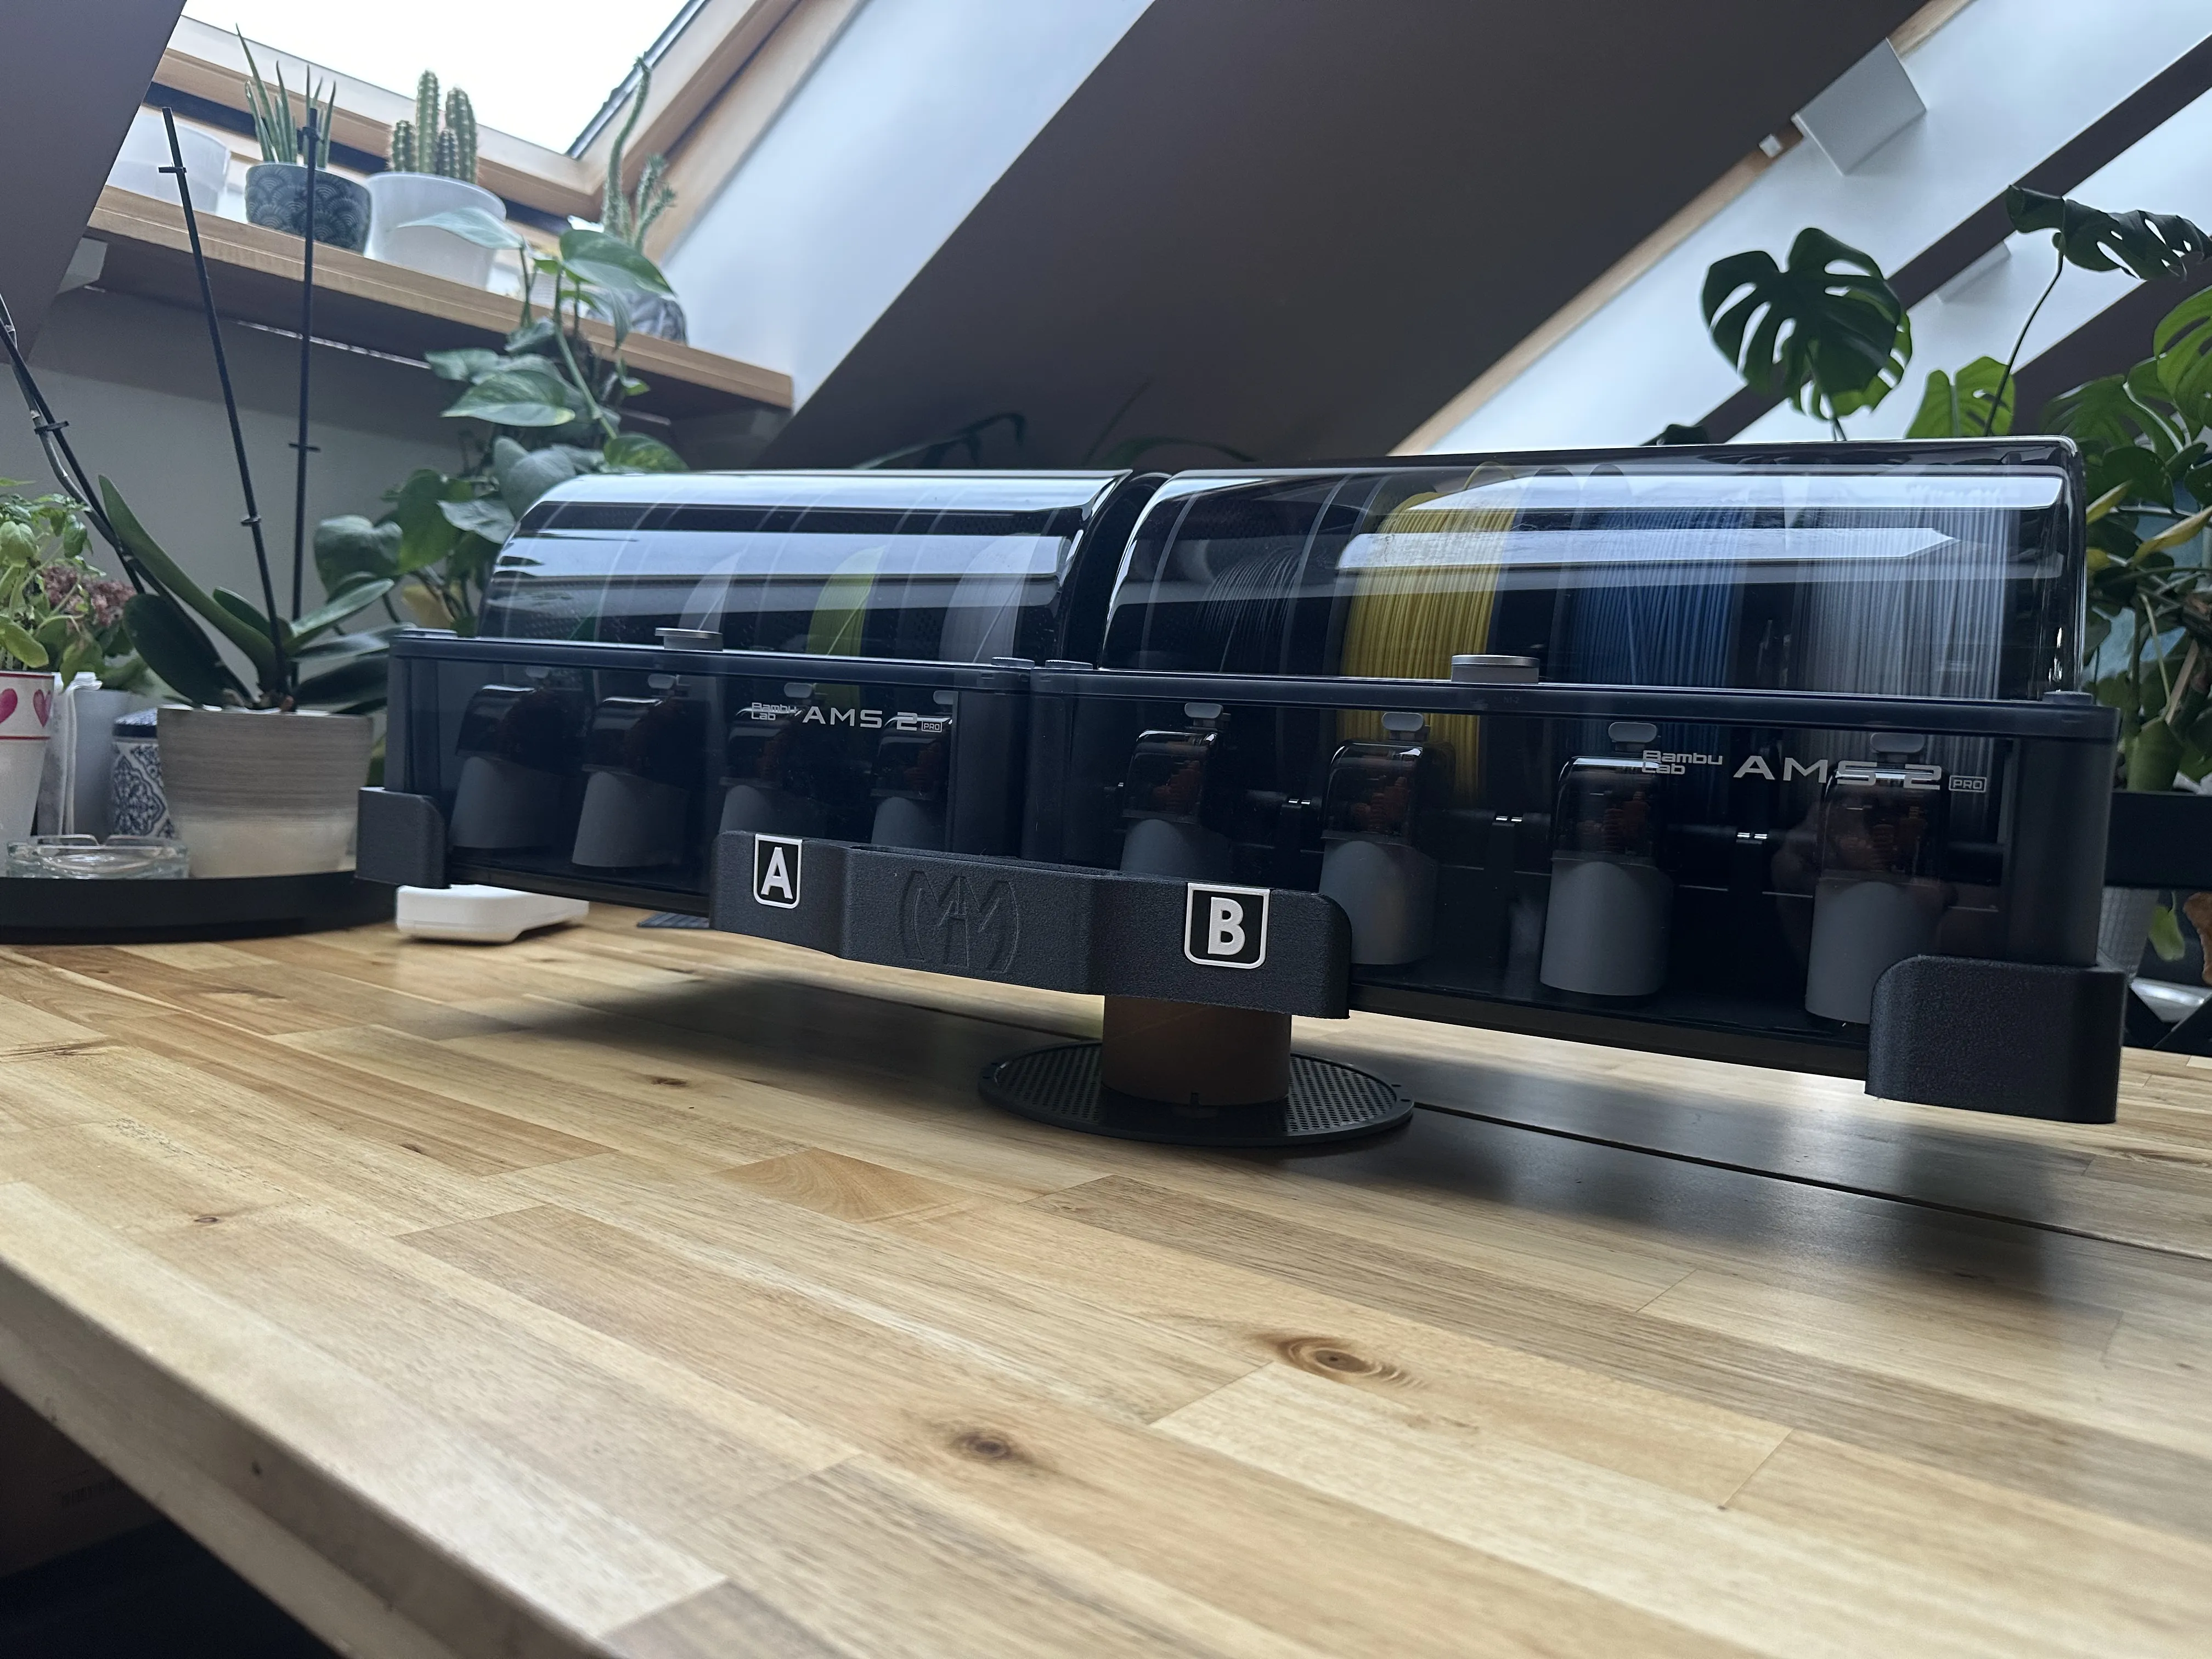
They’ve held up like champs!
The labels are printed from PETG HF with a .4 nozzle.
The print profiles associated with the wooden cart all use PETG HF or ABS.
However, PLA or something else could also be used!
################
####HARDWARE####
################
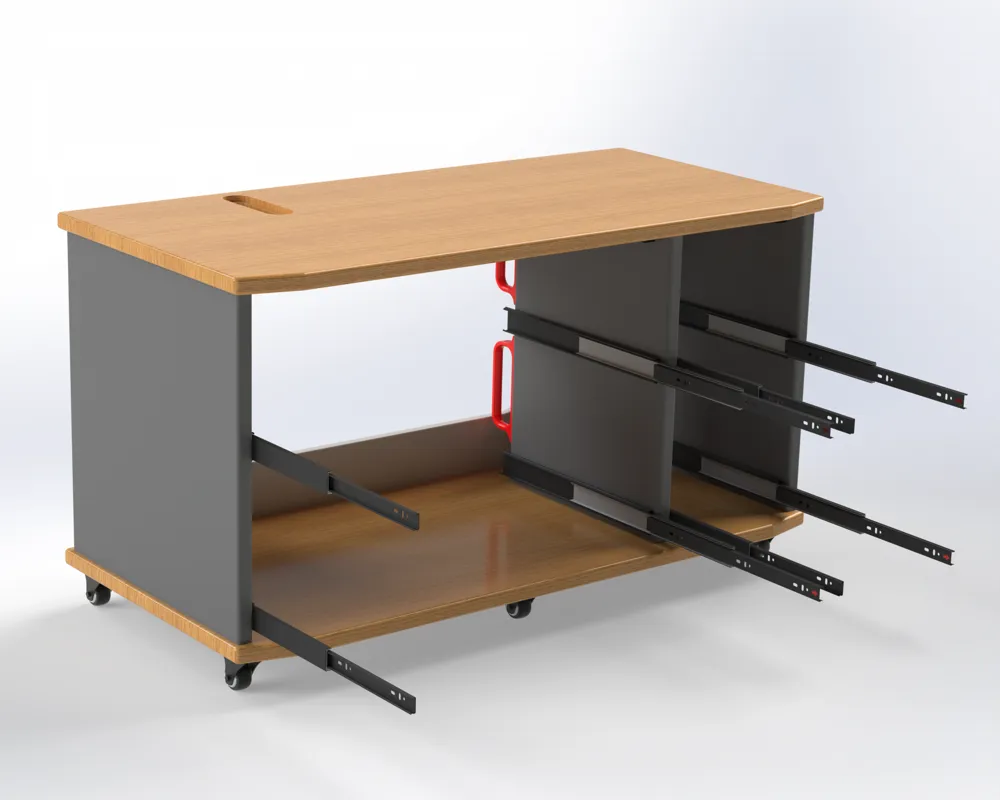
Both AMS 2 Pro and AMS HT Systems are mounted to two 400mm drawer guides like these:
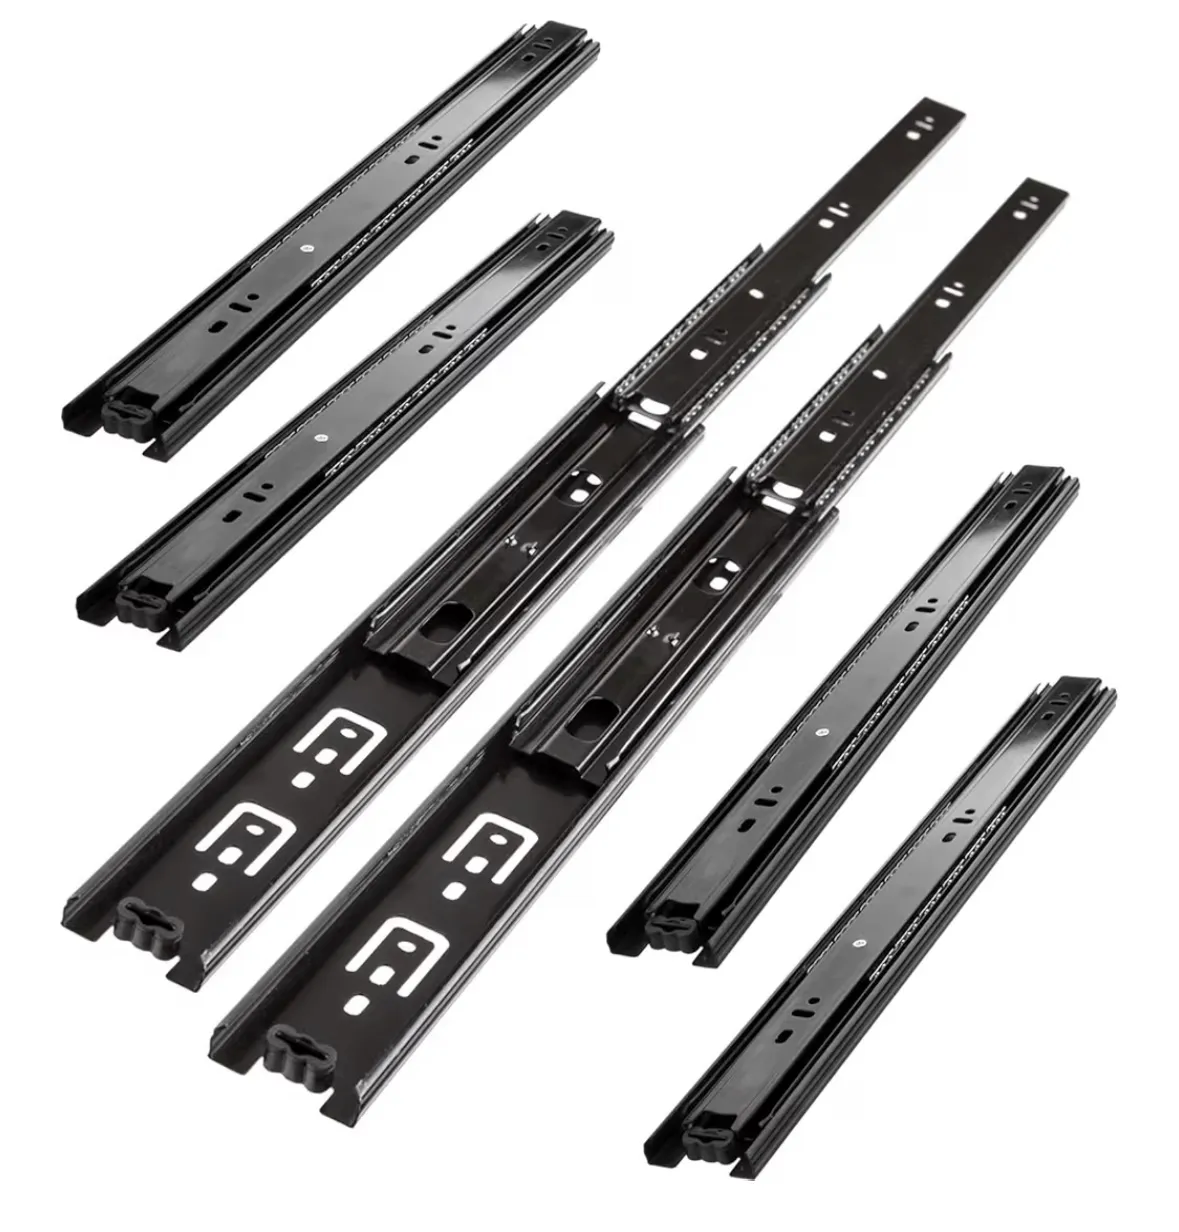
i got those from amazon right here: https://amzn.eu/d/441gfL6
Others will work as long as they‘re also 12,5-13mm thick!
Make sure to get the type the fully extends to 800mm
other than that, you need a few heat set inserts, as well as some screws:
Twin AMS 2 Pro Drawers:
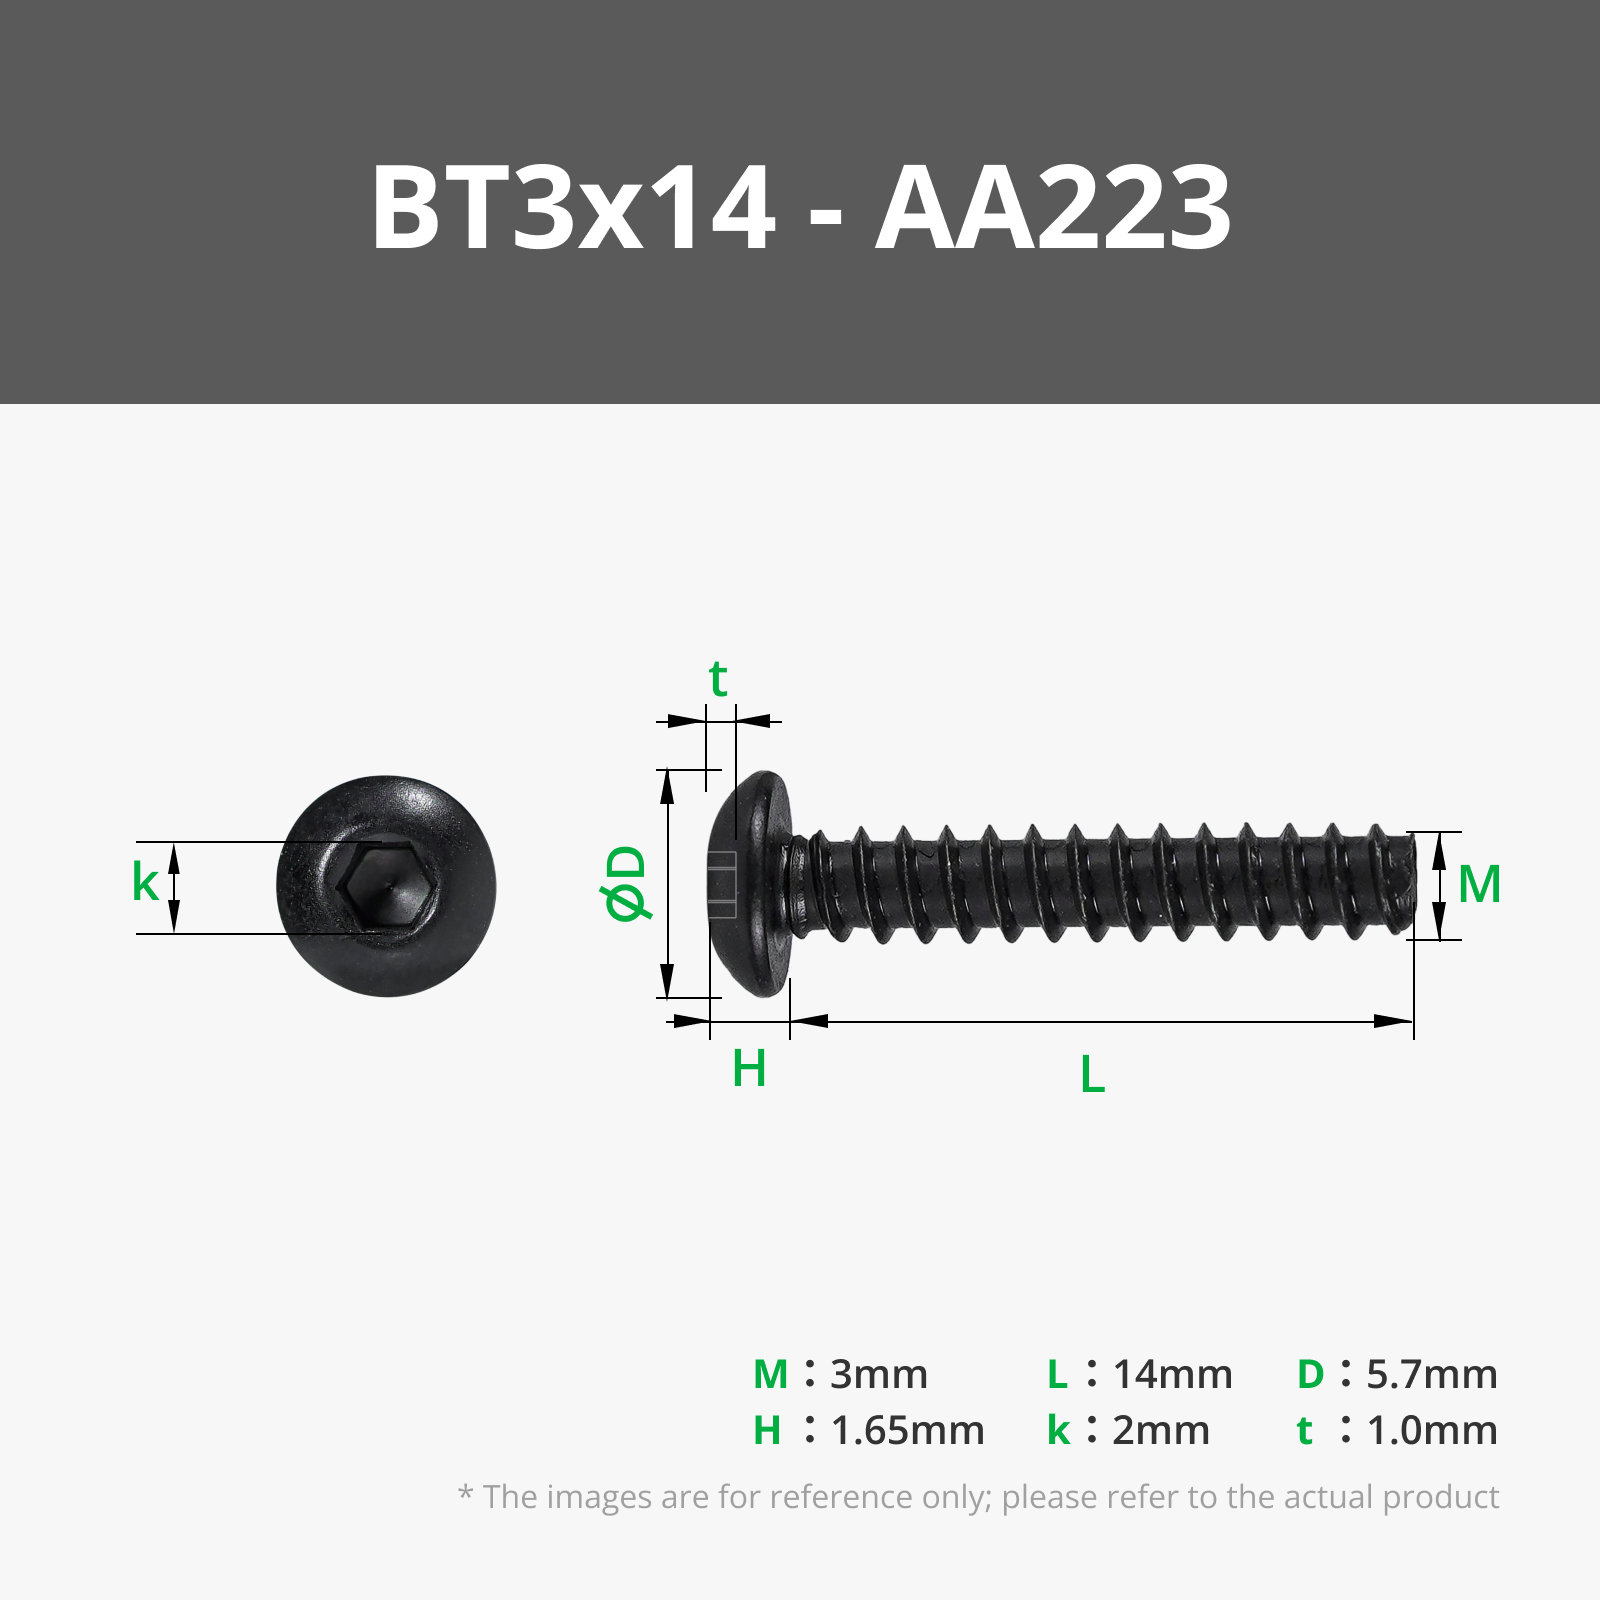
8 Pcs BT3x14 self tapping screws
4 Pcs M4x6mm buttonhead screws
4 Pcs M4 heat set insert,
max. 6mm long!
5 Pcs M3 heat set inserts,
(optionally for accessory mounting)
Twin AMS HT Drawers:
4 Pcs M4x6mm buttonhead screws
4 Pcs M4 heat set insert,
max. 6mm long!
3 Pcs M3 heat set inserts,
(optionally for accessory mounting)
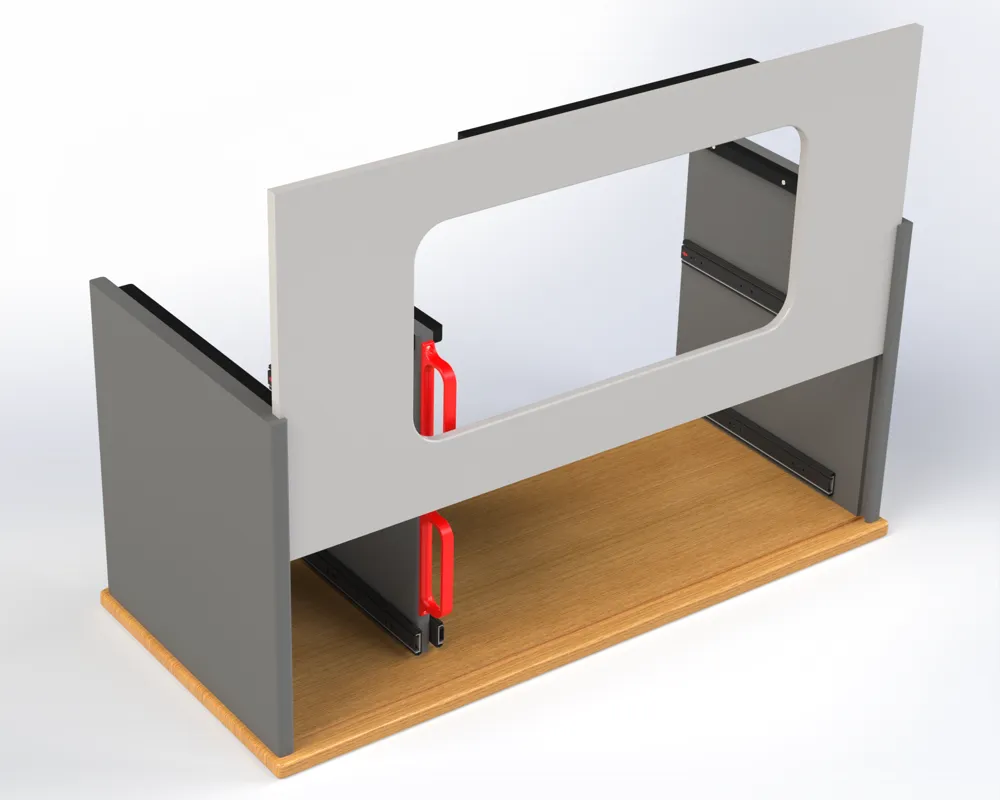
The Material list for the wooden cart is found as a PDF attached to this post!
################
####ASSEMBLY####
################
Twin AMS 2 Pro Drawers:
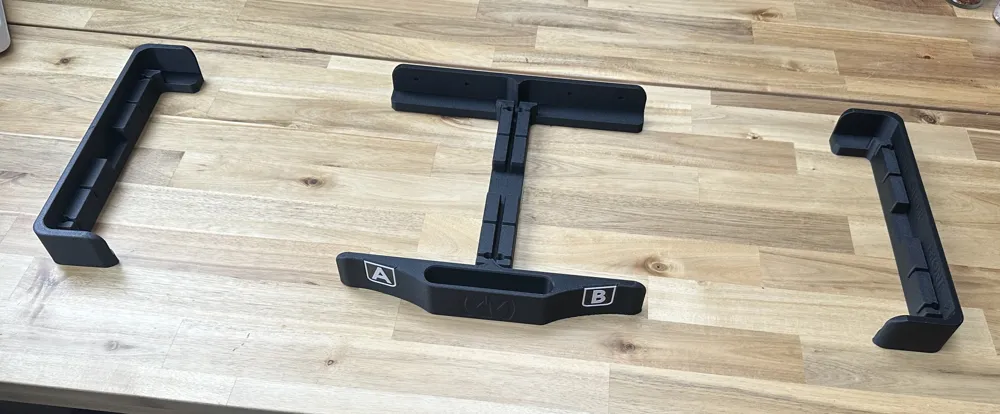
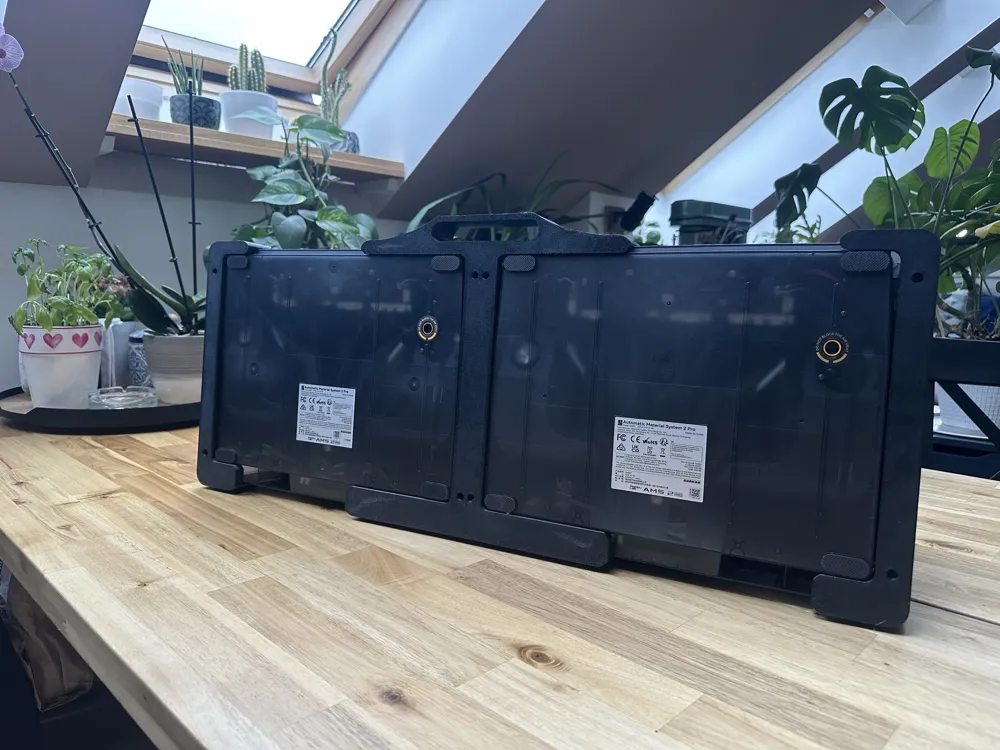
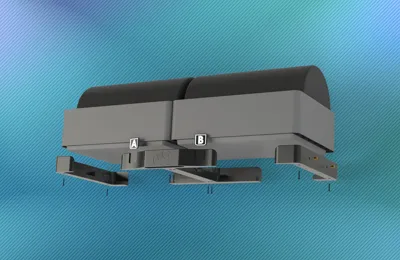
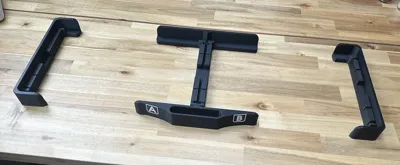
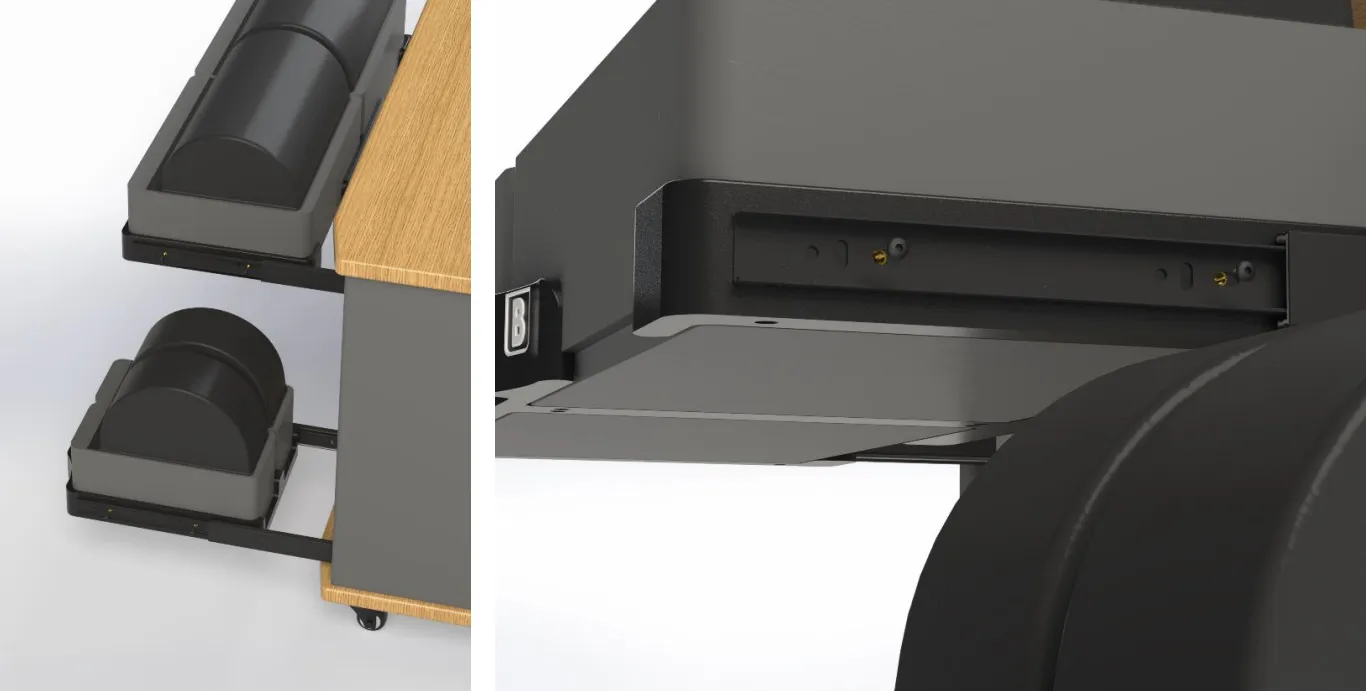
The printed parts are simply slid onto the AMS units from below and secured with eight "BT3x14" screws.
(these screws can be found in the bambu store – Code AA223)
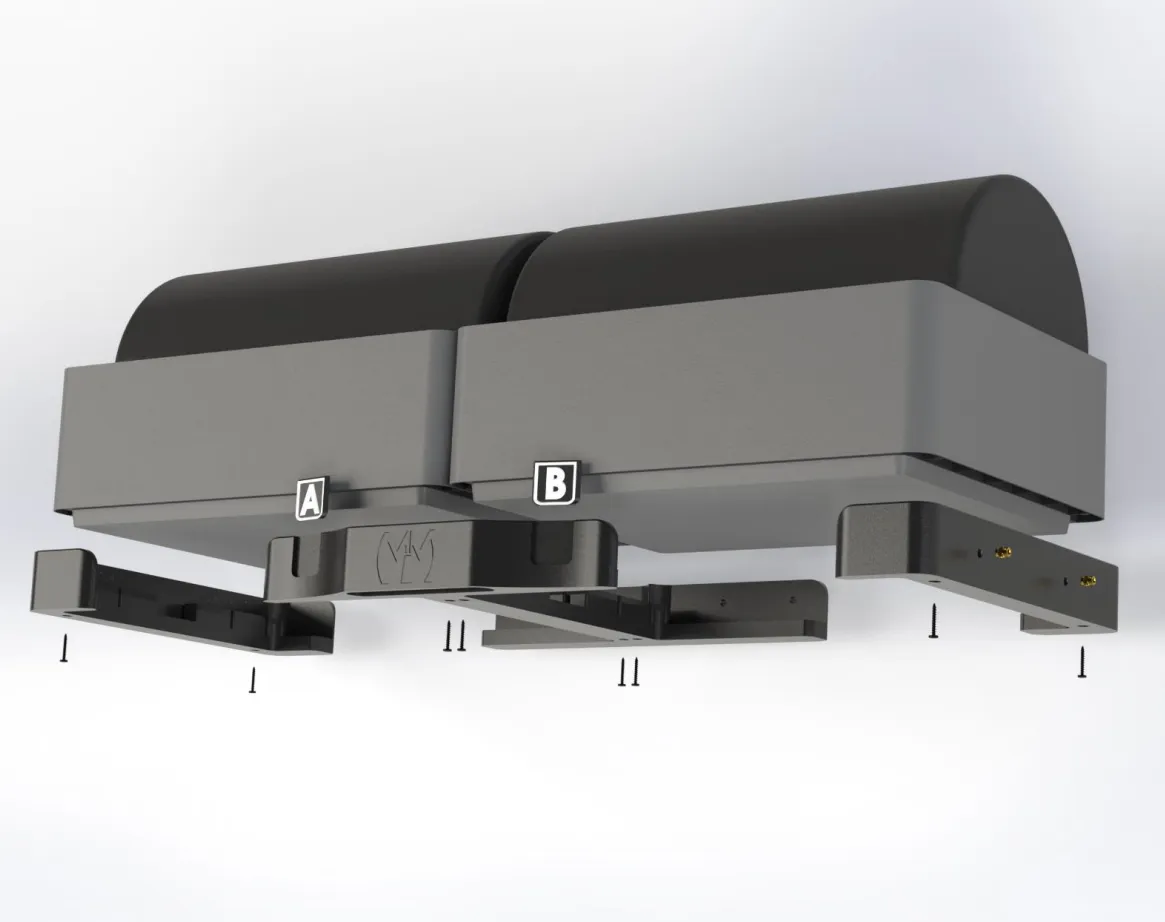
This screw type is exactly the same, as the one used to mount the AMS to the transport securing device when you unpacked it!
Which bracket is the right one and which is the left is clearly marked on the parts.
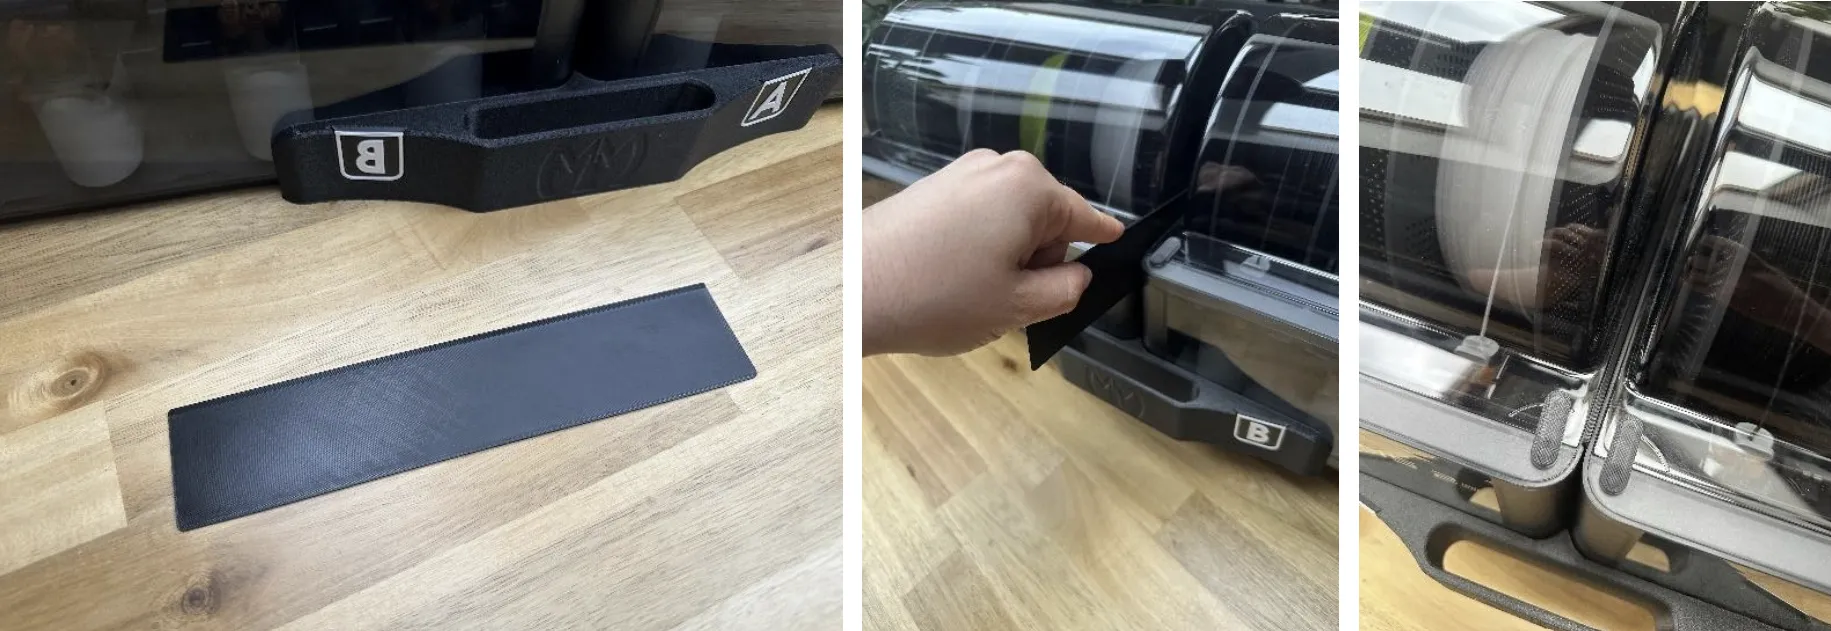
After installing the brackets, the printed shim is slid into place. (it is part of the AMS 2 Pro profile and printed from PETG HF).
It compensates for the small gap between the two AMS units, which results from the tolerances of the plug connections. The shim is needed so there is no sagging in the middle of the drawer system!
In addition, two M4 threaded inserts must be melted into both the left and right brackets.
It is important to ensure that the inserts are not too long! Maximum 6 mm! This is crucial, otherwise the inserts will interfere with the AMS housing. The printable labels just slide in place from top to bottom.
Since there's some free space behind the AMS drawers, I decided to add extra mounting points to the back of the holders. If you want to use this feature, you will need 5 M3 heat set inserts per AMS 2 Pro drawer. You could attach all sorts of things here, such as brackets for the AMS power supplies, if present.
Twin AMS HT Drawers:
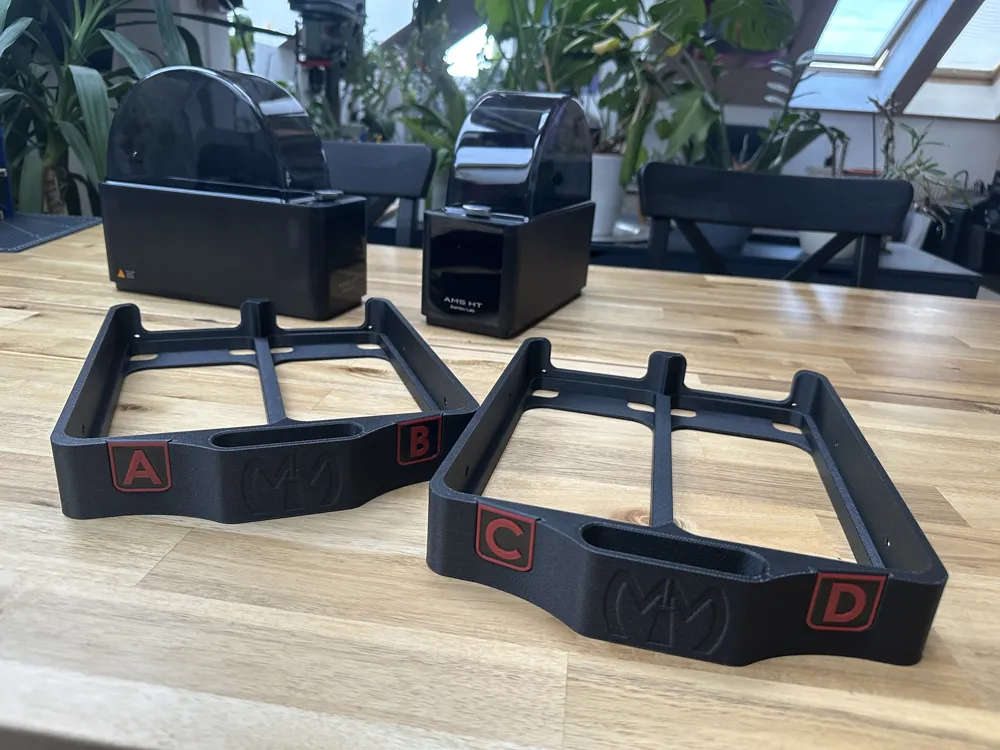
This system is even easier to assemble.
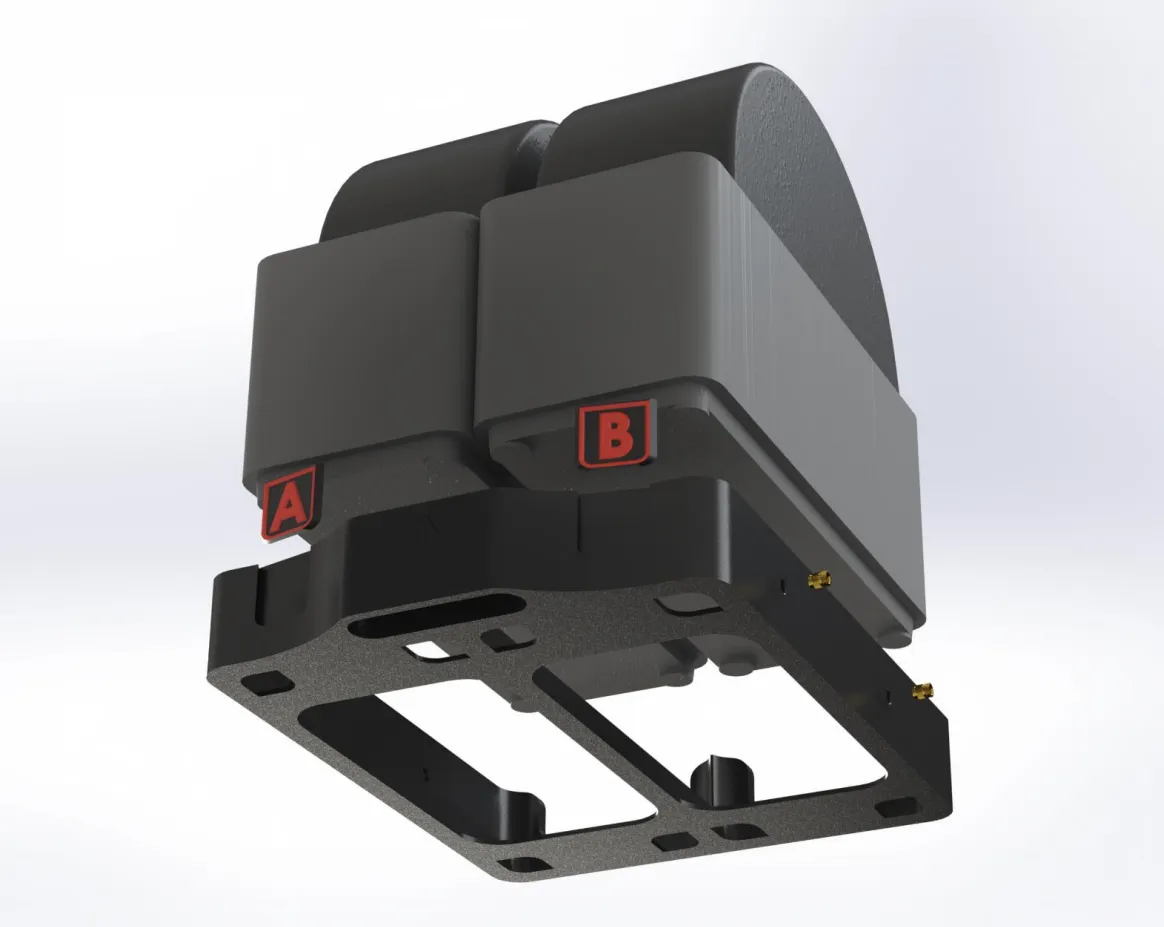
Two M4 inserts per side, again, no longer than 6mm!
This part also features three optional installation pockets for M3 heat-set inserts in the rear, so you can attach all kinds of accessories.
Since this drawer is made from a single piece, it's not necessary to screw the AMS HT units to the drawer. There aren't even any suitable holes for that. The weight of the unit with the spool inserted is perfectly sufficient to hold the HTs in place.
Installation on the drawer guides:
(the construction manual for my cart tells you even more about this process!)
Although I mentioned it before, the dimensions of the gaps into which the drawer slides are installed are 784 mm for the AMS 2 Pro system and 268mm for the HT system.
The individual drawer levels are 260mm high. You should mount the drawer runners at least this distance apart if you are installing multiple levels!
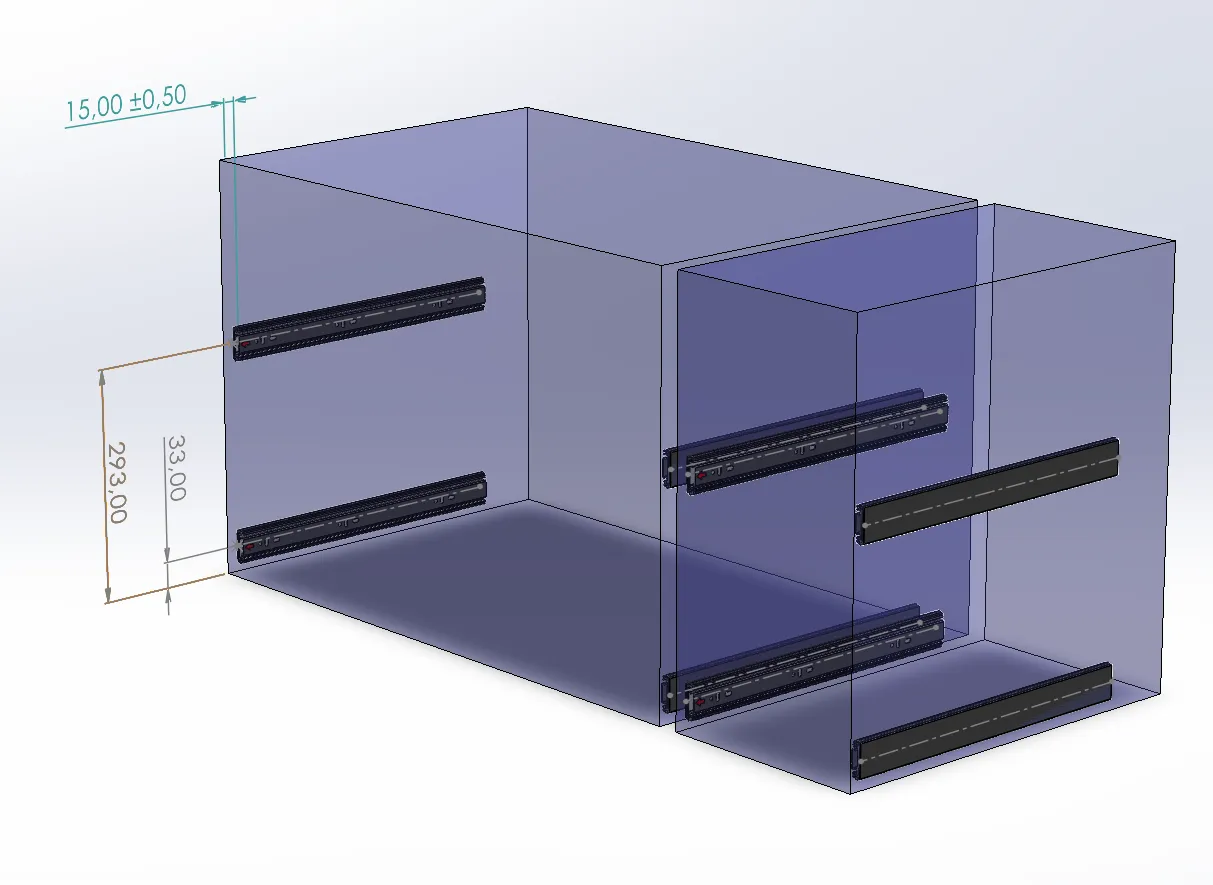
The assembly process is the same for both versions. Screw the brackets in place using four M4x6mm buttonhead screws each (two per side).
####################
that‘s it for the assembly!
####################
wire everything up and connect the PTFE hoses!
A few tips from my side:
When wiring the 6-pin bus cables, you may find that the letters assigned to the individual AMS do not necessarily correspond to the order in which the AMS are connected.
The letter order is assigned each time a new unit is connected for the first time. It's best to find out beforehand which AMS corresponds to which letter, so you can choose the arrangement accordingly.
When routing the PTFE tubing, it's important to keep it as short as possible, but not so short that it's sharply kinked anywhere.
I've set the tubing length so that it's under slight tension when the drawers are fully opened.
When the drawers are closed, the tension is automatically relieved.
Also, generally ensure that there are no very tight bends in the tubing, as these can drastically increase the resistance of the path. This is especially important to consider with setups using long PTFE tubing!
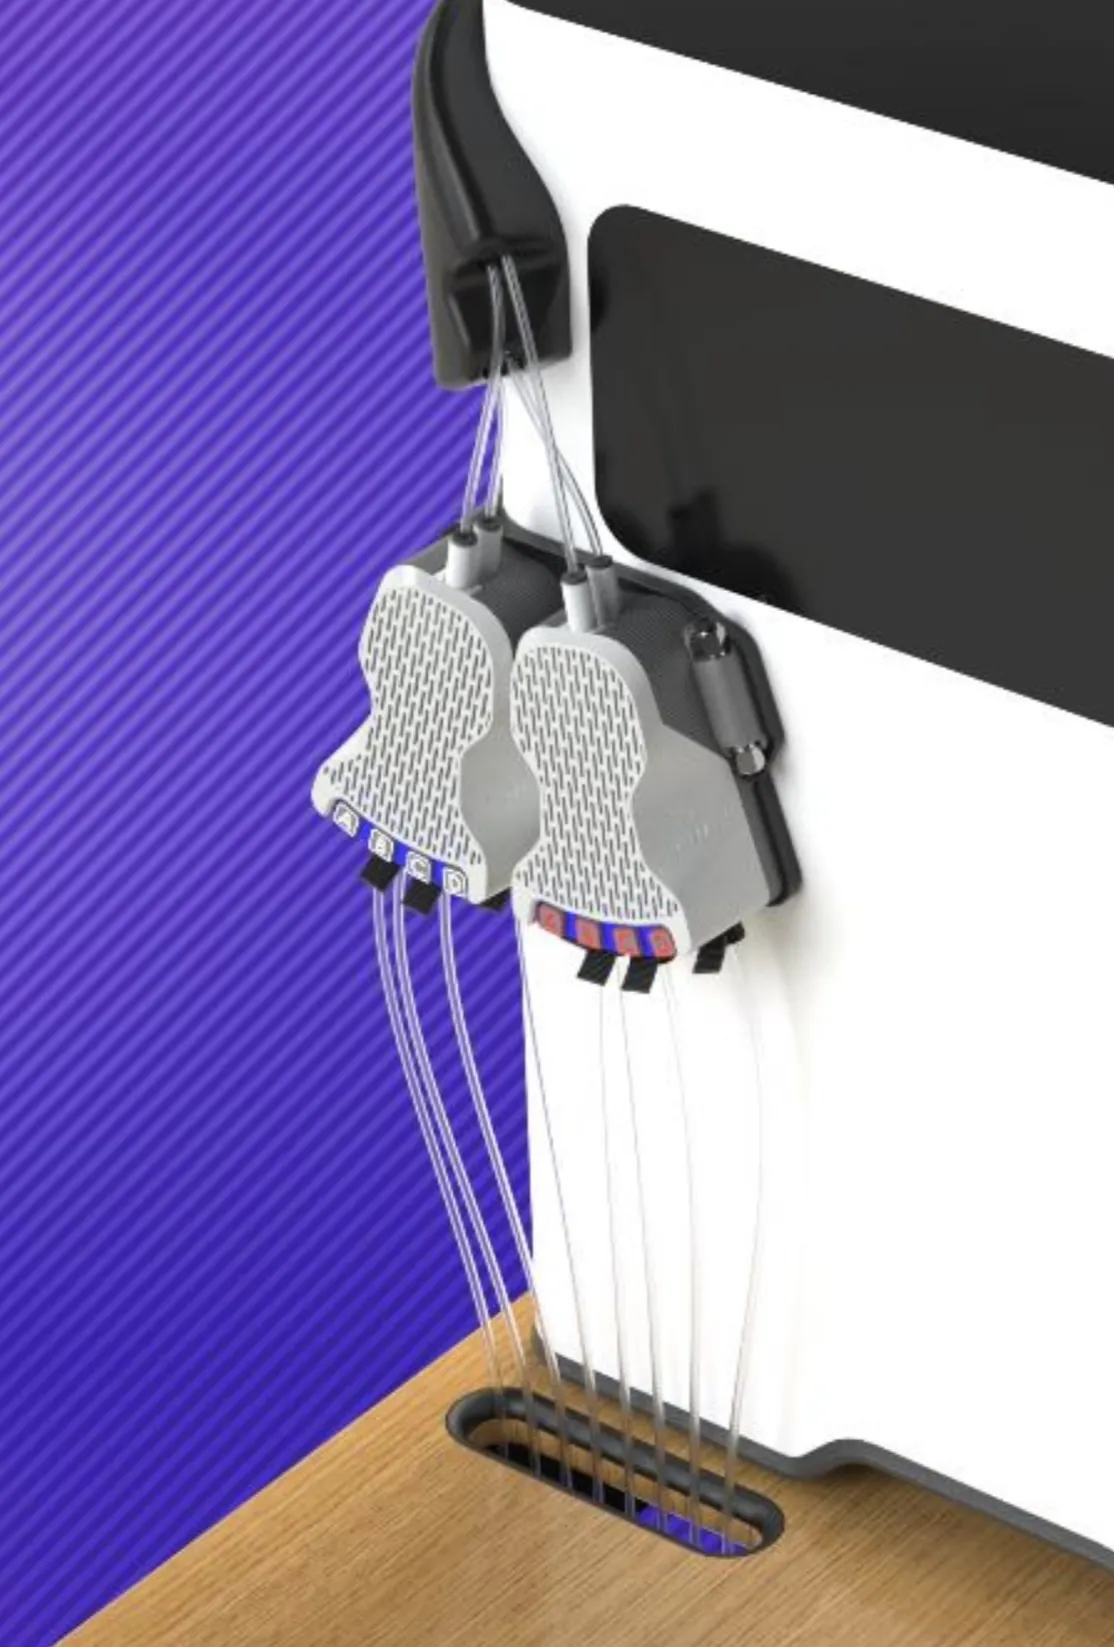
If you're also using an H2D with your multi-AMS setup, I highly recommend checking out my two versions of the "H2D Nozzle Management System." With these, you can switch between connecting your AMS to the left or right nozzle in seconds. You can find out more at the two links!
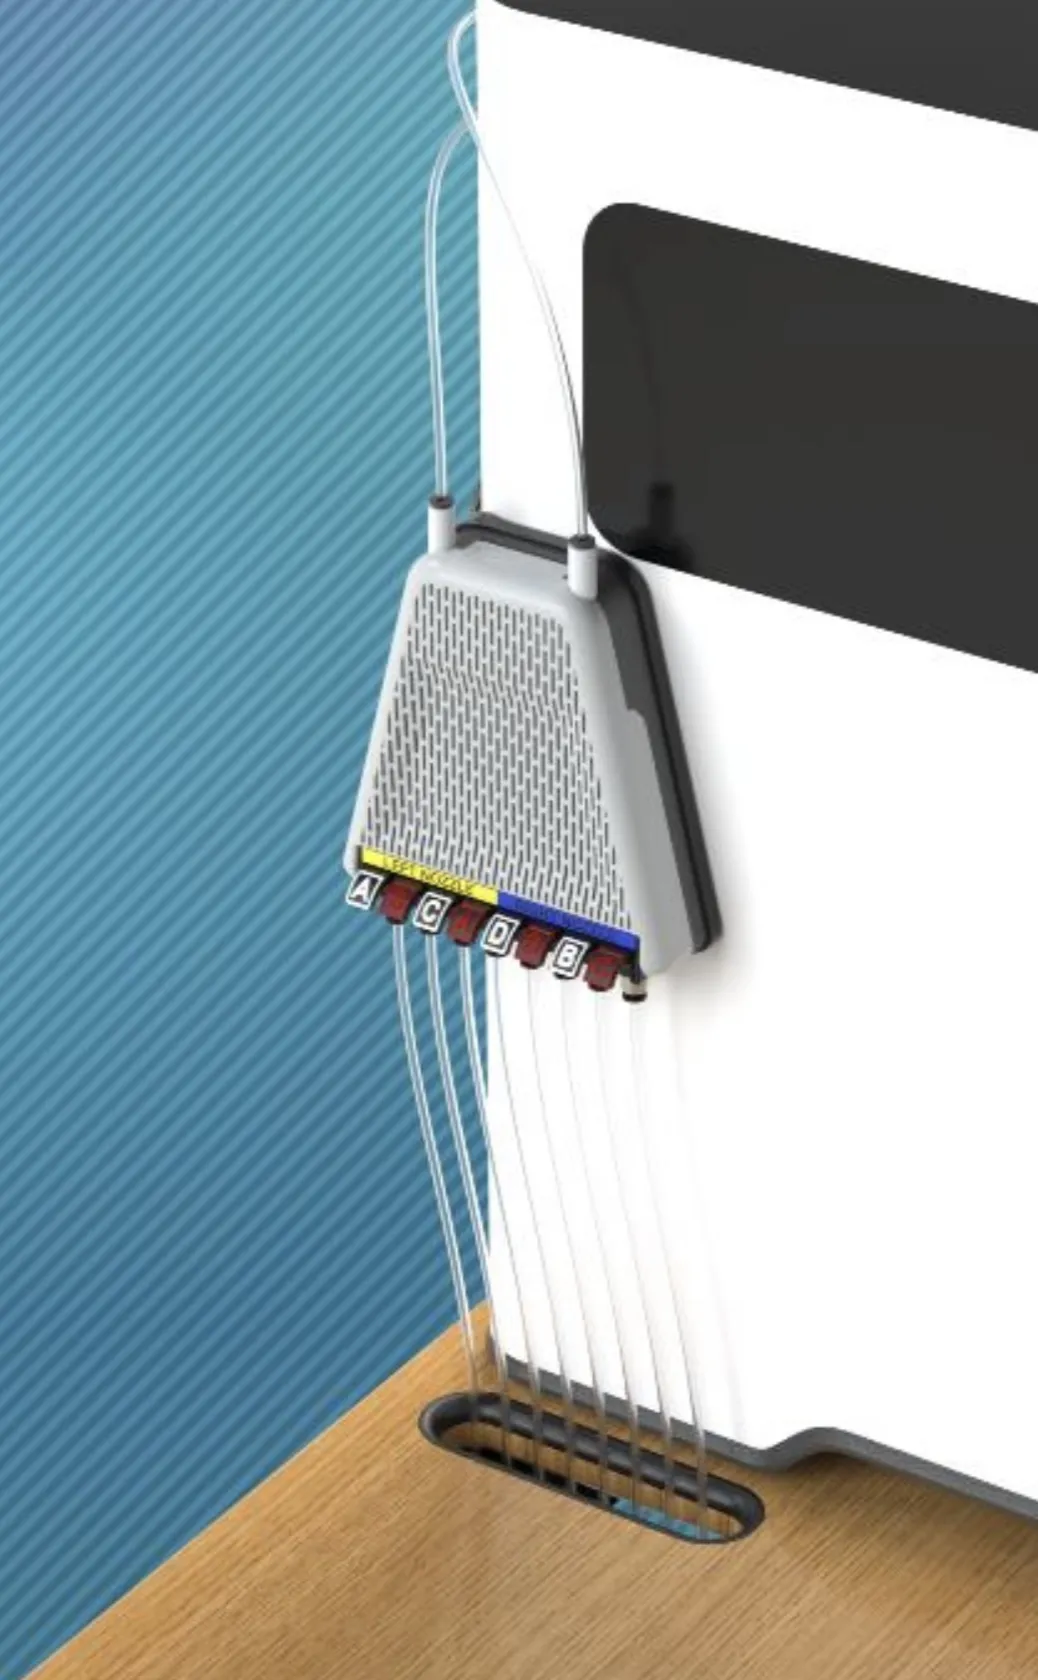
My original release https://makerworld.com/models/1387281 (first picture)
is the perfect solution for my 8 AMS Rig in my opinion. At least if you're not planning to ever connect more than 4 AMS to one nozzle. Since I personally don't need to do that, i am currently using this version for my setup!
The modular version https://makerworld.com/models/1502592 (second picture)
features an improved switching mechanism. I recommend this to anyone that has up to 4, or more than 8 AMS in their system.
The new version makes changing nozzles even faster – a sliding mechanism allows you to switch the "channel".
This eliminates the need to remove and reposition the sliders from their slots – thanks to this improvement, there's never a cable mess under the system like with the first version! And you can always connect all AMS to one nozzle if needed.
You can of course also use it for an 5-8 AMS Setup.
But if you like to print a lot with abrasive materials, I would recommend the first version, as it only uses one 4-in-1 adapter per filament path!
That's it folks,
I really hope you like the models and documentation!
I have a few more models to come in the next months
As a little teaser: so far I've focused on models for setups that have more AMS than printers – in one of my upcoming projects, I'll be doing it the other way around. After the release of the Nozzle Management System, I received several inquiries, all along very similar lines – I won't say any more, but keep your eyes peeled ;)
Kind regards,
Simon, MiM
Documentation (3)
License

You shall not share, sub-license, sell, rent, host, transfer, or distribute in any way the digital or 3D printed versions of this object, nor any other derivative work of this object in its digital or physical format (including - but not limited to - remixes of this object, and hosting on other digital platforms). The objects may not be used without permission in any way whatsoever in which you charge money, or collect fees.


Comment & Rating (721)