Megaman Blaster Lighted


Print Profile(1)

Bill of Materials


- 5 mm LED x 9:
- Momentary push button x 1:
- 4x2mm neodymium magnets x 16:
- 22-26 AWG wire x 5:
- 100Ω Resistors x 9:
- Arduino Nano x 1:
- Solder x 1:
- Soldering Iron x 1:
Description
Boost Me (for free)
If you enjoy this model boost me please!
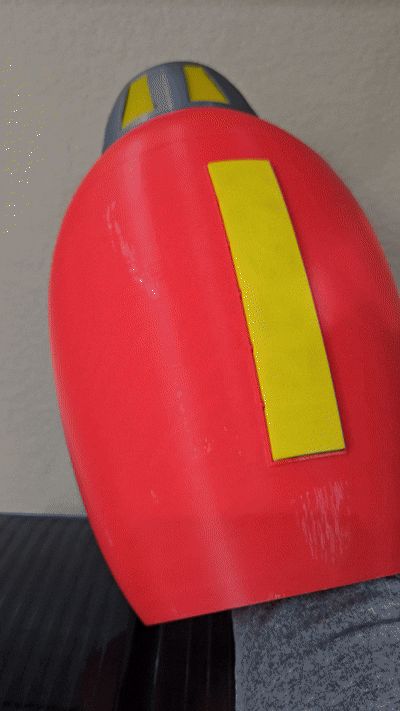
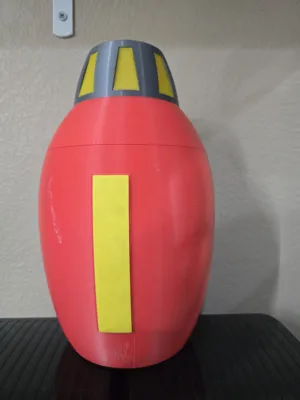
This is a working lighted blaster for costume/cosplay purposes. I designed this for my sons Halloween costume drawing inspiration from the Megaman cartoon/game. While the blaster is in the color scheme of Protoman, you can easily change the colors to whatever you'd like in Bambu Studio using either the project filament tool or the painting tool. I recommend printing in PETG for added strength but PLA will work just fine.
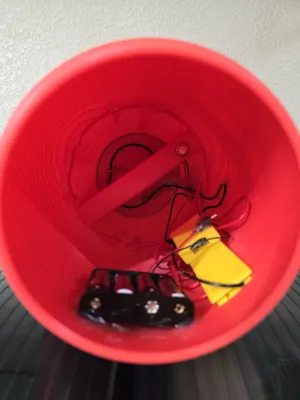
This uses an Arduino nano to control the lights. One long press and release (1 second or more) activates the lights in a forward cascade like capacitors are charging. Pressing the button inside the blaster activates the front emitter and the side lights giving the impression of the blaster firing. A second long press and release deactivates the lights and does a reverse cascade which is slower than the forward cascade, like capacitors that are discharging. The entire system runs on 9 LEDs and 4 AA batteries though any sufficiently portable power source could be used.
The minimum components for this are the printable models supplied in the .3mf file attached and some glue (it comes in pieces). While if you want to add lights and the Arduino logic you will need the following materials:
| Component | Specification / Notes | Quantity |
|---|---|---|
| Arduino Nano | Microcontroller board (any compatible clone) | 1 |
| LEDs – Power Bar | 5 mm standard LEDs | 6 |
| LEDs – Emitter | 5 mm standard LEDs | 3 |
| Resistors | 100 Ω, ¼ W | 9 |
| Momentary Push Button | Normally-open type, 12 mm shaft / 14 mm flange (fits handle hole) | 1 |
| Neodymium Magnets | 4 × 2 mm discs (8 for display + 8 for cradle) | 16 |
| Hook-up Wire | 22–26 AWG solid or stranded; assorted colors recommended | ~5 meters |
| Hot Glue | For securing LEDs and internal wiring | As needed |
| Super Glue (CA) | For permanent assembly | As needed |
| Epoxy (optional) | For structural joints or magnet bonding | As needed |
| Heat Shrink Tubing (optional) | For insulating LED and resistor leads | ~0.5 meter |
| Solder | Standard 60/40 or lead-free | As needed |
Comment & Rating (1)