Brush Cleaner - Brush Rinser


Print Profile(1)

Description
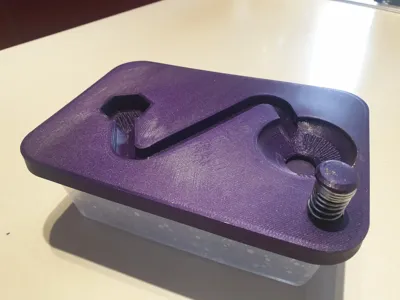
Brush cleaner based on the Brush Rinser from Green Stuff World. Adapted for use with a 650cc rectangular fast-food container measuring 116x165x55, common in some Chinese restaurants. A model for a square Mercadona container (0.8L) measuring 148x148x54 is also included. The water container will be a glass jar of your choice (not too tall), to whose lid we will glue the drainer.
Materials needed:
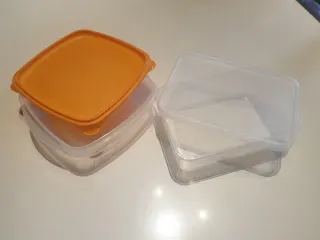
- Tupperware from Mercadona or the aforementioned Chinese restaurant.
- Glass jar, approximately 500g, with its lid.
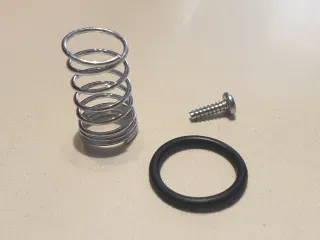
- Rubber toroidal gasket, 22mm outer diameter and 2mm thick.
- Compression spring with a maximum outer diameter of 16mm and a minimum inner diameter of 9mm, medium hardness.
- Two plastic screws with a 3mm x 10mm thread (I get these from disassembling laser printer toner cartridges to recycle components).
Printing:
- Print the appropriate lid for the container you will be using. It prints without support with the top surface glued to the bed with 3 walls and a minimum infill of 50% (100% recommended) at a layer height of 0.2.
- All other files should be printed without support, with three walls, a layer height of 0.2, and 100% infill.
Assembly:
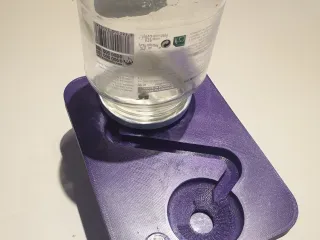
- Place the Drainer centered on the glass jar lid and mark the centers for the holes in the lid. Drill the jar lid on a wooden surface to avoid deforming it, preferably from the outside. Finally, glue the Drainer to the jar lid with cyanoacrylate, aligning the perforations.
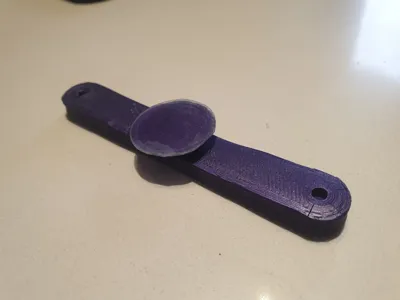
- Fit the printed Closure into the Bridge. It may be necessary to check and lightly sand both the Closure sphere and the Bridge recess depending on print quality; mine fit perfectly the first time. Check that the Closure pivots on the Bridge.
- Glue the toroid to the bottom of the Lid in the hollowed-out half-toroid shape using cyanoacrylate, being careful not to use too much adhesive that could stain the exposed surface of the toroid. I used gel cyanoacrylate, and it was perfect.
- The surface of the Closure, depending on your printer's calibration and bed type, may not be completely smooth. The solution I adopted was to cut a 24mm diameter circle from the original Tupperware lid (which is not used when replaced by the printed one) and glue it to the closure.
- Screw the Bridge to the Lid and the Button, making sure to place the spring on the Button on the outside of the Lid.
- Place the printed Lid on the Tupperware.
- Fill the glass jar with water and close it with its modified lid.
- Place the jar on the lid, fitting the Drainer into the hexagonal recess of the Lid, ensuring the slot aligns with the water outlet of the Lid.
- Done. Press to drain the water and let it refill itself. Enjoy painting!
Translate by Google:
Brush cleaner based on the Green Stuff World Brush Rinser. Adapted for use with a rectangular 650cc fast-food container measuring 116x165x55cm, commonly found in some Chinese restaurants. A model for a square Mercadona container (0.8L) measuring 148x148x54cm is also included. The water container will be a glass jar of your choice (not too tall), to the lid of which we will glue the drainer.
Materials needed:
Tupperware from Mercadona or the aforementioned Chinese restaurant.
Glass jar, approximately 500g, with its lid.
Rubber toroidal gasket, 22mm outer diameter and 2mm thick.
Compression spring with a maximum outer diameter of 16 mm and a minimum inner diameter of 9 mm, medium hardness.
Two plastic screws with a 3 mm x 10 mm thread (I get these from disassembling laser printer toner cartridges to recycle components).
Printing:
Print the appropriate lid for the container you will be using. Print without support, with the top glued to the bed, with three walls and a minimum infill of 50% (100% recommended), at a layer height of 0.2.
All other files should be printed without support, with three walls, a layer height of 0.2, and 100% infill.
Assembly:
Place the Emptying Device centered on the glass jar lid and mark the centers for the holes in the jar. Drill the jar lid on a wooden surface to avoid warping it, preferably from the outside. Finally, glue the Emptying Device to the jar lid with cyanoacrylate glue, matching the holes.
Fit the printed closure onto the bridge. It may be necessary to check and sand both the closure ball and the bridge recess a little depending on the print quality; mine fit the first time. Check that the closure pivots on the bridge.
Glue the toroid to the bottom of the lid using cyanoacrylate in the hollowed-out half-toroid shape, being careful not to over-adhesive the toroid to avoid staining the exposed surface. I used gel cyanoacrylate, and it was perfect.
The closure surface, depending on the setup and bed type of your printer, may not be completely smooth. The solution I adopted is to cut a 24mm diameter circle from the lid of the Tupperware (which is not used when replacing it with the printed one) and glue it to the closure.
Screw the bridge to the lid and to the push button, taking care to place the spring on the push button on the outside of the lid.
Place the printed lid in the Tupperware.
Fill the glass jar with water and close it with its modified lid.
Place the jar on the lid, fitting the Drainer into the hexagonal recess of the lid, making sure the slot aligns with the water outlet of the lid.
Done. Press to pour out the water and let it fill itself. Enjoy painting!
License
You shall not share, sub-license, sell, rent, host, transfer, or distribute in any way the digital or 3D printed versions of this object, nor any other derivative work of this object in its digital or physical format (including - but not limited to - remixes of this object, and hosting on other digital platforms). The objects may not be used without permission in any way whatsoever in which you charge money, or collect fees.
Comment & Rating (0)