Galium58 Case - A Low Profile Mechanical Keyboard


Print Profile(1)
Description
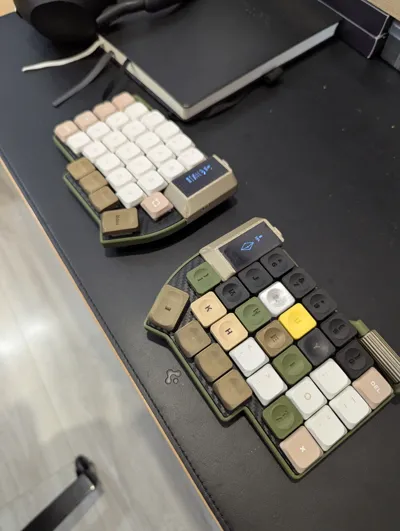
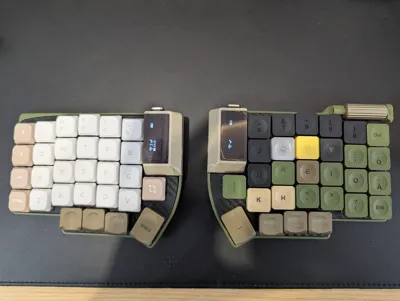
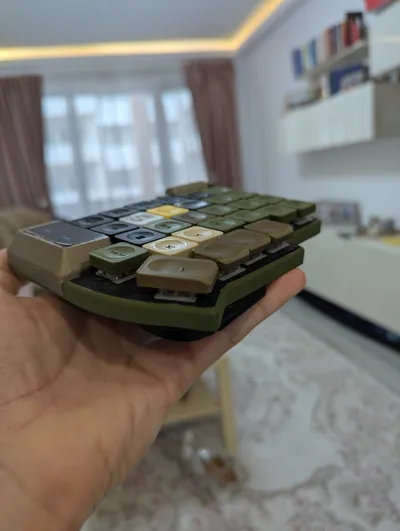
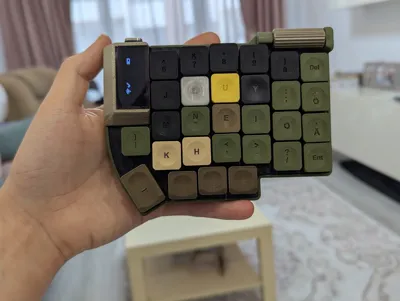
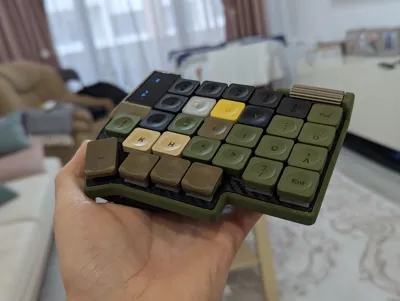
Galium58 - Gateron Low Profile Split Ergonomic Keyboard
This is my own version of the Beekeebs Allium58, which is a Gateron Low Profile Split ergonomic keyboard.
All of the basic info for the keyboard can be found on their github page: GitHub - beekeeb/Allium58: The Allium58 is created based on the Lily58 Pro, designed to enhance wireless capabilities and provide compatibility with GLP (Gateron Low Profile) hotswap sockets.
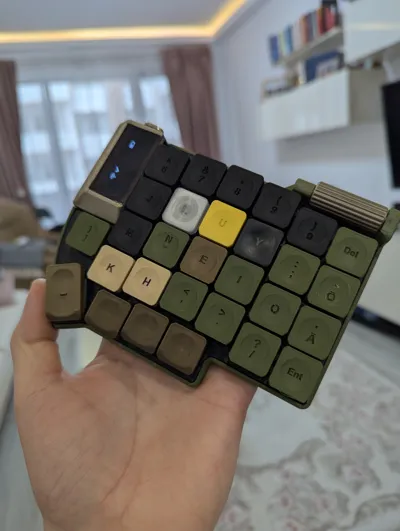
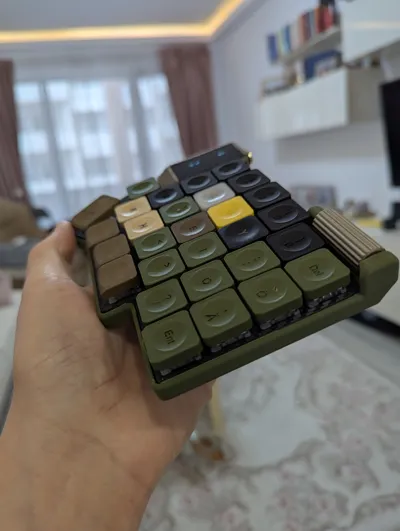
My own modifications include the scrollwheel on the right half, and the casing around the screen. Besides the normal Allium58 stuff, to make these modifications, you will need:
- T6 Torx bit, to use for the srcoll, i got these: https://www.amazon.de/-/en/dp/B01FL89P1K
- Mouse Scroll wheel Sensor (5mm) https://www.aliexpress.com/item/1005005763150316.html
- Some 1mm acrylic, which needs to be cut to 40mm x 21mm. I got this from a local hardware store
Some wire to connect the mouse encoder to the microcontroller
Link to the keycaps model: https://makerworld.com/en/models/1455091-formkey-a-fully-3d-printed-keycap-set
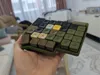
Printing the Parts
Bottom Case
There is really nothing special here, i printed it out of Matte Green PLA, no special precautions or settings.
Switchplate
This one is a bit more “tricky”. You CAN print this out of PLA, but within a few months, it will start cracking due to the pressure of the switches. I had the first version like that, and it lasted me maybe half a year, and then the cracks started to affect the actual typing, so i had to change it up.
So, in here, i have it set up to print out of PETG. You can print it normally with PETG, but i have created a special profile to print on the Smooth PEI plate, to get the Carbon Fiber look on it. It is quite tricky to get right, you MUST wash the buildplate thoroughly, to be able to succeed with the smooth PEI plate.
If you print on the Normal Textured Plate (golden), then there shouldn't be much of an issue printing with PETG.
Scroll Wheel
Again, nothing special here, although i made it to fit VERY tight on the torx bit, to take off any play from it, so you will need to use a lot of force to get it in. If it doesnt go even when pushing with pliers, you might need to heat up the bit, to get it going. But out of the probably 10 that i have made, i have only had to do this once.
ON-OFF Switches
These ones i have printed with a 0.2mm nozzle. IT IS NOT REQUIRED, but with a 0.4mm nozzle, you will not get the I/O printing on the button. It works well without it, but it just looks nicer with it. :)
OLED Screen “Case”
For this one, you will need to cut a piece out of 1mm acrylic. The piece should be 40 x 21mm, and you need two of these, one for each half. There is that 1mm bit of “extra” there, which is designed to be cut off with a box cutter, or sanded off, to get a cleaner fixed edge on it. As i dont have a laser cutter or something similar, i needed this to make a bit of a cleaner finish, so i think the final size for the acrylic is 40x20mm.
When starting the print on these, there is also an extra sacrificial piece on the plate for both of the parts. The print will pause after the first 6 layers, for you to introduce the acrylic pieces. You should be able to fit it between the actual parts, and the sacrificial pieces. Make sure that the acrylic is flush with the top of the print, remember to remove the protective film from the top side, and continue the print.
The PLA will fuse nicely with the acrylic, and give a solid piece, without any glue.
Build Video
I have created a build video of this model on my youtube channel, and it has pretty much all the steps there, besides the screen casing. I might create another separate explanation/build video for this specific model, if there is need/demand for it.
Building a Split Mechanical Keyboard with a Scroll Wheel!
Boost Me (for free)
Making of this has been quite time consuming, if you like the model, i would really appreciate a Boost. Thank you very much!

Comment & Rating (2)