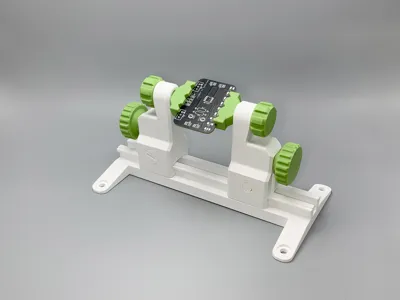
This is a PCB clamp used for fixing circuit boards during PCB soldering, with dimensions of 175*100*85mm and a clamping range of 0-90mm (a longer base is optional for theoretically unlimited length)
It features ease of use, fast printing, no supports, and no hardware needed
Features:
Simple printing, no supports needed, low filament usage
Large clamping range, with different base lengths available (90mm/160mm)
The transmission combines a rack, gear, and worm, forming a fully hidden transmission structure
All parts are easy to replace for convenient maintenance
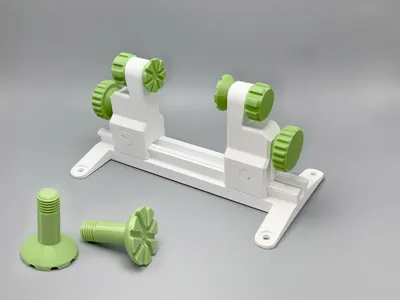
The clamping surfaces can be swapped with various different clamping surfaces to achieve different functions, depending on the use case (users with ideas can design and use their own)
Assembly Notes:
All parts have been print-tested with common materials like PLA/PETG, and tolerances have been balanced
The print profile includes all parts; for source file printing, some parts need to be duplicated
The worm drive is not as robust as a gear drive; when clamping objects, do not apply excessive force to avoid stripping the screw
1. Lubrication:
Since the transmission uses a worm gear, friction is unavoidable; it is recommended to apply a small amount of lubricating oil to the red indicated part of the screw before installation for a smoother experience
Lubrication is not mandatory, but testing shows that it results in smoother operation
2. Assemble Slider:
Install the screw, limit sleeve, and gear as shown in the diagram
After installation, turn the screw to observe the gear rotation
3. Install Slider:
Insert the assembled slider from both ends of the base
Gently turn the bolt to facilitate proper meshing of the gear and rack; do not use brute force to push it in
4. Install Clamping Pads:
Install the clamping pads as shown in the diagram
The source files are in STEP format, making it easy to customize various styles of clamping pads for multiple uses beyond PCB clamping
*2025.10.13 Update: Adjusted the central shaft thread clearance for easier tightening
Besides the practicality of the clamp. I also really like the mechanics of the adjustment mechanism. I dampened the noises that PLA rubbing on PLA naturally makes with a little silicone grease. Great profile
Thanks. I printed that with an eSun refill PLA using the settings for generic PLA. As a retiree, I always have to see which filament is the cheapest. ;-)
I like the easy assembly, all parts can be swapped between the left and right slider, which indicates a good design process. also bonus points for the assembly tools you put into your print profiles.
An amazing design and perfect clearance. printed in ABS with ASA grippers for a tad more heat resistance during soldering. 5 star print. Here's a thought: if you made a rail attachment for one or two third arms with things like fume extractor, solder wheel, or a gripper. It would be priceless.
The styling is beautiful and elegant, and the design of the rotating gear for position adjustment is very clever Printing was very smooth It is also convenient to use Thanks
This user content is licensed under a Standard Digital File License.
You shall not share, sub-license, sell, rent, host, transfer, or distribute in any way the digital or 3D printed versions of this object, nor any other derivative work of this object in its digital or physical format (including - but not limited to - remixes of this object, and hosting on other digital platforms). The objects may not be used without permission in any way whatsoever in which you charge money, or collect fees.


Comment & Rating (108)