Beer Tower for 3 taps


Print Profile(1)

Description
As a homebrewer I quickly switched from bottles to corny kegs. For a long time I was pouring beer in the cellar, where I had the corny kegs in a fridge and the faucet mounted in the fridge door. For practical reasons and laziness I decided to move the tap to the kitchen.
I had space for a small fridge that fits two large and one small keg: 2 × 19 liters and 1 × 12 liters. So I designed my own three-tap beer tower so I could pour from all three kegs at will.
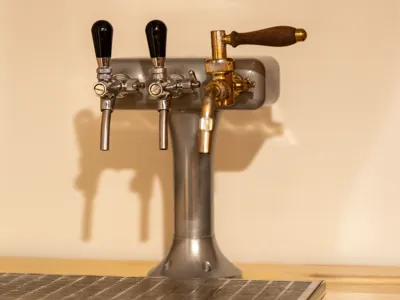
I designed the height so the tower wouldn’t take up unnecessary space, but still allow a standard half-liter glass and other glasses, including a drip tray, to fit underneath without any trouble.
The tower is sufficiently robust, the head is open at the back, and the hookup is simple:
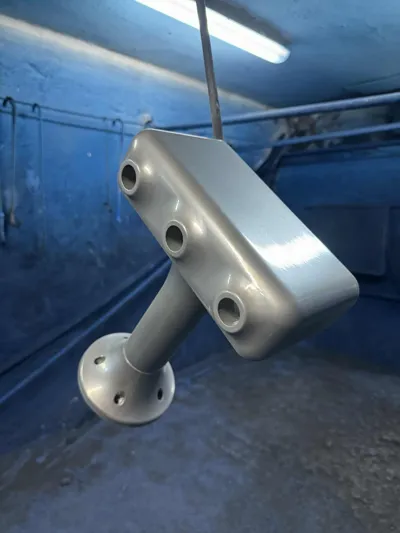
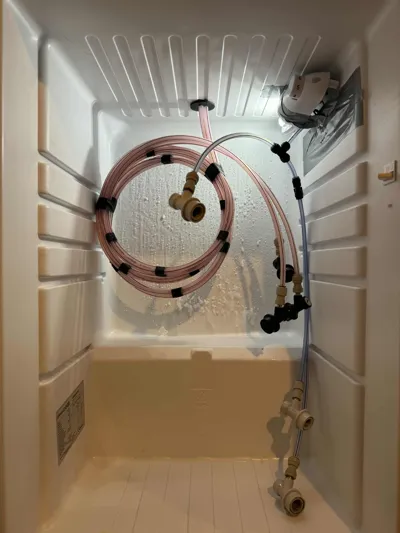
Inside the fridge I drilled a hole with a 29 mm hole saw. The bulkhead passthrough has three openings for three 9.5 mm beer lines. The hole diameter in the passthrough model is 10 mm, but PLA shrinks slightly as it cools.
I printed all three parts of the beer tower on a Bambu Lab A1. I used PLA because that’s what I had on hand. I glued the three parts together with a two-part epoxy, sprayed with a filler/primer, sanded, and painted because I wanted a smooth surface. Watch out for compatibility between the primer and the paint. Today I’d go with an acetone treatment and print directly in the color I want.
You then place the whole tower above the passthrough, route the beverage lines through it, and fasten it to the countertop with five screws.
Inside the tower head I used 90° quick-connect fittings with barbs and then connected them to shanks for the beer faucets with 5/8" threads. The faucet holes in the head are 23.5 mm in diameter.
For gas, it’s enough to bring it into the fridge through a single 8 mm side hole and use “T” or “Y” splitters inside. I kept the gas lines as short as possible. I chose 330 cm for the beer lines, though this depends on temperature and pressure. Based on recommendations in a homebrewing group, what worked well for me was 5 °C and about 0.9 bar.
Boost Me (for free)
Feel free to boost me! I can make any changes - e.g. 1 tap, 2 tap, 4 tap, different hole sizes, etc.
License
You shall not share, sub-license, sell, rent, host, transfer, or distribute in any way the digital or 3D printed versions of this object, nor any other derivative work of this object in its digital or physical format (including - but not limited to - remixes of this object, and hosting on other digital platforms). The objects may not be used without permission in any way whatsoever in which you charge money, or collect fees.
Comment & Rating (0)